
What is a Bladder Scanner?
A bladder scanner is a medical device used to assess the volume of urine in a patient’s bladder without invasive procedures. It utilizes ultrasonic technology to produce real-time images of the bladder and accurately measure its urine volume. This non-invasive and painless procedure provides valuable information for healthcare professionals, allowing them to make informed decisions regarding patient care. Bladder scanners are commonly used in hospitals, clinics, long-term care facilities, and home healthcare settings.
The primary purpose of a bladder scanner is to determine if a patient’s bladder requires emptying or if it is adequately emptied after urination. By evaluating the bladder volume, healthcare professionals can prevent urinary retention, urinary tract infections, and other complications associated with urinary dysfunctions.
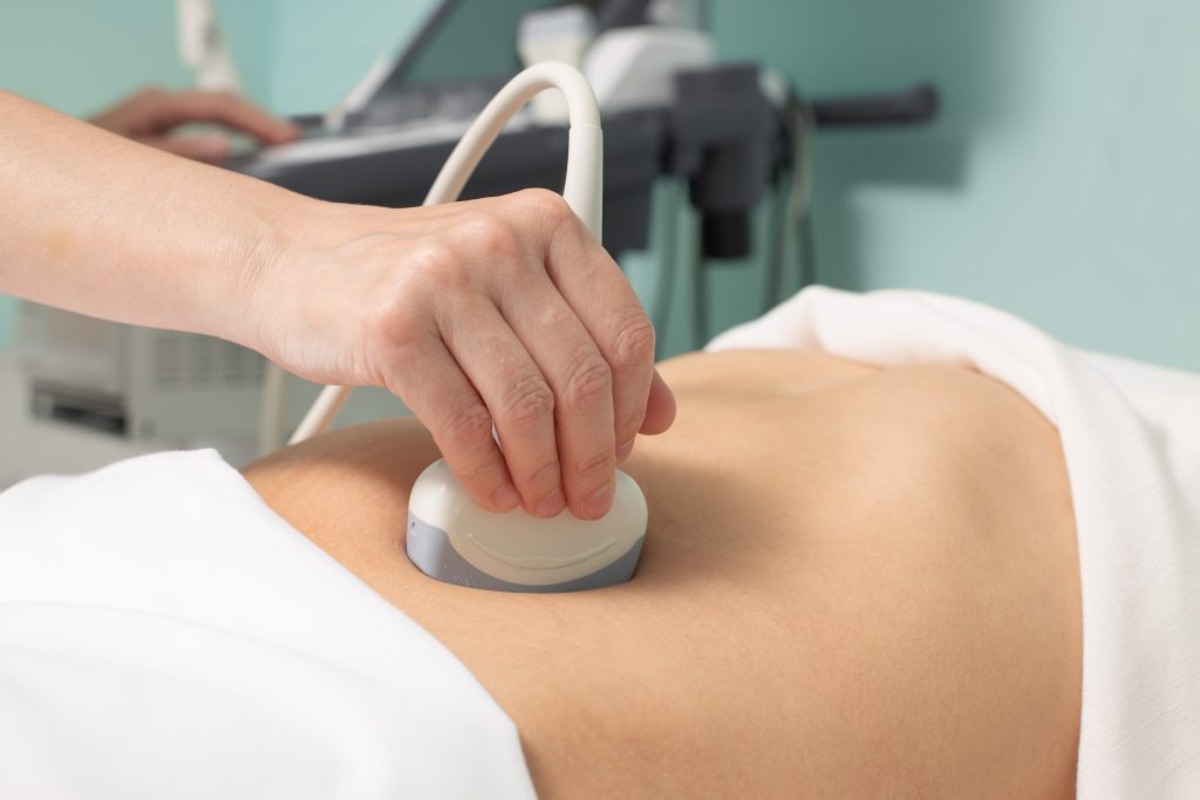
Bladder scanners consist of a handheld device, a built-in screen or display, and a probe that emits high-frequency sound waves. When the probe is placed on the patient’s lower abdomen, it sends sound waves into the bladder, which reflect back and are detected by the device. Based on the time it takes for the sound waves to return, the bladder scanner calculates the bladder’s volume and displays it on the screen.
This technology not only saves healthcare professionals time and effort but also allows for accurate and objective bladder volume measurements. Instead of relying on subjective evaluations or the use of invasive catheters, a bladder scanner provides a non-invasive alternative that minimizes patient discomfort.
Bladder scanners are especially beneficial for patients who may have difficulty urinating due to medical conditions, such as post-operative patients, individuals with neurological disorders, or those with bladder dysfunction. By regularly monitoring bladder volume, healthcare professionals can intervene early, preventing urinary complications and ensuring optimal patient care.
Understanding the Anatomy of a Bladder Scanner
To effectively operate a bladder scanner, it is essential to have a basic understanding of its anatomy. While there may be slight variations among different models, the key components remain relatively consistent.
The handheld device is the main component of a bladder scanner. It is typically compact and lightweight, allowing for easy maneuverability during examinations. The device features a display screen that provides real-time imaging and measurement data.
At the end of the handheld device is the probe, which is responsible for transmitting and receiving the ultrasound waves. The probe is designed to be placed on the patient’s lower abdomen, directly above the bladder. It is important to ensure proper positioning and adequate contact between the probe and the patient’s skin to obtain accurate readings.
Bladder scanners also feature control buttons or a touch interface on the device. These controls allow the user to navigate through the menu options, adjust settings, and capture images. Some advanced models may even offer additional features, such as wireless connectivity or built-in printers for immediate documentation.
The internal components of a bladder scanner include an ultrasound transducer and a signal processor. The ultrasound transducer emits high-frequency sound waves into the body, which then bounce back and are detected by the transducer. The signal processor analyzes the information received from the transducer and converts it into visual images and volume measurements.
Most bladder scanners also have a built-in software program that facilitates data management and analysis. This software allows healthcare professionals to store and review patient information, track changes in bladder volume over time, and generate reports for documentation and analysis purposes.
Understanding the anatomy of a bladder scanner is crucial for its proper operation and to ensure accurate bladder volume measurements. It is essential to follow the manufacturer’s guidelines and instructions when using the device. Regular maintenance and calibration of the bladder scanner are also important to ensure consistent performance and reliable results.
Overall, a bladder scanner is a valuable tool that helps healthcare professionals assess bladder volume without invasive procedures. By understanding its anatomy and functioning, healthcare providers can effectively utilize this device in their clinical practice, improving patient care and outcomes.
Preparing the Bladder Scanner for Use
Proper preparation of the bladder scanner is crucial to ensure accurate measurements and optimal performance. Before using the device, it is important to follow a few essential steps for preparation:
1. Power on the bladder scanner: Ensure that the device is properly charged or connected to a power source. Powering on the scanner will initiate the startup process, allowing it to be ready for use.
2. Perform a system check: Before each use, it is important to conduct a system check to ensure that the bladder scanner is functioning properly. Follow the manufacturer’s instructions to perform the system check, which may involve calibrating the device and ensuring all components are working correctly.
3. Check the probe: Inspect the probe for any signs of damage or wear. Ensure that the probe is clean and free from any debris or residue. If the probe needs cleaning, follow the manufacturer’s guidelines for cleaning and disinfection procedures.
4. Check the gel: Verify that there is a sufficient supply of ultrasound gel available. The gel is used to create a conductive medium between the probe and the patient’s skin, allowing optimal ultrasound transmission. If the gel is running low, refill or replace it as necessary.
5. Verify patient information: Before proceeding with a bladder scan, confirm that the patient’s information is accurately entered into the bladder scanner’s software or interface. This helps in ensuring that the correct measurements are attributed to the respective patient.
6. Set up the environment: Create a comfortable and private space for the patient during the bladder scan. Arrange the equipment, such as a bed or examination table, in a suitable position for easy access to the patient’s lower abdomen.
7. Communicate with the patient: Explain the bladder scanning procedure to the patient, addressing any concerns or questions they may have. Obtain their consent and ensure their cooperation throughout the process.
8. Position the bladder scanner: Hold the bladder scanner in a comfortable position for ease of use. Familiarize yourself with the buttons or touch interface for easy navigation and control during the scan.
By following these preparation steps, healthcare professionals can ensure that the bladder scanner is ready for use, providing accurate measurements and improving the overall patient experience. Proper preparation also helps to maintain the longevity of the device and reduce the potential for errors or complications during the scanning process.
Positioning the Patient for a Bladder Scan
Positioning the patient correctly is crucial for obtaining accurate bladder scan results. The position ensures optimal access to the bladder and allows for effective ultrasound transmission. Follow these guidelines to position the patient correctly for a bladder scan:
1. Assist the patient: Help the patient onto a suitable surface, such as a bed or examination table. Ensure that the patient is comfortable and can lie flat on their back.
2. Provide privacy: Maintain the patient’s privacy by closing curtains or doors if necessary. This fosters a comfortable environment and promotes open communication during the procedure.
3. Expose the lower abdomen: Ask the patient to expose their lower abdomen by lifting their clothing or gown. This allows direct contact between the ultrasound probe and the skin, ensuring accurate readings.
4. Instruct the patient to relax: Advise the patient to relax their abdominal muscles as much as possible. This helps to achieve a more accurate measurement by minimizing any tension or contractions that could affect bladder volume.
5. Position the patient supine: Have the patient lie flat on their back with their legs slightly bent and apart. This position provides better access to the lower abdomen and allows for easy placement of the ultrasound probe.
6. Align the probe: Position the ultrasound probe just above the pubic bone in the midline of the patient’s lower abdomen. Gently press the probe down to ensure adequate contact with the skin.
7. Request patient cooperation: Ask the patient to remain still and avoid any unnecessary movement during the scan. This helps to capture clear ultrasound images and obtain accurate volume measurements.
8. Use blankets or pillows: If needed, provide additional support using blankets or pillows to help the patient maintain a comfortable position. This can be particularly helpful for patients who may have difficulty lying flat or for those who require extra support.
Proper positioning of the patient is essential to obtain reliable and accurate bladder scan results. By following these guidelines, healthcare professionals can ensure optimal access to the bladder and obtain measurements that assist in diagnosis and treatment decisions.
Applying Gel for the Bladder Scan
Applying ultrasound gel is a critical step in conducting an accurate bladder scan. The gel serves as a medium that facilitates the transmission of ultrasound waves between the probe and the patient’s skin. Follow these steps to properly apply gel for a bladder scan:
1. Assess the amount of gel: Ensure that there is an adequate amount of ultrasound gel available before starting the procedure. Having enough gel ensures continuous contact between the probe and the patient’s skin throughout the scan.
2. Explain the gel application: Inform the patient about the gel application process. Explain that the gel is safe and necessary for conducting the bladder scan. Address any concerns or questions they may have.
3. Warm the gel (optional): If desired, warm the gel to body temperature. Warmed gel can provide a more comfortable experience for the patient, as cold gel may cause discomfort or anxiety.
4. Dispense the gel: Squeeze an appropriate amount of gel onto your hand or a disposable glove. The amount of gel required may vary depending on the size of the probe and the manufacturer’s recommendations.
5. Apply the gel: Gently spread the gel evenly over the probe’s contact surface. Make sure to cover the entire area that will come into contact with the patient’s skin. An even layer of gel helps to ensure optimal ultrasound transmission.
6. Inform the patient: Let the patient know that you are about to apply the gel. Explain that it may feel cool or wet on their skin, but it is a normal part of the procedure.
7. Position the probe: Place the gel-coated probe on the patient’s lower abdomen, just above the pubic bone, in the midline. Gently press down to ensure sufficient contact between the probe and the patient’s skin.
8. Check for air bubbles: Before starting the scan, inspect the gel-coated probe for any trapped air bubbles. Air bubbles can interfere with the transmission of ultrasound waves and affect the accuracy of the bladder scan. If present, smooth them out or remove them with a gentle swipe of the probe.
Applying gel for a bladder scan is a simple yet crucial step in the procedure. Properly applying the gel ensures optimal transmission of ultrasound waves and allows for accurate bladder volume measurements. By following these guidelines, healthcare professionals can conduct bladder scans effectively and provide patients with a comfortable experience.
Using the Bladder Scanner to Capture Images
Using a bladder scanner to capture images is a straightforward process that involves proper positioning of the probe, initiating the scan, and capturing the necessary images for accurate bladder volume measurements. Follow these steps to effectively use a bladder scanner:
1. Ensure proper probe placement: Position the probe on the patient’s lower abdomen, just above the pubic bone in the midline. Ensure that the probe has good contact with the skin and is firmly but gently pressed down for optimal ultrasound transmission.
2. Select the appropriate scan mode: Determine the appropriate scanning mode based on the patient’s condition, such as adult or pediatric mode. Selecting the correct mode helps tailor the scanning settings to the specific patient, enhancing accuracy.
3. Initiate the bladder scan: Press the designated button or touch the screen to initiate the bladder scan. Some scanners may have an automatic scan mode that detects the bladder and captures images automatically, while others may require manual adjustment and image captures.
4. Monitor the screen: As the bladder scan progresses, monitor the real-time images on the screen. Ensure that the images are clear and representative of the bladder’s shape and size.
5. Capture images: Utilize the scan controls to navigate through the ultrasound images of the bladder. Adjust settings as necessary to obtain optimal images for accurate volume measurements.
6. Save or store images: Depending on the bladder scanner model, you may have the option to save or store images for future reference or documentation. Follow the device’s instructions for saving or storing images if necessary.
7. Review the captured images: After capturing the images, review them on the screen. Ensure that they provide a clear view of the bladder and its boundaries. If any images appear unclear or distorted, consider repositioning the probe and recapturing the images.
8. Analyze the bladder volume: Once the scan is complete, analyze the bladder volume measurement displayed on the screen. This measurement provides valuable information about the urine volume in the bladder, which helps guide treatment decisions and interventions.
Using a bladder scanner to capture images is an essential step in assessing bladder volume non-invasively. By following these steps, healthcare professionals can obtain accurate measurements and gather valuable information about the patient’s bladder health for appropriate care and management.
Interpreting the Bladder Scan Results
Interpreting the bladder scan results is an important aspect of using a bladder scanner effectively. The results provide valuable information regarding the volume of urine in the patient’s bladder. Here are the key factors to consider when interpreting bladder scan results:
1. Bladder volume measurement: The bladder scan will provide a numeric value representing the volume of urine in the bladder. This measurement is typically expressed in milliliters (ml) or cubic centimeters (cc).
2. Normal bladder volume range: It is important to have a reference range for normal bladder volume based on the patient’s age, gender, and medical condition. A typical normal range for an adult bladder is around 300-500 ml. Deviations from this range may indicate urinary retention or overactive bladder.
3. Residual urine volume: In some cases, the bladder scan may reveal a small amount of remaining urine in the bladder after voiding. This residual urine volume is important to note, as it can indicate incomplete bladder emptying and the need for further intervention.
4. Trends over time: Monitoring bladder scan results over time can provide valuable insights into the patient’s bladder function and urinary habits. Documenting changes in bladder volume can help identify patterns, evaluate treatment effectiveness, and guide ongoing management strategies.
5. Individual patient factors: When interpreting bladder scan results, it is important to consider individual patient factors, such as age, medical history, and current medications. Some patients may have specific conditions that can affect bladder volume or urine retention.
6. Clinical judgement: While bladder scan results provide objective measurements, clinical judgement is still essential when interpreting the findings. Healthcare professionals need to consider the patient’s overall clinical presentation, symptoms, and other diagnostic information to make informed decisions based on the bladder scan results.
7. Communication with the patient: After interpreting the bladder scan results, it is crucial to communicate the findings with the patient. Explain the implications of the results, address any concerns or questions they may have, and discuss any necessary interventions or follow-up plans.
Proper interpretation of bladder scan results is essential for effective patient management and treatment planning. By considering the volume measurements, normal ranges, trends, and individual patient factors, healthcare professionals can make informed decisions and provide appropriate care to optimize bladder health and overall well-being.
Troubleshooting Common Issues with Bladder Scanners
While bladder scanners are valuable tools for assessing bladder volume, they may encounter occasional issues that can affect their performance. Understanding and troubleshooting these common issues can help healthcare professionals resolve problems quickly and ensure accurate results. Here are some common issues and possible solutions:
1. Poor image quality: If the ultrasound images produced by the bladder scanner are unclear or distorted, it may be due to improper probe positioning or insufficient gel application. Check the probe placement, ensuring it is in the correct position above the pubic bone. Also, verify that there is enough gel on the probe to optimize the ultrasound transmission.
2. Inconsistent volume measurements: If the bladder scanner consistently provides inconsistent volume measurements, it may be due to calibration issues or probe damage. Check the manufacturer’s guidelines for calibration instructions and ensure that the scanner is calibrated regularly. If the issue persists, contact the manufacturer for further assistance or consider replacing the probe if it is damaged.
3. Difficulty obtaining measurements in obese patients: Obese patients may present challenges when using a bladder scanner due to increased tissue thickness. In such cases, adjusting the settings on the scanner, such as increasing the depth or gain, may help obtain accurate measurements. It may also be helpful to ensure proper probe placement and adequate gel application to improve ultrasound transmission through the increased tissue layers.
4. Device not powering on or shutting off unexpectedly: If the bladder scanner fails to power on or shuts off unexpectedly, it may be due to a low battery or a problem with the power source. Ensure that the device is properly charged or connected to a power supply. If the issue persists, check the battery connections or consult the manufacturer for assistance.
5. Software or interface malfunctions: If the bladder scanner software or interface malfunctions, it may hinder proper operation and data management. Ensure that the latest software updates are installed. If the issue persists, contact the manufacturer for troubleshooting assistance or consider reinstalling or updating the software.
6. Inaccurate measurements due to patient movement: Patient movement during the bladder scan can lead to inaccurate volume measurements. Educate the patient about the importance of remaining still during the procedure. If the patient has difficulty staying still, consider providing additional support such as pillows or immobilization devices to minimize movement.
7. Error messages or codes: Bladder scanners may display error messages or codes in the event of specific issues. Consult the device’s user manual or contact the manufacturer for troubleshooting instructions related to the specific error message or code encountered. Follow the recommended steps to resolve the issue or seek professional assistance if needed.
Troubleshooting common issues with bladder scanners is crucial for ensuring accurate results and maintaining the device’s functionality. By familiarizing themselves with these troubleshooting techniques, healthcare professionals can overcome challenges and continue to provide quality care to their patients.
Cleaning and Maintaining the Bladder Scanner
Proper cleaning and maintenance of a bladder scanner are essential to ensure accurate measurements, prolong the device’s lifespan, and prevent cross-contamination. Here are some important steps to consider when cleaning and maintaining a bladder scanner:
1. Follow manufacturer’s guidelines: Familiarize yourself with the specific cleaning and maintenance instructions provided by the manufacturer. Different bladder scanner models may have different requirements, so it is crucial to follow the guidelines specific to the device you are using.
2. Disinfect before and after each use: Clean the bladder scanner before and after each use to ensure proper hygiene. Use an appropriate disinfectant recommended by the manufacturer. Pay extra attention to the probe, as it comes into direct contact with the patient’s skin.
3. Clean the probe: Clean the probe with a soft cloth or sponge that is dampened with the recommended disinfectant. Avoid using abrasive or harsh chemicals that may damage the probe’s surface. Wipe the probe thoroughly to remove any gel residue or debris.
4. Inspect for damage: Regularly inspect the bladder scanner and its components for any signs of damage or wear. Check the probe, cables, and connectors for any cracks, fraying, or damage. If any damage is found, contact the manufacturer for repair or replacement options.
5. Check batteries: If the bladder scanner relies on batteries, regularly check the battery levels and replace them as needed. Follow the manufacturer’s guidelines for battery maintenance and ensure that batteries are appropriately charged or replaced to maintain optimal performance.
6. Store in a clean and safe environment: When not in use, store the bladder scanner in a clean and dry environment that is free from dust, moisture, and extreme temperatures. Use the provided storage case or cover to protect the device from potential damage.
7. Calibrate regularly: Follow the manufacturer’s guidelines for calibration. Regular calibration ensures accurate measurements and reliable performance. Calibration may need to be performed at specified intervals or whenever the device indicates that calibration is required.
8. Train staff: Provide comprehensive training to staff members who will be using and maintaining the bladder scanner. Ensure that they understand the proper cleaning procedures, maintenance protocols, and safety precautions to prevent any damage or contamination.
9. Keep records: Maintain a record of cleaning and maintenance activities performed on the bladder scanner. This can include dates of cleaning, calibration, battery replacements, and any repairs or servicing conducted. A well-documented maintenance history helps ensure compliance and aids in troubleshooting if any issues arise.
By following the appropriate cleaning and maintenance procedures, healthcare professionals can ensure that their bladder scanners remain in optimal condition, provide accurate measurements, and promote a safe and hygienic environment for patient care.
Tips and Best Practices for Using a Bladder Scanner
Using a bladder scanner effectively requires a combination of technical skill and practical knowledge. Here are some tips and best practices to consider when using a bladder scanner:
1. Ensure proper patient preparation: Properly prepare the patient by explaining the procedure, obtaining their consent, and ensuring their comfort and privacy. Clear communication and patient cooperation are key to obtaining accurate bladder scan measurements.
2. Position the patient correctly: Position the patient in a supine position with their legs slightly bent and apart. This positioning allows for optimal access to the lower abdomen and ensures accurate probe placement for ultrasound imaging.
3. Maintain probe contact and pressure: During the bladder scan, ensure continuous contact between the probe and the patient’s skin. Gentle but firm pressure is needed to ensure adequate transmission of ultrasound waves and obtain clear and accurate images.
4. Apply sufficient gel: Apply an adequate amount of ultrasound gel to the probe’s contact surface. Sufficient gel helps improve acoustic coupling between the probe and the patient’s skin, enhancing ultrasound transmission and resulting in more accurate volume measurements.
5. Double-check settings and measurements: Before starting the bladder scan, double-check the settings, such as the scanning mode and depth, to ensure they are appropriate for the patient. After capturing the images, review the volume measurements to ensure accuracy. Pay attention to any warnings or error messages that may appear on the device.
6. Regularly calibrate the bladder scanner: Follow the manufacturer’s instructions for regular calibration of the bladder scanner. Regular calibration ensures accurate measurements and proper functioning of the device. Keep track of calibration dates for documentation purposes.
7. Educate and involve patients: Educate patients about the bladder scanning procedure, its benefits, and the importance of accurately measuring bladder volume. Involve patients in the process by explaining the results and discussing any necessary interventions or follow-ups.
8. Clean and disinfect the bladder scanner: Properly clean and disinfect the bladder scanner before and after each use to prevent cross-contamination and maintain hygiene. Follow the manufacturer’s guidelines for cleaning procedures and recommended disinfectants.
9. Keep the bladder scanner accessories organized: Store the bladder scanner and its accessories in a clean and organized manner. This includes keeping cables, probes, and the device itself in designated storage areas, protecting them from potential damage.
10. Stay updated with training and guidelines: Stay informed about any updates or guidelines related to bladder scanning. Attend training sessions and stay updated on the latest advancements and best practices in bladder scanning techniques.
By following these tips and best practices, healthcare professionals can optimize their use of bladder scanners, ensuring accurate measurements, efficient workflows, and improved patient care.