
Checking System Requirements
Before upgrading to the latest operating system, it’s important to ensure that your Mac meets the necessary system requirements. This will help optimize your experience with OS X Yosemite and prevent any compatibility issues. Here’s a step-by-step guide to check if your Mac is compatible:
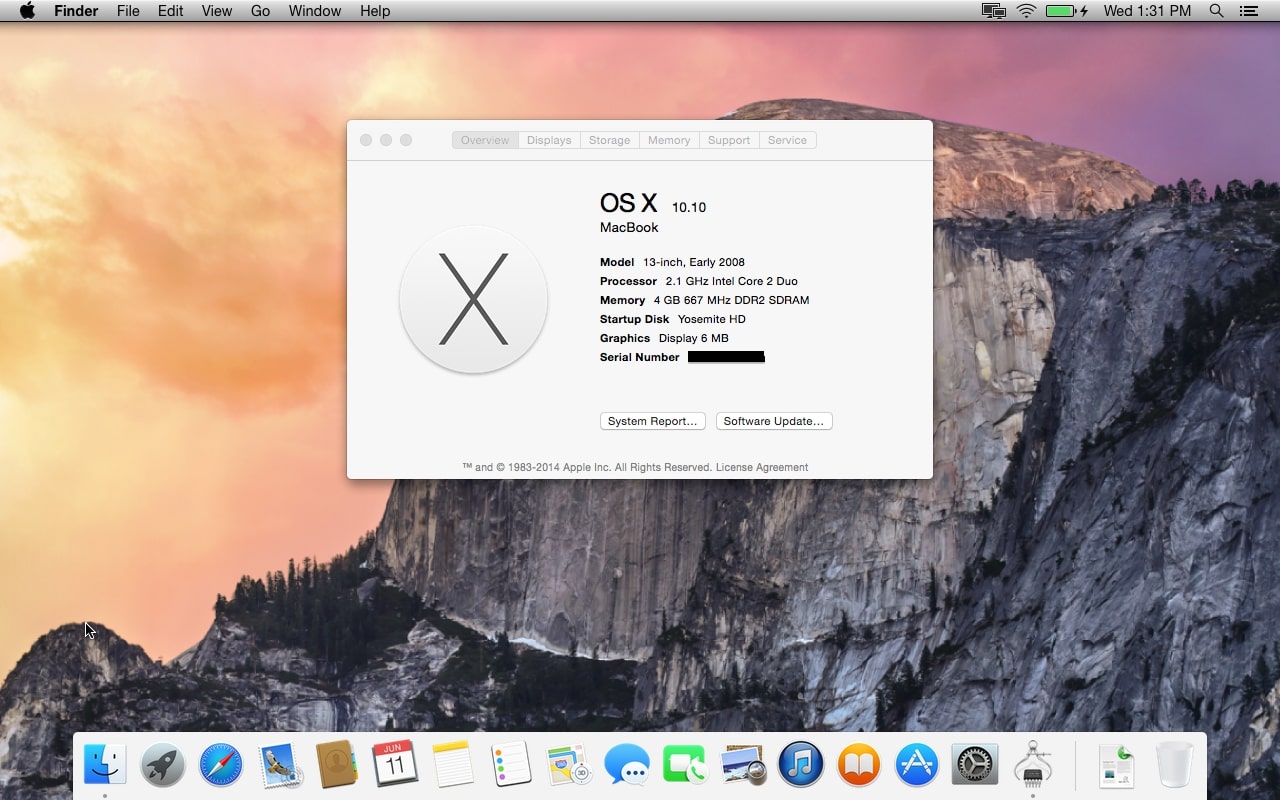
- Verify your Mac model: OS X Yosemite is compatible with most Mac models released after 2009. To check your Mac model, click on the Apple logo in the top left corner of your screen and choose “About This Mac.” The model and year will be displayed.
- Check the minimum hardware requirements: OS X Yosemite requires at least 2GB of RAM and 8GB of available storage space. Ensure that your Mac meets these requirements to ensure a smooth installation process.
- Review the supported Mac models: Some advanced features of Yosemite may only be available on newer Mac models. Visit the official Apple website to see if there are any specific features limited to certain Mac models.
- Update your current operating system: If your Mac is running an older version of OS X, make sure to update it to the latest version before attempting to upgrade to Yosemite. This will help ensure a successful installation and minimize any potential issues.
By going through these steps, you can determine if your Mac is compatible with OS X Yosemite. It’s important to note that not all Mac models will be able to upgrade to the latest operating system. If your Mac doesn’t meet the requirements, you may want to consider upgrading your hardware or sticking with your current operating system.
Backing Up Your Data
Before embarking on the upgrade to OS X Yosemite, it’s crucial to back up your important files and data. While the upgrade process is generally smooth, there’s always a possibility of data loss or unexpected issues. Follow these steps to ensure that your data is safe:
- Choose a Backup Method: There are several options for backing up your data, including using Time Machine, a cloud-based backup service, or manually copying your files to an external hard drive. Evaluate your needs and choose a method that suits you best.
- Connect an External Storage Device: If you decide to use Time Machine or manually back up your files, connect an external hard drive or a network-attached storage (NAS) device to your Mac. Ensure that it has enough space to accommodate your files.
- Set Up Time Machine (Optional): Time Machine is a built-in backup feature in macOS that simplifies the process. To set it up, go to System Preferences, select Time Machine, and follow the on-screen instructions to choose your backup disk.
- Manually Copy Important Files: If you prefer a more hands-on approach, manually copy your important files and folders to the external storage device. This can be done by dragging and dropping files or using the “Export” or “Save As” functions in relevant applications.
- Verify Your Backup: Once the backup process is complete, double-check that all the necessary files are successfully saved. Open a few files or folders to ensure they are accessible from the backup device.
Backing up your data provides reassurance that even if something goes wrong during the upgrade process, you’ll still have a copy of your important files. It’s a precautionary step that can save you from potential headaches and data loss.
Downloading and Installing OS X Yosemite
Once you have confirmed that your Mac meets the system requirements and backed up your data, you’re ready to download and install OS X Yosemite. Follow these steps to successfully complete the installation:
- Connect to a Stable Internet Connection: Ensure that your Mac is connected to a reliable and stable internet connection. This will ensure a smooth and uninterrupted download process.
- Open the App Store: Click on the Apple logo in the top left corner of your screen and select “App Store.” Alternatively, you can find the App Store icon in your Dock.
- Search for OS X Yosemite: In the search bar at the top right corner of the App Store window, type “OS X Yosemite” and press Enter. Locate the official OS X Yosemite page in the search results.
- Download OS X Yosemite: On the OS X Yosemite page, click the “Download” button. The download will start, and the progress will be displayed in the Launchpad or your Downloads folder.
- Wait for the Download to Complete: The download time may vary depending on your internet speed. Be patient and let the download finish before proceeding.
- Begin the Installation: Once the download is complete, a window will automatically appear, guiding you through the installation process. Click on “Continue” to begin the installation.
- Follow the On-Screen Instructions: Read and follow the on-screen instructions carefully during the installation process. You may be prompted to agree to the terms and conditions and enter your Apple ID password.
- Allow the Installation to Finish: The installation process may take some time. Avoid interrupting or shutting down your Mac during this process to prevent any potential issues.
- Restart Your Mac: After the installation is complete, your Mac will automatically restart. Allow it to reboot and log in with your Apple ID and password.
Once your Mac has restarted, you will be running the latest version of OS X Yosemite. Enjoy the new features and enhanced performance that this operating system has to offer!
Restarting Your Mac
After successfully installing OS X Yosemite on your Mac, it’s important to restart your computer to ensure that all changes take effect and to optimize performance. Restarting your Mac is a simple process that can be done in just a few steps:
- Save and close any open files or applications: Before restarting, make sure to save any unsaved work and close all applications. This will prevent data loss and ensure a smooth restart.
- Click on the Apple logo: Located in the top left corner of your screen, click on the Apple logo to reveal a drop-down menu.
- Select “Restart”: Within the drop-down menu, select the “Restart” option. This will initiate the restart process.
- Confirm the restart: A confirmation dialog box will appear, asking if you are sure you want to restart your Mac. Click on “Restart” to proceed.
- Wait for your Mac to restart: Your Mac will begin the restart process, and the screen will go blank for a few moments. You may hear the startup chime or see the Apple logo.
- Login with your credentials: Once your Mac has finished restarting, you will be prompted to log in. Enter your username and password to access your desktop.
Restarting your Mac is an essential step after installing any significant updates or new software. It ensures that your system operates with optimal performance and that all changes made during the installation process are applied correctly. By following these steps, you can ensure a smooth and successful restart of your Mac after upgrading to OS X Yosemite.
Setting Up OS X Yosemite
Once your Mac has been restarted after installing OS X Yosemite, you’ll need to go through the setup process to customize your preferences and configure your new operating system. Follow these steps to set up OS X Yosemite:
- Select your country or region: On the initial setup screen, you’ll be prompted to choose your country or region. Click on the drop-down menu and select your location.
- Choose your keyboard layout: Next, you’ll need to select your keyboard layout. This ensures that the keys on your keyboard are correctly mapped to the corresponding characters.
- Connect to Wi-Fi: If your Mac is not already connected to a Wi-Fi network, you’ll be asked to connect to one. Choose your network from the list and enter the password, if required.
- Set up your Apple ID: If you have an Apple ID, you’ll be given the option to sign in or create a new one. Your Apple ID enables access to various Apple services such as the App Store and iCloud, so it’s recommended to sign in or create an account.
- Enable location services: You’ll then be prompted to enable or disable location services. These services allow apps and services to request your location for various purposes. Choose your preference based on your privacy and convenience needs.
- Agree to terms and conditions: Review the terms and conditions provided by Apple and click “Agree” to proceed with the setup process.
- Create a user account: To personalize your Mac, you’ll be asked to create a user account. Enter your full name, account name, and password. You can also choose to enable automatic login or require a password to access your account.
- Set up FaceTime and iMessage (optional): If you use FaceTime and iMessage, you can sign in with your Apple ID to enable these services on your Mac.
- Choose whether to enable Siri: OS X Yosemite includes Siri, Apple’s intelligent personal assistant. Decide if you wish to enable Siri by selecting your preference.
- Set up iCloud (optional): You’ll have the option to sign in to iCloud, Apple’s cloud storage and syncing service. This allows you to access your files, photos, contacts, and more across multiple devices.
By following these steps, you’ll be able to set up OS X Yosemite according to your preferences. Take your time to customize your settings and make your Mac work best for you. Enjoy exploring the new features and improvements that Yosemite has to offer!
Transferring Your Data
When setting up OS X Yosemite on your Mac, you may have the option to transfer your existing data from your previous system. This can save you time and effort by automatically migrating your files, applications, and settings to your new operating system. Here’s how you can transfer your data to OS X Yosemite:
- Connect your backup device: If you have previously backed up your data using Time Machine or another backup method, connect the backup device to your Mac. Ensure that it is recognized and accessible.
- Follow the on-screen prompts: During the OS X Yosemite setup process, you may be asked if you want to transfer data from another Mac or backup.
- Select the source: Choose the appropriate option depending on where your data is stored. If you backed up using Time Machine, select “From a Mac, Time Machine backup, or startup disk.” If you have a different backup method, choose the relevant option.
- Choose which data to transfer: You will be given the choice to select the specific data you want to transfer. This can include documents, applications, user accounts, and settings.
- Initiate the data transfer: Click “Continue” to begin the data transfer process. The amount of time it takes will depend on the size of your data and the speed of the connection between your devices.
- Wait for the transfer to complete: Once the transfer is underway, be patient and allow the process to complete. Do not disconnect any devices or interrupt the transfer to avoid potential data loss or errors.
- Review the transferred data: After the transfer is finished, you will be able to review the transferred data on your new OS X Yosemite system. Check that all files and settings are intact and accessible.
Transferring your data can make the transition to OS X Yosemite seamless, allowing you to resume your work quickly. However, it’s important to note that not all data may be compatible or transferable depending on the versions of software and file compatibility. Always double-check your transferred data to ensure everything is as expected.
Updating Apps and Software
After upgrading to OS X Yosemite, it’s important to update your apps and software to ensure compatibility and take advantage of new features and improvements. Follow these steps to update your apps and software on your Mac:
- Open the App Store: Click on the Apple logo in the top left corner of your screen and select “App Store.” Alternatively, you can find the App Store icon in your Dock.
- Check for available updates: In the App Store, click on the “Updates” tab located in the toolbar. This will display a list of all available updates for your installed apps and software.
- Select the updates: Review the list of updates and select the apps and software that you want to update. You can choose to update them individually or click on the “Update All” button to update everything at once.
- Enter your Apple ID password (if required): Some updates may require you to enter your Apple ID password to authorize the installation. Follow the on-screen prompts to complete the authorization process.
- Wait for the updates to download and install: The download and installation time will vary depending on the size of the updates and your internet speed. Be patient and let the process complete.
- Restart the apps (if necessary): After the updates have been installed, it’s a good practice to restart the updated apps. This ensures that the changes take effect and any new features or improvements are properly applied.
Updating your apps and software is essential to maintain optimal performance and security on your Mac. It’s a simple process that ensures you have the latest versions of your favorite applications and that they are fully compatible with OS X Yosemite.
Customizing Your Settings
OS X Yosemite offers a range of customization options that allow you to personalize your Mac and tailor it to your preferences. Here are some settings that you can customize after upgrading to OS X Yosemite:
- Desktop and Screensaver: To change your desktop wallpaper or screensaver, go to System Preferences and select “Desktop & Screensaver.” Choose from the available options or click the “+” button to add your own.
- System Appearance: OS X Yosemite introduced a new look with a flat design. However, if you prefer the classic appearance, you can go to System Preferences, click on “General,” and select the appearance option that suits your taste.
- Notification Center: Customize the notifications you receive and how they appear by accessing System Preferences and selecting “Notifications.” Here, you can choose which apps can send you notifications and how they are displayed.
- Privacy Settings: Control the access that apps have to your personal information by going to System Preferences and clicking on “Security & Privacy.” You can manage permissions for location services, contacts, and more.
- Keyboard Shortcuts: Tailor your keyboard shortcuts to fit your workflow by going to System Preferences, selecting “Keyboard,” and then “Shortcuts.” Here, you can customize shortcuts for various functions and apps.
- Trackpad and Mouse: Adjust the settings for your trackpad or mouse by going to System Preferences and selecting “Trackpad” or “Mouse.” Customize gestures, scrolling behavior, and button configurations to your liking.
- Energy Saver: Save energy and optimize battery life by adjusting the settings in System Preferences under “Energy Saver.” Customize sleep settings, adjust display brightness, and manage power-related preferences.
- Sound and Output: Control the audio settings on your Mac by going to System Preferences and selecting “Sound.” Customize output devices, volume levels, and audio effects to suit your preferences.
- Date and Time: Adjust the date, time, and time zone settings by going to System Preferences and selecting “Date & Time.” Customize the format, enable automatic time synchronization, and select your preferred time zone.
- Accessibility: Accessibly settings allow you to personalize your Mac to meet your specific needs. Go to System Preferences and select “Accessibility” to customize features such as display settings, voiceover, and keyboard shortcuts.
By customizing these settings, you can make your Mac truly your own and create a personalized user experience. Explore the various options and adjust them according to your preferences and workflow.
Troubleshooting Common Issues
While upgrading to OS X Yosemite generally goes smoothly, you may encounter some common issues along the way. Here are a few troubleshooting tips to help you resolve potential problems:
- Slow Performance: If you notice that your Mac is slower after upgrading, try restarting your computer. This can help clear out any temporary glitches and improve overall performance. You can also check for any outdated or incompatible software that may be causing issues.
- Wi-Fi Connection Problems: If you’re experiencing connectivity issues with your Wi-Fi network, try turning Wi-Fi off and on again. If the problem persists, restart your router or reset network settings on your Mac. You can also try removing any conflicting software or updating Wi-Fi drivers.
- Application Compatibility: Some older applications may not be compatible with OS X Yosemite. If you encounter issues with specific apps, check the developer’s website for updates or compatibility information. Alternatively, you can consider using alternative apps that are compatible with Yosemite.
- Startup Issues: If your Mac is having trouble starting up or gets stuck on the Apple logo, try booting into Safe Mode by holding down the Shift key during startup. This isolates any problematic third-party software and allows you to troubleshoot further.
- Freezing or Crashing: If your Mac freezes or crashes frequently, it may be due to incompatible software or conflicting drivers. Update all your apps and drivers to the latest versions and check for any known issues with OS X Yosemite. You can also try resetting the System Management Controller (SMC) to resolve hardware-related issues.
- Battery Drain: If you notice that your battery is draining faster than usual, check for any power-hungry processes or applications running in the background. Close unnecessary apps and adjust energy-saving settings to optimize battery life. You can also calibrate your battery by fully charging it and then discharging it completely.
- External Device Issues: If you’re having problems connecting or using external devices such as printers or cameras, ensure that the drivers for those devices are up to date. Check the manufacturer’s website for any driver updates or compatibility issues specific to OS X Yosemite.
If you encounter any other issues or are unable to resolve a problem on your own, it’s recommended to visit the Apple Support website or contact Apple Support for further assistance. They can provide guided troubleshooting steps or help you determine if there may be a hardware-related issue.
Final Tips and Recommendations
As you navigate your way through OS X Yosemite and enjoy its new features and improvements, here are some final tips and recommendations to enhance your experience:
- Stay Updated: Keep your Mac up to date with the latest software updates and security patches. Regularly check for updates in the App Store to ensure you have the most stable and secure version of OS X Yosemite.
- Backup Regularly: Don’t forget to regularly back up your data using Time Machine or another reliable backup method. Regular backups provide an extra layer of protection and peace of mind in case of data loss or hardware failure.
- Explore New Features: Take the time to explore the new features and enhancements offered by Yosemite. Get familiar with the redesigned interface, new notification center, and revamped apps to make the most of your Mac’s capabilities.
- Organize Your Files: Use the improved Finder features to organize your files and folders efficiently. Take advantage of the new tagging system, Spotlight search, and enhanced file management capabilities to stay organized and find your files quickly.
- Optimize Storage: If you’re running low on storage space, utilize the built-in storage optimization tools. OS X Yosemite offers options to optimize storage, automatically remove unnecessary files, and store older files in iCloud to free up local storage.
- Take Advantage of iCloud: Seamlessly integrate your Mac with iCloud to access your files, photos, and documents across all your devices. Set up iCloud Drive and iCloud Photo Library to sync and access your data from anywhere.
- Practice Good Security Habits: Protect your Mac and personal information by enabling firewall, using strong passwords, and being cautious while downloading or installing third-party software. Regularly review your privacy settings to ensure your information is secure.
- Customize Your Workflow: Customize your Mac to match your workflow and productivity preferences. Take advantage of keyboard shortcuts, trackpad gestures, and accessibility features to streamline your tasks and work more efficiently.
- Join the Apple Community: Engage with the Apple user community to learn more about OS X Yosemite, troubleshoot issues, and discover hidden tips and tricks. Visit online forums, participate in discussions, and seek help from fellow Mac users.
By following these tips and recommendations, you can optimize your experience with OS X Yosemite and make the most of its powerful features. Embrace the possibilities that this operating system offers and enjoy a seamless and productive Mac experience!