
Backup Your Data
Before performing a clean install of OS X Yosemite, it’s crucial to safeguard your precious data. This will ensure that you can easily restore your files and settings after the installation is complete. Follow these steps to create a reliable backup:
- Identify your important files: Make a list of the files and folders that are important to you. This may include documents, photos, videos, and any other personal data.
- External storage device: Connect an external hard drive, SSD, or other storage device to your Mac. Ensure that it has enough space to accommodate all the files you want to back up.
- Time Machine backup: If you have been using the Time Machine backup feature, this is the perfect opportunity to create a full backup. Open the Apple menu, go to System Preferences, and select Time Machine. Follow the on-screen instructions to set up a backup and let Time Machine handle the rest.
- Manual backup: If you prefer a manual backup method, you can simply copy and paste your important files and folders to the external storage device. This gives you more control over organizing the backup and selecting specific files and folders to include.
- Verify the backup: Once the backup process is complete, take a moment to verify that all your files are successfully copied to the external storage device. Check a few randomly selected files to ensure they are intact and accessible.
By following these steps, you’re taking the necessary precautions to protect your valuable data. In the event that something goes wrong during the clean installation of OS X Yosemite, you can rest assured knowing that you have a reliable backup to restore your files and settings.
Now that you’ve successfully backed up your data, it’s time to move on to the next step: creating a bootable installer for OS X Yosemite.
Create a Bootable Installer for OS X Yosemite
In order to perform a clean install of OS X Yosemite, you’ll need to create a bootable installer. This will allow you to install the operating system on your Mac without the need for an internet connection. Follow these steps to create a bootable installer:
- Download the OS X Yosemite Installer: Go to the App Store on your Mac and search for OS X Yosemite. Once you find it, click on the “Download” button and wait for the installation file to download.
- Prepare a USB flash drive: You’ll need a USB flash drive with a capacity of at least 8 GB. Make sure the flash drive is empty, as the creation process will erase all existing data.
- Format the USB flash drive: Open the Disk Utility application, which can be found in the Utilities folder within the Applications folder. Select your USB flash drive from the list of available drives, then click on the “Erase” button. Choose “Mac OS Extended (Journaled)” as the format and give it a suitable name.
- Create the bootable installer: Open Terminal, which can also be found in the Utilities folder. Use the command “
sudo /Applications/Install\ OS\ X\ Yosemite.app/Contents/Resources/createinstallmedia --volume /Volumes/Untitled --applicationpath /Applications/Install\ OS\ X\ Yosemite.app“. This command will start the creation process and may take some time to complete. - Complete the process: Once the command finishes executing, your USB flash drive is now a bootable installer for OS X Yosemite. You can now safely eject the flash drive and proceed to the next step.
Having a bootable installer is essential for performing a clean install of OS X Yosemite. It ensures that you have a reliable and accessible installation source, even if your Mac is not connected to the internet. With the bootable installer ready, you’re now ready to restart your Mac and enter recovery mode.
Restart Your Mac and Enter Recovery Mode
Before proceeding with the clean installation of OS X Yosemite, you’ll need to restart your Mac and enter recovery mode. Recovery mode provides a set of tools and utilities that will allow you to erase your startup disk and install a fresh copy of the operating system. Follow these steps to restart your Mac and enter recovery mode:
- Save your work and close all applications: It’s important to save any ongoing work and close all applications before entering recovery mode. This will prevent any data loss or disruptions during the installation process.
- Restart your Mac: Click on the Apple menu in the top-left corner of the screen and select “Restart”. Alternatively, you can press the power button and choose “Restart” from the pop-up menu.
- Enter recovery mode: As soon as your Mac starts to restart, press and hold the Command + R keys simultaneously. Release them when you see the Apple logo or a spinning globe icon.
- Wait for the macOS Utilities window: After a brief moment, your Mac will boot into recovery mode and display the macOS Utilities window. This is where you’ll perform the necessary steps to erase your startup disk and install OS X Yosemite.
Entering recovery mode enables you to access the necessary tools to perform a clean installation of OS X Yosemite. It’s important to follow these steps carefully to ensure a smooth transition into recovery mode. With your Mac successfully in recovery mode, you’re now ready to proceed with erasing and formatting your Mac’s startup disk.
Erase and Format Your Mac’s Startup Disk
In order to perform a clean installation of OS X Yosemite, you’ll need to erase and format your Mac’s startup disk. This will remove all existing data and partitions on your disk, preparing it for a fresh installation of the operating system. Follow these steps to erase and format your Mac’s startup disk:
- Access Disk Utility: In the macOS Utilities window, click on “Disk Utility” and then click “Continue”. This will open the Disk Utility application.
- Select your startup disk: In the left sidebar of Disk Utility, you’ll see a list of disks and volumes. Select your main startup disk, which is typically named “Macintosh HD” or something similar.
- Erase the disk: Click on the “Erase” button in the top toolbar. In the Erase dialog box, choose a suitable name for your disk and select the appropriate format. For maximum compatibility, choose “Mac OS Extended (Journaled)”. Finally, click “Erase” to begin the erasing process.
- Wait for the erase process to complete: The erasing process may take some time, depending on the size of your disk. Once it’s finished, you’ll see a notification indicating that the erase was successful.
- Format the disk: After erasing the disk, select the newly erased disk in Disk Utility. Click on the “Partition” tab, then click the “+” button to add a new partition. Choose a size for your partition (typically you’ll want to use the entire disk) and select “Mac OS Extended (Journaled)” as the format. Finally, click “Apply” to format the disk.
By following these steps, you’ll successfully erase and format your Mac’s startup disk, making it ready for a clean installation of OS X Yosemite. It’s important to note that this process permanently removes all data on the disk, so make sure you have a backup of any important files.
Now that your Mac’s startup disk is clean and formatted, you’re ready to proceed with the installation of OS X Yosemite. The next step is to install OS X Yosemite onto your Mac.
Install OS X Yosemite onto Your Mac
Now that you have successfully erased and formatted your Mac’s startup disk, it’s time to install OS X Yosemite. Follow these steps to install the operating system onto your Mac:
- Access macOS Utilities: In the macOS Utilities window, click on “Install OS X” and then click “Continue”. This will begin the installation process.
- Agree to the license agreement: Read the license agreement carefully, then click on the “Agree” button to proceed with the installation.
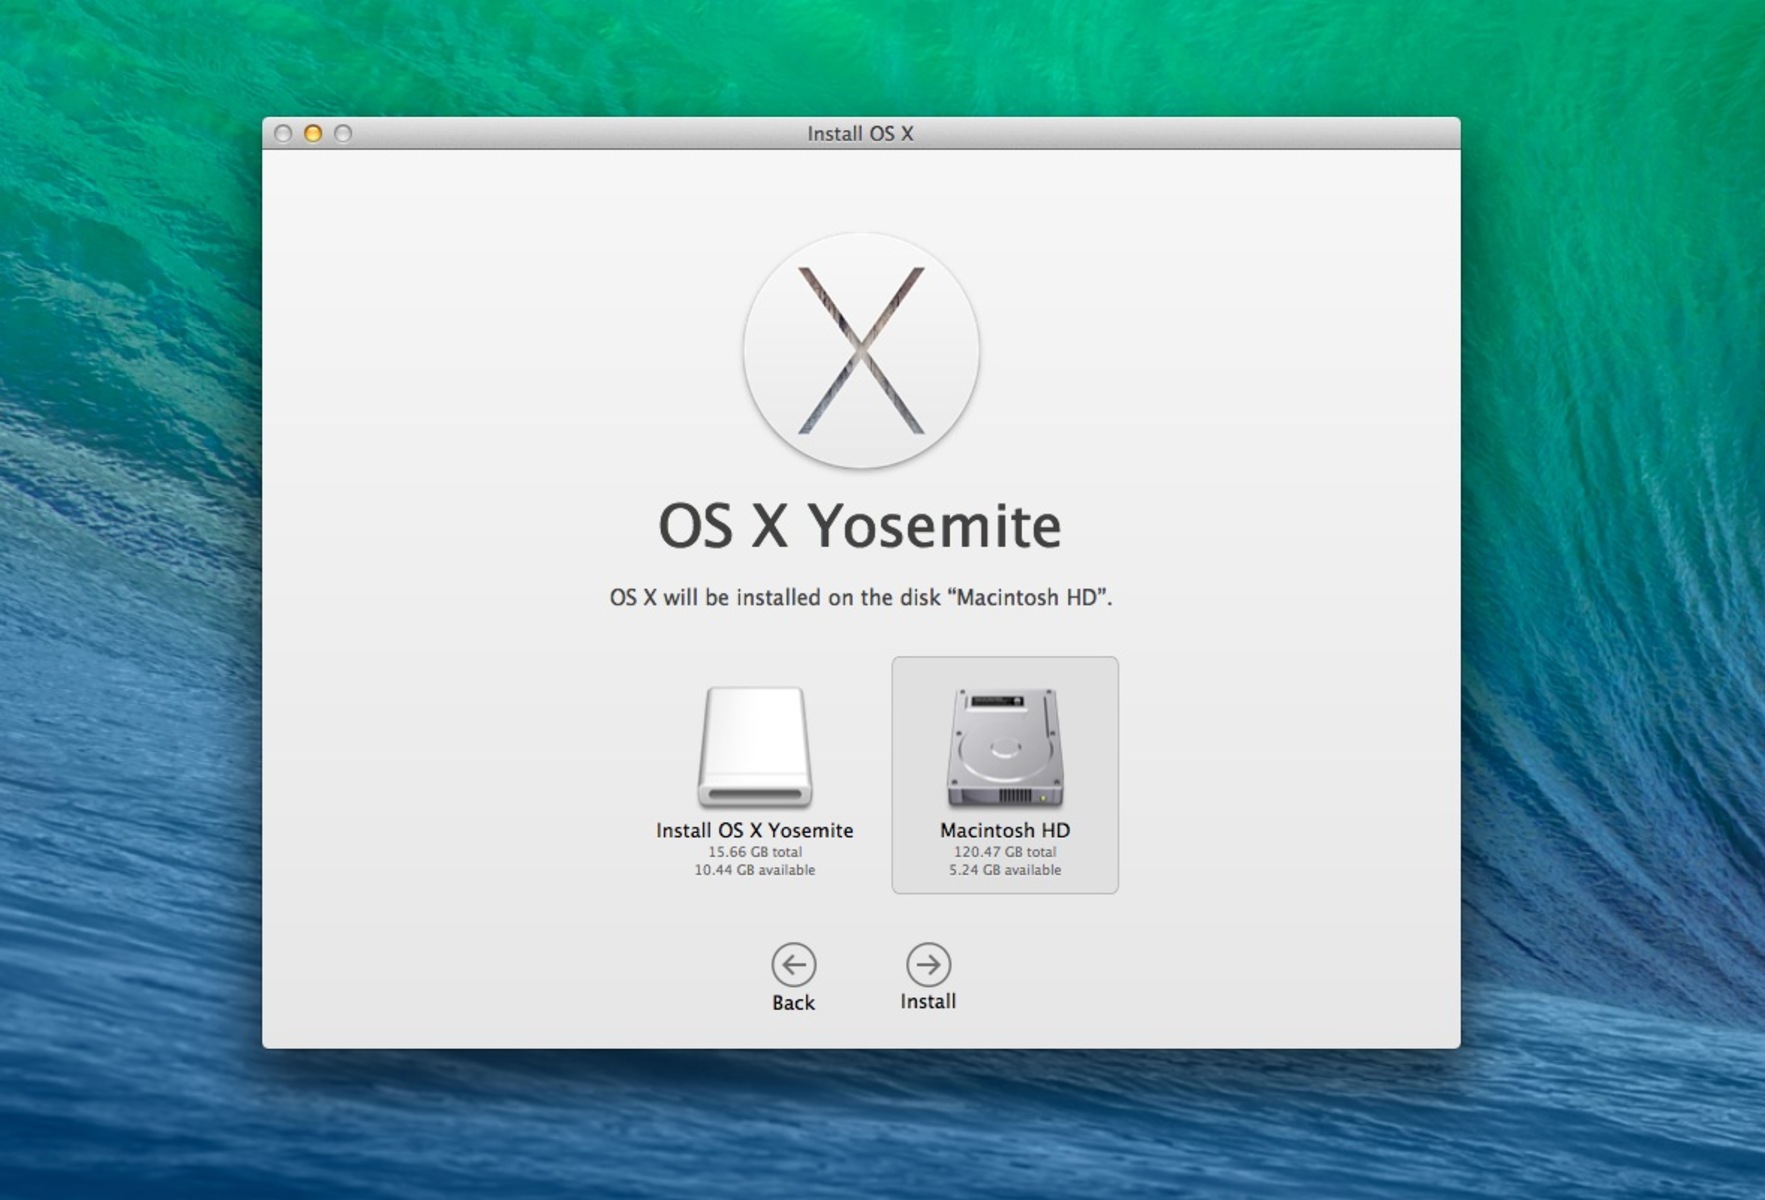
- Select the appropriate destination disk: In the Install OS X window, you’ll see a list of available disks. Choose the recently formatted disk that you want to install OS X Yosemite on.
- Begin the installation: Click on the “Install” button to start the installation process. This may take some time, so be patient and avoid interrupting the process.
- Follow the on-screen instructions: The installation process will guide you through a series of steps. Follow the on-screen instructions to customize your installation preferences, such as language, keyboard layout, and network settings.
- Wait for the installation to complete: Once the installation process is finished, your Mac will restart. This is normal and indicates that the installation of OS X Yosemite was successful.
By following these steps, you’ll successfully install OS X Yosemite onto your Mac. This will provide you with a fresh and updated operating system, ready for you to set up and customize according to your preferences.
Next, we’ll walk you through the process of setting up your Mac with a fresh installation of OS X Yosemite.
Set Up Your Mac with a Fresh Installation of OS X Yosemite
After successfully installing OS X Yosemite on your Mac, it’s time to set it up with a fresh installation. Follow these steps to complete the setup process:
- Select your country or region: Choose your country or region from the list provided and click “Continue”. This will help customize certain settings based on your location.
- Connect to a Wi-Fi network: Select the Wi-Fi network you want to connect to and enter the password if necessary. If you prefer to set up your network later, you can skip this step for now.
- Transfer information (optional): If you have recently backed up your data using Time Machine or another backup method, you can choose to transfer your information from another Mac, a Time Machine backup, or a startup disk. Alternatively, you can choose not to transfer any data and start with a clean slate.
- Sign in with your Apple ID: You’ll be prompted to sign in with your Apple ID. This will allow you to access various Apple services, including the App Store, iCloud, and more. If you don’t have an Apple ID, you can create one at this stage.
- Set up iCloud: Decide whether you want to set up iCloud on your Mac. iCloud provides seamless integration between your devices, allowing you to access your photos, documents, and more across multiple devices.
- Create a computer account: Create a username and password for your Mac’s login. This will be the account you use to access your Mac and make changes to system settings.
- Agree to terms of service: Read and agree to the terms of service presented. Make sure you understand the terms before proceeding.
- Set up Siri (optional): You can choose whether or not to enable Siri, Apple’s virtual assistant. Siri can assist you with tasks, answer questions, and provide personalized recommendations.
- Choose a look for your Mac: Personalize the appearance of your Mac by selecting a dark or light theme. You can always customize these settings later in System Preferences.
- Complete the setup: Once you’ve gone through the setup steps, your Mac will finalize the setup process and take you to the desktop. Congratulations, you now have a fresh installation of OS X Yosemite on your Mac!
Now that you’ve completed the setup, you’re ready to restore your data from the backup and reinstall your applications to make your Mac fully functional again.
Restore Your Data from Backup
With a fresh installation of OS X Yosemite on your Mac, it’s time to restore your data from the backup you created earlier. Follow these steps to restore your files and settings:
- Connect your backup device: If you used an external storage device or Time Machine backup for your data, connect it to your Mac.
- Open Migration Assistant: Go to the Applications folder, open the Utilities folder, and double-click on Migration Assistant.
- Choose your migration method: Migration Assistant will ask how you want to transfer your data. Select the appropriate option based on your backup method:
- From a Mac, Time Machine backup, or startup disk: If you have the backup device connected, choose this option and follow the on-screen instructions to select the source.
- From a Windows PC: If you were previously using a Windows PC and have a backup of your files, choose this option and follow the prompts to locate and transfer the files.
- From another disk or Time Machine backup: Select this option if you have a backup stored on a different disk or Time Machine backup.
- Select the data to transfer: Once Migration Assistant recognizes your backup source, you’ll be presented with a list of data you can transfer. Choose the items you want to restore, such as user accounts, applications, documents, and settings.
- Start the migration: Click on the “Continue” button to begin the data transfer process. Migration Assistant will estimate the time it will take to complete the migration.
- Wait for the migration to finish: The time it takes to transfer your data will depend on the size and complexity of your backup. Once the migration is complete, you’ll be notified.
By following these steps, you’ll restore your data from the backup, ensuring that all your important files, settings, and personalized configurations are back on your Mac. This allows you to seamlessly continue using your Mac with all your familiar files and settings.
Now that your data has been restored, the next step is to reinstall any applications you had on your Mac and customize your settings according to your preferences.
Reinstall Apps and Customize Settings
After restoring your data, it’s time to reinstall your applications and customize the settings on your Mac. Follow these steps to get your Mac set up exactly the way you want it:
- Reinstall applications: Open the App Store on your Mac and browse through your previously used applications. Install the ones you need by clicking on the “Install” button next to each app. Alternatively, if you have installation files for third-party applications, you can reinstall them from those files.
- Sign in to your accounts: Launch individual applications and sign in to your accounts to regain access to your personalized settings, preferences, and data.
- Customize system preferences: Open System Preferences from the Apple menu and adjust the various settings to fit your preferences. This includes settings for display, sound, keyboard, trackpad, energy saver, security, and more.
- Restore browser bookmarks and extensions: If you use web browsers like Safari, Chrome, or Firefox, sign in to your browser account and sync your bookmarks, extensions, and settings to have your browsing experience back to how it was.
- Configure email and other accounts: Set up your email accounts, including iCloud, Gmail, or other providers, in the Mail app or your preferred email client. Also, configure any other accounts like iCloud Drive, Dropbox, or OneDrive to synchronize your files.
- Set up file organization: Take the opportunity to organize your files into appropriate folders and directories. This will help you keep your files well-structured and easily accessible.
- Personalize your desktop and screensaver: Choose a desktop wallpaper and screensaver that matches your style and preferences.
- Install necessary drivers and updates: Check for any hardware drivers or software updates that are needed for your Mac. This will ensure optimal performance and compatibility with your devices.
- Check privacy and security settings: Review and adjust your privacy and security settings to protect your data and ensure your Mac is secure.
- Enjoy your freshly customized Mac: With your applications reinstalled and settings customized, your Mac is now ready to be used exactly the way you like it. Take a moment to enjoy your refreshed and personalized Mac experience.
By following these steps, you’ll reinstall your applications, customize your settings, and personalize your Mac according to your preferences. This will ensure that you have a smooth and tailored experience while using OS X Yosemite on your Mac.
With your Mac fully set up, you can now take full advantage of the features and capabilities that OS X Yosemite has to offer.