
Check System Requirements
Before upgrading to macOS Monterey, it is essential to ensure that your Mac meets the minimum system requirements. This will help ensure a smooth installation process and optimal performance of the operating system. Here are the system requirements to consider:
- Compatibility: macOS Monterey is compatible with a range of Mac models, including MacBook Air (2015 and later), MacBook Pro (2015 and later), Mac mini (2014 and later), iMac (2015 and later), iMac Pro (2017 and later), and Mac Pro (2013 and later).
- Processor: Your Mac should have an Intel Core i5 or i7, Apple M1, or higher processor to run macOS Monterey.
- Memory: Ensure that your Mac has a minimum of 8GB of RAM for smooth performance. However, it is recommended to have 16GB or more for an optimal experience, especially if you frequently use resource-intensive applications.
- Storage Space: Before installing macOS Monterey, make sure your Mac has sufficient free storage space. It is recommended to have at least 20GB of available disk space, although more is advisable for a smoother upgrade process.
- Graphics: Your Mac should have a compatible graphics card to support the visual enhancements and features of macOS Monterey.
- Software Compatibility: Verify the compatibility of your essential software and applications with macOS Monterey. Visit the official websites of the software developers to check for updates or compatibility patches.
- Internet Connection: To download macOS Monterey and receive future updates, ensure that your Mac is connected to a stable internet connection.
By confirming that your Mac meets these system requirements, you can proceed with confidence to the next steps of upgrading to macOS Monterey. It will help to ensure a seamless transition to the latest operating system, unlocking new features and improvements for your Mac.
Backup Your Files
Before upgrading to macOS Monterey, it is crucial to create a backup of your important files to ensure their safety. While the upgrading process is generally smooth, it’s always better to be prepared for any unforeseen issues. Here are some steps to help you backup your files:
- External Storage: Connect an external hard drive or USB flash drive to your Mac. Make sure it has enough free space to accommodate all your important files.
- Time Machine: If you already use Time Machine, it’s an excellent tool for creating backups. Open Time Machine preferences from the Apple menu and select your external drive as the backup destination. Follow the instructions to initiate the backup process.
- Drag and Drop: Alternatively, you can manually copy your important files and folders to the external drive by dragging and dropping them. Organize the files into logical folders to make it easier to restore them later.
- Cloud Storage: Consider using cloud storage services like iCloud, Dropbox, or Google Drive to backup your files. Upload your important documents, photos, and other files to these services to keep them accessible from anywhere.
- Verification: After the backup process is complete, take a few minutes to verify that all your important files are successfully backed up. Double-check folders, documents, and media files to ensure they are safe and intact.
By creating a backup of your files, you’ll have peace of mind during the upgrade process. In the unlikely event of any data loss or complications, you can easily restore your files and continue where you left off. Remember, it’s always better to be safe than sorry when it comes to safeguarding your valuable data.
Free Up Disk Space
Before upgrading to macOS Monterey, it’s a good idea to free up disk space on your Mac. This will not only ensure a smoother installation process but also optimize the performance of your system. Here are some steps to help you free up disk space:
- Delete Unnecessary Files: Go through your files and identify any that are no longer needed. This includes old documents, downloads, and media files that are taking up valuable disk space. Delete or move them to an external drive or cloud storage.
- Empty Trash: Emptying your trash bin will permanently remove any files stored in it, freeing up additional space on your hard drive.
- Manage Applications: Uninstall any applications that you no longer use. Open the “Applications” folder on your Mac, locate the unused applications, and move them to the trash bin. Remember to empty the trash to completely remove them from your system.
- Clear Temporary Files: Temporary files generated by your system and applications can accumulate over time. Use cleaning tools like CleanMyMac or CCleaner to scan and remove these unnecessary files, optimizing your disk space.
- Archive or Compress Large Files: Identify large files, such as videos or large documents, that you don’t frequently access. Archive them into a compressed folder using tools like ZIP or RAR. This will reduce their file size, freeing up disk space without permanently deleting them.
- Move Photos and Videos to External Storage: If you have a large collection of photos and videos, consider moving them to an external hard drive or cloud storage. This will save space on your Mac’s internal storage, while still keeping them easily accessible.
By following these steps, you can significantly free up disk space on your Mac, improving the performance and ensuring a smoother upgrade to macOS Monterey. Remember to backup any files before deleting or moving them to avoid data loss. Keeping your Mac clean and organized will not only benefit the upgrade process but also enhance your overall computing experience.
Update Your Current macOS Version
Before upgrading to macOS Monterey, it’s essential to ensure that your current macOS version is up to date. This will help ensure a smooth transition and compatibility with the latest operating system. Here are the steps to update your macOS:
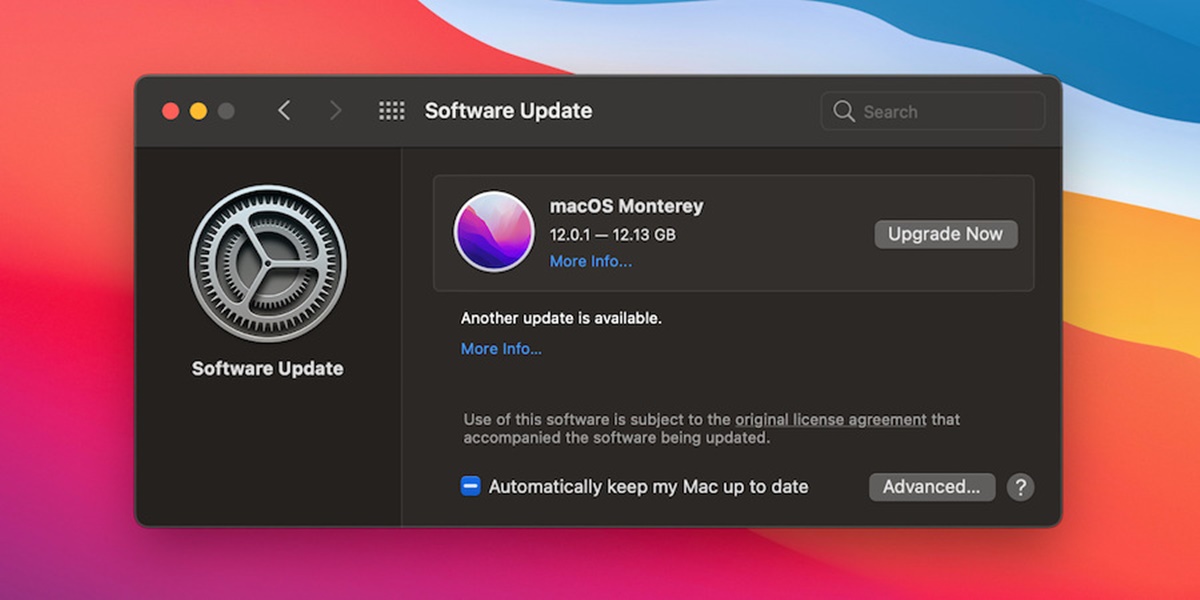
- Check for Updates: Click on the Apple menu in the top left corner of your screen and select “System Preferences.” Then, choose “Software Update” to check for any available updates.
- Download Updates: If any updates are available, click on the “Update Now” button to download and install them. The update process may take some time depending on the size of the update and your internet connection speed.
- Restart Your Mac: After the updates have been installed, you’ll be prompted to restart your Mac. It’s important to save any ongoing work and close applications before proceeding with the restart.
- Recheck for Updates: After restarting your Mac, repeat the previous steps to check for updates again. Sometimes, additional updates may be available only after the initial updates are installed.
- Repeat Until Up to Date: Continue checking for updates and installing them until your macOS version is up to date. It may take several rounds of updates and restarts to reach the latest version.
Updating your macOS to the latest version ensures that your system is equipped with the latest security patches, bug fixes, and performance enhancements. By keeping your operating system up to date, you’ll have a more stable and secure environment for the upgrade to macOS Monterey.
Download macOS Monterey
Once you have completed the necessary preparations, it’s time to download macOS Monterey, the latest operating system for your Mac. Here’s how you can acquire the installation files:
- Check App Store: Open the App Store on your Mac by clicking on the App Store icon in your Dock or by searching for it in Spotlight. Once in the App Store, search for “macOS Monterey” using the search bar.
- Click Download: When you find macOS Monterey in the App Store, click on the “Get” or “Download” button. This will initiate the downloading process of the installation files.
- Wait for the Download: The download time may vary depending on the speed of your internet connection. It is advisable to have a stable and fast internet connection to ensure a smooth and quick download.
- Keep Your Mac Plugged In: Make sure your Mac is connected to a power source throughout the download process. This will prevent any interruptions due to power loss during the download.
- Check Progress: You can view the progress of the download by clicking on the “Purchases” tab in the App Store. Here, you will see the download status and estimated time remaining.
Downloading macOS Monterey may take some time, so be patient and allow the download to complete without interruption. Once the download is finished, you’ll be ready to proceed with the installation process and unleash the new features and enhancements of macOS Monterey on your Mac.
Install macOS Monterey
After you have successfully downloaded macOS Monterey, it’s time to install the operating system on your Mac. Here are the steps to follow:
- Prepare Your Mac: Make sure your Mac is connected to a power source and you have backed up your important files. It is crucial to have a stable power supply to prevent any interruptions during the installation process.
- Locate the Installer: Once the macOS Monterey download is complete, you will find the installation file in your Applications folder. The installer file is typically named “Install macOS Monterey.”
- Run the Installer: Double-click on the installer file to launch the installation process. You may need to enter your administrator password to proceed.
- Follow the On-Screen Instructions: The installation process will guide you through the necessary steps. Read each prompt carefully and make any desired selections, such as agreeing to the terms and conditions.
- Select the Install Disk: You will be asked to select the disk or partition where you want to install macOS Monterey. Choose the appropriate disk and click “Install” to begin the installation process.
- Wait for the Installation: The installation process may take a while to complete, depending on the speed of your Mac and the complexity of your system. It is important not to interrupt or turn off your Mac during the installation.
- Restart Your Mac: Once the installation is finished, your Mac will automatically restart. You may need to provide your password again during the restart process.
After the restart, your Mac will be running macOS Monterey, ready for you to explore its new features and improvements. Take some time to familiarize yourself with the changes and customize your preferences as needed. Enjoy the enhanced performance and functionality provided by macOS Monterey!
Set Up and Customize Your New System
Once you have successfully installed macOS Monterey on your Mac, it’s time to set up and customize your new system. Here are some essential steps to get started:
- Language and Region: Choose your preferred language and region settings during the initial setup. This will ensure that your system displays information in the desired language and adapts to local settings.
- Sign in with Apple ID: If you have an Apple ID, sign in during the setup process to access iCloud, the App Store, and other Apple services. This will enable seamless integration across devices and allow you to access your data and purchases.
- Set Up iCloud: Configure your iCloud settings to sync your files, photos, contacts, and other data across devices. This will ensure that your important information is always up to date and accessible from anywhere.
- Privacy and Security: Review the privacy and security settings to ensure they align with your preferences. Customize settings related to location services, app permissions, and data sharing to make your Mac secure and protect your privacy.
- Customize Appearance: macOS Monterey offers various customization options to personalize your user experience. Explore the system preferences to adjust settings such as desktop wallpaper, screensaver, accent colors, and more.
- Set Up Siri: Enable Siri, Apple’s voice assistant, and configure its settings according to your preferences. Siri can help you with tasks, answer questions, and control various features and applications on your Mac.
- Configure System Preferences: Dive into the system preferences to fine-tune settings related to displays, sound, keyboard, trackpad, accessibility, and more. Customize these settings to optimize your workflow and make your Mac work the way you want it to.
By setting up and customizing your new system, you can tailor it to your specific needs and preferences. Take the time to explore the different options and make adjustments based on your usage habits and workflow. This will help you make the most of your Mac and create an optimized and personalized computing experience.
Transfer Your Files and Apps
After setting up your new macOS Monterey system, it’s time to transfer your files and apps from your old Mac or backup. Here are some methods to help you seamlessly transfer your data:
- Migration Assistant: Use the built-in Migration Assistant tool to transfer data from your old Mac. Connect your old Mac to your new Mac using a Thunderbolt, FireWire, or Ethernet cable, and follow the on-screen instructions to transfer your files, apps, settings, and other data.
- Time Machine Backup: If you have a Time Machine backup, you can use it to restore your files, apps, and settings to your new macOS Monterey system. Connect your Time Machine backup drive to your new Mac, open Migration Assistant, and choose the Time Machine backup as the source for transferring your data.
- Cloud Storage: If you store your files and documents in cloud storage services like iCloud, Dropbox, or Google Drive, you can simply sign in to these services on your new Mac and download your files. This way, you can access your documents and files from anywhere, regardless of the Mac you’re using.
- Manual Transfer: For apps and files that are not included in the above methods, you can manually transfer them using external storage devices like external hard drives, USB flash drives, or even email. Copy your files to the external storage device from your old Mac and then transfer them to your new Mac.
- Reinstall Apps: After transferring your files, you may need to reinstall your apps on your new Mac. Visit the App Store or the respective websites of your applications to download and install them. Be sure to have your license or activation details handy for any paid apps.
By following these methods, you can successfully transfer your files and apps to your new macOS Monterey system. Take your time to ensure that everything is transferred correctly, and double-check that all your important data has been successfully migrated. This way, you can continue your work and seamlessly transition to your new Mac with all your essential files and applications at your fingertips.
Explore New Features and Enhancements in macOS Monterey
macOS Monterey brings a host of exciting new features and enhancements to enhance your Mac experience. Take the time to explore and make the most of these additions. Here are some notable features to get you started:
- Universal Control: Easily control your Mac and iPad using a single mouse and keyboard. Move your cursor seamlessly between devices and share files and content effortlessly. This feature allows for a more seamless multi-device workflow.
- FaceTime Enhancements: Enjoy new FaceTime features like spatial audio, portrait mode, and grid view. Connect with friends, family, and colleagues in a more immersive and engaging way, even from a distance.
- Focused Work with Focus: Focus mode allows you to customize your notifications based on your work or personal activities. Minimize distractions and stay focused on the task at hand by setting notification preferences.
- Enhanced Safari: Safari has been redesigned with a streamlined tab bar, improved tab grouping, and a redesigned tab overview. Enjoy faster web browsing, improved performance, and enhanced privacy features.
- Live Text: Use the power of machine learning to extract text from images and photos. Simply highlight and copy text from images and paste it into documents or use it for quick searches.
- Shortcuts on Mac: Automate tasks and create custom shortcuts with the new Shortcuts app. Create shortcuts to simplify repetitive actions and boost your productivity.
- Enhanced Privacy and Security: macOS Monterey introduces improved privacy features to protect your data. Features like Mail Privacy Protection, App Privacy Report, and Recording Indicator give you better control over your privacy.
- Redesigned Maps: Discover new places and navigate with ease using the redesigned Maps app. Get detailed 3D city maps, explore interactive globe views, and access new guides for a more immersive and informative mapping experience.
- Improved AirPlay: With Monterey, you can now AirPlay content to your Mac from your iPhone, iPad, or other Apple devices. Enjoy streaming videos, presentations, and more directly on your Mac screen.
- Enhanced Accessibility: macOS Monterey introduces new accessibility features, including improved voice control, enhanced display and font settings, and background sounds to aid focus and relaxation.
These are just a few highlights of the new features and enhancements in macOS Monterey. Take the time to explore and familiarize yourself with the updates to enhance your productivity, creativity, and overall Mac experience. Enjoy the new capabilities and discover how they can simplify your daily tasks and make your Mac even more versatile and enjoyable to use.
Troubleshoot Common Issues
While upgrading to macOS Monterey usually goes smoothly, you might encounter some common issues along the way. Here are a few troubleshooting tips to help you overcome potential obstacles:
- Ensure Compatibility: Double-check that your Mac meets the system requirements for macOS Monterey. Incompatible hardware or outdated software can cause issues during installation or while using the new operating system.
- Verify Sufficient Disk Space: Make sure you have enough free disk space for the installation. Insufficient space can lead to errors or a failed installation. Free up disk space by removing unnecessary files or applications.
- Check Internet Connection: A stable and speedy internet connection is essential for downloading macOS Monterey and its updates. Connect to a reliable network to avoid interruptions or slow downloads.
- Take Precautions: Before upgrading, it’s crucial to back up your important files in case something goes wrong during the installation process. Having a backup ensures you can easily restore your data if needed.
- Restart Your Mac: If you encounter issues with your Mac after installing macOS Monterey, try restarting your system. Sometimes, a simple restart can resolve certain glitches or performance problems.
- Update Your Applications: Some applications may experience compatibility issues with the new operating system. Check for updates from the application developers and install the latest versions to ensure compatibility with macOS Monterey.
- Reset NVRAM/PRAM: If you experience unusual behavior or issues with certain system settings after the upgrade, resetting the NVRAM (non-volatile random-access memory) or PRAM (parameter random-access memory) may help. Follow the instructions from Apple’s support website to perform the reset process.
- Seek Official Support: If you encounter persistent issues that you can’t resolve on your own, consider reaching out to Apple’s support team for assistance. Their expertise can help you troubleshoot and resolve any complex or stubborn problems.
These are general troubleshooting tips to help you address common issues during or after upgrading to macOS Monterey. Remember to stay patient and thorough while troubleshooting, and don’t hesitate to seek further assistance if needed. With the right troubleshooting steps, you can overcome any hurdles and enjoy a smooth and satisfying experience with macOS Monterey.