
Check System Requirements
Before upgrading to macOS Catalina, it is essential to ensure that your system meets the necessary requirements. By checking your system compatibility, you can avoid potential issues during and after the upgrade process. Here are the system requirements for macOS Catalina:
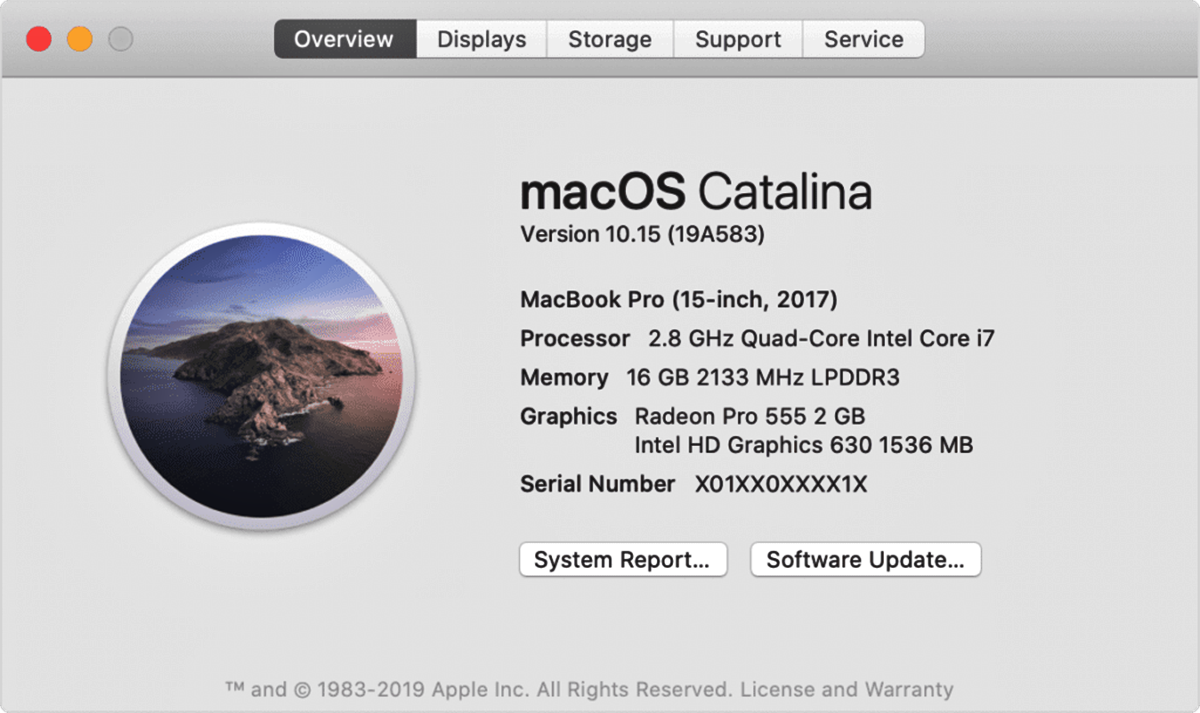
- Mac Models: macOS Catalina supports the following Mac models: MacBook (2015 and later), MacBook Air (2012 and later), MacBook Pro (2012 and later), Mac mini (2012 and later), iMac (2012 and later), iMac Pro (2017 and later), and Mac Pro (2013 and later).
- Processor: Your Mac should have at least a 64-bit processor. This includes Intel Core 2 Duo processors or newer.
- Memory (RAM): Verify that your Mac has a minimum of 4GB of RAM, although 8GB or more is recommended for optimal performance.
- Storage Space: Ensure that you have sufficient free storage space available on your Mac. macOS Catalina requires at least 15GB of available disk space for the installation process.
- Graphics: Your Mac needs to have a graphics card that supports Metal graphics technology. For this, Mac models from 2012 or later are eligible.
- Software Compatibility: Check if your currently installed software is compatible with macOS Catalina. Some older apps may not function correctly or may not work at all after the upgrade. It’s advisable to visit the software developer’s website or contact their support team to find out if an updated version is available.
- Backup: Before proceeding with the upgrade, it is crucial to backup your important data. This ensures that you have a copy of all your files in case of any unforeseen issues.
Once you’ve verified that your Mac meets the system requirements for macOS Catalina and have taken the necessary precautions, you’re ready to proceed with the upgrade process.
Backup Your Data
Before embarking on any software upgrade, it is vital to back up your data to ensure that none of your valuable files are lost during the process. Here’s how you can backup your data before upgrading to macOS Catalina:
- Time Machine: If you have been using Time Machine, Apple’s built-in backup solution, you’re in luck. Connect an external hard drive, launch Time Machine from the System Preferences, and follow the on-screen instructions to create a backup of your entire Mac system. This way, you can restore your files and settings if anything goes wrong during the upgrade.
- Third-Party Backup Solutions: If you prefer using a third-party backup solution, ensure that it is compatible with macOS Catalina. Popular backup software such as Carbon Copy Cloner and SuperDuper! offer comprehensive options for creating bootable backups or cloned copies of your system.
- Cloud Storage: Consider utilizing cloud storage services like iCloud, Google Drive, or Dropbox to store your essential documents, photos, and other files. Upload your files to the cloud storage provider of your choice so that you can access them from any device even if your Mac encounters any issues during the upgrade process.
- External Hard Drives or SSDs: Another option is to manually copy your files to an external hard drive or solid-state drive (SSD). Connect the external drive to your Mac, and then drag and drop your important files to the external drive. This method provides an additional layer of protection for your data.
Whichever method you choose, ensure that your backup is up to date and complete before proceeding with the upgrade. It’s always better to be safe than sorry when it comes to your valuable data.
Update Your Current macOS Version
Before you can upgrade to macOS Catalina, make sure that you are running the latest version of your current macOS. Updating to the latest version ensures that your system is stable and compatible with the Catalina upgrade. Follow these steps to update your macOS:
- Check for Updates: Click on the Apple menu in the top left corner of your screen and select “System Preferences.” Then, click on “Software Update.” The system will automatically check for available updates. If any updates are found, click “Update Now” to begin the installation process.
- Install the Updates: The system will prompt you to download and install the updates. Make sure that your Mac is connected to the internet and has sufficient battery life or is plugged into a power source. Follow the on-screen instructions to complete the update installation. Your Mac may need to restart during the process.
- Check for Additional Updates: After installing the available updates, repeat the previous step to check for any additional updates. It is essential to have the latest updates installed before proceeding with the macOS Catalina upgrade.
- Restart Your Mac: Once all the updates are installed, it’s a good practice to restart your Mac. This helps ensure that any system changes are applied correctly and that your Mac is ready for the next steps of the upgrade process.
By updating your current macOS version, you are ensuring that your system is optimized and ready for the macOS Catalina upgrade. Once you’ve completed these steps, you’re now prepared to move on to the next phase of the upgrade process.
Download macOS Catalina from the App Store
In order to proceed with the upgrade to macOS Catalina, you will need to download the operating system from the App Store. Follow these steps to download macOS Catalina:
- Open the App Store: Launch the App Store on your Mac. You can find it in the Dock or by searching for it using Spotlight.
- Search for macOS Catalina: In the search bar, type “macOS Catalina” and press Enter. The search results will display the macOS Catalina page.
- Click on macOS Catalina: Click on the macOS Catalina icon in the search results. This will open the macOS Catalina page.
- Click on the “Get” or “Download” button: On the macOS Catalina page, you will see a button labeled “Get” or “Download”. Click on this button to begin the download process.
- Enter your Apple ID: If prompted, enter your Apple ID and password to authenticate the download. This step is necessary to ensure that the download is associated with your Apple account.
- Wait for the Download to Complete: The download process may take some time depending on your internet connection speed. Be patient and allow the download to complete uninterrupted.
It is important to note that once the download is complete, the macOS Catalina installer will automatically launch. However, do not proceed with the installation just yet. We will cover that in the next section.
Once you have successfully downloaded macOS Catalina from the App Store, you are one step closer to experiencing the new features and improvements offered by the latest macOS version.
Install macOS Catalina
Now that you have downloaded macOS Catalina, it’s time to proceed with the installation. Follow these steps to install macOS Catalina on your Mac:
- Ensure your Mac is connected to a power source: It is crucial to connect your Mac to a power source during the installation process to avoid any interruptions that may result in a failed installation.
- Close all open applications: Before proceeding with the installation, close all running applications to ensure a smooth installation process.
- Launch the macOS Catalina installer: The installer will automatically launch once the download is complete. If it doesn’t, navigate to your Applications folder and double-click on the “Install macOS Catalina” file to start the installation.
- Follow the on-screen instructions: The installer will guide you through the installation process. Read the instructions carefully and click on the “Continue” button to proceed. You will need to agree to the terms and conditions before the installation can begin.
- Select the disk to install macOS Catalina: You will be prompted to select the disk on which you want to install macOS Catalina. Choose the appropriate disk and click on “Install” to begin the installation process.
- Wait for the installation to complete: The installation process may take some time, so be patient and avoid interrupting the process. Your Mac may restart multiple times during the installation.
- Set up macOS Catalina: Once the installation is complete, your Mac will restart into macOS Catalina. Follow the on-screen instructions to set up your Mac with macOS Catalina, including selecting your language, signing in with your Apple ID, and configuring other settings.
Once the setup is complete, you will be greeted with the new macOS Catalina interface. Take some time to explore the new features and enhancements that the latest macOS version has to offer.
Remember to be patient throughout the installation process and allow your Mac to complete each step. This will ensure a successful installation of macOS Catalina on your device.
Set Up and Customize macOS Catalina
After successfully installing macOS Catalina, it’s time to set up and customize your new operating system. Follow these steps to personalize your macOS Catalina experience:
- Sign in with your Apple ID: If you didn’t sign in with your Apple ID during the installation process, you can do so now by going to the Apple menu and selecting “System Preferences.” Click on “Apple ID” and follow the prompts to sign in or create a new Apple ID.
- Customize your preferences: Navigate to “System Preferences” from the Apple menu and explore the various settings options. You can customize your desktop background, screen saver, energy-saving options, trackpad and mouse settings, and much more. Take some time to review and adjust the settings to your liking.
- Set up iCloud: macOS Catalina offers seamless integration with iCloud, allowing you to access your files, photos, and documents across multiple devices. From “System Preferences,” click on “Apple ID” and then select “iCloud.” Sign in with your Apple ID and choose the services you want to enable, such as iCloud Drive, Photos, and iCloud Keychain.
- Explore the App Store: Take a moment to browse through the App Store on macOS Catalina to discover new and updated applications. You can install your favorite apps or explore new ones that are optimized for macOS Catalina, taking advantage of its new features such as Sidecar and Catalyst.
- Customize the Dock: The Dock is a central feature of the macOS interface, providing quick access to your favorite applications and documents. Right-click on the Dock to customize its appearance, location, and behavior. You can add or remove apps, rearrange them, and adjust other settings.
- Set up Time Machine: If you haven’t already, now is a good time to set up Time Machine. Time Machine automatically backs up your data to an external drive, providing an additional layer of protection. Connect an external hard drive and follow the prompts to configure Time Machine.
By setting up and customizing macOS Catalina according to your preferences, you can optimize your workflow and make the most of the new features and improvements offered by the operating system.
Take some time to explore the various customization options and make macOS Catalina truly your own.
Transfer Your Files and Applications
When upgrading to macOS Catalina, you may want to transfer your files and applications from your previous macOS version to the new one. Here are the steps to easily transfer your data:
- Migration Assistant: macOS Catalina includes a built-in tool called Migration Assistant that makes transferring your files and applications a breeze. Launch Migration Assistant by going to the Apple menu, selecting “System Preferences,” and then clicking on “Migration Assistant.”
- Select Transfer from another Mac or Time Machine Backup: Choose the option that suits your situation. If you have a Time Machine backup, connect your external hard drive containing the backup and select “Transfer from a Mac, Time Machine backup, or startup disk.”
- Follow the on-screen instructions: Migration Assistant will guide you through the process of selecting the source from which you want to transfer files. It will detect the available sources and allow you to choose specific files, applications, and settings to transfer.
- Connect your devices: If you are transferring files from another Mac, connect the two Macs using a Thunderbolt, USB, or FireWire cable. If you are transferring from a Time Machine backup, connect the backup disk to your Mac. Follow any additional prompts to establish the connection.
- Transfer your files: Once the connection is established, Migration Assistant will transfer your selected files, applications, and settings to your new macOS Catalina installation. The duration of the transfer process may vary depending on the size of your data.
- Complete the setup: After the transfer is complete, you may need to complete the setup process of any transferred applications or settings. Follow any on-screen instructions to finalize the migration.
- Verify the transferred data: Double-check that all your files and applications have been successfully transferred to macOS Catalina. Make sure they are functioning as expected and that no data was left behind.
Transferring your files and applications using Migration Assistant simplifies the upgrade process and minimizes the risk of data loss. It ensures that you can seamlessly continue working with your familiar files and applications in macOS Catalina.
Take the time to verify the transferred data and enjoy the familiarity of your files and applications in the new macOS Catalina environment.
Set Up iCloud and Apple ID
iCloud and your Apple ID play integral roles in the functionality and synchronization of your data across all Apple devices. Setting up iCloud and ensuring your Apple ID is properly configured will enable you to seamlessly access your files, photos, and more. Follow these steps to set up iCloud and your Apple ID on macOS Catalina:
- Open System Preferences: Click on the Apple menu, then select “System Preferences” from the dropdown menu.
- Click on Apple ID: Locate the Apple ID option in the System Preferences window and click on it.
- Sign in to your Apple ID: If you already have an Apple ID, enter your credentials in the provided fields. If you don’t have an Apple ID, click on “Create Apple ID” and follow the prompts to create a new one.
- Configure iCloud: From the Apple ID screen, select the “iCloud” tab. In this menu, you can select which features of iCloud you’d like to enable, such as iCloud Drive, Photos, Notes, Contacts, and more. Enable the features you want to use, and iCloud will automatically sync your data across all your devices.
- Set iCloud storage: If you need additional storage beyond the free iCloud storage tier, you can upgrade your plan by clicking on the “Manage…” button under iCloud Storage. Follow the prompts to select a storage plan that suits your needs and complete the upgrade process.
- Enable iCloud Keychain: iCloud Keychain securely stores your passwords and credit card information across your devices. To enable iCloud Keychain, go back to the Apple ID screen and click on the “Passwords” tab. Follow the prompts to set up and enable iCloud Keychain.
- Verify settings: Double-check your iCloud preferences and ensure that the features you want to use are properly enabled. Review the storage allocation, iCloud Keychain, and other settings to ensure they align with your preferences and requirements.
By setting up iCloud and configuring your Apple ID, you can seamlessly access your data across all your Apple devices. This enables a smooth and synchronized experience, allowing you to easily access your files, photos, and other content on macOS Catalina.
Take some time to explore the features and settings offered by iCloud and ensure that your Apple ID is properly configured to maximize the benefits and convenience it provides.
Explore New Features of macOS Catalina
macOS Catalina introduces a range of exciting new features and enhancements that enhance productivity, creativity, and entertainment. Take some time to explore these new features and get the most out of your macOS Catalina experience:
- Sidecar: Sidecar allows you to use your iPad as a secondary display for your Mac. Extend your desktop or mirror your screen wirelessly, and use your Apple Pencil to draw, sketch, or annotate directly on your iPad while working on your Mac.
- Screen Time: Stay informed about your digital habits with the Screen Time feature. It provides detailed insight into your app usage, website visits, and device activity. Use this information to set limits on time spent on specific apps or websites, helping you to strike a healthier balance.
- Apple Arcade: macOS Catalina introduces Apple Arcade, a subscription gaming service that gives you access to a wide range of high-quality games. Explore new games across various genres, and enjoy a seamless gaming experience across your Apple devices.
- Project Catalyst: With Project Catalyst, developers can easily bring their iPad apps to the Mac. This means that you’ll have access to a broader range of apps that were previously only available on iPad, enhancing the functionality and versatility of your Mac.
- Voice Control: macOS Catalina introduces a powerful built-in voice control feature. Use voice commands and dictation to control your Mac, navigate menus, edit documents, and more. This feature enhances accessibility and provides a more inclusive computing experience.
- Improved Photos App: The Photos app in macOS Catalina has been enhanced with a new user interface and powerful editing tools. Explore the redesigned layout, enjoy improved organization and browsing capabilities, and take advantage of advanced editing features to enhance your photos.
- Find My: macOS Catalina combines the Find My iPhone and Find My Friends apps into a single, streamlined app called Find My. Use it to track and locate your Apple devices, even if they are offline or have been lost.
These are just some of the exciting features that macOS Catalina offers. Take the time to familiarize yourself with these enhancements and explore how they can enhance your productivity, entertainment, and overall Mac experience.
Keep an eye out for other new features and updates that are released by Apple, as they continue to improve and optimize macOS Catalina.
Troubleshooting Common Issues
While upgrading to macOS Catalina is generally a smooth process, you may encounter some common issues along the way. Here are a few troubleshooting tips to help you resolve these issues:
- Compatibility Problems: If you encounter compatibility issues with certain apps or hardware after upgrading to macOS Catalina, check for updates from the developers and hardware manufacturers. Some apps may require an update to ensure compatibility with the latest version of macOS.
- Slow Performance: If your Mac seems slower after the upgrade, it could be due to indexing or background tasks. Give your Mac some time to complete these tasks, and monitor its performance over a few days. If the issue persists, try restarting your Mac or resetting the SMC (System Management Controller).
- Wi-Fi Connectivity Issues: If you experience Wi-Fi connectivity problems, try restarting your router and your Mac. You can also try resetting the network settings by going to “System Preferences” > “Network” > “Advanced” > “Renew DHCP Lease.” If the issue persists, contact your internet service provider or Apple Support for further assistance.
- Battery Drain: If you notice a significant decrease in battery life after upgrading, go to “System Preferences” > “Energy Saver” and adjust the settings. If the issue persists, check for energy-consuming background processes or apps, update them if necessary, and consider resetting the SMC.
- Application Crashes: If specific apps keep crashing after the upgrade, try reinstalling them or checking for any available updates. If the problem persists, contact the app developer for support or consider using alternative apps that are compatible with macOS Catalina.
- Kernel Panics or System Freezes: If your Mac experiences frequent kernel panics or system freezes, it may be due to incompatible kernel extensions or drivers. Check for updates from third-party developers and uninstall any incompatible extensions or drivers. If the issue persists, contact Apple Support for assistance.
If you encounter any other issues during or after the upgrade process, consulting Apple resources such as support articles, forums, or contacting Apple Support directly can provide further guidance and troubleshooting steps specific to your situation.
By following these troubleshooting tips, you can address common issues that may arise when upgrading to macOS Catalina and ensure a smooth and optimal experience with the new operating system.