
Check for System Updates
Keeping your Lenovo laptop up to date is crucial for optimal performance and security. Regularly checking for system updates ensures that you have access to the latest features, bug fixes, and security patches. Here’s how you can check for system updates on your Lenovo laptop:
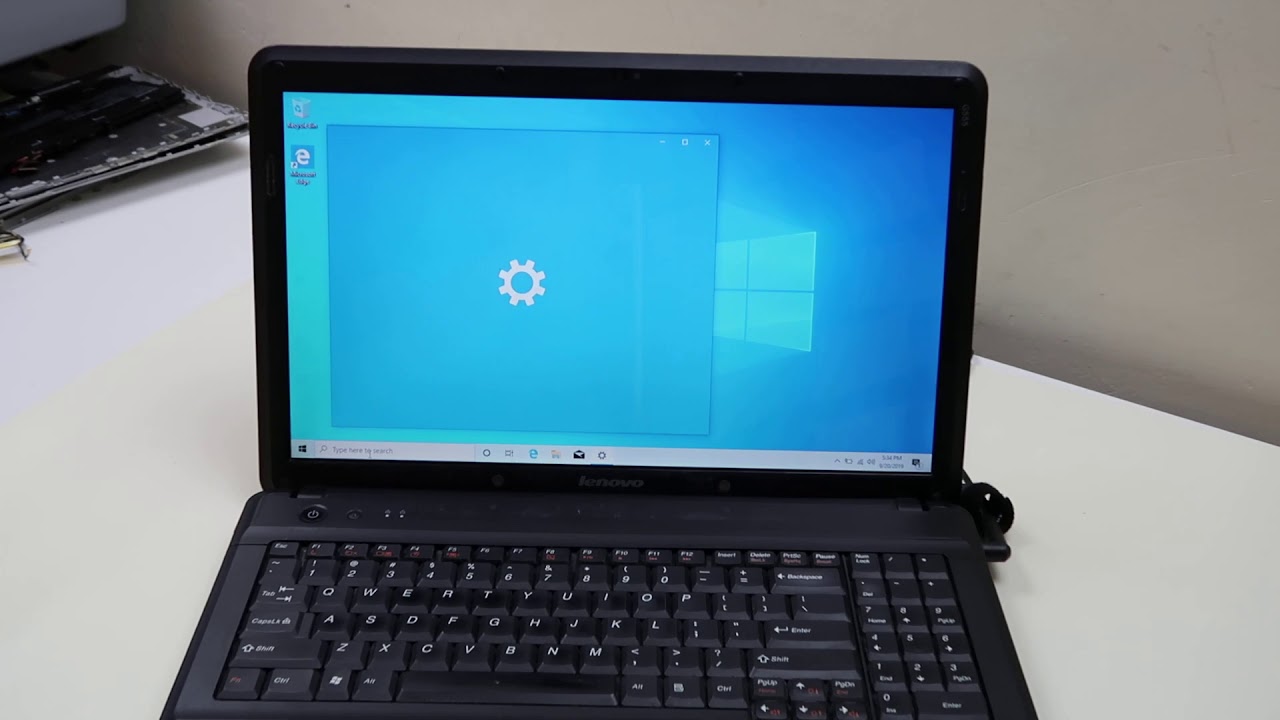
- Windows Updates: Start by checking for Windows updates. Open the Start Menu, click on the Settings icon (represented by a gear), and select “Update & Security.” From there, click on “Windows Update” and click on the “Check for updates” button. Windows will then automatically search for and download any available updates.
- Lenovo System Update: Lenovo provides its own software called “Lenovo Vantage” which makes it easier to keep your laptop up to date. It not only provides system updates but also helps manage other aspects of your Lenovo laptop. If you don’t have Lenovo Vantage installed, you can download it from the Lenovo support website. Once installed, open the application and select “System Update” to check for any Lenovo-specific updates.
- Device drivers: Device drivers are essential for the proper functioning of hardware components in your laptop. Outdated or incompatible device drivers can lead to various issues. To ensure that your drivers are up to date, you can use Lenovo Vantage’s “Device Manager” or manually visit the Lenovo support website and download the latest drivers for your specific laptop model.
- BIOS updates: BIOS (Basic Input/Output System) is responsible for the firmware that powers your laptop. It’s crucial to stay up to date with BIOS updates as they often include security and stability improvements. You can find the latest BIOS updates on the Lenovo support website. However, be cautious when updating your BIOS, as an incorrect update can cause irreversible damage to your laptop.
Regularly checking for system updates ensures that your Lenovo laptop is running efficiently and securely. By keeping your laptop up to date, you can take advantage of the latest features and enhancements while ensuring that your device is protected against potential security vulnerabilities.
Update Windows Operating System
Keeping your Windows operating system up to date is essential for the smooth functioning of your Lenovo laptop. Windows updates not only introduce new features but also include important security patches and bug fixes. Here’s how you can update the Windows operating system on your Lenovo laptop:
- Automatic updates: By default, Windows is configured to download and install updates automatically. However, it’s a good idea to check if automatic updates are enabled on your laptop. To do this, open the Start Menu and click on the Settings icon (represented by a gear). Select “Update & Security” and navigate to the “Windows Update” section. Ensure that the “Automatic Updates” option is turned on.
- Manual updates: In some cases, Windows updates may not install automatically. If you suspect that your system is not up to date, you can manually check for updates. Open the Start Menu, click on the Settings icon, select “Update & Security,” and go to the “Windows Update” section. Click on the “Check for updates” button, and Windows will search for any available updates. If updates are found, follow the prompts to download and install them.
- Feature updates: Windows releases major updates known as feature updates. These updates introduce significant changes and improvements to the operating system. To check for feature updates, go to the “Windows Update” section in the Settings menu and click on the “Check for updates” button. If a feature update is available, Windows will prompt you to download and install it.
- Restart your laptop: After installing updates, it’s important to restart your laptop to complete the update process. Windows may require a restart to finalize the changes and ensure that your system is updated properly. Make sure to save any open files before restarting your laptop.
Regularly updating the Windows operating system on your Lenovo laptop is crucial for maintaining system stability, security, and compatibility with the latest software and hardware. By keeping your Windows up to date, you can enjoy improved performance and maximize the overall functionality of your Lenovo laptop.
Update Lenovo Drivers
Updating the drivers on your Lenovo laptop is important to ensure that all hardware components work smoothly and efficiently. Outdated or incompatible drivers can lead to performance issues, device malfunctions, or even system crashes. Here’s how you can update the drivers on your Lenovo laptop:
- Lenovo Vantage: Lenovo provides its own software called Lenovo Vantage, which makes it easy to update drivers. If you don’t have Lenovo Vantage installed, you can download it from the Lenovo support website. Once installed, open the application and navigate to the “Driver & Software” section. Lenovo Vantage will automatically detect and display available driver updates for your laptop. Simply click on the “Install” or “Update” button to update the drivers.
- Device Manager: Windows comes with a built-in utility called Device Manager, which allows you to manage and update device drivers. To access Device Manager, press the Windows key + X and select “Device Manager” from the menu. Expand the categories to view the devices, right-click on the device you want to update, and select “Update driver.” Choose the option to search for drivers automatically or browse your computer for driver software, depending on your preference.
- Lenovo support website: If you prefer to manually download and install drivers, you can visit the Lenovo support website. Go to the support page and enter your laptop’s model number or serial number to find the appropriate drivers. Download the drivers and double-click on the downloaded file to run the installer. Follow the on-screen instructions to complete the installation.
- Driver update tools: If you prefer a more automated approach, there are several third-party driver update tools available. These tools scan your system for outdated drivers and provide a convenient way to update them. However, it’s important to choose a reputable tool from a trusted source to avoid malware or potential security risks.
Regularly updating the drivers on your Lenovo laptop ensures that your hardware components are functioning optimally and are compatible with the latest software updates. By keeping your drivers up to date, you can enhance the performance, stability, and overall functionality of your Lenovo laptop.
Update BIOS
The Basic Input/Output System (BIOS) is a firmware embedded in your Lenovo laptop that initializes and controls the hardware components during the boot process. Updating the BIOS can bring improvements in system performance, compatibility, and security. Here’s how you can update the BIOS on your Lenovo laptop:
- Identify your current BIOS version: Before updating the BIOS, it’s essential to know the current version installed on your laptop. Restart your laptop and press the appropriate key (usually F1, F2, F12, or Delete) to enter the BIOS setup. Look for the BIOS version information, which is typically displayed on the main screen or under a specific section.
- Check for BIOS updates: Visit the official Lenovo Support website and enter your laptop’s model number or serial number to access the support page. Look for the BIOS section and download the latest available BIOS update for your specific laptop model. It’s important to download the correct BIOS update to avoid any compatibility issues.
- Prepare for the update: Before proceeding with the BIOS update, ensure that your laptop is connected to a reliable power source. Updating the BIOS requires uninterrupted power to prevent any possible damage. It’s also advisable to close any running applications and temporarily disable any antivirus or security software.
- Perform the BIOS update: Open the downloaded BIOS update file and follow the instructions provided by the manufacturer. This typically involves running an executable file that guides you through the update process. It’s crucial to follow the instructions carefully and avoid interrupting the update process, as this can result in a non-functional laptop.
- Restart your laptop: After successfully updating the BIOS, restart your laptop to apply the changes. During the restart, the laptop may take slightly longer than usual as it configures the new BIOS settings. Once your laptop has booted up, you can enter the BIOS setup again to verify the updated BIOS version.
Updating the BIOS on your Lenovo laptop can bring significant improvements in terms of performance, compatibility, and security. However, it is important to be cautious when updating the BIOS, as an incorrect or interrupted update can potentially render your laptop unusable. If you are unsure about the BIOS update process, it’s recommended to seek assistance from Lenovo Support or a qualified technician.
Install Lenovo Vantage Software
Lenovo Vantage is a powerful software application designed specifically for Lenovo laptops, providing an easy and convenient way to manage and optimize your device. Here’s how you can install Lenovo Vantage on your Lenovo laptop:
- Download Lenovo Vantage: Visit the official Lenovo support website and search for Lenovo Vantage in the software and drivers section. Download the latest version of Lenovo Vantage compatible with your laptop’s model.
- Run the installer: Once the download is complete, locate the installer file and double-click on it to run the installation. Follow the on-screen prompts to proceed with the installation process.
- Agree to the terms and conditions: During the installation, you will be presented with the terms and conditions of using Lenovo Vantage. Read through the terms and conditions, and if you agree, click the “Agree” or “Accept” button to continue.
- Customize the installation (optional): Depending on your preferences, you may be given the option to customize the installation. You can choose the destination folder for the software or select additional features or components to install. If you are unsure, it is usually best to leave the default settings.
- Complete the installation: Once any customization options are selected, click the “Install” or “Next” button to proceed with the installation. The installer will copy the necessary files and set up Lenovo Vantage on your laptop. This process may take a few minutes.
- Launch Lenovo Vantage: After the installation is complete, you can launch Lenovo Vantage either by finding it in the Start Menu or by clicking on the desktop shortcut if one has been created. Once launched, Lenovo Vantage will provide you with an assortment of tools and features to help you manage, optimize, and customize your Lenovo laptop.
Installing Lenovo Vantage on your Lenovo laptop can significantly enhance your user experience. This software provides access to various features, including system updates, driver updates, hardware diagnostics, power management options, and more. It’s a comprehensive tool that allows you to personalize and optimize your laptop settings easily.
Update Software and Applications
Regularly updating the software and applications on your Lenovo laptop is vital to ensure optimal performance, security, and access to the latest features. Here’s how you can update the software and applications on your Lenovo laptop:
- Windows Software Updates: Windows operating system includes various software components that may require updates. To update these components, open the Start Menu, click on the Settings icon (represented by a gear), and select “Update & Security.” Go to the “Windows Update” section and click on the “Check for updates” button. Windows will scan for available software updates, and you can download and install them accordingly.
- Third-party Applications: Many applications that you install on your Lenovo laptop have their own update mechanisms. Check for updates within each application individually. Most applications have an option in their menu or settings to check for updates. Enable automatic updates if available, so that you receive updates without manual intervention.
- Software Update Notifications: Some software applications may provide notifications when updates are available. Pay attention to these notifications, as they often include important security patches and bug fixes. Follow the instructions provided by the software applications to initiate the update process.
- Lenovo Vantage: Lenovo Vantage, mentioned earlier, also provides a one-stop solution for updating software and drivers on your Lenovo laptop. Open Lenovo Vantage and navigate to the “System Update” section. It will analyze your laptop and display available updates for both Lenovo-specific software and third-party applications.
- Manual Updates: In some cases, you may need to manually download and install the latest version of specific software or applications from their official websites. Visit the respective websites, locate the download section, and look for the latest version. Follow the instructions provided to download and install the updates manually.
Keeping your software and applications up to date is crucial for improving performance, accessing new features, and ensuring the security of your Lenovo laptop. Therefore, it is recommended to regularly check for updates using the methods mentioned above. By doing so, you can ensure that you are running the latest versions of software and applications on your Lenovo laptop.
Uninstall Unnecessary Programs and Apps
Over time, your Lenovo laptop may accumulate unnecessary programs and applications that not only take up valuable storage space but also affect system performance. It’s important to regularly review and uninstall any programs or apps that you no longer use or need. Here’s how you can uninstall unnecessary programs and apps from your Lenovo laptop:
- Windows Uninstall: Windows provides a built-in uninstallation feature that allows you to easily remove programs and apps. Open the Start Menu, click on the Settings icon (represented by a gear), and select “Apps.” You will see a list of installed programs and apps. Scroll through the list, select the program or app you want to uninstall, and click the “Uninstall” button. Follow the prompts to complete the uninstallation process.
- Lenovo Vantage: Lenovo Vantage also provides a convenient way to uninstall unnecessary programs. Open Lenovo Vantage and navigate to the “Optimize” section. Click on the “Remove Apps” option, and you will see a list of installed programs. Select the programs you want to uninstall and click the “Uninstall” button.
- Third-party uninstaller tools: If you want more advanced features and options for uninstalling programs and apps, you can consider using third-party uninstaller tools. These tools provide additional features, such as complete program removal, including leftover files and registry entries. Some popular third-party uninstaller tools include Revo Uninstaller and IObit Uninstaller.
- Delete Apps: For apps downloaded from the Microsoft Store on Windows 10, you can easily uninstall them directly from the Start Menu or the Apps section in Settings. Right-click on the app you want to remove and select “Uninstall” or click on the “Uninstall” button when viewing the app details in Settings.
By uninstalling unnecessary programs and apps, you can free up valuable storage space, declutter your laptop’s system, and improve overall performance. It’s recommended to review your installed programs and apps periodically and remove those that you no longer need. This practice helps to ensure that your Lenovo laptop runs smoothly and efficiently.
Cleanup and Optimization
To maintain optimal performance and ensure the smooth operation of your Lenovo laptop, it’s essential to perform regular cleanup and optimization tasks. By keeping your laptop clean and optimized, you can improve system speed, free up storage space, and enhance overall efficiency. Here are some steps you can take to clean up and optimize your Lenovo laptop:
- Disk Cleanup: Windows includes a built-in utility called Disk Cleanup, which allows you to remove unnecessary files and free up disk space. Open the Start Menu, type “Disk Cleanup” in the search bar, and select the corresponding result. Choose the drive you want to clean, select the file types you want to delete, and click on “OK” to initiate the cleanup process.
- Uninstall Unused Programs: As mentioned earlier, uninstall any programs or apps that you no longer use or need. This will not only free up storage space but also declutter your laptop’s system, leading to improved performance. Follow the steps mentioned in the “Uninstall Unnecessary Programs and Apps” section to remove unused software.
- Organize Files and Folders: Take the time to organize your files and folders properly. Create separate folders for different types of files, such as documents, pictures, videos, and downloads. This will not only make it easier to find specific files but also improve system efficiency by reducing the time it takes for file searches and indexing.
- Defragment or Optimize Hard Drive: Over time, files on your hard drive can become fragmented, leading to slower performance. Use the built-in Windows utility called “Defragment and Optimize Drives” to organize the files on your hard drive and improve system speed. Open the Start Menu, type “Defragment and Optimize Drives,” and select the corresponding result. Choose the drive you want to defragment, click on “Optimize,” and let the process complete.
- Disable Startup Programs: Some programs may be set to automatically start when you boot up your laptop, which can slow down the startup process. Review the list of startup programs and disable any unnecessary ones. Open the Task Manager by pressing Ctrl+Shift+Esc, go to the “Startup” tab, right-click on the programs you want to disable, and select “Disable.”
- Update and Run Antivirus Software: Ensure that your antivirus software is up to date and run a full system scan to detect and remove any malware or viruses that may be impacting your laptop’s performance. Consider using reputable antivirus software to protect your system and regularly update it with the latest virus definitions.
Performing regular cleanup and optimization tasks on your Lenovo laptop helps maintain its performance and prolong its lifespan. By following these steps, you can keep your laptop running smoothly and efficiently, ensuring a better user experience and minimizing potential issues.
Run Antivirus and Malware Scan
Protecting your Lenovo laptop from viruses and malware is crucial for maintaining system security and preventing potential damage or data breaches. Running regular antivirus and malware scans helps detect and remove any malicious software that might be present. Here’s how you can run an antivirus and malware scan on your Lenovo laptop:
- Update Antivirus Software: Ensure that your antivirus software is up to date with the latest virus definitions. Antivirus programs regularly release updates to detect and counter new threats. Open your antivirus software and navigate to the updates or settings section to check for updates. If an update is available, initiate the download and installation process.
- Schedule Scans: Most antivirus software allows you to schedule regular scans for your laptop. Set up a schedule that suits your needs and preferences. It’s recommended to schedule scans during periods when your laptop is not in use, such as overnight. This ensures that the scan doesn’t interfere with your daily activities.
- Run Full System Scan: Perform a full system scan to thoroughly check all files and programs on your Lenovo laptop. Depending on the size of your hard drive and the number of files, the scan process may take some time. During the scan, your antivirus software will check for any infected files or suspicious activities.
- Quarantine or Remove Threats: Once the scan is complete, your antivirus software will provide a report on any identified threats. Review the report and take appropriate action. If any threats are found, you can choose to quarantine, disinfect, or remove them. Quarantining isolates the infected files, disinfecting attempts to remove the infection, and removing permanently deletes the threats.
- Scan External Devices: Remember to scan any external devices, such as USB drives or external hard drives, that you connect to your Lenovo laptop. These devices can carry malware or viruses from other systems. Open your antivirus software and use the option to scan external devices or manually initiate a scan when a device is connected.
Regularly running antivirus and malware scans on your Lenovo laptop ensures that your system remains protected from potential threats. By updating your antivirus software, scheduling regular scans, and taking appropriate action against any identified threats, you can maintain the security and integrity of your laptop’s data and operation.
Backup Important Files and Data
Backing up your important files and data is essential for ensuring that you don’t lose valuable information in the event of a hardware failure, malware attack, or accidental deletion. It’s recommended to regularly create backups to safeguard your important files. Here’s how you can backup files and data on your Lenovo laptop:
- External Hard Drive or USB Drive: One of the simplest and cost-effective ways to backup files is by utilizing an external hard drive or USB drive. Connect the external storage device to your Lenovo laptop and copy the files and folders you want to backup onto the device. It’s a good idea to organize your files into specific folders before starting the backup process.
- Cloud Storage: Cloud storage services like Google Drive, Dropbox, or Microsoft OneDrive offer secure online storage options. Sign up for a cloud storage service and install the corresponding application on your Lenovo laptop. Simply move or copy your important files to the designated cloud storage folder, and the files will be automatically synchronized and saved securely in the cloud.
- Network Attached Storage (NAS): If you have multiple devices connected to a home network, you may consider using a Network Attached Storage (NAS) device. A NAS device allows you to create backups and store files on a centralized location that can be accessed by all devices on the network. Follow the instructions provided by the manufacturer to set up and configure the NAS device.
- Backup Software: There are several backup software options available that provide automated and scheduled backups. These tools allow you to select specific files, folders, or even entire disk images to backup. Configure the software to run regular backups according to your preference. Some popular backup software includes Acronis True Image, EaseUS Todo Backup, and Macrium Reflect.
Regularly backing up your important files and data ensures that you have a copy of your information in case of accidental loss or damage. It’s recommended to create multiple backups and store them in different locations, such as a physical external hard drive and a cloud storage service. This redundancy adds an extra layer of protection to your files and ensures accessibility from various devices. Remember to periodically check and update your backups to include any newly created or modified files.
Restart the Laptop
Restarting your Lenovo laptop on a regular basis is a simple but important task that can help resolve various issues and maintain optimal performance. Restarting your laptop clears temporary files, resets system processes, and allows for updates to be properly installed. Here’s why restarting your laptop is important and how to do it:
Reasons to Restart:
- Performance Optimization: Restarting your laptop clears out temporary files and frees up system resources, which can help improve performance. It allows your laptop to start fresh, eliminating any processes that may be running in the background and consuming system resources.
- Software Updates and Installation: After installing software updates, some updates require a restart to complete the installation. Restarting your laptop ensures that the updates are properly applied and any necessary system configurations are made.
- Troubleshooting Problems: In many cases, restarting your laptop can help resolve minor software issues or glitches. It clears out temporary software conflicts and allows the operating system to start anew, potentially resolving any problems you may be experiencing.
How to Restart:
- Using the Start Menu: Click on the Start Menu in the bottom left corner of your screen. On the power options menu, select “Restart.” Your laptop will shut down and then automatically restart.
- Using Keyboard Shortcuts: Press and hold the Ctrl key, then press the Shift key and the Esc key simultaneously. Release all keys and select the power icon in the bottom right corner of the screen. Choose “Restart” from the power options menu.
- Using the Power Button: If your laptop is unresponsive or the operating system is frozen, you can forcefully restart it by pressing and holding the power button for several seconds until it shuts down. Wait for a few seconds, then press the power button again to turn it back on.
Restarting your Lenovo laptop periodically helps maintain optimal performance, resolves software issues, and ensures that updates are properly installed. It’s a simple yet effective way to keep your laptop running smoothly and efficiently.