
Why Would I Want to Turn Off the Fan on My Nest Thermostat?
Having a Nest thermostat offers a myriad of benefits, including enhanced comfort, energy savings, and convenience. However, there may be instances when you want to turn off the fan on your Nest thermostat. Understanding the reasons why you might want to do this can help you make the most out of your smart home device. Here are a few scenarios where turning off the fan on your Nest thermostat would be advantageous:
- Noise Reduction: The sound of the fan can be disruptive in certain situations. Whether you’re working from home, watching a movie, or trying to sleep, having a quiet environment is essential. By turning off the fan, you can enjoy a peaceful atmosphere without any unnecessary noise.
- Energy Conservation: Although the fan is not as energy-consuming as your HVAC system, it still consumes electricity. If you’re looking to reduce your energy usage and cut down on utility bills, turning off the fan when it’s not needed can contribute to overall energy conservation in your home.
- Climate Comfort: In some regions, the temperature fluctuations throughout the day can be quite significant. During these times, you may not require the fan to circulate the air. By turning off the fan, you can maintain a comfortable climate without constantly adjusting the thermostat.
- Preference for Natural Airflow: If you prefer relying on natural ventilation rather than using the fan, turning it off can allow fresh air to naturally flow through your home. This can be especially beneficial during mild weather conditions when there is no need for mechanical air circulation.
- Personal Control: Every individual has unique preferences when it comes to temperature and airflow. By turning off the fan, you have more control over your home environment, allowing you to customize it according to your specific needs and preferences.
Understanding these reasons can help you make an informed decision about turning off the fan on your Nest thermostat. The next steps will guide you through the process of disabling the fan function, ensuring you have complete control over your home’s climate and energy consumption.
Step 1: Ensure Your Nest Thermostat Is Connected to Wi-Fi
In order to control your Nest thermostat remotely and make changes to the fan settings, you need to ensure that your device is connected to Wi-Fi. Follow these steps to check the Wi-Fi connection status on your Nest thermostat:
- Locate your Nest thermostat on the wall of your home. It should be easily visible and accessible.
- Press on the thermostat display to wake it up. The screen should light up, displaying the current temperature and other relevant information.
- Look for the Wi-Fi symbol on the display. It typically appears in the top right or left corner of the screen. If the symbol is not present, it means that your Nest thermostat is not connected to Wi-Fi.
- If the Wi-Fi symbol is not displayed, you need to reconnect your Nest thermostat to Wi-Fi. To do this, go to the main menu by pressing on the display and selecting the gear icon.
- From the menu, navigate to the “Network” or “Wi-Fi” settings. Follow the on-screen instructions to connect your Nest thermostat to your home’s Wi-Fi network. Make sure you have the Wi-Fi network name (SSID) and password handy.
- Once the connection is established, the Wi-Fi symbol should appear on the display. This indicates that your Nest thermostat is successfully connected to Wi-Fi and ready for remote control.
Ensuring that your Nest thermostat is connected to Wi-Fi is crucial for accessing and changing the fan settings remotely. This allows you to conveniently turn off the fan or make any necessary adjustments to the thermostat while you’re away from home.
Once you have confirmed the Wi-Fi connection, you can proceed to the next step to access the menu on your Nest thermostat and adjust the fan settings accordingly.
Step 2: Access the Nest Thermostat Menu
To modify the fan settings on your Nest thermostat, you need to access the menu on the device. Follow these steps to navigate to the menu:
- Locate your Nest thermostat on the wall of your home.
- Ensure that the thermostat display is awake. You can do this by pressing the screen, which wakes up the display and shows the current temperature and other information.
- Look for the “Menu” button on the display. It is usually represented by an icon with three horizontal lines. Press the “Menu” button to access the main menu of your Nest thermostat.
- The menu will display a variety of options, allowing you to customize different settings of your thermostat. Use the navigation buttons or touch screen to scroll through the menu and select the desired option for fan settings.
- Note that the menu layout may vary depending on the model of your Nest thermostat. However, the fan settings option should generally be accessible through the main menu.
- Once you have located the fan settings option, proceed to the next step to make changes to the fan settings and turn off the fan.
Accessing the menu on your Nest thermostat is essential to modify any settings, including the fan settings. By following these steps, you can easily navigate to the menu and prepare to make the necessary changes to turn off the fan. Stay tuned for the next step, where we will delve into the details of adjusting the fan settings to your preference.
Step 3: Select the “Settings” Option from the Menu
In order to access the fan settings on your Nest thermostat, you need to navigate to the “Settings” option within the menu. Follow these steps to select the “Settings” option:
- Once you are in the main menu of your Nest thermostat, use the navigation buttons or touch screen to scroll through the options.
- Look for the “Settings” option within the menu. It is usually represented by the gear icon or labeled as “Settings.”
- Once you have located the “Settings” option, press the corresponding button or select it on the touch screen to access the settings menu.
- The settings menu will provide a range of options for you to customize various aspects of your Nest thermostat. These options may include temperature units, scheduling, display preferences, and fan settings.
- Scroll through the settings menu to find the fan settings option. It may be labeled as “Fan” or “Fan Settings.”
- Once you have found the fan settings option, proceed to the next step to adjust the fan settings and turn off the fan.
Selecting the “Settings” option from the menu is a crucial step in accessing and modifying the fan settings on your Nest thermostat. By following these steps, you can easily find the settings menu and prepare to make changes to the fan settings. Next, we will explore the process of navigating to the specific “Fan” settings to turn off the fan.
Step 4: Navigate to the “Fan” Settings
In order to turn off the fan on your Nest thermostat, you need to navigate to the “Fan” settings within the settings menu. Follow these steps to find and access the “Fan” settings:
- Once you are in the settings menu of your Nest thermostat, use the navigation buttons or touch screen to scroll through the available options.
- Look for the “Fan” option within the settings menu. It is typically labeled as “Fan” or “Fan Settings.”
- Once you have located the “Fan” option, press the corresponding button or select it on the touch screen to access the fan settings.
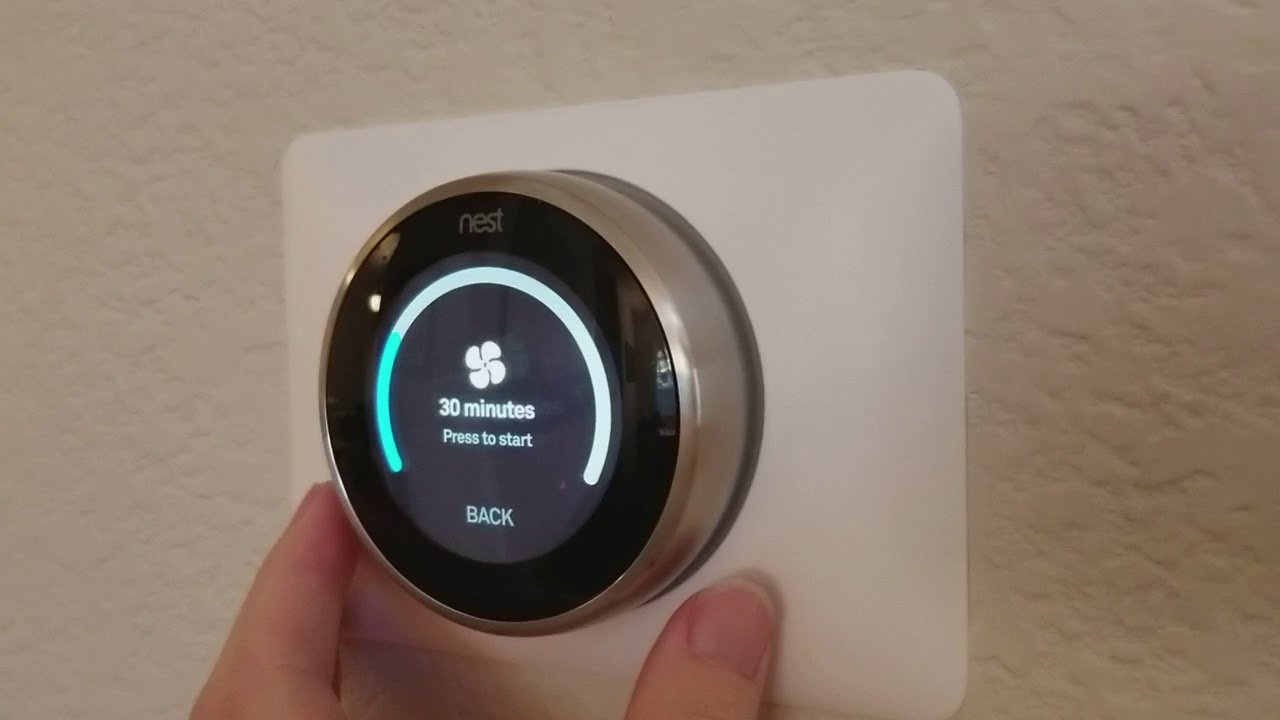
- The “Fan” settings menu will display various options related to the fan operation on your Nest thermostat. These options may include “Fan Schedule” and “Fan Timer.”
- Scroll through the “Fan” settings menu to find the option to turn off the fan completely.
- Once you have found the option to turn off the fan, proceed to the next step to make the necessary adjustments and save your changes.
Navigating to the “Fan” settings within the settings menu of your Nest thermostat is essential to modify the fan operation. By following these steps, you can easily locate the “Fan” settings and prepare to turn off the fan. Stay tuned for the next step, where we will delve into the details of adjusting the fan settings to turn it off completely.
Step 5: Adjust the Fan Settings to Turn It Off
Now that you have accessed the “Fan” settings on your Nest thermostat, you can proceed to adjust the settings and turn off the fan. Follow these steps to make the necessary adjustments:
- Within the “Fan” settings menu, look for the option that allows you to control the fan operation.
- Select the option to turn off the fan. This can be labeled as “Off,” “Auto,” or “Disable.”
- Once you have chosen the appropriate option, the fan will be disabled, and it will no longer run automatically.
- Alternatively, you may find an option to adjust the fan schedule. If so, deselect or remove any scheduled fan periods to effectively turn off the fan.
- Take note of any additional fan settings in the “Fan” settings menu, such as fan speed or circulation options. Adjust these settings according to your preference.
- After making the necessary adjustments to the fan settings, review your changes to ensure the fan is turned off.
- Save your changes by following the prompts on the screen or selecting the corresponding button.
By adjusting the fan settings in your Nest thermostat, you can turn off the fan and prevent it from running automatically. This can be beneficial for reducing noise, conserving energy, and customizing your home’s airflow. Once you have successfully adjusted the fan settings, you can proceed to save your changes and exit the settings menu.
Now that you have learned how to adjust the fan settings, continue to the next step to confirm that the fan has been turned off on your Nest thermostat.
Step 6: Save Your Changes and Exit the Menu
After adjusting the fan settings on your Nest thermostat to turn off the fan, it is important to save your changes and exit the menu to ensure the new settings take effect. Follow these steps to save your changes and exit the menu:
- Review your adjustments in the “Fan” settings menu to ensure the fan has been turned off according to your preference.
- If you are satisfied with your changes, look for the “Save” or “Apply” option within the settings menu.
- Select the “Save” or “Apply” option to save your changes. Your Nest thermostat will process the new settings and update accordingly.
- Once your changes have been saved, locate the “Exit” or “Back” option within the menu.
- Select the “Exit” or “Back” option to exit the settings menu and return to the main screen of your Nest thermostat.
- Confirm that the main screen of your thermostat indicates that the fan is turned off or set to the desired setting.
By saving your changes and exiting the menu, you ensure that the new fan settings are successfully applied to your Nest thermostat. Confirming the changes on the main screen of your thermostat provides reassurance that the fan has been turned off according to your desired configuration.
With the fan turned off, you can enjoy a quieter and more energy-efficient home environment. In the next step, we will go a step further and confirm that the fan is indeed turned off on your Nest thermostat.
Step 7: Confirm Fan Is Turned Off
After adjusting the fan settings and saving your changes on your Nest thermostat, it is important to confirm that the fan is indeed turned off. Follow these steps to ensure that the fan operation has been disabled:
- Take a moment to observe the main screen of your Nest thermostat.
- Check for any indication or symbol on the display that suggests the fan is running.
- If the fan symbol or any related indicator is not present, it is a positive sign that the fan is turned off.
- You can also listen for any noise or airflow coming from the vents in your home. With the fan turned off, there should be no noticeable air circulation.
- If you had previously turned off the fan schedule or adjusted other fan settings, ensure that these changes have taken effect and the fan is not running at any specific times.
- If you are uncertain or wish to double-check, refer to the documentation or manual that came with your Nest thermostat for further confirmation.
Confirming that the fan is turned off ensures that your Nest thermostat is operating according to your desired settings. It guarantees a quieter and more energy-efficient environment within your home. By following these steps, you can confidently verify that the fan is not running and that the changes you made to the fan settings have been successfully applied.
With the fan turned off on your Nest thermostat, you can enjoy a more comfortable and customized home climate. If you encounter any issues or have further questions regarding the fan settings, refer to the troubleshooting section or contact Nest support for assistance.
Troubleshooting: If You Cannot Find the Fan Settings
If you are unable to locate the fan settings on your Nest thermostat, there are a few troubleshooting steps you can take to address the issue. Here are some possible solutions:
- Ensure that your Nest thermostat software is up to date. You can check for any available updates in the settings menu and install them if necessary. Updated software may introduce new features or reorganize the menu options, including the fan settings.
- Refer to the user manual or documentation that came with your Nest thermostat. The manual provides detailed instructions on navigating the menu and finding specific settings. Look for the section that discusses fan settings or consult the troubleshooting section for guidance.
- If you have recently installed or reset your Nest thermostat, it may take a few minutes for all the options, including the fan settings, to become available. Give it some time and check again to see if the fan settings have appeared.
- Reset your Nest thermostat to its factory settings. This can be done through the settings menu or by using the physical reset button on the back of the device. Resetting the thermostat can restore default settings and potentially resolve any menu-related issues.
- If none of these troubleshooting steps solve the problem, consider contacting Nest support for assistance. They can provide expert guidance and help you navigate through any technical difficulties you may be experiencing with your Nest thermostat.
It’s important to ensure that you are able to access the fan settings on your Nest thermostat for optimal control over your home’s climate. By following these troubleshooting steps, you can address any issues preventing you from finding the fan settings and receive the necessary guidance to resolve the problem.
If you encounter any other difficulties or have further questions or concerns, reach out to Nest support for personalized assistance. They are available to help you make the most out of your Nest thermostat and ensure a smooth user experience.