
Checking Parental Control Settings
If you have set up parental controls on your Nintendo Switch and want to turn them off, it’s essential to know how to navigate the system’s settings. Checking your current parental control settings is the first step in disabling them. Follow the steps below to locate and review the settings on your Nintendo Switch:
- Start by powering on your Nintendo Switch and navigating to the Home menu.
- Select the System Settings option, which can be found as a gear icon on the right-hand side of the screen.
- Scroll down the menu on the left-hand side and look for the Parental Controls option. It is represented by an orange icon with a parental lock symbol.
- Click on the Parental Controls option to open the settings menu.
Within the Parental Controls settings, you will have the ability to customize various restrictions and limitations. Take a moment to review the current settings enabled on your Nintendo Switch. This will allow you to understand which areas might be restricted and help you determine the changes you need to make.
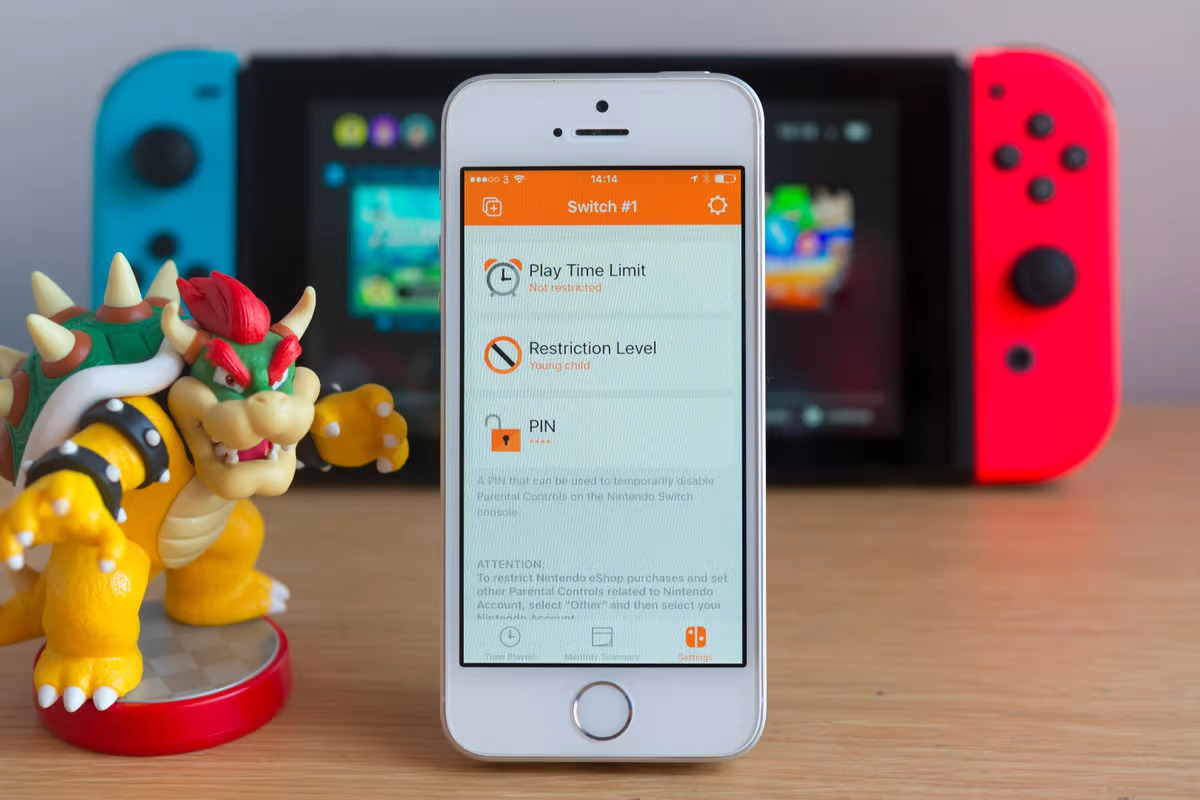
With the Parental Control settings open, you can see information about the time restrictions, game restrictions, and other parental control features currently in place. Pay close attention to the settings and note any restrictions that you want to remove.
Remember to validate your changes by selecting the “Save” or “Apply” button, if necessary, before exiting the settings menu. This will ensure that any adjustments you make to the parental control settings are properly saved and applied to your Nintendo Switch system.
By checking your parental control settings and familiarizing yourself with the current restrictions on your Nintendo Switch, you are ready to proceed to the next steps of turning off parental controls.
Locating the Parental Control App
The Parental Control app on your Nintendo Switch allows you to easily manage and modify the restrictions and limitations you have set for your console. Finding and accessing the app is vital if you want to turn off parental controls. Follow the steps below to locate the Parental Control app on your Nintendo Switch:
- Power on your Nintendo Switch and navigate to the Home menu.
- Look for the orange icon with a parental lock symbol on it. This icon represents the Parental Control app.
- If you can’t locate the app on the Home menu, you may need to swipe left or right to access additional screens where the app may be placed.
- If you’ve rearranged the order of the icons on your Home menu, you may need to look for the Parental Control app in a different location.
Remember that the exact placement of the Parental Control app may vary depending on how your Nintendo Switch is organized, but it should generally be on one of the Home menu screens. Take your time to search and locate it.
Once you’ve found the Parental Control app, you are ready to proceed to the next step of launching the app and accessing the settings.
Note: If you have forgotten the location of the Parental Control app or accidentally removed it from your Home menu, you can re-download it from the Nintendo eShop. Simply search for “Parental Controls” in the eShop and select the app to download and install it again on your Nintendo Switch.
Launching the Parental Control App
Once you have located the Parental Control app on your Nintendo Switch, the next step is to launch the app and access the settings. Follow the step-by-step instructions below to successfully launch the Parental Control app:
- First, power on your Nintendo Switch.
- Navigate to the Home menu by pressing the Home button on your Joy-Con controller or the console itself.
- Locate the Parental Control app on the Home menu. It is represented by an orange icon with a parental lock symbol.
- Highlight the Parental Control app by using the directional pad or touchscreen.
- Press the A button or tap the Parental Control app on the touchscreen to launch it.
After launching the Parental Control app, you will be able to access and modify the settings for your Nintendo Switch’s parental control features. The app provides a user-friendly interface that allows you to navigate through various options and customize the restrictions according to your preferences.
Remember to take your time while navigating the app to ensure that you make the necessary changes accurately. Make sure to refer to the app’s instructions or on-screen prompts for any specific guidance or clarifications.
With the Parental Control app successfully launched on your Nintendo Switch, you are now ready to proceed with entering the passcode and accessing the parental control menu.
Entering the Passcode
Entering the passcode is a necessary step in accessing and modifying the parental control settings on your Nintendo Switch. The passcode is a security measure that ensures only authorized users can make changes to the restrictions and limitations. Follow the steps below to enter the passcode and gain access to the parental control menu:
- Launch the Parental Control app on your Nintendo Switch by following the previous instructions.
- On the Parental Control app’s main screen, you will be prompted to enter the passcode.
- Using the on-screen keyboard, enter the four-digit passcode that you initially set up when configuring the parental control settings.
- Ensure that you enter the passcode correctly, paying attention to uppercase and lowercase letters if applicable.
- Once you have entered the passcode, press the Enter or OK button on the screen to proceed.
If you have forgotten the passcode, you can select the “Forgot PIN” option on the login screen. This will prompt you to provide the answer to the security question you set up when creating the passcode. If you don’t remember the answer to the security question as well, you will need to contact Nintendo Support for further assistance in recovering or resetting the passcode.
Entering the correct passcode will grant you access to the parental control menu, allowing you to view and modify the settings according to your preferences. Take your time to explore the various options and make the necessary adjustments to disable or customize the restrictions.
Once you have successfully entered the passcode, you are ready to navigate the parental control menu and make the desired changes.
Navigating the Parental Control Menu
Once you have entered the passcode in the Parental Control app on your Nintendo Switch, you will gain access to the parental control menu. This menu allows you to navigate through different options and settings to customize the restrictions and limitations. Follow the steps below to successfully navigate the parental control menu:
- After entering the passcode, you will be presented with the main menu of the Parental Control app.
- Using the directional buttons on your Joy-Con controller or the touchscreen, navigate through the menu options.
- The menu will contain various sections related to different aspects of parental controls, such as time restrictions, game restrictions, and communication settings.
- Highlight the desired menu option and press the A button or tap on the touchscreen to select it.
- Within each menu option, you will find submenus and settings that you can further customize.
- Navigate through these submenus using the same controls mentioned above and make changes as desired.
- Take your time to review each setting and ensure that you understand the impact of changes you make.
The Parental Control menu provides intuitive navigation, making it easy to explore different settings and customize them according to your preferences. Refer to any on-screen guidance or instructions that may be provided for specific options or features.
Remember to validate your changes by selecting the “Save” or “Apply” button, if necessary, before exiting the parental control menu. This ensures that any modifications you make are properly saved and implemented on your Nintendo Switch system.
By effectively navigating the parental control menu, you can easily disable or modify the restrictions and limitations that were previously set up on your Nintendo Switch.
Selecting the Device to Remove Parental Controls
If you have multiple devices linked to your Nintendo Switch Parental Control app, you may need to specify which device you want to remove the parental controls from. This step is important if you have set up parental controls on more than one Nintendo Switch console. Follow the instructions below to select the appropriate device and remove parental controls:
- In the Parental Control app’s main menu, navigate to the option that allows you to manage devices or linked consoles.
- Once you are in the device management section, you will see a list of all the devices linked to your Parental Control app.
- Review the list and identify the Nintendo Switch console for which you want to remove parental controls.
- Select the specific device by highlighting it and pressing the A button or tapping on the touchscreen.
- After selecting the device, you will be taken to a submenu that provides options specifically for that device.
- Look for the option to remove parental controls for the selected device.
- Confirm your selection by following any on-screen prompts or confirmation messages.
- Depending on the Parental Control app’s interface, you might need to enter your passcode again to authenticate the removal of parental controls.
- Once the removal process is complete, you will no longer have parental controls enabled on the specific device you selected.
It is important to ensure that you are selecting the correct device to remove parental controls, as this action cannot be undone. Take your time to double-check the device name or any other identifying information to avoid any unintended changes.
By following these steps, you can easily select the appropriate device and remove parental controls from your Nintendo Switch console. Once parental controls are removed, you will have unrestricted access to all features and content on the selected device.
Disabling Parental Controls Temporarily
Sometimes, you may only want to disable parental controls on your Nintendo Switch for a temporary period. Whether it’s for a specific event, a gathering with friends, or any other reason, temporarily disabling parental controls can be easily done. Follow the steps below to temporarily disable parental controls on your Nintendo Switch:
- Launch the Parental Control app on your Nintendo Switch using the steps provided earlier.
- Enter your passcode to access the parental control settings.
- Navigate to the section or submenu that allows you to customize time restrictions or game play limits.
- Within this section, you will find options to temporarily disable or suspend the parental controls.
- Depending on the interface of the Parental Control app, you may have the option to set a specific duration for the temporary disablement.
- Enable the temporary disablement by selecting the appropriate option and confirming the changes.
- During the specified duration, the restrictions and limitations set by the parental controls will be lifted.
- After the set duration has passed, the parental controls will automatically revert to their previous settings, and the restrictions will be reinstated.
Temporarily disabling parental controls gives you the flexibility to enjoy unrestricted access to your Nintendo Switch for a certain period without permanently modifying the settings. It allows you to customize the level of control you want over your gameplay experience.
Remember to re-enable the parental controls when you no longer require the temporary disablement. This will ensure that the restrictions are correctly implemented and provide the intended level of control over your Nintendo Switch usage.
With these steps, you can easily disable parental controls temporarily and enjoy a brief period of unrestricted access to your Nintendo Switch console.
Customizing Parental Control Settings
Customizing parental control settings on your Nintendo Switch allows you to tailor the restrictions and limitations according to your preferences. This ensures that you have control over the content and playtime on your console. Follow the steps below to customize your parental control settings:
- Launch the Parental Control app on your Nintendo Switch and enter your passcode to access the settings.
- Navigate to the specific section or submenu that corresponds to the settings you want to customize.
- Examples of customizable settings include time restrictions, game rating restrictions, and online communication restrictions.
- Select the relevant option within the section you are in to modify the settings.
- Depending on the setting, you may have different options to choose from or parameters to set.
- Adjust the settings according to your preferences by following the on-screen instructions or guidance.
- Take your time to review the impact of the changes you make and ensure they align with your intended goals.
- If needed, repeat these steps for other sections or submenus to customize additional parental control settings.
While customizing the parental control settings, always keep in mind the age appropriateness of the content and the playtime limits you want to enforce. It’s essential to strike a balance between providing a safe environment and allowing age-appropriate freedom for gameplay.
Once you have made the desired changes, remember to save or apply the settings to ensure that they are properly implemented on your console. This will help to ensure that the customized parental control settings take effect and provide the desired level of control over content and playtime.
With these steps, you can easily customize the parental control settings on your Nintendo Switch to align with your preferences and create a safe gaming environment.
Removing All Parental Control Restrictions
If you no longer require any parental control restrictions on your Nintendo Switch, you have the option to remove them entirely. This will give you unrestricted access to all features and content on your console. Follow the steps below to remove all parental control restrictions:
- Launch the Parental Control app on your Nintendo Switch and enter your passcode to access the settings.
- Navigate to the section or submenu that allows you to manage the parental control restrictions.
- Look for the option to remove or disable all parental control restrictions.
- Select this option, following any on-screen prompts or confirmation messages.
- Confirm your decision to remove all parental control restrictions.
- Enter your passcode again, if required, to authenticate the removal of the restrictions.
After completing these steps, all parental control restrictions will be completely removed from your Nintendo Switch. You will have unrestricted access to all games, apps, and online features without any limitations.
It’s important to note that removing all parental control restrictions is a permanent action, and it cannot be undone. Before proceeding, carefully consider if removing all the restrictions aligns with your goals and intentions.
Remember that disabling parental control restrictions means that anyone using your Nintendo Switch, including children, will have unrestricted access to all content and features. Be sure to communicate any necessary guidelines or rules to ensure responsible use of the console.
By following these steps, you can easily remove all parental control restrictions from your Nintendo Switch and enjoy unrestricted access to your console’s features and content.
Restarting the Nintendo Switch after Changes
After making changes to the parental control settings on your Nintendo Switch, it is advisable to restart the console. Restarting allows the changes to take effect and ensures that your console operates with the updated settings. Follow the steps below to restart your Nintendo Switch:
- Ensure that your console is in sleep mode or powered on.
- Press and hold the power button located on the top edge of the Nintendo Switch for a few seconds.
- A power menu will appear on the screen with options such as sleep mode, power off, and restart.
- Select the “Restart” option by highlighting it and pressing the A button or tapping on the touchscreen.
- Your Nintendo Switch will shut down and automatically reboot.
Allow the console a few moments to restart and apply the updated parental control settings. Once the restart is complete, the changes you made to the settings will be in effect, and any new restrictions or modifications will be applied accordingly.
Restarting your Nintendo Switch after making changes to the parental control settings also ensures a smooth transition and helps prevent any potential conflicts or issues that may arise from the updated settings.
If you’re still experiencing any difficulties or discrepancies with the parental control settings after restarting, double-check your changes and ensure that they are properly saved and applied in the Parental Control app.
By following these steps and restarting your Nintendo Switch, you can ensure that the changes made to the parental control settings are fully implemented and take effect on your console.