
Why Turn Off Notifications?
Notifications on your Mac serve the purpose of keeping you informed and updated about various activities and events. Whether it’s incoming messages, calendar reminders, or app notifications, they can sometimes be a distraction and interrupt your workflow. Turning off notifications can help you regain focus and minimize interruptions during important tasks. Here are a few reasons why you might want to consider turning off notifications:
- Minimize Distractions: Notifications can be a constant source of interruptions, diverting your attention away from your work or important activities. By turning them off, you can create a distraction-free environment, allowing you to concentrate better and boost your productivity.
- Reduce Stress: Constant notifications chiming or popping up on your screen can create a sense of urgency and stress, especially when you’re trying to meet deadlines or concentrate on important tasks. With notifications turned off, you can experience a more peaceful and stress-free work environment.
- Preserve Privacy: Notifications can display sensitive information, such as message previews or app content. By turning off notifications, you can protect your privacy and ensure that confidential information remains secure from prying eyes.
- Save Battery Life: Notifications can also drain your Mac’s battery life, especially when multiple apps are sending notifications frequently. By disabling notifications, you can extend your battery’s lifespan and use your Mac for longer periods without needing to recharge.
While notifications can be helpful in staying updated, it’s important to strike a balance between staying informed and avoiding distractions. Understanding why you might want to turn off notifications can help you make an informed decision about managing them effectively. Now, let’s explore different methods to control and customize notifications on your Mac.
How to Turn Off Notifications for Specific Apps
With a multitude of apps installed on your Mac, you may find that certain applications flood you with unnecessary notifications. Fortunately, you can easily disable notifications for specific apps. Here’s how:
- Open the “System Preferences” on your Mac. You can access it either by clicking on the Apple menu in the top-left corner of the screen and selecting “System Preferences” or by searching for “System Preferences” using Spotlight.
- In the System Preferences window, click on “Notifications.”
- A list of apps will appear on the left-hand side. Scroll through the list and click on the app for which you want to disable notifications.
- Uncheck the box next to “Allow Notifications” for that particular app.
- Repeat the process for any other apps that you want to disable notifications for.
By turning off notifications for specific apps, you can filter out distractions and only receive important notifications from the apps that matter most to you. It gives you more control over the type and frequency of notifications you receive on your Mac.
It’s worth noting that even if you disable notifications for an app, you can still access the app’s notifications by manually checking the notification center. This way, you won’t miss any critical updates while still minimizing distractions.
Now that you know how to turn off notifications for specific apps, let’s explore how you can temporarily disable all notifications when you need some focused time.
How to Turn Off Notifications Temporarily
Sometimes you may not want to completely disable notifications for specific apps but rather just temporarily silence them for a specific duration. Luckily, macOS provides a “Do Not Disturb” feature that allows you to temporarily disable notifications. Here’s how to turn off notifications temporarily:
- Click on the “Notification Center” icon located in the top-right corner of your Mac’s screen. It looks like three stacked lines. Alternatively, you can swipe left with two fingers from the right edge of the trackpad.
- At the top of the Notification Center, you’ll see various options. Click on “Do Not Disturb.”
- You can choose to activate “Do Not Disturb” for one hour, until the evening, or until you manually turn it off. Select the desired option.
Once “Do Not Disturb” is enabled, your Mac will not display any notifications, and the Notification Center icon in the menu bar will appear dimmed. This allows you to work without any interruptions during the specified period.
If you need to quickly enable or disable “Do Not Disturb” without accessing the Notification Center, you can make use of the Control Center. Simply swipe down from the top-right corner of the screen (or up from the bottom if you’re using a mouse) to access the Control Center. From there, you can toggle the “Do Not Disturb” option on or off.
Keep in mind that while “Do Not Disturb” is enabled, you will still receive notifications, but they will be silenced. They will be stored in the Notification Center and can be viewed later.
Now that you know how to temporarily disable notifications, let’s move on to managing notification settings for different apps on your Mac.
How to Manage Notification Settings for Different Apps
Managing notification settings for different apps on your Mac allows you to have more control over the type and frequency of notifications you receive. Here’s how you can manage notification settings for different apps:
- Open the “System Preferences” on your Mac. You can access it by clicking on the Apple menu in the top-left corner of the screen and selecting “System Preferences.”
- Click on “Notifications.”
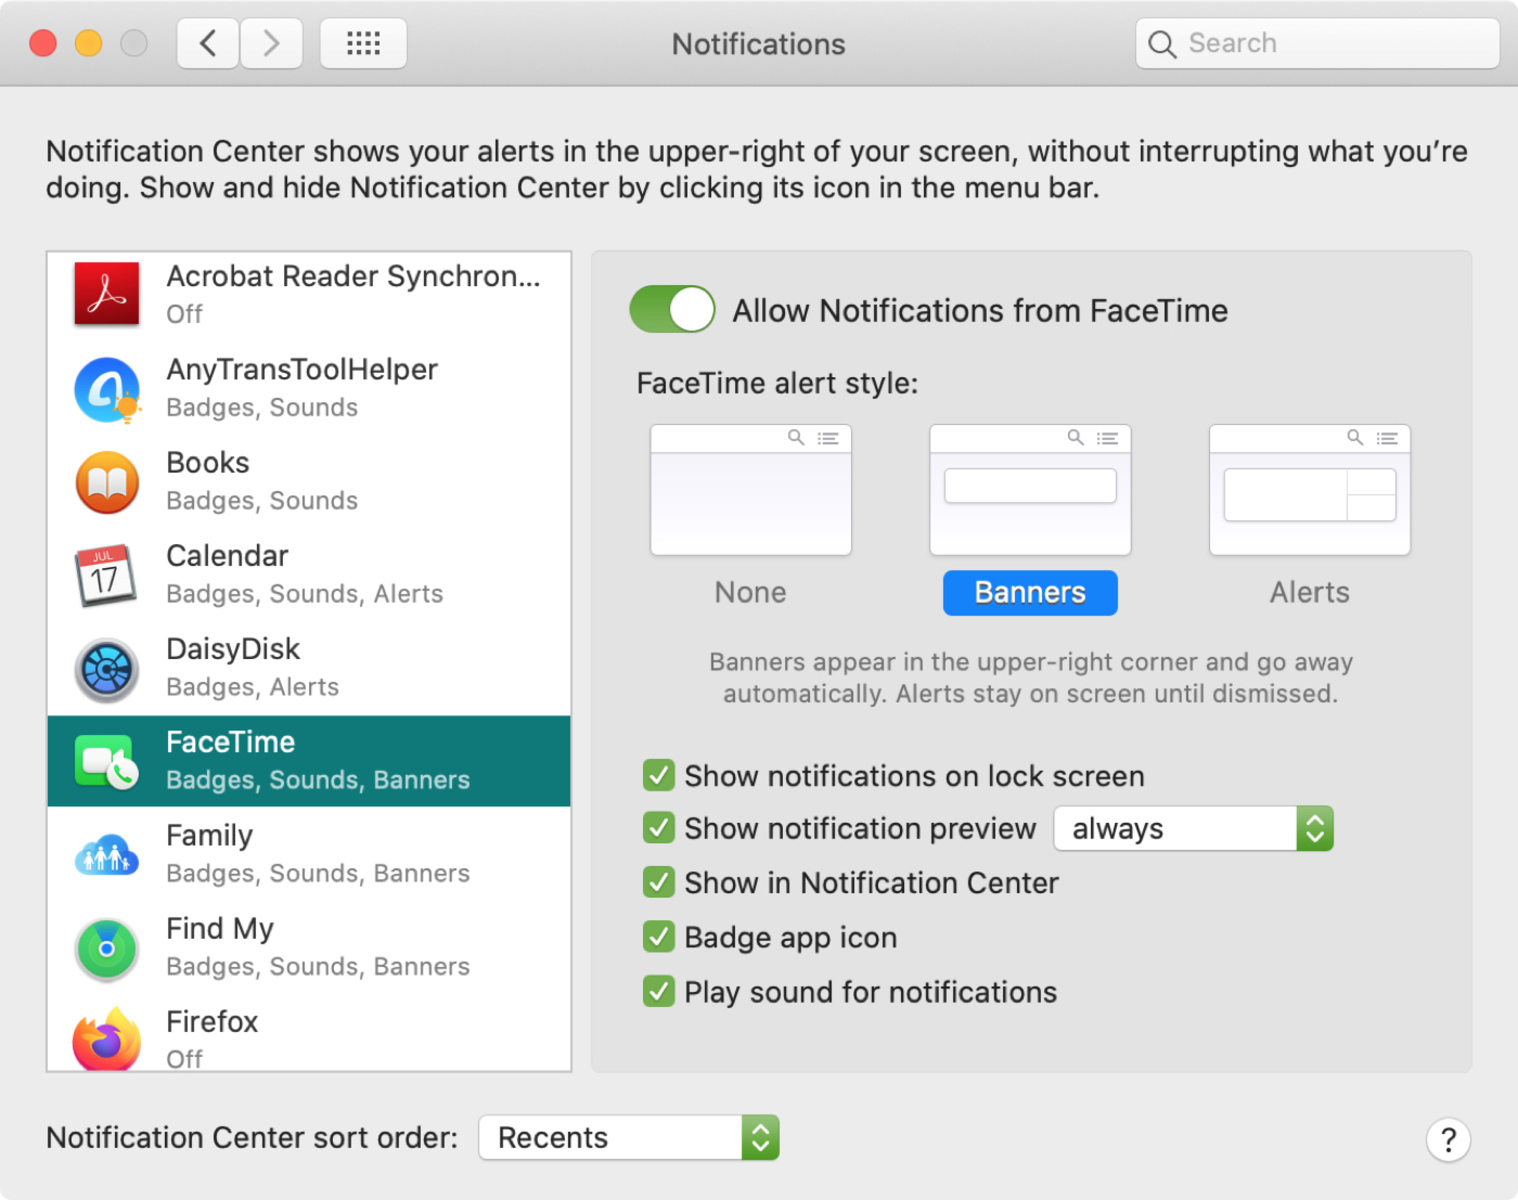
- In the Notifications preferences window, you’ll see a list of apps on the left-hand side. Scroll through the list and select the app for which you want to manage notifications.
- You can customize various notification settings for the selected app. For example, you can choose the notification style (banners or alerts), the sound it makes, and whether it appears in the Notification Center or on the lock screen.
- Adjust the settings according to your preferences. You can enable or disable each setting based on your needs.
- Repeat the process for other apps if you want to customize their notification settings as well.
By managing notification settings for different apps, you can tailor the notifications to your liking and ensure that you only receive the important ones. This way, you can avoid being overwhelmed by unnecessary notifications and stay focused on the tasks at hand.
Additionally, you can also sort the apps in the Notifications preferences window based on your preference. You can rearrange the apps in the list by dragging and dropping them to the desired position. This gives you more control over the order in which the notifications appear in the Notification Center.
Now that you know how to manage notification settings for different apps, let’s explore how you can customize the Notification Center to suit your needs.
How to Customize the Notification Center
The Notification Center on your Mac provides a centralized location for all your notifications, making it easier to stay updated. Customizing the Notification Center allows you to personalize it according to your preferences. Here’s how you can customize the Notification Center:
- Open the “System Preferences” on your Mac. You can access it by clicking on the Apple menu in the top-left corner of the screen and selecting “System Preferences.”
- Click on “Notifications.”
- In the Notifications preferences window, you’ll see various options to customize the Notification Center’s look and behavior.
- At the top, you can choose the number of recent items to show in the Notification Center. Adjust the slider according to your preference.
- Beneath that, you’ll find a list of apps that can appear in the Notification Center. You can enable or disable specific apps from appearing in the Notification Center by checking or unchecking the box next to their name.
- Further down, you can customize the order of the notifications by dragging and dropping the apps in the list. This allows you to prioritize the apps and control the sequence in which their notifications appear.
- You can also adjust the alert style for each app. Choose between banners, which appear briefly and then disappear, or alerts, which require your attention before they disappear.
- Lastly, you can select the sound that plays when a notification arrives. Simply choose your preferred sound from the dropdown menu.
By customizing the Notification Center, you can create a tailored notification experience that suits your preferences. You can prioritize the apps that are most important to you, control the number of items displayed, and choose the alert styles and sounds that you find most appealing.
Experiment with different settings until you find the ideal configuration that optimizes your productivity and minimizes distractions. Remember, you can always revisit the Notification Center preferences and adjust the settings whenever you want.
Now that you know how to customize the Notification Center, let’s explore how you can disable notifications completely if needed.
How to Disable Notifications Completely
If you find that notifications are consistently interrupting your workflow or causing distractions, you may decide to disable them completely. Disabling notifications allows you to create a focused work environment with minimal interruptions. Here’s how you can disable notifications on your Mac:
- Open the “System Preferences” on your Mac. You can access it by clicking on the Apple menu in the top-left corner of the screen and selecting “System Preferences.”
- Click on “Notifications.”
- In the “Notifications” preferences window, you’ll find a list of apps on the left-hand side.
- Scroll through the list and uncheck the box next to “Allow Notifications” for each app.
- Alternatively, to disable notifications for all apps at once, you can switch off the “Allow Notifications” toggle at the top of the preferences window.
By disabling notifications completely, you can create an uninterrupted work environment where you have complete control over when and how you receive notifications. Keep in mind that disabling notifications will prevent all apps from sending notifications, so make sure to consider the impact on any important alerts or updates you might require.
If you decide to re-enable notifications in the future, simply access the “Notifications” preferences again and check the box next to “Allow Notifications” for the selected apps or toggle the “Allow Notifications” switch for all apps.
Now that you know how to disable notifications completely, let’s explore how to temporarily mute notifications during presentations or screen sharing sessions.
How to Mute Notifications During Presentations or Screen Sharing
During presentations or screen sharing sessions on your Mac, it’s crucial to minimize distractions and interruptions. Muting notifications ensures that you can deliver your presentation or share your screen without any unwelcome pop-ups or sounds. Here’s how you can mute notifications during presentations or screen sharing:
- Open the “System Preferences” on your Mac. You can access it by clicking on the Apple menu in the top-left corner of the screen and selecting “System Preferences.”
- Click on “Notifications.”
- In the Notifications preferences window, scroll down to the bottom and look for the “Do Not Disturb” section.
- Check the box next to “Turn on Do Not Disturb” or “When mirroring to TVs and projectors” option.
By enabling this setting, your Mac will automatically activate the “Do Not Disturb” mode whenever you start a presentation or screen sharing session. This ensures that notifications are muted, allowing you to maintain focus and ensure a seamless experience for your audience.
Remember to disable the “Do Not Disturb” mode after you’ve completed your presentation or screen sharing session to resume receiving notifications as usual.
If you prefer a more manual approach, you can access the Notification Center by clicking on the icon in the top-right corner of the screen (three stacked lines) or swiping left with two fingers from the right edge of the trackpad. From there, you can manually enable “Do Not Disturb” mode by clicking on its icon.
By muting notifications during presentations or screen sharing sessions, you can deliver your content without any distractions and maintain a professional and uninterrupted experience for both yourself and your audience.
Now that you know how to mute notifications during presentations or screen sharing, let’s explore how you can enable Do Not Disturb mode to have a peaceful and interruption-free environment.
How to Enable Do Not Disturb Mode
Do Not Disturb mode on your Mac allows you to create a peaceful and interruption-free environment by silencing notifications for a specified period. Whether you need focused work time, quiet hours, or a good night’s sleep, enabling Do Not Disturb mode can help you achieve it. Here’s how to enable Do Not Disturb mode:
- Click on the “Notification Center” icon located in the top-right corner of your Mac’s screen. It looks like three stacked lines. Alternatively, you can swipe left with two fingers from the right edge of the trackpad.
- At the top of the Notification Center, you’ll find various options. Click on “Do Not Disturb.”
- You can choose one of the available options to enable Do Not Disturb mode:
- For one hour: This option activates Do Not Disturb mode for the next hour.
- Until this evening: Selecting this option enables Do Not Disturb mode until the evening. The exact time will vary based on your system settings.
- Until tomorrow: Choosing this option activates Do Not Disturb mode until the next day.
- Custom: If you prefer a specific duration, select “Custom” and specify the start and end times for Do Not Disturb mode.
Once Do Not Disturb mode is enabled, notifications will be silenced, and you can focus on your work, relax, or have a peaceful night’s sleep without any interruptions. During this time, the Notification Center icon in the menu bar will appear dimmed.
While in Do Not Disturb mode, you can still access notifications by manually opening the Notification Center. They will be stored there and can be viewed whenever you choose.
To turn off Do Not Disturb mode before the scheduled end time, simply click on the “Notification Center” icon again and disable Do Not Disturb mode.
By enabling Do Not Disturb mode, you can have greater control over your notifications and enjoy uninterrupted periods of focus and relaxation whenever you need them.
Now that you know how to enable Do Not Disturb mode, you can create a more peaceful and interruption-free environment on your Mac.