
Getting Started
Are you ready to take your video recording skills to the next level on your Chromebook? With the right apps and a few simple steps, you’ll be creating high-quality videos in no time. Let’s dive in and get started!
The first thing you’ll need to do is locate the camera app on your Chromebook. It may be labeled as “Camera” or “Webcam” and is usually found in the app launcher or the bottom shelf of your screen. Once you’ve found the app, click on it to open it.
Next, ensure that your Chromebook’s camera is working properly. You can do this by taking a quick test photo or video to confirm that the camera is functioning as expected. If you encounter any issues, you may need to troubleshoot or seek technical assistance.
Now that your camera is ready, it’s time to choose the right app for video recording. Chromebooks often come pre-installed with a default video recorder app, but you can also explore other options available on the Chrome Web Store. Look for apps that offer features such as HD recording, video editing capabilities, and easy sharing options.
Once you’ve selected your preferred app, it’s a good idea to familiarize yourself with its settings and options. Take some time to explore the various camera and video settings, such as resolution, frame rate, and autofocus, to ensure you capture the best possible footage.
Before you start recording, think about the purpose and theme of your video. Are you creating a tutorial, a vlog, or a short film? Consider the angle, composition, and lighting that will best convey your message or story. Take a moment to brainstorm and plan out the shots you want to capture.
Additionally, make sure your Chromebook is placed on a stable surface or use a tripod to avoid shaky footage. This will help maintain a professional look and ensure that your video is steady and easy to watch.
Lastly, make sure you have good audio quality for your video. If your Chromebook has a built-in microphone, position yourself close to it for clear sound. Alternatively, you can use an external microphone for better audio capture.
Now that you’re familiar with the necessary steps to get started, you’re well on your way to creating amazing videos on your Chromebook. In the next sections, we’ll explore more advanced techniques, such as editing your video and sharing it with others. So, let’s continue our video-making journey!
Choosing the Right App
When it comes to taking videos on your Chromebook, selecting the right app is crucial for a smooth and enjoyable recording experience. While Chromebooks often come with a default camera app, exploring other options can offer you advanced features and enhanced video recording capabilities. Let’s delve into the process of choosing the perfect app for your needs.
The Chrome Web Store is a great place to start your search for video recording apps. Simply open the Chrome Web Store and search for keywords like “video recorder,” “camera app,” or “video editor.” You’ll find a variety of options to choose from, suiting different preferences and requirements.
When browsing through the available apps, there are a few key factors to consider. Firstly, look for an app that offers high-definition (HD) recording. This ensures that your videos are of excellent quality, with clear details and vibrant colors.
Additionally, you may want an app that provides easy-to-use editing features. This allows you to trim and join video clips, add transitions and effects, and adjust audio levels, all within the same app. Having editing capabilities within your chosen video recorder app can save you time and effort in post-production.
Consider the sharing options offered by the app as well. Some apps allow you to directly upload your videos to popular platforms like YouTube, Vimeo, or social media sites. This simplifies the process of sharing your creations with the world and ensures maximum exposure.
Reading user reviews and ratings can also be helpful in making your decision. Pay attention to the overall rating, as well as the specific feedback provided by users. Look for apps that have a good balance between positive reviews and a significant number of installations.
Furthermore, it’s worth checking if the app is regularly updated by the developer. Frequent updates indicate that the app is actively maintained and that any bugs or issues are being addressed. On the other hand, apps that have not been updated for a long time may be less reliable or lacking in new features.
Lastly, don’t hesitate to experiment with different apps. You may find that certain apps better fit your preferences or offer unique features that align with your creative vision. With the wide range of options available, it’s worth exploring and finding the app that best suits your needs.
By taking the time to choose the right app for your video recording on your Chromebook, you can enhance the quality of your videos and streamline your workflow. So get ready to unleash your creativity with the perfect video recorder app!
Adjusting the Camera Settings
Before you start recording your video on your Chromebook, it’s important to adjust the camera settings to ensure optimal video quality. By making a few simple adjustments, you can enhance the clarity, focus, and overall visual appeal of your videos. Let’s explore how to adjust the camera settings on your Chromebook.
The first step is to open the camera app on your Chromebook. Once the camera interface is open, look for a settings icon or menu. This icon is usually represented by a gear or three dots. Click on the icon to access the camera settings.
In the camera settings, you’ll find various options to customize your video recording experience. One of the most important settings to consider is the resolution. Higher resolutions, such as 1080p or 720p, offer better image quality and more clarity. However, keep in mind that higher resolutions may require more storage space on your Chromebook.
Another setting to adjust is the frame rate. The frame rate determines the number of frames captured per second, which affects the smoothness of your video. Common frame rates include 30fps (frames per second) and 60fps. Higher frame rates result in smoother motion, but they may require more processing power from your device.
Autofocus is another crucial setting to check. Enabling autofocus allows the camera to automatically adjust focus as you move or the distance changes. This ensures that your videos remain clear and sharp, even if you’re not stationary. If your camera app doesn’t have autofocus, you may need to manually adjust the focus using a slider or a focus ring.
White balance is another setting to consider. It adjusts the color temperature of your videos to compensate for different lighting conditions. Experiment with different white balance settings like “auto,” “incandescent,” “daylight,” or “fluorescent” to find the one that produces the most accurate colors in your specific environment.
Some camera apps also offer exposure settings. Exposure determines how much light the camera sensor captures. You can adjust the exposure manually to brighten or darken your videos if the auto-exposure doesn’t produce the desired results. Keep in mind that exposure adjustments may be more necessary in challenging lighting situations.
Once you’ve made the desired camera settings adjustments, take a test video to ensure everything is working as expected. Playback the video and pay attention to the quality, focus, and overall appearance. If you notice any issues, go back to the settings and make further adjustments as needed.
Remember that the availability and specific settings may vary depending on the camera app you are using. Take the time to explore the settings thoroughly and experiment with different options to achieve the desired results.
By adjusting the camera settings on your Chromebook, you can greatly enhance the quality of your videos and capture moments with clarity and precision. So take a moment to tweak those settings and get ready to create stunning videos!
Framing Your Shot
The way you frame your shot can significantly impact the overall look and feel of your video. It’s not just about pointing the camera in the right direction; it’s also about considering composition, perspective, and visual storytelling. Whether you’re shooting a tutorial, vlog, or a short film, follow these tips to ensure you capture compelling and engaging footage on your Chromebook.
Firstly, think about the purpose and message of your video. What story do you want to convey? Consider the main subject of your video and how you can best highlight it within the frame. For example, if you’re shooting a cooking tutorial, place the ingredients and tools within close range of the camera to provide a clear view for your viewers.
When framing your shot, use the rule of thirds as a guide. Imagine your frame divided into a 3×3 grid. Position key elements, such as the main subject or points of interest, along these gridlines or at their intersections. This creates a visually pleasing composition and adds depth to your video.
Pay attention to the background of your shot as well. Make sure it complements your subject and adds to the overall narrative. Avoid cluttered or distracting backgrounds that might take away attention from the main focus of the video. Consider using a plain background or finding a location that enhances the visual appeal and reinforces the theme of your video.
Experiment with different camera angles to make your footage more dynamic and interesting. For example, shooting from a higher angle can make the subject appear smaller and more vulnerable, while shooting from a lower angle can make the subject appear more powerful or dominant. Don’t be afraid to get creative and try out unconventional angles to add excitement and variety to your videos.
Remember to consider the distance between the camera and the subject. Depending on the type of video you are creating, you may want to use a close-up to capture details or a wide shot to establish the scene. Think about the emotions or information you want to convey and adjust the distance accordingly.
Keep the camera stable to avoid shaky footage. If your Chromebook doesn’t have a built-in stabilization feature, consider using a tripod or placing your device on a stable surface. Smooth and steady footage creates a professional feel and enhances the viewing experience for your audience.
As you frame your shot, don’t forget about the power of movement. If your Chromebook has the capability, experiment with panning or tracking shots to add cinematic flair to your videos. Controlled and purposeful camera movements can add depth and engage your audience in a more immersive experience.
Prioritize composition, perspective, and purposeful framing when shooting your videos on your Chromebook. Take the time to plan your shots, experiment with different angles and camera movements, and pay attention to the overall visual storytelling. By doing so, you’ll capture more engaging footage that captivates and resonates with your viewers.
Setting up the Microphone
When it comes to recording videos on your Chromebook, having good audio quality is just as important as capturing clear visuals. To ensure that your audience can hear you clearly and without distractions, it’s essential to set up and optimize your microphone. Let’s explore how you can do this on your Chromebook.
The first step is to check if your Chromebook has a built-in microphone. Most Chromebooks come equipped with a microphone located near the webcam, but the quality can vary. If you find that the built-in microphone doesn’t meet your needs or if you simply want to improve audio clarity, you may opt for an external microphone.
If you decide to use an external microphone, ensure that it is compatible with your Chromebook. There are different types of microphones available, such as USB microphones or 3.5mm jack microphones. Connect the microphone to the appropriate port on your Chromebook, and it should be automatically recognized.
Once your microphone is connected, you’ll need to adjust the audio settings on your Chromebook. Click on the volume icon in the bottom-right corner of your screen and select “Settings.” In the Sound settings, you can choose the input device or microphone you want to use for recording.
Keep in mind that different microphones may require different configuration. Some microphones have their own audio settings, such as gain control or volume adjustment. These settings can often be accessed through the microphone itself or through specialized software provided by the microphone manufacturer.
Test your microphone before recording to ensure that it is functioning properly and that the audio levels are set correctly. Open the sound recorder app on your Chromebook or use a video recording app to capture a short audio sample. Play it back and check for any distortion, background noise, or low volume issues.
If you encounter audio problems, adjust the microphone placement or distance from your mouth. Getting closer to the microphone while speaking can improve clarity and reduce background noise. Consider using a pop filter or windscreen to minimize unwanted plosives or wind noise if necessary.
Additionally, be mindful of your recording environment. Try to minimize background noise by choosing a quiet location and turning off any unnecessary devices or appliances that may create unwanted sounds. Consider using a foam or cloth pad underneath your Chromebook to reduce vibrations or keyboard noise that can be picked up by the microphone.
Lastly, during the recording process, monitor the audio levels to ensure that your voice is not too soft or too loud. Keeping an eye on the audio meter or level indicator will help you maintain a consistent volume throughout your video.
By setting up and optimizing your microphone on your Chromebook, you can greatly improve the audio quality of your videos. Clear and crisp audio will enhance the overall production value and ensure that your message is effectively communicated to your viewers.
Recording Your Video
Now that you have your camera settings configured and your microphone set up, it’s time to start recording your video on your Chromebook. Whether you’re creating a tutorial, vlog, or capturing precious moments, following a few best practices will help you create high-quality and engaging videos. Let’s explore the steps to record your video smoothly and effectively.
Before you start recording, ensure that you have enough storage space on your Chromebook. Video files can take up a significant amount of storage, so it’s a good idea to free up space by deleting any unnecessary files or transferring them to an external storage device.
Next, launch the camera app on your Chromebook. Position yourself or the subject within the frame according to your pre-planned shots and composition. Consider the rule of thirds, camera angles, and any movements or gestures you’ll be making during the recording.
Take a moment to review the camera settings again and make any adjustments if necessary. Ensure that you’re using the desired resolution, frame rate, and autofocus settings. Double-check the microphone settings to confirm that the correct input device is selected and the audio levels are appropriate.
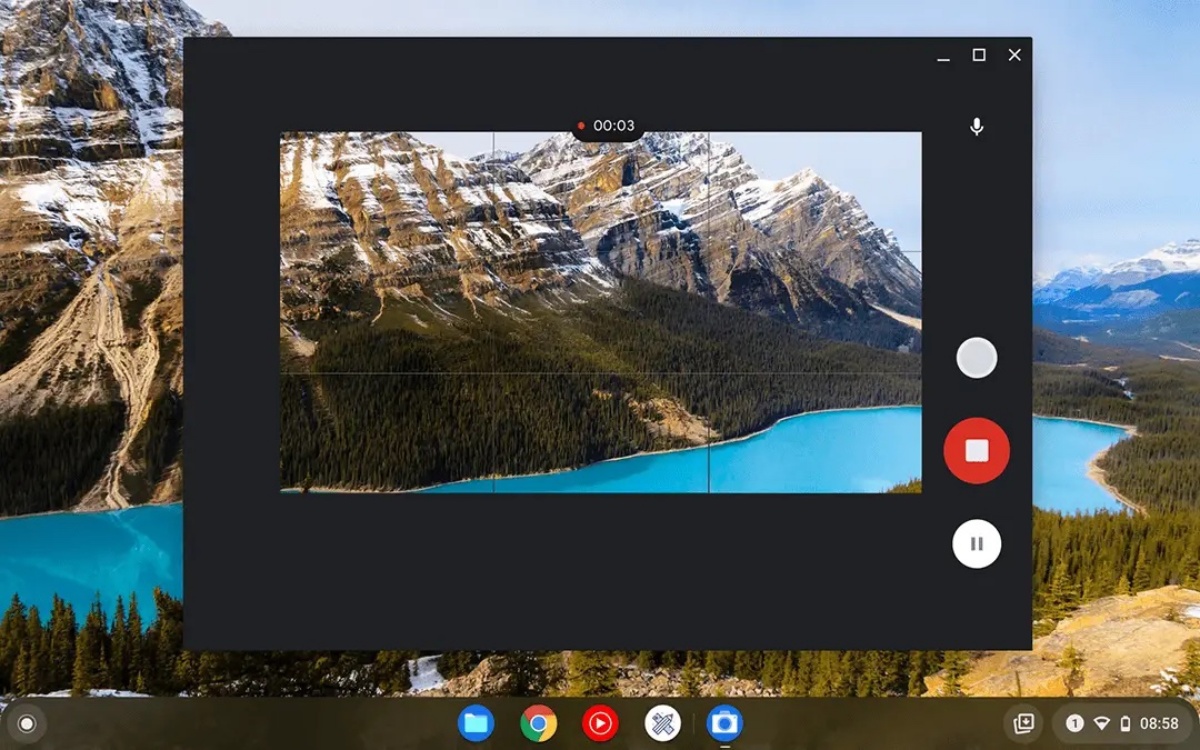
Once you’re ready, click the record button within the camera app to start capturing your video. Maintain steady posture and avoid unnecessary movements during the recording to keep the footage stable and minimize distractions. If you need to change your position or angle, do so smoothly and deliberately to ensure a seamless transition.
As you record, keep an eye on the video duration and available storage space. Chromebooks have limited internal storage, so it’s important to be mindful of the recording length and manage your storage accordingly. If needed, consider recording in shorter segments and merging them during the editing process.
Pay attention to your voice projection and speaking pace. Speak clearly and project your voice towards the microphone if you’re using a built-in or external microphone. Maintain a consistent pace to keep your viewers engaged and ensure that your message is effectively communicated.
During the recording, don’t be afraid to pause, repeat, or rephrase if needed. It’s natural to make mistakes or stumble over words, and it’s better to take a moment to correct yourself rather than rushing through the content. Remember, you can always edit out or trim these sections later during the post-production process.
If possible, record from different angles or perspectives to add visual interest and variety to your video. Consider capturing close-ups of important details, wide shots to establish the scene, or even incorporating b-roll footage to enhance storytelling and engagement.
Once you’ve finished recording, review the footage to ensure that you’re satisfied with the quality, content, and overall performance. Listen back to the audio and visually inspect the footage for any issues or areas that require improvement. If needed, you can always re-record specific segments or plan for additional takes.
Now that you have successfully recorded your video footage, you’re one step closer to creating your final masterpiece. In the next section, we’ll explore the process of editing your video and adding those finishing touches to make it shine. So, let’s move on to the next step of your video creation journey!
Editing Your Video
After recording your video on your Chromebook, it’s time to bring it all together and give it that polished and professional look. Video editing is the process of selecting and arranging your footage, adding transitions and effects, adjusting the audio, and refining your video to create a cohesive and engaging final product. Let’s explore how you can edit your video on your Chromebook.
The first step is to choose a video editing software that is compatible with your Chromebook. There are several options available on the Chrome Web Store, ranging from simple and user-friendly editors to more advanced and feature-rich software. Select an editor that suits your skill level and the complexity of your video editing needs.
Once you’ve selected your preferred video editing software, import your recorded footage into the editor. Most editors allow you to simply drag and drop your video files directly into the timeline or media library. Organize your clips in the order that makes sense for your video’s narrative or structure.
Trimming is a crucial step in the editing process. Remove any unnecessary footage or mistakes by selecting the sections you want to remove and deleting them from the timeline. This helps streamline your video and keep it concise and engaging for your viewers.
Add transitions to smooth out the cuts between different clips and create a seamless flow. Commonly used transitions include fades, dissolves, and wipes. Experiment with different transition effects and choose the ones that best fit the mood and style of your video.
Enhance your video by adding effects and filters. These can include color correction, saturation adjustments, or adding a vintage-styled look. Be cautious not to overdo the effects and maintain a consistent aesthetic throughout your video.
Adjust the audio levels to ensure that your voice can be heard clearly over any background music or sound effects. Balance the volume levels to avoid any sudden audio changes that may distract your viewers. Trim or remove any unwanted background noise or mic pops during the editing process.
Consider adding text overlays or captions to provide additional information or enhance the storytelling. This can include titles, subtitles, or lower-thirds to introduce segments or identify individuals or locations within your video.
If you want to add music or sound effects, browse through royalty-free music libraries or utilize the audio clips available in your video editing software. Make sure the chosen music or sound effects complement the mood and tone of your video without overpowering the main audio narration.
Experiment with different video and audio effects provided by your editing software. These can include slow motion, time-lapse, visual filters, or audio enhancements. Use these effects strategically to emphasize specific moments or enhance the overall visual impact of your video.
Once you’re satisfied with the editing, preview your video to ensure a smooth playback experience. Make any necessary tweaks or adjustments to perfect the timing, transitions, and overall visual and audio quality.
Once you’re happy with the final outcome, export or render your video in the desired file format. Ensure that you choose a suitable resolution and file size that is optimal for your intended use – whether it’s uploading to video hosting platforms, sharing on social media, or preserving on your local storage.
Video editing on your Chromebook allows you to transform your raw footage into a polished and captivating video. So embrace your creativity, explore the various editing tools available, and enjoy the process of turning your recordings into a compelling visual story.
Saving and Sharing Your Video
Once you have finished editing your video on your Chromebook, it’s time to save and share your creation with others. Whether you want to showcase your video on social media, share it with friends and family, or upload it to a video hosting platform, there are a few important steps to consider. Let’s explore how you can save and share your video with ease.
Before saving your video, ensure that you have chosen the desired file format and resolution. Consider the purpose and target platform of your video to select the appropriate settings. Common video file formats include MP4, MOV, or AVI, which are widely compatible with various devices and platforms.
When saving your video, give it a descriptive and engaging filename that reflects its content. This will make it easier for you to identify the video in the future and will provide a clear indication to others about what they can expect when viewing it.
Choose a suitable location to save your video. You can save it directly to your Chromebook’s internal storage or to an external storage device such as a USB drive or an external hard drive. Make sure you have enough storage space available.
Consider creating a backup of your video files to prevent the loss of your hard work. You can duplicate the video files and store them in a separate location or cloud storage service for added protection.
If you want to share your video on social media platforms, select the relevant sharing options provided by your video editing software. You may be able to directly upload your video to popular platforms like YouTube, Facebook, Instagram, or Vimeo with just a few clicks, saving you time and effort.
Alternatively, you can manually upload your video to a video hosting platform. Many platforms provide you with the option to create an account and upload your videos for free or for a subscription fee. Once uploaded, you can customize the video’s privacy settings and share the link with your desired audience.
If you prefer to share your video privately with specific individuals, consider using cloud storage services like Google Drive or Dropbox. Upload your video file to the cloud service and share a link or grant access to the selected recipients. This way, you have control over who can view and download your video.
When sharing your video, consider writing a catchy and informative description or caption that accompanies it. This helps to provide context and engage your audience, enticing them to watch and share your video with others.
Finally, don’t forget to promote your video through your social media channels, website, or blog. Spread the word about your creation and encourage others to watch and share it. Engage with your viewers by responding to comments and feedback, fostering a sense of community around your video content.
Saving and sharing your video on your Chromebook allows you to showcase your creativity, share your message, and connect with others. So, confidently save and share your masterpiece, and enjoy the journey of inspiring and entertaining your audience.