
Creating a Trezor Account
Creating a Trezor account is the first step towards securing your cryptocurrencies. Trezor is a hardware wallet that offers a high level of security for storing and managing your digital assets. Follow these steps to create your Trezor account:
- Visit the Trezor website: Start by visiting the official Trezor website at www.trezor.io. Here, you will find all the necessary information about the device and its features.
- Choose your Trezor model: Trezor offers different models, including the Trezor One and Trezor Model T. Choose the model that suits your needs and budget.
- Purchase and receive your Trezor: Once you have selected your Trezor model, proceed with the purchase. Follow the instructions on the website to complete the transaction. Your Trezor device will be shipped to your specified address.
- Set up your Trezor: When your Trezor device arrives, unbox it and familiarize yourself with the contents. You will find the device itself, a USB cable for connecting it to your computer, and some documentation.
- Connect your Trezor to your computer: Take the USB cable and connect your Trezor device to your computer. Ensure that your computer is connected to the internet and that you have the latest version of the Trezor Bridge software installed.
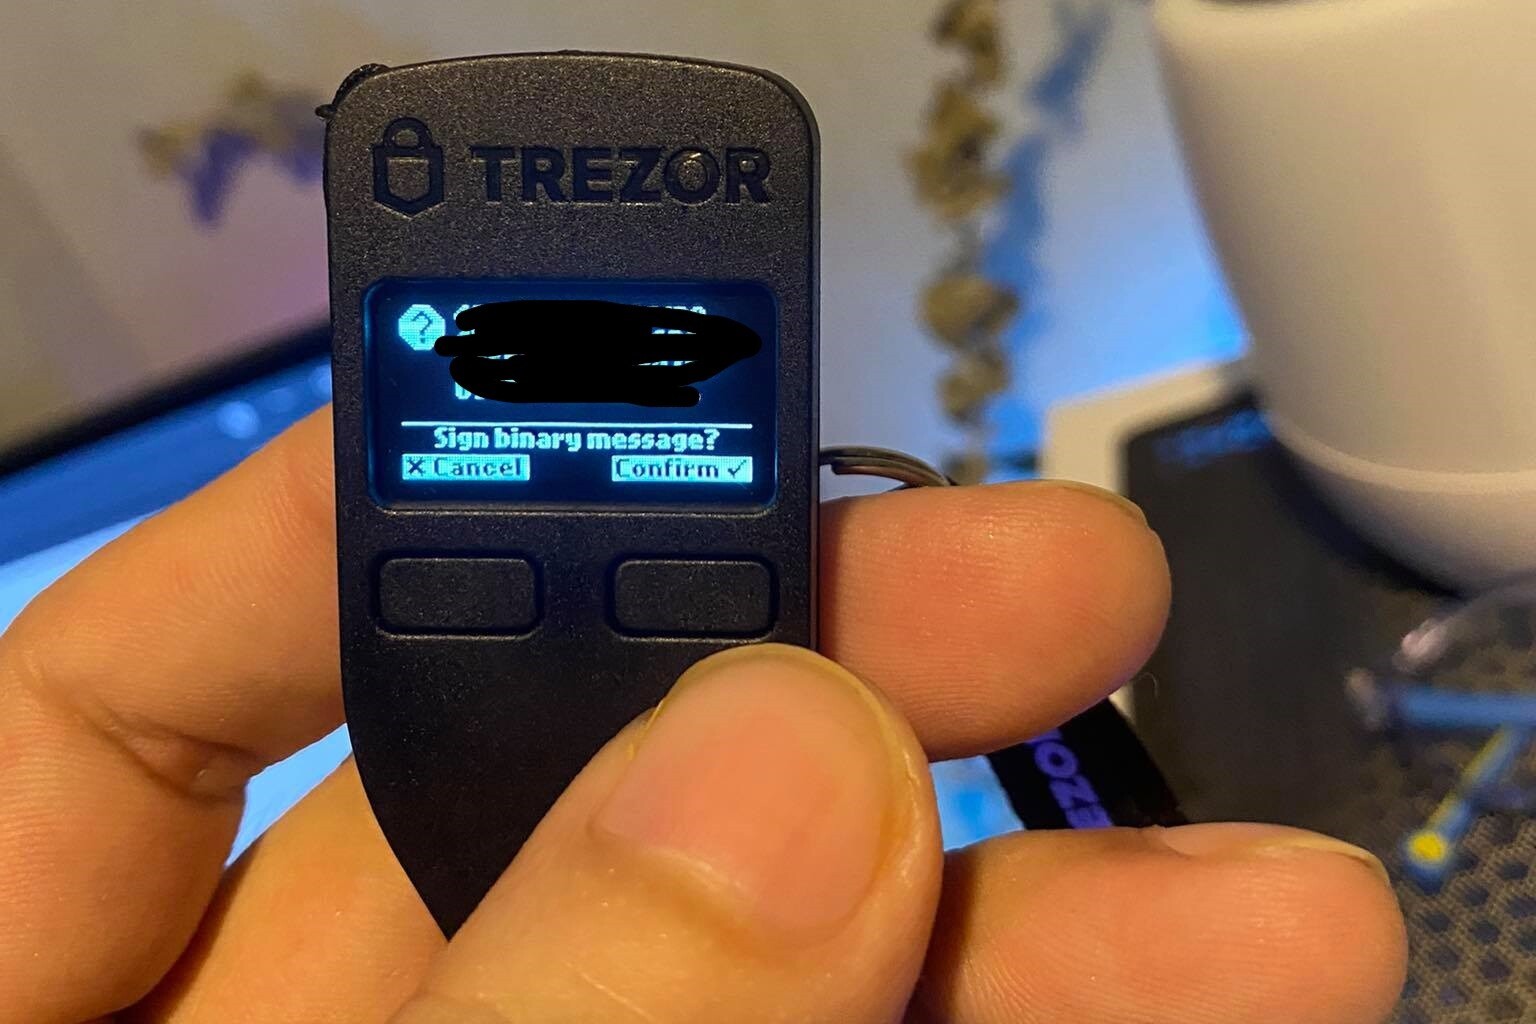
- Initialize your Trezor: Follow the instructions on the Trezor device’s screen to initialize it. You will be prompted to confirm actions by pressing the device’s physical buttons.
- Choose a PIN: Select a PIN for your Trezor device. Make sure to choose a strong PIN that is not easily guessable. Enter the PIN using the device’s buttons.
- Write down your recovery seed: Trezor will generate a recovery seed consisting of 24 words. Write down these words and keep them in a safe place. They will be essential for recovering your funds in case your Trezor device is lost or damaged.
- Confirm your recovery seed: After writing down your recovery seed, the device will prompt you to enter a few of the words to ensure that you have properly written them down. Follow the instructions on the screen to confirm your recovery seed.
By following these steps, you will have successfully created a Trezor account. Your Trezor device is now ready to securely store your cryptocurrencies and ensure the safety of your digital assets.
Preparing Your Trezor Device
Before you can start using your Trezor device to store and manage your cryptocurrencies, it is important to properly prepare it. This involves a few essential steps to ensure that your device is ready to securely handle your digital assets. Follow these instructions to prepare your Trezor device:
- Check for authenticity: Before using your Trezor device, always check its authenticity to ensure that you have a genuine product. Be cautious of counterfeit devices that may compromise the security of your cryptocurrencies.
- Update the firmware: It is crucial to keep your Trezor firmware up to date to benefit from the latest security enhancements and features. Visit the Trezor website and follow the instructions to update your device’s firmware to the latest version.
- Enable the passphrase feature: The passphrase feature adds an extra layer of security to your Trezor device. It allows you to set a unique passphrase that acts as an additional password when accessing your wallet. Enable this feature by following the instructions provided by Trezor.
- Secure your recovery seed: The recovery seed is a vital component of your Trezor device. It is a series of 24 words that can be used to restore access to your wallet if your device is misplaced, damaged, or lost. Store your recovery seed in a secure location, preferably offline, like a fireproof safe or a safety deposit box.
- Consider a passphrase manager: If you choose to use the passphrase feature, it is essential to have a reliable passphrase manager. This tool securely stores your passphrases, ensuring easy access and reducing the risk of forgetting or losing them.
By following these steps, you ensure that your Trezor device is well-prepared and optimized for the secure storage and management of your cryptocurrencies. Remember to regularly check for firmware updates and keep your recovery seed safe. With a properly prepared Trezor device, you can have peace of mind knowing that your digital assets are protected.
Connecting Your Trezor to Your Computer
To start using your Trezor device, you need to connect it to your computer. The connection allows you to access the Trezor wallet interface and manage your cryptocurrencies. Follow these steps to connect your Trezor to your computer:
- Locate the USB cable: Find the USB cable that came with your Trezor device. It is typically included in the package and has a USB Type-A connector on one end and a micro USB or USB Type-C connector on the other end, depending on your Trezor model.
- Connect your Trezor to your computer: Take the USB cable and plug the USB Type-A end into an available USB port on your computer. Then, connect the micro USB or USB Type-C end to the corresponding port on your Trezor device.
- Ensure the Trezor Bridge software is installed: The Trezor Bridge software allows your computer to communicate with your Trezor device. Before connecting your Trezor, ensure that you have the Trezor Bridge software installed on your computer. You can download the latest version from the official Trezor website.
- Unlock your Trezor device: Press the power button on your Trezor device to turn it on. A Trezor logo should appear on the screen. Enter your PIN using the device’s buttons to unlock it.
- Authorize the connection on the device: After unlocking your Trezor device, it may prompt you to authorize the connection to your computer. Follow the instructions on the device’s screen to confirm and authorize the connection. This step ensures that only you can access your Trezor wallet from your computer.
- Wait for the computer to detect your Trezor: Once connected, your computer should detect your Trezor device. It may install the necessary drivers automatically if needed. Wait for the detection process to complete before proceeding.
Once your Trezor device is successfully connected to your computer, you can access the Trezor wallet interface to manage your cryptocurrencies securely. This connection allows you to view your account balance, send and receive transactions, and access additional features provided by the Trezor device.
Remember to disconnect your Trezor device from your computer when you’re not using it to minimize the risk of unauthorized access to your cryptocurrencies. Keep your Trezor device and the USB cable in a secure location when not in use to protect them from potential damage or loss.
Accessing the Trezor Wallet
Once you have connected your Trezor device to your computer, accessing the Trezor wallet is the next step to manage your cryptocurrencies securely. The Trezor wallet interface provides a user-friendly platform to view your account balances, send and receive transactions, and explore additional features. Follow these steps to access your Trezor wallet:
- Open your web browser: Launch your preferred web browser on your computer.
- Visit the Trezor wallet website: Type or paste the URL “wallet.trezor.io” into your browser’s address bar and press Enter.
- Connect your Trezor: On the Trezor wallet website, click on the “Connect Trezor” button or a similar option to establish a connection between your Trezor device and the wallet interface.
- Confirm on your Trezor device: Your Trezor device will display a prompt confirming the connection to the web wallet. Check that the URL displayed on the Trezor device matches the one you entered earlier on your computer. Press the corresponding button on your Trezor device to proceed with the connection.
- Unlock your Trezor wallet: Enter your PIN using the buttons on your Trezor device to unlock your wallet on the Trezor wallet interface.
- Choose your account: If you have multiple accounts associated with your Trezor device, select the account you want to manage from the list provided on the wallet interface. Each account represents a specific cryptocurrency or wallet address.
- Navigate the Trezor wallet interface: Once you have selected your desired account, you will be able to view the account balance, transaction history, and various other options specific to that cryptocurrency. Use the navigation menu on the interface to explore different features, such as sending/receiving transactions, accessing settings, or managing account preferences.
By following these steps, you can easily access and navigate the Trezor wallet interface to manage your cryptocurrencies efficiently. Remember to disconnect your Trezor device and close the wallet interface when you are done to ensure the security of your digital assets.
Entering Your PIN
The PIN is an important security feature of your Trezor device, providing an added layer of protection for accessing your wallet. When setting up your Trezor, you are prompted to create a PIN that is required every time you connect your device and access the wallet. Follow these steps to enter your PIN:
- Connect your Trezor device: Connect your Trezor device to your computer using the provided USB cable.
- Power on your Trezor: Press the power button on your Trezor device to turn it on. The Trezor logo should appear on the screen.
- Enter your PIN: On the Trezor device’s screen, you will see a 9×9 grid with numbers from 1 to 9. Each time you log in, you will be presented with a randomized layout of numbers. Look at the layout on the computer screen and enter your PIN using the point-and-click method. Use your computer’s mouse to click on the corresponding numbers on the device’s grid. The numbers will appear as asterisks (*) on the computer screen for added security.
- Confirm your PIN: Once you have entered your PIN, the Trezor device will ask you to confirm it. The numbers on the device’s grid will shuffle, and you will need to re-enter your PIN using the point-and-click method. This step helps ensure that you have entered the correct PIN and protects against potential keyloggers or screen recorders.
It is essential to choose a PIN that is unique and not easily guessable. Avoid using common or sequential number combinations that can be easily guessed. Remember to keep your PIN confidential and never share it with anyone. Your Trezor device’s PIN is a key element in protecting your digital assets from unauthorized access.
If you enter an incorrect PIN multiple times, your Trezor device will prompt you to wait before trying again. This feature helps prevent brute-force attacks and unauthorized access to your wallet.
By following these steps and creating a secure PIN, you can confidently access your Trezor wallet, knowing that your cryptocurrencies are protected.
Setting Up the Trezor Password Manager
In addition to securely storing your cryptocurrencies, Trezor offers a password manager feature that allows you to store and manage your passwords in a safe and convenient manner. By using the Trezor Password Manager, you can have peace of mind knowing that your passwords are protected by the same high level of security as your cryptocurrencies. Follow these steps to set up the Trezor Password Manager:
- Access the Trezor wallet interface: Connect your Trezor device to your computer and open the Trezor wallet interface by visiting the Trezor website or using the Trezor Bridge software.
- Navigate to the Password Manager: On the Trezor wallet interface, look for the Password Manager section or tab. Click on it to access the password management features.
- Create a new password database: If you are using the password manager for the first time, you will need to create a password database. Follow the on-screen instructions to create a secure password for your database. This password will be used to encrypt and protect your stored passwords.
- Add passwords to your database: Once you have set up your password database, you can start adding your passwords. Click on the “Add Password” or similar option to enter the website or service name, username, and password. You can also add additional information or custom fields if required.
- Generate strong passwords: When creating or updating passwords, you can use the password generator provided by the Trezor Password Manager. This feature generates strong, random passwords that are difficult to crack. It is recommended to use unique and complex passwords for each website or service.
- Organize and manage your passwords: The Trezor Password Manager allows you to organize your passwords into different categories or folders for easy management. You can create folders for personal, work, or other specific purposes and move or copy passwords between them.
- Access your passwords securely: Whenever you need to retrieve a password, return to the Trezor Password Manager and enter your database password. Your encrypted password database will be unlocked, allowing you to access and copy your passwords as needed.
- Sync your passwords across devices: If you have multiple Trezor devices or want to access your password database on different devices, you can enable synchronization. This feature ensures that your passwords remain consistent and up to date across all your authorized devices.
By setting up the Trezor Password Manager, you can enjoy the convenience of secure password storage and management. Ensure that you always use strong and unique passwords, and remember to keep your database password confidential and secure. With the Trezor Password Manager, you can simplify and enhance your password management while maintaining a high level of security.
Adding Cryptocurrencies to Your Trezor Wallet
One of the key features of the Trezor wallet is its ability to securely store and manage multiple cryptocurrencies. To add cryptocurrencies to your Trezor wallet, follow these steps:
- Access the Trezor wallet interface: Connect your Trezor device to your computer and open the Trezor wallet interface by visiting the Trezor website or using the Trezor Bridge software.
- Choose the account: Identify the cryptocurrency you want to add to your Trezor wallet. Each cryptocurrency typically has its own account. In the wallet interface, select the corresponding account for the cryptocurrency you wish to add.
- Find the receiving address: On the Trezor wallet interface, look for the “Receive” or “Receive Address” option. Click on it, and a unique receiving address for the chosen cryptocurrency will be displayed. This receiving address is where you will send your cryptocurrency from an exchange or another wallet.
- Send cryptocurrency to your Trezor wallet: Use the provided receiving address to initiate a transfer of the desired cryptocurrency from the exchange or wallet you currently hold it in. Follow the instructions provided by the exchange or wallet to complete the transaction.
- Confirm the transaction: Once the transaction is initiated, you will need to confirm it on your Trezor device. The device will display the transaction details, including the amount and destination address. Verify that the information is correct and press the corresponding button on your device to approve the transaction.
- Wait for confirmation: Depending on the cryptocurrency you are adding to your Trezor wallet, confirmation times may vary. You will need to wait for the transaction to be confirmed on the blockchain network. This confirmation ensures the transfer is completed and your cryptocurrencies are securely stored in your Trezor wallet.
- View your balance: Once the transaction is confirmed, you can view your updated balance in the Trezor wallet interface. The added cryptocurrency will be reflected in the corresponding account’s balance.
Repeat these steps for each cryptocurrency you want to add to your Trezor wallet. Trezor supports a wide range of cryptocurrencies, including Bitcoin, Ethereum, Litecoin, and many others. Adding cryptocurrencies to your Trezor wallet and storing them securely provides peace of mind, knowing that your digital assets are under your control and protected by the Trezor’s robust security features.
Making Your First Transaction with Trezor
Once you have successfully added cryptocurrencies to your Trezor wallet, you may want to make your first transaction to send or receive digital assets. Whether you are sending cryptocurrencies to another wallet or receiving them from someone else, Trezor ensures the security and integrity of your transactions. Here is a step-by-step guide on making your first transaction with Trezor:
- Access the Trezor wallet interface: Connect your Trezor device to your computer and open the Trezor wallet interface by visiting the Trezor website or using the Trezor Bridge software.
- Choose the account: Select the account that holds the cryptocurrency you wish to transact with. Each cryptocurrency typically has its own account within the Trezor wallet interface.
- Specify the transaction type: Decide whether you want to send or receive cryptocurrencies. If you want to make a payment or send funds, choose the “Send” option. If you are expecting someone to send you cryptocurrencies, provide them with your receiving address or select the “Receive” option to view your unique address for the selected cryptocurrency.
- Enter the transaction details: Depending on the type of transaction, you may need to enter the recipient’s address, the amount you want to send or request, and any additional details required by the recipient or the transaction purpose.
- Confirm the transaction on your Trezor device: After entering the transaction details, your Trezor device will display the information on its screen. Verify that the details are correct and press the appropriate button on your device to confirm the transaction.
- Wait for confirmation: Once the transaction is confirmed on your Trezor device, you will need to wait for the transaction to be validated and confirmed on the blockchain network. The time required for confirmation can vary depending on the cryptocurrency and network congestion.
- View transaction status: While waiting for confirmation, you can monitor the status of your transaction on the blockchain explorer or the Trezor wallet interface. This allows you to track the progress and ensure that the transfer is completed successfully.
- Check your updated balance: Once the transaction is confirmed and included in the blockchain, you can check your updated balance in the Trezor wallet interface. Your transaction history will also be updated with the details of the recent transaction.
Making your first transaction with Trezor is an exciting step towards securely managing your digital assets. Always double-check the transaction details, including addresses, before confirming the transaction. With Trezor’s robust security measures, you can confidently send and receive cryptocurrencies, knowing that your transactions are protected and your private keys are secure.
Backing Up Your Trezor Device
Backing up your Trezor device is a crucial step in ensuring the security and integrity of your cryptocurrencies. By creating a backup, you can protect your digital assets from loss, theft, or damage to your Trezor device. Trezor uses a recovery seed, consisting of a series of 24 words, as a backup mechanism. Follow these steps to back up your Trezor device:
- Prepare a recovery sheet: Before creating the backup, prepare a recovery sheet or booklet. This can be a sheet of paper or a journal where you will write down your recovery seed.
- Access the Trezor wallet interface: Connect your Trezor device to your computer and open the Trezor wallet interface by visiting the Trezor website or using the Trezor Bridge software.
- Go to the recovery seed setup: In the wallet interface, navigate to the recovery seed setup section. This section will guide you through the process of generating your recovery seed.
- Follow the instructions on the screen: The Trezor device will display a series of words, one at a time. Write down each word in the order they appear on the Trezor device. Be careful to note them accurately and in the correct sequence.
- Verify your recovery seed: Once you have written down all 24 words, the Trezor device will ask you to verify your recovery seed. It will display a set of random words from your recovery seed, and you need to select the correct words in the given order. This step ensures that you have correctly written down your recovery seed.
- Store your recovery seed securely: Once you have verified your recovery seed, store the written-down words in a safe and secure location. Consider options like a fireproof safe, safety deposit box, or a dedicated hardware wallet backup device. Ensure that your backup location is protected from unauthorized access, theft, and physical damage.
It is essential to never store your recovery seed digitally or in an online format, as it exposes it to the risk of being hacked or compromised. Keep it in a physical and offline format to maintain the highest level of security.
By making a proper backup of your Trezor device, you ensure that you can recover access to your cryptocurrencies in case your Trezor device is lost, damaged, or stolen. The recovery seed serves as your key to restoring your funds and maintaining control over your digital assets.
Troubleshooting and Frequently Asked Questions
While using your Trezor device, you may encounter certain issues or have questions about its operation. Here are some common troubleshooting steps and frequently asked questions (FAQs) to help you resolve any concerns:
1. My Trezor device is not turning on:
- Make sure the device is properly connected to your computer using the provided USB cable.
- Try connecting the device to a different USB port on your computer.
- If the device is still not turning on, ensure you have the latest version of the Trezor Bridge software installed and try again.
- If the issue persists, contact Trezor support for further assistance.
2. I forgot or lost my PIN:
- If you forget or lose your PIN, your Trezor device will enter a temporary lockdown for a specific period of time (e.g., 15 minutes, increasing with each failed attempt).
- After the temporary lockdown period, you can attempt to enter your PIN again.
- If you are unable to remember or recover your PIN, the only way to regain access to your funds is by using the recovery seed.
3. I lost my Trezor device:
- If you lose your Trezor device, your funds are still safe as long as you have your recovery seed.
- Obtain a new Trezor device and follow the instructions to recover your wallet using the recovery seed.
- Never share your recovery seed with anyone and ensure it is stored securely.
4. I received a different address on my Trezor than expected:
- Ensure that you double-check the receiving address on both your Trezor device and the wallet interface.
- Each time you make a new transaction, a new address is generated for security reasons. It is normal for receiving addresses to change.
- If you have concerns about the address, you can verify it on a trusted blockchain explorer.
5. Can I use my Trezor with multiple wallets?
- Yes, you can use your Trezor device with multiple wallets that support the Trezor integration.
- Ensure that you follow the specific instructions provided by each wallet to set up and access your Trezor device.
6. How often should I update my Trezor firmware?
- It is recommended to regularly update your Trezor firmware to benefit from the latest security enhancements and features.
- Check the official Trezor website for any firmware update notifications or follow their recommended update frequency.
If you encounter any issues not covered here or have additional questions, it is recommended to visit the official Trezor support page or reach out to their customer support for further assistance. They have a dedicated team available to help resolve any queries or concerns you may have.