
What is a Trezor PIN?
A Trezor PIN is a personal identification number used to secure your Trezor hardware wallet. Trezor is one of the most popular and trusted hardware wallet brands in the cryptocurrency industry. It is designed to provide a secure way to store, manage, and access your digital assets, such as Bitcoin, Ethereum, and other cryptocurrencies.
The Trezor PIN acts as the first line of defense against unauthorized access to your wallet. It acts as a lock on your device, preventing anyone without the PIN from accessing your funds or making transactions. It adds an extra layer of security on top of the wallet’s physical security features, such as encryption and offline storage.
Think of your Trezor PIN as a digital key to your wallet. Without the correct PIN, it would be nearly impossible for someone to gain access to your funds even if they manage to physically get hold of your device.
Unlike traditional PINs, which usually consist of four digits, the Trezor PIN can be a combination of six to nine digits. This longer PIN length significantly increases the security level, making it harder for potential attackers to guess or crack your PIN.
It is worth noting that the Trezor PIN is not to be confused with your recovery seed, which is another crucial security feature. The recovery seed is a set of randomly generated words that can be used to restore access to your wallet in case your device is lost, damaged, or stolen. The PIN is an additional layer of protection specifically for accessing your wallet regularly.
Now that you understand the importance of a Trezor PIN, let’s explore why it is crucial to choose a strong PIN to further enhance the security of your cryptocurrency holdings.
Importance of a Strong PIN
Choosing a strong PIN for your Trezor hardware wallet is essential to ensure the security of your cryptocurrencies. Here are a few reasons why a strong PIN is crucial:
Protection against unauthorized access: A strong PIN acts as a barrier to prevent unauthorized individuals from accessing your wallet. It adds an extra layer of security beyond the physical protection provided by the Trezor device itself.
Defense against brute-force attacks: A weak PIN can be easily cracked using brute-force attacks, where automated software tries multiple combinations until the correct PIN is found. A strong PIN significantly increases the time and effort required to break into your wallet, making it highly unlikely for an attacker to succeed.
Securing your funds from physical theft: In case your Trezor device is lost or stolen, a strong PIN ensures that even if someone gets their hands on your hardware wallet, they won’t be able to access your funds without the PIN.
Protecting against unauthorized transactions: A strong PIN prevents unauthorized transactions from being carried out on your wallet. This is crucial as it ensures that only you have control over your funds and can avoid any potential fraudulent activity.
Peace of mind: By choosing a strong PIN, you can have peace of mind, knowing that your cryptocurrencies are well protected. This allows you to focus on your crypto investments and activities without constantly worrying about the security of your assets.
It’s important to note that selecting a strong PIN does not guarantee absolute security, but it significantly reduces the risk of unauthorized access to your Trezor wallet. It’s always recommended to use a combination of numbers, uppercase and lowercase letters, as well as special characters to create a strong and unique PIN.
Now that you understand the importance of a strong PIN, let’s delve into the process of choosing a secure PIN for your Trezor hardware wallet.
How to Choose a Secure PIN
Choosing a secure PIN is vital to protect your Trezor hardware wallet and the cryptocurrencies it holds. Follow these guidelines to create a strong and unique PIN:
Avoid common and predictable patterns: Steer clear of obvious choices such as sequential numbers (e.g., 123456) or repeating digits (e.g., 111111). These patterns are easy for attackers to guess or crack.
Use a mixture of numbers, uppercase and lowercase letters, and special characters: Creating a PIN that includes a variety of characters increases its complexity and makes it more challenging for potential attackers to guess. Mix numbers, letters (both uppercase and lowercase), and special characters to create a strong and unique combination.
Don’t use personal or easily guessable information: Avoid using easily guessable information like your birthdate, phone number, or address as your PIN. This information can be easily obtained by hackers or acquaintances trying to gain unauthorized access to your wallet.
Aim for a longer PIN: Longer PINs are generally more secure than shorter ones. Trezor allows PIN lengths between six and nine digits. Consider opting for the maximum length to maximize the security of your wallet.
Make it memorable, but not obvious: While it’s important to choose a secure PIN, it’s equally crucial to select one that you can remember. Create a memorable PIN by using a combination of meaningful numbers or letters to you, but avoid obvious choices that others can easily guess.
Regularly update your PIN: To stay ahead of potential threats, it’s a good practice to update your Trezor PIN periodically. By changing your PIN regularly, you add an extra layer of security and reduce the risk of your PIN being compromised.
Remember, your PIN should be unique to your Trezor device and not shared across multiple accounts or services. By following these guidelines, you can create a strong and secure PIN that enhances the protection of your Trezor hardware wallet and the cryptocurrencies it safeguards.
Now that you know how to choose a secure PIN, let’s move on to the process of setting up your Trezor PIN.
How to Set Up Your Trezor PIN
Setting up your Trezor PIN is a straightforward process that can be completed in just a few steps. Follow the instructions below to secure your Trezor hardware wallet with a PIN:
- Power Up Your Trezor Device: Connect your Trezor device to your computer or mobile device using the provided USB cable. Ensure that your Trezor is powered on.
- Connect Your Trezor to a Computer or Mobile Device: Once your Trezor device is powered up, plug it into the USB port of your computer or connect it to your mobile device using an OTG cable or adapter.
- Launch the Trezor Wallet Interface: Open your web browser and visit the Trezor website. Click on the “Get Started” or “Access Wallet” button to launch the Trezor wallet interface.
- Create a New Wallet or Access Your Existing Wallet: Choose whether you want to create a new wallet or access your existing one. If you’re setting up your Trezor for the first time, select the option to create a new wallet.
- Enter Your PIN: You will be prompted to set up a PIN for your Trezor. Enter your desired PIN using the device’s buttons. Remember to follow the guidelines for creating a secure PIN mentioned earlier in this article.
- Confirm Your PIN: After entering your PIN, you will be asked to confirm it. Re-enter your PIN to ensure accuracy.
- Backup Your Recovery Seed: Once you have set up your PIN, the Trezor wallet interface will guide you through the process of backing up your recovery seed. Follow the instructions carefully and ensure that you store your recovery seed in a safe and secure location.
That’s it! You have successfully set up your Trezor PIN. Now, every time you want to access your Trezor wallet, you will be required to enter your PIN to ensure the security of your cryptocurrencies.
It’s important to note that if you enter the wrong PIN multiple times, your Trezor device may initiate a security feature called a “wipe” or “factory reset.” This will erase all data on your device, including your wallet and funds. Therefore, it’s crucial to remember your PIN or keep it stored securely.
In the next section, we will provide some tips for remembering your Trezor PIN to avoid any potential lockouts or loss of access to your wallet.
Step 1: Power Up Your Trezor Device
The first step in setting up your Trezor hardware wallet is to power up the device. Follow these instructions to ensure a successful power-up:
- Gather the necessary components: Ensure that you have all the required components for your Trezor device, including the Trezor device itself, the USB cable provided with your Trezor, and a computer or mobile device.
- Connect the USB cable to your Trezor: Take the USB cable that came with your Trezor and plug one end into the USB port on your computer or the charging port on your mobile device. The other end of the cable has a micro-USB or USB-C connector that will plug into your Trezor device.
- Plug in your Trezor: Take the USB end of the cable and insert it into the corresponding port on your Trezor device. Ensure that the connection is secure.
- Power on your Trezor: Once the Trezor device is connected to your computer or mobile device and properly plugged in, it should power on automatically. If it doesn’t turn on, press and hold the power button on the device for a few seconds to initiate the power-up process.
- Check for the device’s display: After powering on, the Trezor device’s display should come to life, showing the Trezor logo or a prompt for further action. This indicates that the device is successfully powered up.
It’s important to note that Trezor devices have a built-in battery that gets charged when connected to a power source. This battery ensures that the device remains powered on even when disconnected from the USB cable for a short period.
Once you have successfully powered up your Trezor hardware wallet, you can move on to the next step of connecting it to a computer or mobile device. This will allow you to access the Trezor wallet interface and proceed with the setup process.
Note that the power-up process may vary slightly depending on the specific Trezor model you have. Always refer to the official documentation provided by Trezor for detailed instructions specific to your device.
In the next section, we will guide you through the process of connecting your Trezor device to a computer or mobile device.
Step 2: Connect Your Trezor to a Computer or Mobile Device
After successfully powering up your Trezor device, the next step in setting up your Trezor hardware wallet is to connect it to a computer or mobile device. Follow these instructions to establish a connection:
- Gather the necessary components: Ensure that you have your Trezor device, the USB cable that came with it, and a computer or mobile device ready for the connection.
- Choose the appropriate USB interface: Depending on the model of your Trezor device and the device you are connecting it to, you might need to use a USB-A to micro-USB or USB-C cable or an OTG (On-The-Go) adapter. Choose the cable or adapter that is compatible with both your Trezor and your computer or mobile device.
- Plug in the USB cable: Take one end of the USB cable and plug it into the corresponding USB port on your computer or the charging port on your mobile device. If you are using an OTG adapter, connect the USB end of the cable to the adapter, and then plug the adapter into your mobile device.
- Connect your Trezor: Take the other end of the USB cable and plug it into the USB port on your Trezor device. Ensure that the connection is secure.
- Wait for the device to be recognized: Once the Trezor device is properly connected to your computer or mobile device, it should be automatically recognized by the operating system. You might see a notification or pop-up indicating that a new device has been connected.
- Install any necessary drivers or apps: In some cases, your computer or mobile device might require drivers or apps to be installed to properly communicate with the Trezor device. Follow the on-screen prompts to install any necessary software.
Once your Trezor device is successfully connected to your computer or mobile device, you can proceed to the next step of launching the Trezor wallet interface. This will allow you to access and interact with your Trezor wallet.
Always ensure that you use official and trusted software or apps when connecting your Trezor device. Avoid using unknown or suspicious software that may compromise the security of your hardware wallet.
In the next section, we will walk you through the process of launching the Trezor wallet interface to continue setting up your Trezor hardware wallet.
Step 3: Launch the Trezor Wallet Interface
Once you have successfully connected your Trezor hardware wallet to your computer or mobile device, the next step is to launch the Trezor wallet interface. By accessing this interface, you will be able to set up and manage your Trezor wallet. Follow these steps to launch the interface:
- Open your web browser: Ensure that you have a web browser installed on your computer or mobile device. Commonly used browsers include Google Chrome, Mozilla Firefox, and Safari.
- Visit the official Trezor website: In the address bar of your web browser, enter the official Trezor website URL: https://trezor.io/. Press Enter to load the website.
- Find the access or get started button: Once the Trezor website loads, look for a button that says “Access Wallet” or “Get Started.” Click on this button to proceed to the Trezor wallet interface.
- Wait for the interface to load: After clicking on the “Access Wallet” or “Get Started” button, the Trezor wallet interface will begin to load. Depending on your internet connection speed, this may take a few seconds.
- Ensure a secure connection: Look for the padlock icon in the web browser’s address bar, indicating that the connection to the Trezor wallet interface is secure. This icon confirms that you are accessing the authentic Trezor website and helps protect your privacy and security.
- Follow any on-screen instructions: Once the Trezor wallet interface has loaded, you may be prompted to select a language or make some initial configuration choices. Follow any on-screen instructions to proceed with the setup process.
It’s important to access the Trezor wallet interface from the official Trezor website to ensure that you are using genuine software. As a security measure, always double-check the URL and verify that you are visiting the official website before entering any sensitive information.
Once you have launched the Trezor wallet interface, you will be one step closer to completing the setup of your Trezor hardware wallet. In the next step, we will guide you through the process of creating a new wallet or accessing your existing wallet.
Step 4: Create a New Wallet or Access Your Existing Wallet
After launching the Trezor wallet interface, you have the option to either create a new wallet or access your existing wallet. Follow these steps to proceed with the appropriate choice:
- On the Trezor wallet interface: Once the Trezor wallet interface has loaded, you will be presented with options to create a new wallet or access an existing wallet. Take a moment to familiarize yourself with the interface.
- Create a new wallet: If you are setting up your Trezor device for the first time or want to create an additional wallet, click on the option to create a new wallet. This will guide you through the process of generating a new wallet and recovery seed.
- Access an existing wallet: If you already have a Trezor wallet associated with your device and want to access it, click on the option to access an existing wallet. You will be prompted to enter your recovery seed, which is a crucial step to restore access to your wallet.
- Follow the on-screen instructions: Depending on your chosen option (creating a new wallet or accessing an existing wallet), follow the on-screen instructions provided by the Trezor wallet interface. These instructions will guide you through the specific steps required for your selection.
- Enter any required information: During the wallet creation or wallet access process, you may be prompted to enter additional information such as a wallet name, passphrase, or PIN. Follow the instructions carefully and provide the necessary details as requested.
- Confirm your selections: Once you have followed the necessary steps and entered the required information, review your selections and confirm that everything is accurate. Double-check that you have properly recorded your recovery seed if it was provided during the setup process.
Creating a new wallet gives you the opportunity to generate a new set of keys and recovery seed, which is used to restore access to your wallet in case of device loss or failure. Accessing an existing wallet allows you to regain access to your funds using the recovery seed associated with that specific wallet.
It’s important to follow the instructions provided by the Trezor wallet interface carefully to ensure the successful creation or access of your wallet. Take your time during this step to guarantee the accuracy and security of your wallet setup.
In the next step, we will guide you through the process of entering your Trezor PIN, which adds an additional layer of security to your wallet.
Step 5: Enter Your PIN
Entering your PIN is a vital step in securing your Trezor hardware wallet. Follow these instructions to successfully enter your PIN:
- On the Trezor wallet interface: After creating a new wallet or accessing your existing wallet, the Trezor wallet interface will prompt you to enter your PIN.
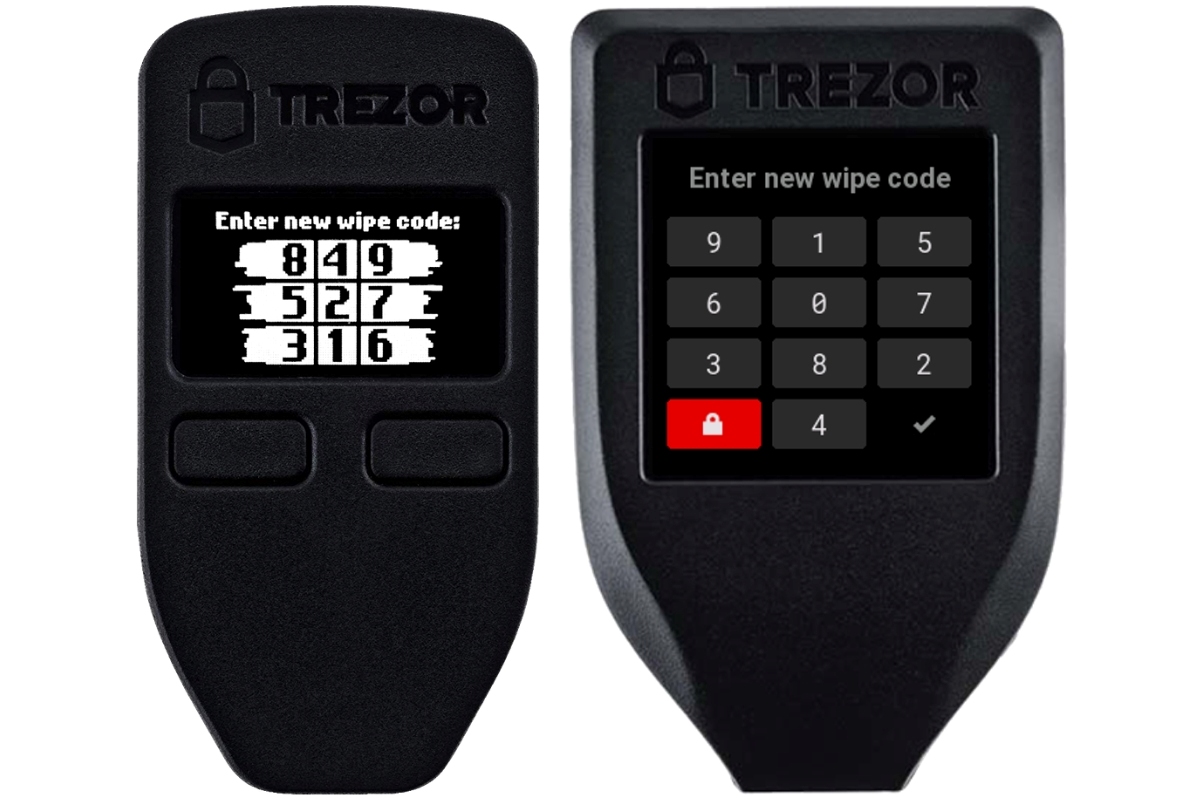
- On your Trezor device: Look at the Trezor device’s display, where you will see a numerical keypad with randomized positions. The numbers will appear in a different order each time.
- On your computer or mobile device: Instead of typing your PIN on your computer or mobile device’s keyboard, use your mouse or finger to click on the corresponding numbers displayed on the Trezor wallet interface.
- Enter your PIN: Look at the numbers displayed on your Trezor device and click or tap on the corresponding numbers shown on the wallet interface in the correct order. Take your time to ensure accuracy.
- Complete the PIN entry: After entering your PIN, click or tap on the “Enter” or “Submit” button on the Trezor wallet interface to complete the PIN entry process.
- Be cautious to protect your PIN: Always be cautious and make sure no one is watching you while entering your PIN. Keep your PIN private and do not share it with anyone. Remember, the PIN is the first line of defense against unauthorized access to your wallet.
It’s important to note that entering the correct PIN is crucial to access your Trezor wallet. If you enter the wrong PIN multiple times, your Trezor device may initiate a security feature called a “wipe” or “factory reset.” This will erase all data on your device, including your wallet and funds. Therefore, it’s essential to remember your PIN or keep it stored securely.
Once you have successfully entered your PIN, you will gain access to your Trezor wallet and be able to manage your cryptocurrencies securely. In the next step, we will discuss how to confirm your PIN to finalize the setup process.
Step 6: Confirm Your PIN
Confirming your PIN is an important step to ensure the accuracy of your entry and complete the setup of your Trezor hardware wallet. Follow these instructions to successfully confirm your PIN:
- On the Trezor wallet interface: After entering your desired PIN, the Trezor wallet interface will present you with a confirmation screen.
- On your Trezor device: Look at the device’s display, which will show a numerical keypad similar to the one presented during the PIN entry. The position of the numbers will be randomized.
- On your computer or mobile device: Similar to the PIN entry step, use your mouse or finger to click or tap on the corresponding numbers displayed on the Trezor wallet interface, matching the positions shown on your Trezor device.
- Confirm your PIN: Verify that the numbers you select on the Trezor wallet interface match the numbers displayed on your Trezor device. Take your time to ensure accuracy.
- Finalize the PIN confirmation: After confirming that the selected numbers on the wallet interface match the numbers on your Trezor device’s display, click or tap on the “Confirm” or “Submit” button on the interface to finalize the PIN confirmation process.
- Double-check your PIN: Before proceeding, take a moment to double-check that your Trezor device’s display shows the same PIN that you entered and confirmed on the wallet interface. This ensures that there were no errors during the entry and confirmation process.
Confirming your PIN is a vital step that adds an extra layer of security to your Trezor hardware wallet. It helps to prevent errors and ensures that your PIN is accurately set up for future use.
Once you have successfully confirmed your PIN, you can proceed with the next step of the setup process, which involves backing up your recovery seed. This is a critical step for safeguarding your wallet and accessing your funds in case of any unforeseen circumstances.
Step 7: Backup Your Recovery Seed
Backing up your recovery seed is a crucial step in securing your Trezor hardware wallet and ensuring you can regain access to your funds in case of device loss, damage, or theft. Follow these instructions to properly backup your recovery seed:
- On the Trezor wallet interface: After confirming your PIN, the Trezor wallet interface will prompt you to back up your recovery seed.
- Prepare a pen and paper: Get a pen and a piece of paper ready to write down your recovery seed. It’s important to use a pen rather than a pencil to prevent any accidental erasure or fading over time.
- Read the instructions: Carefully read the instructions and guidelines provided by the Trezor wallet interface regarding the recovery seed backup process.
- Write down the recovery seed: Following the instructions displayed on the Trezor wallet interface, write down each word of your recovery seed on the piece of paper. Take your time to ensure accuracy, legibility, and proper order.
- Verify the recovery seed: After writing down the recovery seed, verify its correctness by re-entering each word into the Trezor wallet interface. This is an additional step to ensure that you have correctly recorded your recovery seed.
- Store your recovery seed securely: Once you have confirmed the accuracy of your recovery seed, store it in a safe and secure location. Consider using a fireproof, waterproof, and tamper-resistant device, such as a safe or a safety deposit box.
- Keep your recovery seed offline: It’s important to keep your recovery seed completely offline and away from any digital or online environments. Avoid storing it on your computer, mobile device, or cloud storage, as these can be vulnerable to hacking or data breaches.
- Do not share your recovery seed: Your recovery seed is the key to accessing your wallet and funds. Never share it with anyone, as it would give them complete control over your cryptocurrencies.
Backing up your recovery seed is one of the most critical steps in securing your Trezor hardware wallet. It serves as a backup copy of your wallet, allowing you to restore access to your funds even if your device is lost, damaged, or stolen.
Remember to regularly check the condition of your recovery seed and update it if necessary. If you ever need to restore your wallet using your recovery seed, follow the instructions provided by the Trezor wallet interface.
Congratulations! You have successfully completed the setup process for your Trezor hardware wallet. Your funds are now securely stored, and you can confidently manage your cryptocurrencies using your Trezor device.
In the next section, we will provide some helpful tips for remembering your PIN and ensuring smooth and secure access to your Trezor wallet.
Tips for Remembering Your PIN
Remembering your Trezor PIN is crucial for accessing your hardware wallet and ensuring the security of your cryptocurrencies. Here are some helpful tips to aid in remembering your PIN:
- Create a memorable pattern: Formulate a pattern that relates to a personal story or phrase. For example, you can use the first letter of each word in a memorable sentence or a significant date.
- Avoid commonly used PINs: Steer clear of easily guessable PINs, such as sequential numbers (e.g., 123456) or repeated digits (e.g., 111111). These patterns can make your wallet vulnerable to brute-force attacks.
- Utilize muscle memory: Practice entering your PIN regularly to develop muscle memory. The physical action of entering your PIN repeatedly can help engrave it in your mind.
- Use an association technique: Associate each digit of your PIN with something memorable. For example, you can associate numbers with corresponding objects or people in your life.
- Split your PIN into segments: If your Trezor device supports a longer PIN length, you can split it into manageable segments that are easier to remember. Just ensure that each segment still adheres to the principles of a strong PIN.
- Write yourself reminders: Jot down hints or prompts that can serve as memory triggers. However, be cautious not to write down your complete PIN or store it in an easily accessible location.
- Avoid sharing or storing your PIN electronically: Keep your PIN confidential and avoid sharing it with anyone. Additionally, refrain from storing your PIN on digital platforms or in online note-taking apps to minimize the risk of potential hacks or data breaches.
- Develop a passphrase: Consider creating a passphrase to supplement your PIN. This can be an additional layer of security that adds complexity to gaining access to your Trezor wallet.
- Practice good security habits: Maintain good security practices by ensuring that your computer and mobile devices are protected with strong passwords, updated operating systems, and reputable security software.
It’s essential to strike a balance between creating a unique and memorable PIN while prioritizing security. By implementing these tips, you can increase your chances of remembering your Trezor PIN without compromising its strength.
Remember, your PIN serves as a critical safeguard for your Trezor wallet and the cryptocurrencies it protects. Take the time to develop a memorization strategy that works best for you to ensure secure and convenient access to your funds.
In the next section, we will address some frequently asked questions related to Trezor PINs to provide additional insights and clarity.
Frequently Asked Questions about Trezor PINs
Here are answers to some commonly asked questions regarding Trezor PINs:
- Can I change my Trezor PIN?
Yes, you can change your Trezor PIN at any time. Simply access the Trezor wallet interface, navigate to the settings or security section, and follow the instructions to change your PIN. It’s a good practice to update your PIN regularly to enhance the security of your wallet. - What happens if I forget my Trezor PIN?
If you forget your Trezor PIN, don’t panic. Your funds are not lost. However, entering your PIN incorrectly multiple times can trigger a “wipe” or “factory reset” feature, which erases all data on your device. To regain access, you can initiate the recovery process using your recovery seed, so it’s crucial to keep your recovery seed stored securely. - How can I avoid forgetting my Trezor PIN?
To avoid forgetting your Trezor PIN, it’s essential to create a memorable but secure PIN using mnemonic techniques, association, or pattern formation. Practice entering your PIN regularly to reinforce your memory. Consider using a passphrase along with your PIN as an additional layer of security and memorize it using similar techniques. - Can I change my Trezor PIN remotely?
No, it is not possible to change your Trezor PIN remotely. To change your PIN, you need physical access to your Trezor device and must interact with the Trezor wallet interface on a connected computer or mobile device. - Can someone access my Trezor wallet if they know my PIN?
Knowing your Trezor PIN alone is insufficient for someone to access your wallet and funds. They would still require physical access to your Trezor device, as well as any additional security measures you have set up, such as a passphrase or the recovery seed. Always keep your Trezor device physically secure and your recovery seed confidential. - What should I do if I suspect someone knows my Trezor PIN?
If you suspect that someone knows your Trezor PIN, it’s important to take immediate action. First, ensure the security of your Trezor device by changing your PIN. Additionally, consider using a passphrase and monitor your wallet for any unauthorized activity. If you have concerns about the security of your funds, seek assistance from the official Trezor support channels.
Trezor PINs play a crucial role in securing your hardware wallet and protecting your cryptocurrencies. By understanding how to manage and keep your PIN secure, you can confidently use your Trezor device and protect your digital assets.
If you have further questions or concerns regarding Trezor PINs, it’s recommended to refer to the official Trezor documentation or reach out to their support team for assistance.