
System Requirements
Before diving into the exciting world of virtual reality with your HTC Vive headset, it’s important to ensure that your system meets the necessary requirements. These specifications are crucial for a seamless VR experience and optimal performance. Here are the minimum and recommended system requirements for the HTC Vive:
Minimum System Requirements:
- Operating System: Windows 7 SP1 or newer
- Processor: Intel Core i5-4590 or AMD FX 8350
- RAM: 4GB or more
- Graphics Card: NVIDIA GeForce GTX 970 or AMD Radeon R9 290 or better
- Video Output: HDMI 1.4 or DisplayPort 1.2 or newer
- USB Port: 1x USB 2.0 or newer
Recommended System Requirements:
- Operating System: Windows 10
- Processor: Intel Core i5-4590 or AMD FX 8350
- RAM: 8GB or more
- Graphics Card: NVIDIA GeForce GTX 1070 or AMD Radeon RX 480 or better
- Video Output: HDMI 1.4 or DisplayPort 1.2 or newer
- USB Port: 1x USB 3.0 or newer
Ensure that your computer meets these requirements to guarantee smooth and immersive virtual reality experiences. Additionally, make sure that you have sufficient space in your room to move around comfortably while wearing the headset.
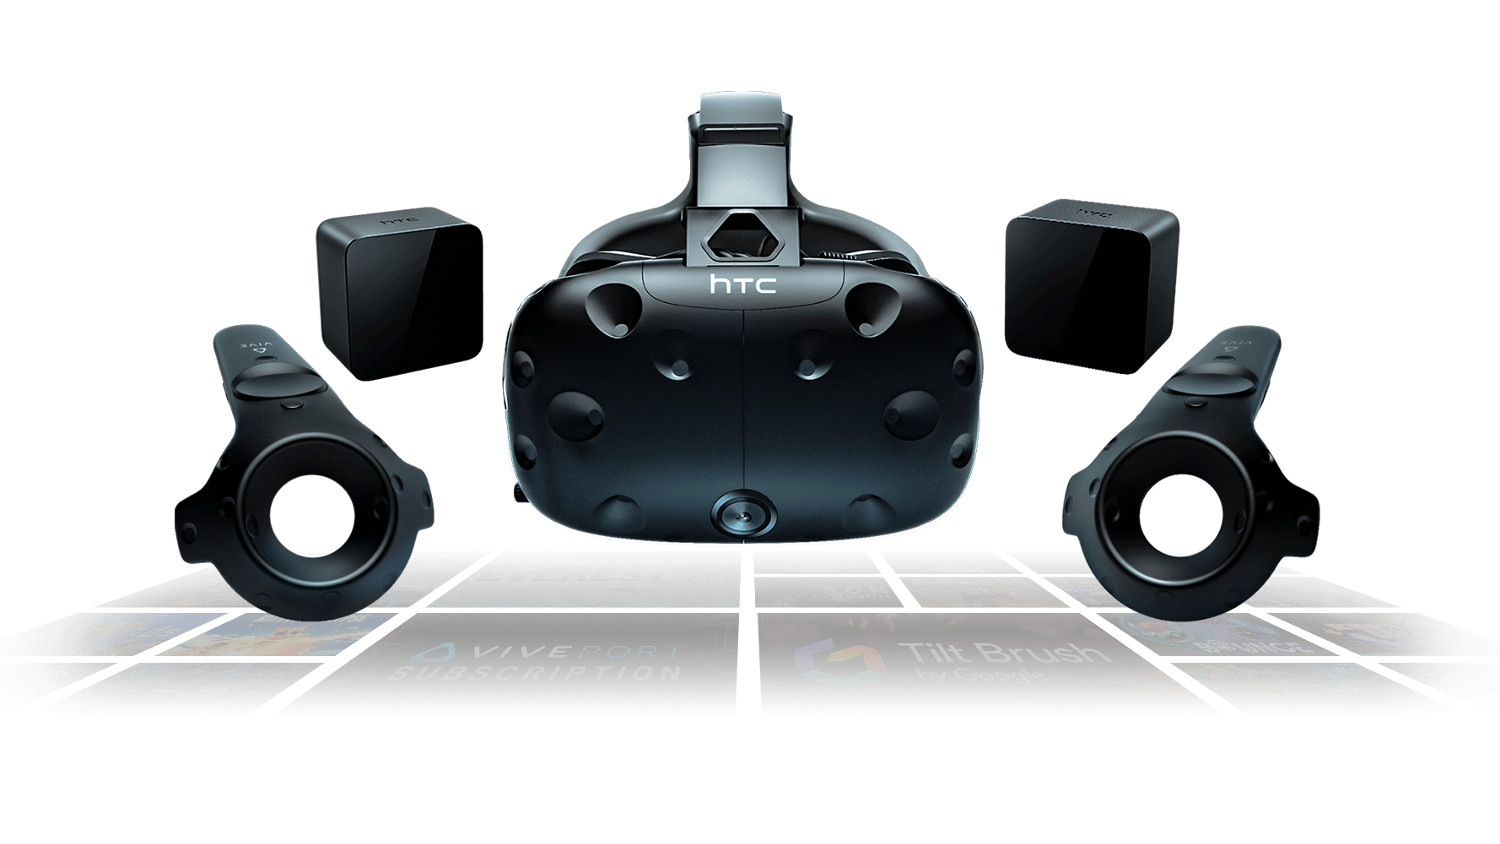
Unboxing the HTC Vive
When you receive your HTC Vive headset, unboxing it is an exciting and important step towards enjoying the immersive world of virtual reality. Here’s a guide on what you can expect to find inside the box and how to set it up:
1. Open the box: Carefully open the packaging and remove the contents. Inside, you will find the following:
- HTC Vive headset
- Two wireless controllers
- Two base stations
- Mounting kit for the base stations
- Link box
- Link box power adapter
- HDMI cable
- USB cable
- Earbuds
- Documentation and setup guide
2. Familiarize yourself with the components: Take a moment to examine each component and get a sense of how they fit together. This will help you during the setup process.
3. Prepare your play area: Clear a space in your room where you can set up the base stations and move around comfortably. Make sure there are no obstacles that could pose a safety risk.
4. Connect the link box: Locate the link box and connect it to your PC using the provided HDMI and USB cables. This box acts as a hub for connecting your HTC Vive headset to your computer.
5. Charge the controllers: Before using the wireless controllers, ensure they are charged by connecting them to your PC or using the included power adapter.
6. Connect the headset: Connect the headset to the link box using the provided cables. Make sure to match the HDMI and USB connections correctly.
7. Put on the headset: Adjust the straps on the headset to fit comfortably on your head. The lenses should be aligned with your eyes for optimal viewing.
8. Turn on the system: Once everything is connected, power on your PC and follow the on-screen instructions to install the necessary software and drivers for the HTC Vive.
With the HTC Vive unboxed and connected, you’re all set to explore virtual reality. Take your time to familiarize yourself with the controls and enjoy the immersive experiences that await you.
Connecting the Cables
In order to set up your HTC Vive and ensure proper functionality, it is crucial to connect the necessary cables correctly. Here’s a step-by-step guide on how to connect the cables for your HTC Vive:
1. Locate the Link Box: The Link Box is a crucial component of the HTC Vive setup. It acts as a bridge between your headset and your computer. Find a suitable location for the Link Box that is within reach of your PC and has enough space for the necessary cables.
2. Connect the Power Adapter: Take the power adapter that came with your HTC Vive and plug it into the power socket of the Link Box. Ensure that it is securely connected.
3. Plug in the Headset: Connect one end of the provided HDMI cable to the HDMI port on the Link Box and the other end to the HDMI port on your computer’s graphics card. Additionally, connect the USB cable from the Link Box to a USB port on your computer.
4. Position the Base Stations: The base stations are essential for tracking your movements in virtual reality. Place them in opposite corners of your play area, preferably mounted on stable surfaces or using the included mounting kit. Ensure that they are positioned at a height of around 6 feet and angled downward.
5. Connect the Base Stations to Power: Connect the power cables of each base station to a power outlet. Make sure they are securely plugged in and that the base stations have a clear line of sight with each other.
6. Turn on the System: After connecting all the necessary cables, power on your PC and wait for it to fully boot up. The Link Box will light up when it receives power, indicating that it is connected correctly.
7. Check the LED Status: Look at the LED lights on the base stations. If they are solid green, it means that they are tracking and functioning properly. If the LED is blinking or not lighting up, check the position and angle of the base stations and ensure they are connected to power.
By following these steps, you will have successfully connected the necessary cables for your HTC Vive setup. This will ensure that your headset and base stations communicate effectively, allowing for a seamless and immersive virtual reality experience.
Setting up the Base Stations
The base stations are crucial components of your HTC Vive setup as they provide the tracking system that allows for accurate movement and positioning within the virtual environment. Here’s a step-by-step guide on how to set up the base stations:
1. Choose the Right Location: Select suitable locations for your base stations, preferably in opposite corners of your play area. Ensure that there are no obstructions blocking the line of sight between the base stations.
2. Mount the Base Stations: If desired, use the included mounting kit to secure the base stations to walls or tripods. Make sure they are stable and positioned at a height of around 6 feet, angled downward approximately 30-45 degrees.
3. Connect the Base Stations to Power: Plug the power cables for each base station into a power outlet. Ensure that the cables are properly connected and that the base stations receive a steady power supply.
4. Check the LED Status: Once the base stations are powered on, check the LED status. A solid green light indicates that they are functioning correctly. If the LED is blinking or not lit, double-check the power connection and angle of the base stations.
5. Sync the Base Stations: One base station will act as the “master” while the other will be the “slave.” To sync them, use a micro-USB cable to connect the “master” base station to your computer. The “master” base station will emit a pulsing blue light, indicating that it is in syncing mode.
6. Install the Bluetooth Driver (Optional): If you want to power the base stations on and off automatically, install the SteamVR Bluetooth Driver. This allows the base stations to communicate with your computer via Bluetooth.
7. Test the Tracking: Once the base stations are set up and synced, put on your HTC Vive headset and launch SteamVR. Move around in your play area and verify that the tracking is accurate. If you notice any issues, make small adjustments to the base station positions or angles.
Setting up the base stations correctly is crucial for ensuring precise and reliable tracking within your virtual reality experiences. Take the time to position them properly and test the tracking to optimize your HTC Vive setup.
Installing the Vive Software
Before you can fully enjoy your HTC Vive headset, it is essential to install the necessary software on your computer. The Vive software provides the required drivers, firmware updates, and the SteamVR platform for accessing a vast library of virtual reality content. Here’s a step-by-step guide on installing the Vive software:
1. Connect the Link Box: Ensure that your HTC Vive Link Box is connected to your computer using the provided HDMI and USB cables.
2. Power On the Link Box: Plug the power adapter into the Link Box and connect it to a power outlet. The power indicator on the Link Box should turn on.
3. Download the Vive Software: Visit the official Vive website and navigate to the Downloads section. Locate the Vive software and click on the download link that corresponds to your operating system.
4. Run the Installer: Once the Vive software has finished downloading, locate the installer file and double-click on it to run the installation process. Follow the on-screen instructions to install the software.
5. Accept the License Agreement: During the installation process, you will be presented with a license agreement. Read through it and click on the “Accept” button to proceed.
6. Select the Installation Location: Choose the desired installation location for the Vive software. The default location is typically fine, but you can select a different directory if desired. Click “Next” to continue.
7. Install the Software: The installer will now proceed to install the Vive software on your computer. This may take a few minutes, so be patient and allow the installation to complete.
8. Launch SteamVR: Once the installation is finished, you can launch SteamVR by clicking on the corresponding icon on your desktop or by accessing it through the Steam client.
9. Update Firmware and Drivers: Upon launching SteamVR, it may prompt you to update the firmware and drivers for your HTC Vive components. Follow the prompts to complete these updates.
10. Verify the Installation: After the updates are installed, the SteamVR status window should appear, indicating that the Vive software is installed correctly. Ensure that all the connected components are detected and functioning properly.
By following these steps, you can successfully install the Vive software and ensure that your HTC Vive headset is ready to deliver a remarkable virtual reality experience. Enjoy exploring the vast array of VR content available through SteamVR!
Pairing the Controllers
Once you have set up your HTC Vive headset and installed the necessary software, the next step is to pair the controllers with your system. The controllers are your key to interacting with the virtual world, allowing you to navigate, grasp objects, and perform actions. Here’s a step-by-step guide on how to pair the controllers:
1. Power on the Controllers: Press and hold the system button located above the trackpad on each controller to turn them on. The LED light on the controller will blink slowly, indicating that it is in pairing mode.
2. Open the SteamVR Menu: Put on your HTC Vive headset and ensure that SteamVR is running on your computer. Press the system button on one of the controllers to open the SteamVR menu in your virtual environment.
3. Select the Pair Controller Option: Using the other controller or activating the pointer in your VR environment, navigate to the Pair Controller option in the SteamVR menu. Click on it to initiate the pairing process.
4. Follow the On-Screen Prompts: The SteamVR menu will prompt you to follow specific actions to pair the controllers. This may involve pressing certain buttons or touching the appropriate areas on the trackpad. Pay attention to the instructions provided and perform the necessary actions to pair each controller.
5. Verify the Pairing: After completing the pairing process for both controllers, you should see their icons displayed as connected in the SteamVR menu. Additionally, the LED lights on the controllers will turn solid green, indicating that they are successfully paired with your system.
6. Test the Controllers: Take a moment to test the functionality of the controllers. Move them around, press buttons, and interact with objects in your virtual environment. Ensure that the movements and button inputs are accurately reflected in the virtual world.
7. Recharging the Controllers: When the battery level of the controllers is low, connect them to your computer or a power source using the included USB cables to recharge. The LED lights on the controllers will indicate the charging status.
By following these steps, you can successfully pair the controllers with your HTC Vive system. Enjoy the freedom of movement and interaction that the controllers provide in your virtual reality experiences!
Adjusting the Headset for Comfort
To fully enjoy your HTC Vive virtual reality experience, it’s essential to ensure that the headset is properly adjusted for comfort. Finding the right fit will not only enhance your immersion but also prevent any discomfort during extended gaming sessions. Here are some tips on how to adjust the headset for optimal comfort:
1. Loosen the Straps: Begin by loosening all the straps on the headset. This will make it easier to put on and adjust the headset accordingly.
2. Put on the Headset: Place the headset over your head, ensuring that the display rests comfortably in front of your eyes. Adjust the straps so that the headset feels secure but not overly tight. The top strap should go over the crown of your head, while the side straps should sit just above your ears.
3. Adjust the Side Straps: Tighten or loosen the side straps until the headset feels balanced and secure on your head. Avoid making them overly tight, as this can lead to discomfort and pressure on your face.
4. Position the Display: Gently move the display portion of the headset up or down until it aligns properly with your eyes. The lenses should be centered over each eye and at a comfortable distance from your face. Take a moment to ensure that you have a clear and focused view of the virtual environment.
5. Check the IPD Adjustment: The HTC Vive offers IPD (Interpupillary Distance) adjustment to accommodate different eye distances. Locate the IPD knob on the bottom-right side of the headset and rotate it to the appropriate setting for your eyes. This will help ensure that the virtual images appear sharp and in proper alignment.
6. Adjust the Headset Weight Distribution: If you find that the front of the headset is placing too much pressure on your face, you can adjust the weight distribution by gently tightening or loosening the top strap. Experiment with different tension levels until you find the most comfortable fit.
7. Take Breaks and Make Adjustments: During your VR sessions, it’s important to take periodic breaks and make any necessary adjustments to ensure ongoing comfort. If you start to feel discomfort or your eyes become fatigued, take a short break, and make any required adjustments to the headset positioning and straps.
By taking the time to properly adjust your HTC Vive headset, you can optimize comfort and minimize any discomfort during your virtual reality experiences. Remember, everyone’s preferences and head shapes are different, so don’t hesitate to experiment with different adjustments until you find the most comfortable fit for you.
Starting SteamVR
After setting up your HTC Vive headset and connecting all the necessary components, it’s time to start SteamVR and enter the captivating world of virtual reality. SteamVR is the platform that powers the HTC Vive and provides access to a vast library of immersive VR experiences. Here’s how to get started:
1. Ensure All Connections are Secure: Before launching SteamVR, double-check that all the cables and connections from your HTC Vive headset, base stations, and controllers are securely connected to your computer and power outlets. This will ensure a smooth and uninterrupted VR experience.
2. Launch Steam: Open the Steam application on your computer. If you don’t have Steam installed, you can download it from the official Steam website and follow the installation instructions.
3. Log into Your Steam Account: If you are not automatically logged in, enter your Steam account credentials to log in. If you don’t have a Steam account, you will need to create one to access the SteamVR platform.
4. Enable SteamVR: Once you are logged into Steam, navigate to the Library section and search for “SteamVR” in the search bar. Click on the “SteamVR” application to access its page.
5. Install SteamVR: If you haven’t installed SteamVR yet, click the “Install” button on the SteamVR page to initiate the download and installation process. This may take a few minutes depending on your internet connection speed.
6. Launch SteamVR: Once the installation is complete, click the “Play” or “Start” button to launch SteamVR. This will activate the VR mode on your HTC Vive headset and bring you to the SteamVR home screen.
7. Check the Status: On the SteamVR home screen, you will see various icons and displays indicating the status of your HTC Vive, base station tracking, and controller pairing. Ensure that all the components are connected and functioning properly.
8. Explore the SteamVR Environment: Once you have verified the status, you can start exploring the SteamVR environment. Use the controllers to interact with objects, navigate menus, and access VR experiences available in your Steam library.
9. Choose and Launch VR Experiences: From the SteamVR home screen or the Steam library, browse through the vast collection of VR experiences and games. Select the desired experience and follow the prompts to launch it and immerse yourself in virtual reality.
By following these steps, you can successfully start SteamVR and begin your virtual reality journey with your HTC Vive headset. Enjoy exploring a wide range of immersive experiences and games in the captivating world of VR!
Running the Room Setup
Running the room setup process is essential for creating a virtual environment that matches the physical space you’re using for your HTC Vive. This ensures accurate tracking and enhances your overall VR experience. Here’s a step-by-step guide on how to run the room setup:
1. Start SteamVR: Begin by launching SteamVR on your computer. Ensure that your HTC Vive headset, base stations, and controllers are all connected and functioning properly.
2. Navigate to the Dashboard: While wearing your HTC Vive headset, press the system button on one of the controllers to bring up the SteamVR Dashboard. This is the main control panel for managing your VR experience.
3. Access the Room Setup: From the SteamVR Dashboard, navigate to the settings tab, usually represented by a gear icon. Within the settings menu, you should see an option for room setup or room calibration.
4. Follow the On-Screen Prompts: Click on the room setup or room calibration option, and you will be guided through a series of on-screen prompts. These prompts will help you define the boundaries of your play area and optimize the tracking of your HTC Vive.
5. Choose the Room Shape: During the room setup process, you will be prompted to choose the shape of your play area. The most common options are rectangular or square, but you can choose a custom shape if needed.
6. Define the Play Area Boundaries: Follow the instructions provided to physically trace the boundaries of your play area using one of the HTC Vive controllers. Walk around the perimeter of your desired play area while pressing the controller against the walls or edges.
7. Set the Floor Level: After defining the boundaries, you will be prompted to set the floor level. Place one of the controllers on the floor and press the trigger button to confirm the floor height.
8. Confirm and Save the Setup: Once you have defined the room shape, boundaries, and floor level, review the setup information and ensure that everything is accurate. Save the room setup, and SteamVR will calibrate the tracking system based on your defined play area.
9. Test the Tracking: After completing the room setup, put on your HTC Vive headset, and test the tracking by moving around within your play area. Ensure that the virtual objects and your movements accurately match in the virtual environment.
By following these steps, you can successfully run the room setup for your HTC Vive. This process optimizes tracking and ensures an immersive and seamless virtual reality experience tailored to your physical space.
Troubleshooting Common Issues
While the HTC Vive provides an incredible virtual reality experience, you might encounter some common issues along the way. Here are some troubleshooting tips to help you resolve these issues and get back to enjoying your VR adventures:
1. Tracking Loss or Drifting: If you notice tracking loss or drifting, ensure that your base stations are properly positioned and angled towards your play area. Clean the base station lenses with a microfiber cloth to remove any dust or smudges that might affect tracking. Also, check for any reflective surfaces in your room that could interfere with the tracking system.
2. Controller Syncing Issues: If you’re having trouble syncing your controllers, ensure that they are fully charged and powered on. Restart both the controllers and the headset by turning them off and on again. Use the SteamVR menu to re-pair the controllers, following the on-screen instructions carefully.
3. Display Issues: If you’re experiencing display issues such as a blank or flickering screen, ensure that all cables are securely connected to the Link Box and your computer. Try disconnecting and reconnecting the HDMI and USB cables. Restart your computer and SteamVR to see if the issue persists.
4. USB Connection Problems: If you encounter USB connection issues, try using different USB ports on your computer. Make sure that you have both the Link Box and the headset connected to USB 3.0 ports for optimal performance. You may also need to update your USB drivers or consider using a powered USB hub for additional power.
5. Audio Troubles: If you’re not hearing any audio through the HTC Vive, ensure that the audio is not muted on your computer and that the speakers or headphones are connected correctly to the Link Box. In the SteamVR settings, check the audio settings to ensure the correct audio output device is selected.
6. Software and Firmware Updates: Regularly check for software and firmware updates for your HTC Vive components. Ensure that you have the latest version of SteamVR installed. Updates often include bug fixes and performance improvements that can help resolve common issues.
7. System Compatibility: Double-check that your computer meets the minimum system requirements for running the HTC Vive. If you’re experiencing consistent performance issues, such as lag or low frame rates, consider upgrading your hardware components, such as the graphics card or RAM, to meet the recommended specifications.
8. Drivers and Software Conflicts: Occasionally, conflicts with other software or drivers on your computer can affect the performance of your HTC Vive. Disable or uninstall any unnecessary background programs or services that could be interfering with VR performance. Update your graphics card drivers to the latest version as well.
If you’ve tried these troubleshooting tips, but the issues persist, it may be helpful to consult the HTC Vive support website or reach out to their customer support for further assistance. They can provide more specific guidance based on your particular situation. Remember, patience and persistence are key when troubleshooting, and with the right steps, most issues can be resolved, allowing you to fully enjoy your HTC Vive virtual reality experience.
Tips and Tricks
As you delve further into the world of virtual reality with your HTC Vive headset, here are some tips and tricks to enhance your overall experience:
1. Optimize Your Play Area: Clear any clutter and create a dedicated space for your VR sessions. Remove any objects that could potentially obstruct your movements or pose safety risks. Consider using a rug or mat to mark the center of your play area for orientation.
2. Be Mindful of Cable Management: The cables attached to the HTC Vive headset can sometimes get in the way during your VR sessions. Use cable management solutions, such as cable clips or retractable cable systems, to keep the cables organized and prevent them from tangling or tripping you up.
3. Explore Different VR Experiences: Don’t limit yourself to just one type of virtual reality experience. Experiment with a wide range of games, simulations, and educational applications. Try different genres, themes, and interactive experiences to discover what captivates and engages you the most.
4. Customize Your Gameplay: Take advantage of the customization options available in many VR games. Adjust comfort settings, movement speeds, and control schemes to suit your preferences. Don’t be afraid to experiment and find the settings that offer the most comfortable and immersive experience for you.
5. Take Breaks: While VR can be incredibly immersive, it’s important to take breaks and rest your eyes to prevent fatigue and discomfort. Use the break to hydrate, stretch, and give yourself a chance to readjust to the real world. Remember, it’s always good to find a balance between virtual reality and the physical world.
6. Engage in Multiplayer Experiences: Many VR games and experiences offer multiplayer modes, allowing you to connect and play with friends or other VR enthusiasts. Take advantage of these opportunities to socialize, collaborate, and compete in a virtual environment, adding an extra dimension of fun and excitement.
7. Explore User Communities: Join online communities and forums dedicated to virtual reality and the HTC Vive. Engage with fellow VR enthusiasts, share tips and experiences, and discover new and exciting VR content recommended by others.
8. Experiment with Room Lighting: Adjusting the lighting in your play area can affect the overall VR experience. Avoid bright, direct sunlight, as it can interfere with the tracking system. Experiment with different lighting setups to find what works best for you, considering a dimly lit or ambient environment for optimal immersion.
9. Take Advantage of Accessories: Consider investing in additional accessories such as VR covers for hygiene, protective mats for your play area, or even motion-tracking accessories like VR gloves or trackers to enhance the level of interaction and immersion in VR.
10. Keep Your Equipment Clean: Regularly clean your HTC Vive headset, controllers, and base stations to maintain optimal performance. Use a microfiber cloth to wipe away smudges and dust. Consider using antibacterial wipes for the controllers and facial interface to keep them clean and hygienic.
By incorporating these tips and tricks into your HTC Vive VR experience, you can make the most out of your virtual adventures and immerse yourself in the captivating world of virtual reality.