
What is TeamSpeak?
TeamSpeak is a voice-over-IP (VoIP) software that allows users to communicate with each other in real-time through the internet. It is commonly used by gamers, businesses, and communities to facilitate voice communication during online gaming sessions, collaborative work, or group discussions. TeamSpeak provides a reliable and high-quality audio communication solution that ensures clear and efficient communication regardless of the number of participants.
With TeamSpeak, users can create their own servers, create channels within those servers, and manage user permissions. It offers a wide range of features to enhance the communication experience, such as customizable hotkeys, adjustable audio settings, and robust security measures. TeamSpeak supports both voice and text-based communication, making it versatile and suitable for various types of interactions.
TeamSpeak operates on a client-server architecture, where users connect to a server using the TeamSpeak client software. It uses a centralized server to manage the connections and handle the voice data transmission. This ensures that all participants in a conversation are synchronized and can communicate seamlessly.
TeamSpeak is available for multiple platforms, including Windows, Mac, Linux, iOS, and Android. This cross-platform compatibility allows users to connect and communicate with others regardless of their operating system. It also offers a mobile app, enabling users to stay connected while on the go.
One of the key advantages of TeamSpeak is its low latency communication, which means that the delay between sending and receiving messages is minimal. This real-time interaction is crucial, especially in competitive gaming, where split-second decisions can be the difference between victory and defeat.
Whether you are a gamer looking to coordinate strategies with your teammates, a professional needing an efficient communication tool for remote work, or a community organizer looking to bring people together, TeamSpeak provides a reliable and feature-rich solution. With its user-friendly interface and robust functionality, TeamSpeak has earned its reputation as one of the leading voice communication platforms in the world.
System Requirements
Before downloading and installing TeamSpeak, it’s essential to ensure that your computer meets the necessary system requirements. This will ensure optimal performance and a smooth user experience. Here are the recommended system requirements for running TeamSpeak:
- Operating System: TeamSpeak is compatible with Windows, Mac, Linux, iOS, and Android. Make sure you have the latest version of the respective operating system.
- Processor: A multi-core processor is recommended for better performance. However, TeamSpeak can run on single-core processors as well.
- Memory (RAM): TeamSpeak requires a minimum of 512 MB of RAM. However, for optimal performance, it is recommended to have at least 2 GB of RAM.
- Hard Drive Space: TeamSpeak itself requires minimal disk space. However, to store chat logs and other data, it is advisable to have at least 100 MB of free disk space.
- Network: A stable internet connection is crucial for TeamSpeak. It is recommended to have a broadband connection with a minimum speed of 512 Kbps for voice communication.
- Sound Card: A sound card that supports full-duplex communication is necessary for voice transmission. Most modern computers come with built-in sound cards that meet this requirement.
- Microphone and Headset: To communicate using TeamSpeak, you will need a microphone and headset. These can be either external devices or built into your computer.
It’s important to note that these are the recommended system requirements. TeamSpeak may still function on systems that do not meet these specifications but with potential performance issues. It is always recommended to have a stable and capable computer system to ensure the best experience while using TeamSpeak.
Downloading TeamSpeak
To get started with TeamSpeak, you need to download the appropriate version of the software for your operating system. TeamSpeak is available for Windows, Mac, Linux, iOS, and Android. Here’s how you can download TeamSpeak:
- Visit the official TeamSpeak website at www.teamspeak.com
- Click on the “Downloads” tab located in the main navigation menu.
- On the Downloads page, you’ll find all the available versions of TeamSpeak. Choose the version that corresponds to your operating system.
- Click on the download link to start the download process. The file will be saved to your computer or device.
- Once the download is complete, locate the downloaded file and double-click on it to start the installation process.
- Follow the on-screen instructions to install TeamSpeak on your computer. Make sure to read and accept the license agreement.
- After the installation is complete, you can launch TeamSpeak by double-clicking the shortcut icon on your desktop or finding it in your applications folder.
For mobile devices, such as iOS and Android, you can download TeamSpeak from the respective app stores. Search for “TeamSpeak” in the App Store for iOS devices or the Google Play Store for Android devices. Once you find the app, tap on “Install” to download and install it on your device.
It’s important to ensure that you download TeamSpeak from the official website or trusted app stores to ensure that you get the legitimate and latest version of the software. This will help protect your computer or device from potential security risks.
By following these steps, you can easily download TeamSpeak and prepare to set up your own server or connect to an existing one for seamless voice communication with your team or community.
Installing TeamSpeak
Once you have downloaded the TeamSpeak software, you can proceed with the installation process. Follow these steps to install TeamSpeak on your computer:
- Locate the downloaded TeamSpeak installation file on your computer. It is usually saved in the “Downloads” folder, unless you specified a different location.
- Double-click on the installation file to begin the installation process. You may be prompted to confirm if you want to allow the application to make changes to your device. Click “Yes” or “Allow” to proceed.
- The installation wizard will appear. Read and accept the license agreement by clicking on the checkbox and then clicking the “Next” button.
- Choose the installation location for TeamSpeak. By default, it will be installed in the recommended location. You can choose a different location by clicking the “Browse” button and selecting a new folder.
- Select the desired additional features you want to install. These may include shortcut icons, start menu entries, and desktop shortcuts. Check the corresponding boxes for the features you want and click “Next” to proceed.
- Choose whether you want TeamSpeak to automatically start when you log in to your computer. You can select either “Yes” or “No” based on your preference.
- Click “Install” to begin the installation process. The progress bar will show the installation progress.
- Once the installation is complete, click on the “Finish” button to exit the installation wizard.
After the installation process is finished, TeamSpeak will be ready to use on your computer. You can launch it by double-clicking the shortcut icon on your desktop or finding it in the list of installed programs in the start menu.
It’s important to note that during the installation process, TeamSpeak may prompt you to install additional software or components required for proper functionality. Make sure to read these prompts carefully and choose the appropriate options based on your needs.
By following these simple steps, you can install TeamSpeak on your computer and get ready to set up your own server or connect to existing servers for seamless voice communication with your team or community.
Creating a Server
TeamSpeak allows you to create your own private server, providing you with full control over the voice communication environment. Creating a server in TeamSpeak is a straightforward process. Here’s how you can create your own server:
- Launch TeamSpeak on your computer by clicking on the shortcut icon or finding it in the list of installed programs.
- In the main TeamSpeak window, go to the “Connections” menu and click on “Connect”.
- The “Connect” window will appear. In the “Server Address” field, enter a server address of your choice. This can be an IP address or a domain name.
- Enter a nickname for yourself in the “Nickname” field. This is the name that will be displayed to others when you connect to a server.
- Leave the “Server Password” field blank, unless the server you are trying to connect to requires a password. If so, enter the password provided by the server administrator.
- Click on the “Connect” button to establish a connection to the TeamSpeak server.
Once you have connected to the server, you can proceed with creating your own server. Here’s how:
- In the TeamSpeak main window, navigate to the “Permissions” menu and click on “Server Groups”.
- Click on the “Create” button to create a new server group.
- Enter a name for your server group in the “Name” field. This can be something descriptive like “Admins” or “Members”.
- Choose the appropriate permissions for your server group by selecting the checkboxes next to the desired permissions. These permissions determine what actions are allowed or restricted for users in the group.
- Click on the “OK” button to save the changes and create the server group.
- To assign users to the server group, go to the “Permissions” menu and click on “Server Groups”.
- Select the desired user or users from the list and click on the “Assign” button.
- In the “Server Group” section, select the server group you created earlier from the dropdown menu.
- Click on the “OK” button to assign the selected users to the server group.
By following these steps, you can create your own server in TeamSpeak and define the necessary permissions for different user groups. This allows you to have full control over your communication environment and tailor it to your specific needs.
Connecting to a Server
To start communicating with others on TeamSpeak, you’ll need to connect to a server. Whether it’s your own server or someone else’s server, the process to connect is simple. Here’s how:
- Launch TeamSpeak on your computer by clicking on the shortcut icon or finding it in the list of installed programs.
- In the main TeamSpeak window, go to the “Connections” menu and click on “Connect”.
- The “Connect” window will appear. Here, you’ll need to enter the server information to establish a connection. This typically includes the server address or IP, port number, and your desired nickname.
- In the “Server Address” field, enter the server address provided by the server administrator or the IP address of the server.
- If there is a specific port number required, enter it in the “Port” field. If not, leave it blank to use the default port.
- Set your desired nickname in the “Nickname” field. This is the name that will be displayed to others when you connect to the server.
- If the server requires a password, enter it in the “Server Password” field. Otherwise, leave it blank.
- Click on the “Connect” button to initiate the connection to the server.
- Once the connection is established, you will be able to see the server channels and users in the main TeamSpeak window.
- To communicate with others, simply join one of the available channels and start talking using your microphone or typing in the chatbox.
It’s important to remember that you will need the correct server address, port number, and any required passwords to successfully connect to a server. These details are typically provided by the server administrator or host.
If you encounter any connection issues, make sure to check your internet connection, firewall settings, and ensure that you have entered the server information correctly. If the problem persists, contact the server administrator for assistance.
By following these steps, you can easily connect to a server on TeamSpeak and start engaging in voice or text communication with other users in the server.
Setting up Permissions
Permissions are an essential aspect of managing a TeamSpeak server. They allow you to control what actions users can perform, such as joining channels, sending messages, or kicking other users. TeamSpeak provides a comprehensive permission system that allows you to fine-tune access and privileges for different user groups. Here’s how you can set up permissions on your TeamSpeak server:
- Launch TeamSpeak on your computer and connect to your server as the administrator.
- In the TeamSpeak main window, go to the “Permissions” menu and click on “Server Groups”.
- Here, you’ll see a list of default server groups and any custom groups you’ve created.
- Select the server group for which you want to modify permissions or create a new server group.
- Click on the “Permissions” button to view or modify the permissions for the selected server group.
- In the “Permissions” window, you’ll see a list of available permissions categorized under different tabs, such as “General”, “Channel”, “Client”, and “Miscellaneous”.
- Click on the checkboxes to grant or revoke permissions for the selected server group. You can also adjust the values for specific permissions like “Join Power” or “Talk Power”.
- If you want to create a new server group, click on the “Create” button. Assign a name to the group and configure its permissions.
- Assign server groups to users by going to the “Permissions” menu and clicking on “Server Groups”.
- Select the desired user or users from the list and click on the “Assign” button.
- In the “Server Group” section, select the server group you want to assign to the user(s).
- Click on the “OK” button to save the changes and assign the server group.
By setting up permissions, you can ensure that users on your TeamSpeak server have the appropriate access levels and privileges. For example, you can grant administrative permissions only to trusted individuals, restrict channel creation to specific groups, or prevent certain actions for certain users.
It’s important to regularly review and update your server’s permissions to maintain a secure and organized communication environment. This way, you can ensure that your server operates smoothly and that users have the necessary permissions to perform their assigned roles.
Take advantage of TeamSpeak’s flexible permission system to customize the user experience and create a server environment that aligns with your specific needs and requirements.
Creating Channels
Channels in TeamSpeak act as virtual rooms where users can gather and communicate. They provide a structured and organized way to categorize conversations based on topics, teams, or any other criteria you define. Creating channels in TeamSpeak is simple and allows you to customize the communication environment to suit your needs. Here’s how you can create channels on your TeamSpeak server:
- Launch TeamSpeak on your computer and connect to your server as the administrator.
- In the TeamSpeak main window, navigate to the channel tree on the left side.
- Right-click on the desired parent channel or server root to which you want to add the new channel.
- In the context menu, click on “Create Channel”.
- A new window will appear, allowing you to configure the settings for the new channel.
- Enter the desired name for the channel in the “Name” field.
- Choose the appropriate codec for the channel’s audio quality. The most commonly used option is the “Speex Wideband” codec.
- Set the channel’s maximum users limit in the “Max Clients” field, if desired. Leave it blank for unlimited users.
- Configure other settings such as password protection, channel description, topic, and other channel-specific options as needed.
- Click on the “OK” button to create the channel.
Once the channel is created, it will appear in the channel tree. You can further customize and manage the channel by right-clicking on it and selecting the desired options, such as editing the channel settings, changing permissions, or deleting the channel.
You can create multiple channels under the same parent channel or create sub-channels within existing channels. This hierarchical structure allows you to create a well-organized communication environment.
In addition to creating channels manually, TeamSpeak also provides the option to create temporary channels. These channels are automatically removed once they become empty. They are useful for temporary discussions or dynamic groups.
By creating channels in TeamSpeak, you can create dedicated spaces for discussions, team collaboration, or different language groups. This helps to streamline communication and make it easier for users to find and join the appropriate conversations.
Managing Users
As the administrator of a TeamSpeak server, you have the responsibility of managing the users and ensuring a smooth and secure communication environment. TeamSpeak provides a range of tools and features to help you effectively manage users on your server. Here are some key aspects of managing users in TeamSpeak:
User Accounts: TeamSpeak allows you to create user accounts that provide a unique identity to each user. By creating user accounts, you can assign specific permissions, track user activity, and maintain a more controlled environment. To create user accounts, go to the “Permissions” menu and click on “Privilege Keys”. Here you can generate privilege keys that can be used to assign specific permissions to users.
Assigning Permissions: TeamSpeak uses a sophisticated permission system that allows you to assign different levels of access to individual users or user groups. You can configure permissions based on various criteria, such as server-level permissions, channel-level permissions, or specific actions within the server. To manage permissions, go to the “Permissions” menu and explore the various options available, such as server groups, channel groups, and permission assignments.
User Bans: In some cases, you may need to ban a user from your server due to disruptive behavior or violation of server rules. TeamSpeak allows you to ban users by their unique IP address or their unique client identity. To ban a user, right-click on their name in the user list, select “Ban Client”, and follow the prompts. Banned users will be denied access to the server.
Kicking Users: If you need to temporarily remove a user from the server, you can kick them. Kicking a user will immediately disconnect them from the server, but they will be able to reconnect. To kick a user, right-click on their name in the user list and select “Kick from Server”.
Monitoring User Activity: TeamSpeak provides various tools to monitor user activity and server statistics. You can view real-time information such as the number of users online, their connection status, and the current server load. This information can help you identify any issues or unusual behavior on the server.
Regular Maintenance: It is important to regularly review and update the server configuration and permissions to ensure a secure and well-managed server environment. Regularly check for updates to the TeamSpeak software and apply them to make use of the latest features and security improvements.
By effectively managing users on your TeamSpeak server, you can create a positive and productive environment for communication. This will help foster collaboration, facilitate smooth interactions, and ensure that server rules and guidelines are upheld.
Using Hotkeys
Hotkeys in TeamSpeak are keyboard shortcuts that allow you to perform various actions quickly and efficiently without having to navigate through menus or use mouse clicks. Hotkeys can be customized to suit your preferences and workflow, making it easier to control different aspects of TeamSpeak while actively engaging in conversations. Here’s how you can use and customize hotkeys in TeamSpeak:
- Launch TeamSpeak on your computer and connect to a server.
- Go to the “Settings” menu and click on “Options”.
- In the Options window, click on the “Hotkeys” tab.
- Here, you’ll find a list of default hotkeys and their assigned actions.
- To customize a hotkey, select it from the list and click on the “Change” button.
- Press the desired key combination on your keyboard to assign it as the new hotkey.
- If the selected hotkey is already assigned to another action, TeamSpeak will prompt you to confirm the change.
- Click on the “OK” button to save the changes.
- To disable a hotkey, select it from the list and click on the “Delete” button.
- You can create new hotkeys by clicking on the “Add” button and specifying the desired action and key combination.
- Experiment with different hotkeys to find the ones that work best for your needs and enhance your workflow.
Hotkeys can be used to perform various actions, such as muting your microphone, activating push-to-talk mode, toggling between different channels, or quickly switching between different TeamSpeak windows. By using hotkeys, you can stay focused on your conversations and perform actions with minimal effort.
It’s important to note that hotkeys may conflict with system-wide hotkeys or other application-specific hotkeys. Be mindful of any conflicts and choose hotkey combinations that are easy to remember and do not interfere with other essential functions on your computer.
By utilizing and customizing hotkeys in TeamSpeak, you can streamline your communication experience and have greater control over the various features and actions within the application.
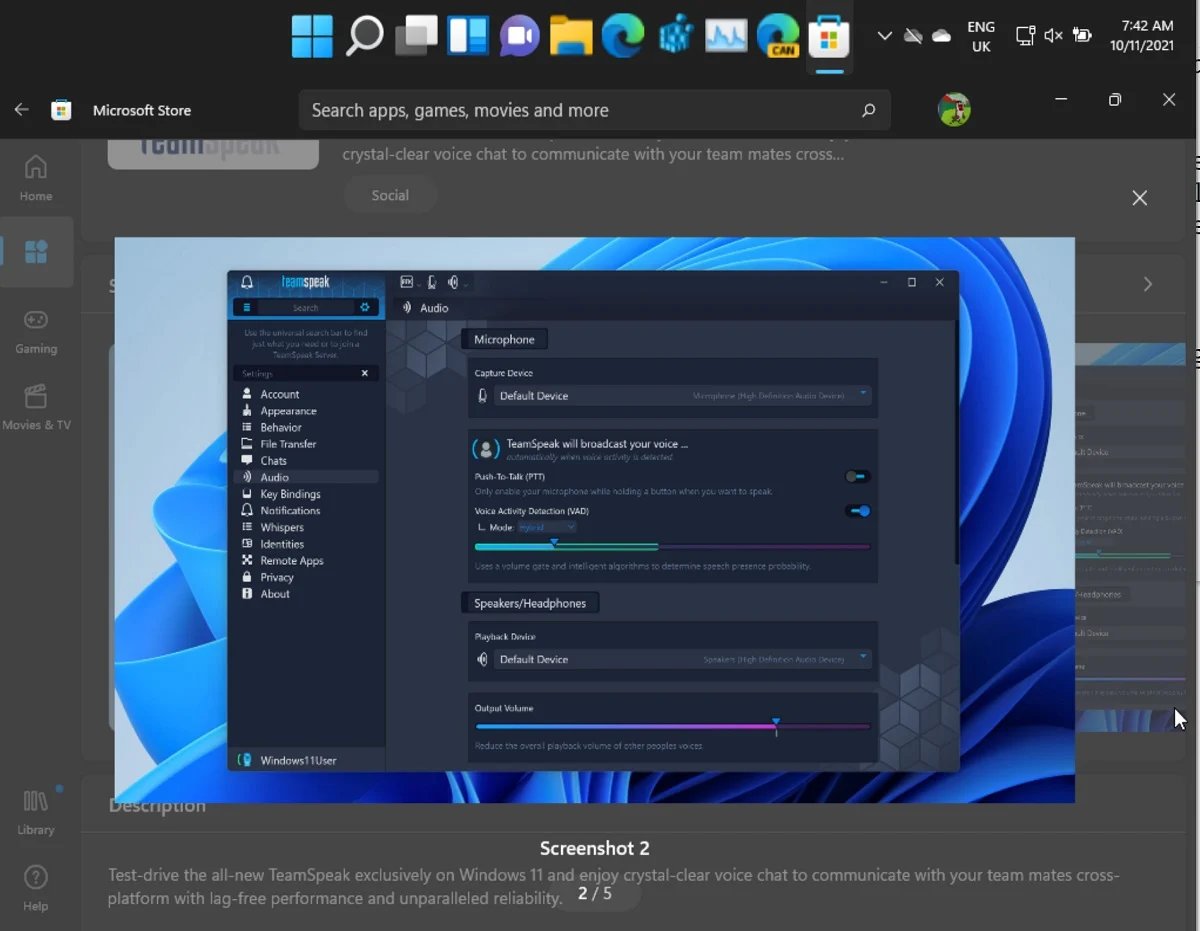
Adjusting Audio Settings
TeamSpeak provides a range of audio settings that allow you to customize your sound experience and ensure clear and optimal communication with other users. Adjusting these audio settings can help improve the quality of your voice communication and enhance your overall TeamSpeak experience. Here’s how you can adjust the audio settings in TeamSpeak:
- Launch TeamSpeak on your computer and connect to a server.
- Go to the “Settings” menu and click on “Options”.
- In the Options window, click on the “Playback” tab to adjust settings related to audio output.
- Here, you can select the playback device you want to use for audio output, such as speakers or headphones.
- Adjust the volume level using the “Volume Control” slider.
- Enable or disable 3D sound positioning, which provides a more immersive audio experience.
- In the “Capture” tab, you can adjust settings for audio input, such as microphone settings.
- Choose the appropriate capture device, such as your microphone.
- Adjust the microphone volume using the “Volume Control” slider. Test the microphone by speaking into it and monitoring the input level indicator.
- Set the preferred Push-To-Talk (PTT) key by clicking on “Capture” and selecting the desired key combination.
- In the “Notifications” tab, you can customize settings related to audio notifications, such as incoming message sounds.
- Adjust the volume level for notifications using the “Volume Control” slider.
- Enable or disable specific notification sounds by checking or unchecking the respective checkboxes.
It’s important to regularly check and adjust your audio settings to ensure clear and balanced sound during communication. You may need to fine-tune the microphone volume and adjust other audio settings based on your specific hardware setup and personal preferences.
During voice communication, consider using headphones instead of speakers to minimize any potential audio feedback or echoing issues.
If you experience any audio-related problems, make sure that your audio drivers are up to date and compatible with TeamSpeak. Additionally, check your sound settings in the operating system to ensure that the correct playback and capture devices are selected.
By adjusting the audio settings in TeamSpeak, you can optimize your voice communication experience and ensure that you are heard clearly by others while maintaining a comfortable listening experience.
Customizing TeamSpeak
TeamSpeak provides various customization options to personalize your user experience and make the application cater to your specific preferences. Customizing TeamSpeak allows you to create a personalized environment that suits your style and enhances your usability. Here are some ways you can customize TeamSpeak:
Theme Selection: TeamSpeak offers a variety of pre-installed themes to change the look and feel of the application. You can choose a theme that fits your aesthetic preferences or create your own custom theme if desired. To change the theme, go to the “Settings” menu and click on “Options”. In the “Design” tab, you’ll find the available themes to select from.
Layout Configuration: TeamSpeak allows you to customize the layout of the main window to suit your workflow. You can modify the size, position, and visibility of various elements, such as the channel list, user list, chatbox, or server tree. Right-click on the main window or use the “View” menu to access layout customization options.
Sound Pack Customization: TeamSpeak allows you to customize the sounds used for notifications, messages, and other events. You can select from a range of built-in sound packs or create your own custom sound pack. To customize sound packs, go to the “Settings” menu, click on “Options”, and navigate to the “Notifications” tab.
Overlay Customization: TeamSpeak offers an overlay feature that allows you to display information from TeamSpeak within your in-game environment. You can customize the positioning, transparency, and appearance of the overlay to suit your preferences. To customize the overlay, go to the “Plugins” menu and click on “TS Overlay”.
Font and Text Customization: TeamSpeak allows you to customize the font type, size, and color used for various text elements within the application. You can adjust the font settings in the “Design” tab of the Options menu.
Shortcut Key Customization: In addition to the default hotkeys, TeamSpeak allows you to create custom keyboard shortcuts for various actions. You can assign specific actions to your preferred key combinations for quick access. To customize shortcuts, go to the “Settings” menu, click on “Options”, and navigate to the “Hotkeys” tab.
By customizing TeamSpeak to your liking, you can create a unique and personalized communication environment that enhances your user experience. Take advantage of the customization options available in TeamSpeak to make the application work best for you and meet your specific needs.