
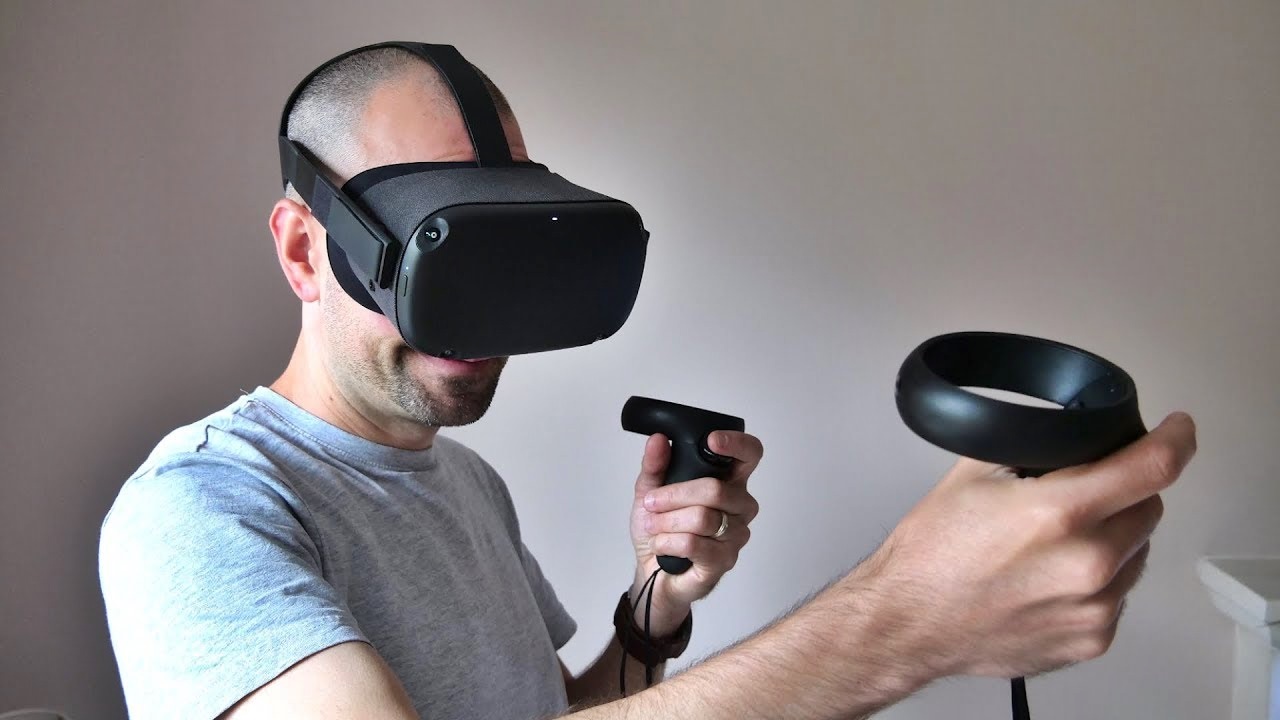
How to Enable Microphone Access on the Oculus Quest
The Oculus Quest is a powerful virtual reality headset that offers an immersive gaming and entertainment experience. To fully enjoy the capabilities of the Oculus Quest, it’s important to enable microphone access. This will allow you to communicate with others during multiplayer games, use voice commands, and even record audio. Here’s how you can enable microphone access on your Oculus Quest:
Step 1: Open the Settings Menu
To access the microphone settings on your Oculus Quest, start by putting on the headset and navigating to the system menu. From there, look for the Settings icon and select it to open the Settings menu.
Step 2: Find the Microphone Settings
Once you are in the Settings menu, scroll down until you find the “Device” section. Within this section, you will see an option called “Microphone”. Tap on it to access the microphone settings on your Oculus Quest.
Step 3: Enable Microphone Access
In the microphone settings, you will see a toggle switch labeled “Microphone Access”. By default, it may be set to “Off”. To enable microphone access, simply slide the toggle switch to the “On” position.
Step 4: Confirm Permission
After enabling microphone access, you may be prompted to confirm the permission. This is to ensure that you are aware of and agree to the use of the microphone on your Oculus Quest. Follow the on-screen instructions to provide the necessary confirmation.
Step 5: Test the Microphone
Once microphone access is enabled, you can test it to ensure that it is working properly. Open a compatible app or game that supports microphone input and try speaking into the microphone. If your voice is captured and registered, congratulations! Your microphone is now enabled and ready to use.
Enabling microphone access on the Oculus Quest is a straightforward process that allows you to unlock the full potential of the device’s communication features. Whether you’re engaging in multiplayer action, recording audio, or using voice commands, the microphone access will enhance your overall virtual reality experience.
Adjusting Microphone Settings on the Oculus Quest
The Oculus Quest offers various microphone settings that allow you to customize and optimize your audio experience. Whether you want to adjust the microphone volume, enable noise cancellation, or explore other options, here is a guide on how to adjust microphone settings on your Oculus Quest:
Step 1: Open the Settings Menu
To access the microphone settings on your Oculus Quest, put on the headset and navigate to the system menu. Look for the Settings icon and select it to open the Settings menu.
Step 2: Find the Microphone Settings
Within the Settings menu, scroll down until you find the “Device” section. Tap on it to access the microphone settings on your Oculus Quest.
Step 3: Adjust Microphone Volume
One important setting you may want to adjust is the microphone volume. In the microphone settings, you will see a slider labeled “Microphone Volume”. Use this slider to increase or decrease the microphone volume level according to your preference. Test it out by speaking into the microphone and making adjustments until you achieve the desired volume.
Step 4: Enable Noise Cancellation
To reduce background noise and improve audio quality, the Oculus Quest offers a noise cancellation feature. In the microphone settings, you will find a toggle switch labeled “Noise Cancellation”. Slide the toggle switch to the “On” position to enable this feature and enhance your microphone’s performance in noisy environments.
Step 5: Explore Additional Microphone Settings
Beyond volume adjustment and noise cancellation, the Oculus Quest provides additional microphone settings that you can experiment with. These settings may include options such as microphone boost, microphone gain, or microphone sensitivity, depending on the firmware version of your Oculus Quest. Take the time to explore these settings and find the configuration that best suits your needs and preferences.
By adjusting the microphone settings on your Oculus Quest, you can ensure optimal audio quality and customize the microphone performance according to your specific requirements. Whether you want to fine-tune the volume, reduce background noise, or explore advanced options, taking advantage of these settings will enhance your overall virtual reality experience.
Activating the Microphone on Oculus Quest Games and Apps
The microphone on your Oculus Quest can be a valuable tool for communication during gaming sessions and using various apps. Activating the microphone ensures that you can fully engage in multiplayer games, communicate with teammates, and enjoy the interactive features of different apps. Here’s how you can activate the microphone on your Oculus Quest games and apps:
Step 1: Check Game and App Requirements
Before you can use the microphone in games and apps, it’s important to ensure that they support microphone input. The Oculus Quest store provides information about each game and app, including whether they utilize the microphone. Check the game or app description or consult the developer’s website to confirm microphone compatibility.
Step 2: Launch the Game or App
Once you’ve identified a compatible game or app, put on your Oculus Quest headset and navigate to the home screen. From there, select the game or app you wish to use the microphone with and launch it.
Step 3: Grant Microphone Permissions
Upon launching the game or app, you may be prompted to grant microphone permissions. This is to ensure that the game or app has access to the microphone and can utilize its functionality. Follow the on-screen instructions to provide the necessary permission and access.
Step 4: Configure Microphone Settings within the Game or App
Some games and apps may offer specific microphone settings that you can tailor to your preferences. These settings may include options for voice sensitivity, push-to-talk functionality, or microphone effects. Take the time to navigate through the game or app’s settings menu to adjust these options according to your preferences.
Step 5: Test the Microphone
Now that the microphone is activated and the necessary settings have been adjusted, it’s time to test it within the game or app. Engage in voice chat or interact with the microphone-dependent features to ensure that the microphone is functioning correctly and that other players or app features can detect and respond to your voice.
Activating the microphone on your Oculus Quest games and apps opens up a world of possibilities for communication, collaboration, and immersion. Whether you’re strategizing with teammates, coordinating in multiplayer games, or utilizing voice-dependent features in apps, activating and utilizing the microphone will enhance your overall virtual reality experience.
Troubleshooting Microphone Issues on the Oculus Quest
The microphone on your Oculus Quest is an essential component for communication and interaction, but sometimes issues may arise that prevent it from functioning properly. If you’re experiencing microphone problems on your Oculus Quest, don’t worry. There are several troubleshooting steps you can take to resolve the issue. Here are some common microphone issues and how to troubleshoot them:
1. Check Microphone Access
Ensure that microphone access is enabled on your Oculus Quest. Go to the system settings and confirm that the microphone access toggle switch is set to “On”. If it’s disabled, slide it to the “On” position and test if the microphone is working afterward.
2. Restart the Oculus Quest
Rebooting the Oculus Quest can often fix minor glitches or temporary issues with the microphone. To restart the headset, navigate to the Power menu in the settings, then select “Restart”. After the restart, test if the microphone is functioning correctly.
3. Check for App and Firmware Updates
Ensure that both your apps and the Oculus Quest firmware are up to date. Developers often release updates that fix bugs and improve compatibility. Visit the Oculus Store and check for any available updates. Keeping your apps and firmware updated can resolve microphone issues and improve overall performance.
4. Check Microphone Settings within Apps
If the microphone only has issues within specific apps or games, check the in-app microphone settings. Make sure the microphone is enabled and that the appropriate settings, such as microphone volume or sensitivity, are properly adjusted. Sometimes, in-app settings can override the system settings of the Oculus Quest.
5. Reset the Oculus Quest
If the above steps didn’t resolve the microphone issue, you can try performing a factory reset on your Oculus Quest. Keep in mind that this will erase all data and settings on the headset. To perform a factory reset, go to the Settings menu and select “Device”. From there, choose “Factory Reset” and follow the on-screen instructions. After the reset, set up the Oculus Quest again and test if the microphone is working correctly.
6. Contact Oculus Support
If none of the above solutions solve your microphone problems, it’s time to reach out to Oculus Support for further assistance. Visit the Oculus website and submit a support ticket or explore their knowledge base for troubleshooting articles specific to microphone issues.
Troubleshooting microphone issues on the Oculus Quest may require some patience, but by following these steps, you have a good chance of resolving the problem and restoring the functionality of the microphone. Enjoy clear and crisp communication while immersing yourself in the world of virtual reality!
Recording Audio with the Oculus Quest Microphone
The Oculus Quest not only allows you to enjoy immersive virtual reality experiences but also gives you the ability to record audio. Whether you want to capture your gameplay commentary, create voiceover narration, or record ambient sounds, the Oculus Quest microphone can be a powerful tool. Here’s how you can record audio using the Oculus Quest microphone:
1. Choose a Recording App
Start by selecting an app that supports audio recording on the Oculus Quest. There are several recording apps available on the Oculus Store, so choose one that suits your needs and preferences. Look for features such as adjustable recording settings, file format options, and compatibility with external microphones if desired.
2. Launch the Recording App
Put on your Oculus Quest headset and navigate to the app library or home screen. Locate the recording app you installed and select it to launch the app.
3. Grant Microphone Permissions within the App
When launching the recording app for the first time, you may be prompted to grant microphone permissions. Allow the app to access the microphone so that it can start recording audio.
4. Configure Recording Settings
Explore the settings and options within the recording app to configure the recording settings according to your needs. These settings may include recording quality, recording format, and microphone sensitivity. Adjust these parameters to achieve the desired audio recording setup.
5. Start Recording
Once you have configured the recording settings, it’s time to start recording audio. Follow the prompts or on-screen instructions within the recording app to initiate the recording process. Speak directly into the Oculus Quest microphone to capture your voice or allow the microphone to record ambient sounds, depending on your recording objectives.
6. Stop and Save the Recording
When you have finished capturing the desired audio, stop the recording through the app’s interface. The recording app will typically provide an option to save the recorded audio file. Follow the instructions to save the recording to a location of your choice on your Oculus Quest or transfer it to a connected device for further editing or sharing.
Recording audio with the Oculus Quest microphone opens up opportunities for content creation, voiceover work, and capturing memorable moments in virtual reality. Experiment with different recording apps, settings, and audio techniques to create high-quality audio recordings that complement your virtual reality experiences.
Using the Oculus Quest Microphone for Voice Commands
The Oculus Quest microphone not only enables communication and audio recording but also allows you to control your virtual reality experience through voice commands. Voice commands can enhance the immersion and convenience of using the Oculus Quest, providing a hands-free way to navigate menus, launch apps, and perform various actions. Here’s how you can use the Oculus Quest microphone for voice commands:
1. Enable Voice Commands
Start by ensuring that voice commands are enabled on your Oculus Quest. Go to the system settings and check if there is an option specifically for voice commands or voice control. Enable this feature if it’s not already activated.
2. Familiarize Yourself with Available Commands
Each Oculus Quest firmware version may have different available voice commands. Familiarize yourself with the specific commands supported by your version. Consult the Oculus website or user manual for a list of voice commands or explore the voice command settings within the system menu.
3. Activate the Microphone
Ensure that the microphone access is enabled on your Oculus Quest, as voice commands rely on the microphone to listen and interpret your spoken instructions. Go to the system settings, navigate to the microphone settings, and confirm that the microphone access toggle switch is set to “On”.
4. Speak Clearly and Naturally
When using voice commands on the Oculus Quest, it’s important to speak clearly and naturally. Face the microphone and articulate your instructions in a normal and audible voice. Give clear and concise commands to help the system accurately recognize and respond to your voice.
5. Practice and Refine
Using voice commands can take some practice to become comfortable and proficient. Experiment with different commands and observe how the Oculus Quest responds. Take note of any specific phrases or enunciations that yield better recognition. Over time, you’ll become more adept at utilizing voice commands to enhance your virtual reality experience.
6. Combine Voice Commands with Controller Input
While voice commands can provide hands-free control, some actions may still require input from the Oculus Quest controllers. Learn how to combine voice commands with controller input to maximize the efficiency and flexibility of navigating menus, selecting options, and interacting with apps.
Using the Oculus Quest microphone for voice commands offers a convenient and immersive way to interact with the device. By enabling voice commands, familiarizing yourself with available commands, and practicing clear speech, you can enhance your virtual reality experience and navigate the Oculus Quest system effortlessly.
Exploring Voice Chat Options on the Oculus Quest
Communication is a crucial aspect of multiplayer gaming and social interactions on the Oculus Quest. The headset offers various voice chat options that enhance your ability to connect with friends, teammates, and other virtual reality enthusiasts. By utilizing voice chat features, you can coordinate strategies, immerse yourself in teamwork, or simply engage in conversation within the virtual world. Here’s a look at the voice chat options available on the Oculus Quest:
1. Oculus Party
Oculus Party is a built-in voice chat feature that allows you to create a private group voice chat with your friends on the Oculus Quest. You can create a party, invite your friends, and communicate with each other throughout your gaming sessions. Oculus Party provides clear and seamless communication for socializing and coordinating gameplay.
2. In-Game Voice Chat
Many multiplayer games on the Oculus Quest have their own in-game voice chat systems. These allow you to communicate with other players within the game, even if they are not part of your Oculus Party. In-game voice chat enables real-time communication with teammates, strategizing in competitive matches, or simply engaging in conversation while exploring virtual environments.
3. Third-Party Voice Chat Apps
In addition to the built-in voice chat options, you can also utilize third-party voice chat apps to further enhance your communication experience on the Oculus Quest. Apps such as Discord or TeamSpeak allow you to create dedicated voice channels, join communities, and chat with a wider range of virtual reality enthusiasts beyond your immediate friend group.
4. Microphone Quality Settings
The Oculus Quest offers microphone quality settings that allow you to adjust the audio input according to your preferences. Depending on the app or game, you can control microphone volume, sensitivity, and other parameters to optimize voice chat quality and ensure your voice is clear and easily heard by others.
5. Mute and Privacy Options
For times when you need to mute your microphone or adjust privacy settings, the Oculus Quest provides options to do so. You can manually mute yourself when necessary or adjust privacy settings to control who can hear and communicate with you during multiplayer sessions.
Exploring the voice chat options on the Oculus Quest adds a new layer of connectivity and engagement to your virtual reality experiences. Whether utilizing Oculus Party, in-game voice chat, third-party apps, or adjusting microphone settings, voice chat enhances teamwork, coordination, and social interactions within the virtual world.
Best Practices for Using the Oculus Quest Microphone
The Oculus Quest microphone is a powerful tool that enhances your virtual reality experience by enabling communication, voice commands, and audio recording. To ensure optimal performance and quality when using the microphone, it’s helpful to follow some best practices. Here are some tips to make the most out of your Oculus Quest microphone:
1. Position Yourself in a Quiet Environment
When using the Oculus Quest microphone, try to position yourself in a quiet environment to minimize background noise. This will help ensure that your voice comes through clearly and is not drowned out by external sounds.
2. Speak Clearly and Directly into the Microphone
When using voice commands or engaging in voice chat, speak directly into the microphone on the Oculus Quest. This will help the microphone pick up your voice accurately and deliver clearer audio to others. Avoid covering or obstructing the microphone while speaking.
3. Adjust Microphone Sensitivity
Experiment with the microphone sensitivity settings to find the right balance for your voice. If the sensitivity is too high, background noise may be more pronounced. If it’s too low, your voice may not be picked up clearly. Find the sweet spot that captures your voice without unnecessary noise.
4. Use Pop Filters or Windshields (if available)
If you’re recording narration or audio commentary, consider using pop filters or windshields to reduce plosive sounds or wind noise. These accessories can help improve the overall audio quality by minimizing unwanted artifacts when speaking into the microphone.
5. Test and Adjust Volume Levels
Before engaging in voice chat or recording audio, test and adjust the microphone volume levels to ensure that your voice is neither too loud nor too quiet. Doing so will help maintain a balanced and pleasant listening experience for others.
6. Be Mindful of Privacy
When using voice chat or recording audio, be mindful of privacy considerations. Avoid sharing personal or sensitive information through the microphone, as voice chat is audible to others. Ensure that you are comfortable with the level of privacy provided by the apps or games you use.
By following these best practices, you can optimize your experience with the Oculus Quest microphone. Clear communication, reduced background noise, and balanced audio levels will enhance your multiplayer gaming, audio recording, and voice command interactions within the virtual reality world.
Protecting Your Privacy While Using the Oculus Quest Microphone
The Oculus Quest microphone adds a new dimension to your virtual reality experience, enabling communication, voice commands, and audio recording. However, it’s important to be mindful of your privacy while using the microphone. Here are some essential practices to protect your privacy when using the Oculus Quest microphone:
1. Understand App Permissions
When using apps or games that access the microphone, take the time to understand the permissions they request. Read the app’s privacy policy and information provided by the developers to ensure that you are comfortable with how your audio data will be used and stored.
2. Limit Microphone Access
Consider granting microphone access to only trusted apps that genuinely require it. Avoid providing microphone permissions to apps that you do not recognize or that lack sufficient privacy policies. Be cautious about granting access to unnecessary or unrelated functions.
3. Check for Mute Options
Utilize the mute feature on the Oculus Quest to control when your microphone is active. When you’re not engaged in voice chat or recording audio, consider muting the microphone to ensure that unintended conversations or recordings are not captured.
4. Be Mindful of Voice Chat
When engaging in voice chat, exercise caution about the personal information you share. Avoid discussing sensitive or private matters while using the microphone, as your conversations may be audible to others within the virtual environment.
5. Review Platform Privacy Settings
Regularly review and update your privacy settings within the Oculus Quest platform. Familiarize yourself with the available options to control who can hear you, who can interact with you through voice chat, and how your audio data is processed and stored.
6. Keep Firmware Up to Date
Maintain the firmware of your Oculus Quest headset up to date. Developers often release updates that address security vulnerabilities or privacy concerns. By keeping your firmware updated, you can benefit from improved privacy safeguards provided by Oculus.
7. Monitor App Permissions and Usage
Regularly review the permissions granted to the apps on your Oculus Quest. If you find an app that is misusing or mishandling microphone access, consider revoking its permission or uninstalling the app altogether. Be proactive in safeguarding your privacy.
By following these privacy best practices, you can enjoy the benefits of the Oculus Quest microphone while maintaining control over your personal information. Protecting your privacy ensures a safer and more confident virtual reality experience.