
#
Creating an iCloud Account on the iPad
Setting up an iCloud account on your iPad is a simple process that allows you to access and synchronize your files, photos, contacts, and more across all your Apple devices. Here’s how you can create an iCloud account on your iPad:
1. Go to Settings: Open the Settings app on your iPad and tap on your name at the top of the screen.
2. Access iCloud Settings: In the Apple ID menu, tap on “iCloud”.
3. Create a New Apple ID: If you don’t have an existing Apple ID, tap on “Get a Free Apple ID” and follow the on-screen instructions to create a new account. If you already have an Apple ID, enter your credentials and proceed to sign in.
4. Set up iCloud Services: After signing in, you will be presented with a list of iCloud services such as iCloud Drive, Photos, Contacts, Calendar, and more. Toggle the switches to enable the services you want to use.
5. Agree to Terms and Conditions: You will be prompted to agree to the Terms and Conditions of iCloud. Read through the document, and if you agree, tap on “Agree” to continue.
6. Set up Two-Factor Authentication (optional): For added security, you can set up Two-Factor Authentication for your iCloud account. Follow the on-screen instructions to complete the setup process.
7. Confirmation: Once you have completed the setup process, your iCloud account will be created, and all the selected services will be synced with your iPad.
Creating an iCloud account on your iPad provides you with a seamless cloud-based experience, allowing you to access your important data from any Apple device. This not only ensures that your files and information are backed up but also allows you to easily transfer data between devices.
So, take advantage of the convenience and versatility of iCloud by creating an account on your iPad and enjoy effortless synchronization across all your Apple devices!
#
Signing in to iCloud on the iPad
If you already have an iCloud account, signing in to iCloud on your iPad is quick and easy. By signing in, you can access your synced files, photos, contacts, and more from anywhere. Follow these steps to sign in to iCloud on your iPad:
1. Open Settings: Launch the Settings app on your iPad.
2. Tap on Your Name: Scroll down and tap on your name located at the top of the Settings menu.
3. Access iCloud Settings: In the Apple ID menu, tap on “iCloud”.
4. Enter Apple ID Credentials: On the iCloud screen, enter your Apple ID and password. If you have Two-Factor Authentication enabled, you may need to verify your identity using the verification code sent to your trusted device.
5. Enable iCloud Services: After signing in, you will see a list of available iCloud services such as iCloud Drive, Photos, Contacts, Calendar, and more. Toggle the switches to enable the services you want to sync with your iPad.
6. Merge or Replace Data (optional): If you have existing data on your iPad that conflicts with the data stored in iCloud, you will be prompted to choose whether to merge or replace it. Select the appropriate option based on your preference.
7. Wait for Sync: Once you have signed in and selected the desired services, your iPad will start syncing your data with iCloud. Depending on the amount of data, it may take some time to complete the initial sync.
Signing in to iCloud on your iPad ensures that all your important data is accessible and up to date across your Apple devices. This seamless synchronization allows you to work seamlessly and effortlessly across devices, ensuring that you have the latest information at your fingertips.
So, sign in to iCloud on your iPad today and experience the convenience and flexibility of accessing your data anywhere, anytime!
#
Understanding iCloud Backup on the iPad
iCloud Backup is an essential feature that ensures the safety and security of your data on your iPad. By enabling iCloud Backup, your important files, settings, app data, and device preferences are automatically backed up to your iCloud storage. Here’s what you need to know about iCloud Backup on your iPad:
What is iCloud Backup?
iCloud Backup is a cloud-based service provided by Apple that allows you to create secure backups of your iPad. It saves a copy of your data to your iCloud account, providing a convenient way to restore your information in case of device loss, damage, or upgrade.
What does iCloud Backup include?
iCloud Backup automatically backs up various types of data on your iPad, including:
- App data
- Device settings and preferences
- Photos and videos stored in the Photos app
- Messages and attachments in iMessage
- Purchase history from the App Store, iTunes Store, and Apple Books
- Ringtones
- Health data (if enabled)
- HomeKit configurations (if applicable)
How to enable iCloud Backup on the iPad?
To enable iCloud Backup on your iPad, follow these steps:
- Open Settings: Launch the Settings app on your iPad.
- Tap on Your Name: Scroll down and tap on your name located at the top of the Settings menu.
- Access iCloud Settings: In the Apple ID menu, tap on “iCloud”.
- Tap on iCloud Backup: On the iCloud screen, tap on “iCloud Backup”.
- Enable iCloud Backup: Toggle the switch to turn on iCloud Backup. If you want to initiate an immediate backup, tap on “Back Up Now”.
How to check when the last backup was performed?
To check the date and time of the last iCloud Backup on your iPad, follow these steps:
- Open Settings: Launch the Settings app on your iPad.
- Tap on Your Name: Scroll down and tap on your name located at the top of the Settings menu.
- Access iCloud Settings: In the Apple ID menu, tap on “iCloud”.
- Tap on iCloud Backup: On the iCloud screen, you will find the date and time of the last backup under the “Back Up Now” button.
iCloud Backup provides peace of mind, knowing that your data is securely stored in the cloud. Regular backups ensure that your important information is protected, even in the event of unexpected incidents.
So, enable iCloud Backup on your iPad today and never worry about losing your valuable data again!
#
Enabling iCloud Drive on the iPad
iCloud Drive is a powerful cloud storage service provided by Apple that allows you to store, access, and sync your files across all your Apple devices. By enabling iCloud Drive on your iPad, you can easily access and manage your documents, photos, videos, and more from anywhere. Here’s how to enable iCloud Drive on your iPad:
Enabling iCloud Drive on iOS 13 or later:
- Open Settings: Launch the Settings app on your iPad.
- Tap on your name: Scroll down and tap on your name at the top of the Settings menu.
- Access iCloud Settings: In the Apple ID menu, tap on “iCloud”.
- Enable iCloud Drive: On the iCloud screen, toggle the switch next to “iCloud Drive” to turn it on.
- Choose to synchronize items (optional): You can choose whether to synchronize all the files and folders on your iPad by toggling the “Optimize iPad Storage” switch. If you want to store all files locally on your iPad, leave it turned off.
Enabling iCloud Drive on iOS 12 or earlier:
- Open Settings: Launch the Settings app on your iPad.
- Tap on iCloud: In the Settings menu, tap on “iCloud”.
- Enable iCloud Drive: Toggle the switch next to “iCloud Drive” to turn it on.
Once you have enabled iCloud Drive, you can access and manage your files using the Files app on your iPad. Files saved in iCloud Drive can be organized into folders, and you can also search for specific files using the search bar at the top of the app.
iCloud Drive also allows you to collaborate with others by sharing files and folders. You can share documents with specific people and control their access levels, whether it’s viewing or editing the file.
By enabling iCloud Drive on your iPad, you can sync your files across all your Apple devices seamlessly. This means you can start working on a document on your iPad and continue where you left off on your Mac or iPhone without any hassle.
So, take advantage of the convenience and flexibility of iCloud Drive by enabling it on your iPad today!
#
Using iCloud Photos on the iPad
iCloud Photos is a fantastic feature that allows you to store, access, and share your photos and videos across all your Apple devices. By enabling iCloud Photos on your iPad, you can effortlessly view and manage your entire photo library from anywhere. Here’s how to use iCloud Photos on your iPad:
Enabling iCloud Photos on iOS 13 or later:
- Open Settings: Launch the Settings app on your iPad.
- Tap on your name: Scroll down and tap on your name at the top of the Settings menu.
- Access iCloud Settings: In the Apple ID menu, tap on “iCloud”.
- Enable iCloud Photos: On the iCloud screen, toggle the switch next to “Photos” to turn on iCloud Photos.
- Choose synchronization preferences (optional): You can choose whether to optimize your iPad storage by selecting “Optimize iPad Storage.” If you prefer to keep all your photos locally on your iPad, leave this option turned off.
Enabling iCloud Photos on iOS 12 or earlier:
- Open Settings: Launch the Settings app on your iPad.
- Tap on iCloud: In the Settings menu, tap on “iCloud”.
- Enable iCloud Photos: Toggle the switch next to “Photos” to turn on iCloud Photos.
Once you have enabled iCloud Photos, here’s how you can use it:
Viewing and organizing photos:
- Photos app: Open the Photos app on your iPad to access your iCloud Photos. You will find all your synced photos and videos organized by date and location.
- Albums: Use the Albums tab in the Photos app to view and organize your photos into albums. You can create new albums, add photos to existing albums, and delete unwanted photos.
- Search: Utilize the Search feature to find specific photos based on people, places, or keywords that you have associated with them.
- Face recognition: iCloud Photos automatically recognizes faces in your photos, allowing you to view all pictures of a specific person by tapping on their face in the People album.
Sharing and collaboration:
- Shared Albums: Create shared albums in the Photos app and invite friends and family to view and contribute to the album. This is a great way to share photos from an event or vacation.
- Sharing options: Share individual photos or videos directly from the Photos app via message, email, or social media platforms.
- Collaboration: Multiple users can collaborate on shared albums, enabling them to add, delete, and comment on photos within the album.
Device synchronization:
iCloud Photos seamlessly syncs your photos across all your Apple devices. Any changes you make, such as organizing photos, deleting images, or adding new ones, will be reflected on all your devices.
iCloud Photos is a fantastic tool for managing and accessing your photo library on your iPad. It provides a seamless experience, ensuring that all your photos and videos are securely backed up and easily accessible from any of your Apple devices.
So, enable iCloud Photos on your iPad today and enjoy the convenience of having your entire photo collection at your fingertips!
#
Syncing Contacts with iCloud on the iPad
Syncing your contacts with iCloud on your iPad allows you to have all your important contact information accessible and up to date across all your Apple devices. By enabling iCloud Contacts, any changes or additions you make to your contacts will automatically sync with your iCloud account. Here’s how to sync contacts with iCloud on your iPad:
Enabling iCloud Contacts on iOS 13 or later:
- Open Settings: Launch the Settings app on your iPad.
- Tap on your name: Scroll down and tap on your name at the top of the Settings menu.
- Access iCloud Settings: In the Apple ID menu, tap on “iCloud”.
- Enable iCloud Contacts: Toggle the switch next to “Contacts” to turn on iCloud Contacts. Any existing contacts on your iPad will be uploaded to your iCloud account.
Enabling iCloud Contacts on iOS 12 or earlier:
- Open Settings: Launch the Settings app on your iPad.
- Tap on iCloud: In the Settings menu, tap on “iCloud”.
- Enable iCloud Contacts: Toggle the switch next to “Contacts” to turn on iCloud Contacts. Any existing contacts on your iPad will be uploaded to your iCloud account.
Once you have enabled iCloud Contacts, here’s how you can manage and access your contacts:
Contacts app: Open the Contacts app on your iPad, and you will see all your synced contacts. Here, you can view, edit, add, or delete contacts as needed.
Contact synchronization: Any changes you make on your iPad, such as adding or editing a contact, will automatically sync with your iCloud account. These changes will then be reflected on all your other Apple devices connected to the same iCloud account.
Merge duplicate contacts: iCloud Contacts has a built-in feature that allows you to merge duplicate contacts. If you have multiple contacts with the same information, you can easily merge them into a single contact to keep your address book organized.
Export and import: iCloud Contacts also allows you to export and import contacts. You can export contacts as a vCard file, which can then be shared or imported into other address book applications or services.
Restore contacts: In case you accidentally delete or lose a contact, you can easily restore it by logging into your iCloud account and accessing the recently deleted contacts folder.
Syncing your contacts with iCloud provides a seamless experience, ensuring that your contact information is always up to date and accessible on all your devices. It eliminates the need to manually transfer contacts between devices, simplifying contact management and ensuring that you never lose important contact information.
So, enable iCloud Contacts on your iPad today and have all your contacts at your fingertips, no matter which Apple device you’re using!
#
Managing Calendar Events with iCloud on the iPad
iCloud Calendar is a powerful tool that allows you to manage your schedule, appointments, and events across all your Apple devices. By enabling iCloud Calendar on your iPad, you can effortlessly create, edit, and share events, ensuring that your calendar is always up to date. Here’s how to manage calendar events with iCloud on your iPad:
Enabling iCloud Calendar on iOS 13 or later:
- Open Settings: Launch the Settings app on your iPad.
- Tap on your name: Scroll down and tap on your name at the top of the Settings menu.
- Access iCloud Settings: In the Apple ID menu, tap on “iCloud”.
- Enable iCloud Calendar: Toggle the switch next to “Calendar” to turn on iCloud Calendar.
Enabling iCloud Calendar on iOS 12 or earlier:
- Open Settings: Launch the Settings app on your iPad.
- Tap on iCloud: In the Settings menu, tap on “iCloud”.
- Enable iCloud Calendar: Toggle the switch next to “Calendar” to turn on iCloud Calendar.
Once you have enabled iCloud Calendar, here’s how you can manage your calendar events:
Calendar app: Open the Calendar app on your iPad, and you will see all your synced calendar events. Here, you can view, create, edit, and delete events.
Creating events: Tap on the “+” button in the Calendar app to create a new event. Enter the event details such as title, date, time, location, and any additional notes. You can also set reminders for events and invite others to the event via email or message.
Editing events: To make changes to an existing event, simply tap on the event in the Calendar app and select “Edit”. Make the necessary changes to the event details, and the changes will be synced across all your devices.
Sharing calendars: iCloud Calendar allows you to share calendars with others, making collaboration and scheduling easier. You can share calendars with specific people, set their access level (viewing or editing), and even subscribe to public calendars.
Managing multiple calendars: iCloud Calendar supports multiple calendars, allowing you to separate personal, work, or other categories. You can create new calendars, color-code them, and easily switch between them in the Calendar app.
Invitation management: When you receive a calendar invitation, you can easily respond to it directly from the Calendar app. You can accept, decline, or suggest a different time for the event, and the changes will be synchronized with the sender’s calendar.
Enabling iCloud Calendar on your iPad ensures that your schedule is synchronized across all your Apple devices. This seamless integration allows you to access and manage your events anytime, anywhere, and ensures that you never miss an important appointment.
So, enable iCloud Calendar on your iPad today and stay organized and on top of your schedule!
#
Accessing iCloud Mail on the iPad
With iCloud Mail, you can access your email on your iPad anytime, anywhere, as long as you have an internet connection. iCloud Mail is seamlessly integrated with your Apple ID, which means you can easily access your iCloud email account on your iPad. Here’s how to access iCloud Mail on your iPad:
Accessing iCloud Mail through Settings:
- Open Settings: Launch the Settings app on your iPad.
- Tap on your name: Scroll down and tap on your name at the top of the Settings menu.
- Access iCloud settings: In the Apple ID menu, tap on “iCloud”.
- Enable Mail: Toggle the switch next to “Mail” to turn on iCloud email.
Accessing iCloud Mail through the Mail app:
- Open the Mail app: Locate the Mail app on your iPad’s home screen and tap on it to launch.
- Add iCloud account: If you haven’t added your iCloud account previously, tap on “Add Account” and select “iCloud” from the list of email providers. Enter your iCloud email address and password to add the account.
- Accessing iCloud Mail: Once you have added your iCloud account, you will be able to access your iCloud Mail inbox, where you can read, compose, reply to, and manage your emails.
By accessing iCloud Mail on your iPad, you can enjoy the following benefits:
- Seamless integration: Your iCloud Mail is seamlessly integrated across all your Apple devices, which means any changes you make (e.g., reading, deleting, or moving emails) will sync across all your devices.
- Offline access: You can access your iCloud Mail even when you don’t have an internet connection. Any actions you perform while offline will sync once you reconnect to the internet.
- Push notifications: Stay up to date with incoming emails by enabling push notifications for your iCloud Mail. You’ll receive instant alerts on your iPad whenever a new email arrives.
- Spam and junk filtering: iCloud Mail includes built-in spam and junk filtering to help keep unwanted emails out of your inbox.
Whether it’s for personal or professional use, accessing iCloud Mail on your iPad provides a convenient and efficient way to manage your email correspondence. Stay connected and organized, and keep your inbox under control with the power of iCloud Mail!
#
Using iCloud Keychain on the iPad
iCloud Keychain is a secure password management tool provided by Apple that allows you to store and auto-fill your usernames, passwords, and credit card information across all your Apple devices. By utilizing iCloud Keychain on your iPad, you can enhance your online security and easily access your login credentials whenever you need them. Here’s how to use iCloud Keychain on your iPad:
Enabling iCloud Keychain on iOS 13 or later:
- Open Settings: Launch the Settings app on your iPad.
- Tap on your name: Scroll down and tap on your name at the top of the Settings menu.
- Access iCloud Settings: In the Apple ID menu, tap on “iCloud”.
- Enable iCloud Keychain: Toggle the switch next to “Keychain” to turn on iCloud Keychain.
- Set iCloud Security Code: If you haven’t set up an iCloud Security Code previously, you will be prompted to do so. Follow the on-screen instructions to create a security code. This code will be used to unlock and authorize access to your iCloud Keychain.
Enabling iCloud Keychain on iOS 12 or earlier:
- Open Settings: Launch the Settings app on your iPad.
- Tap on iCloud: In the Settings menu, tap on “iCloud”.
- Enable Keychain: Toggle the switch next to “Keychain” to turn on iCloud Keychain.
- Set iCloud Security Code: If you haven’t set up an iCloud Security Code previously, you will be prompted to do so. Follow the on-screen instructions to create a security code. This code will be used to unlock and authorize access to your iCloud Keychain.
Once you have enabled iCloud Keychain, here’s how you can use it:
Auto-fill passwords: When you visit a website or login screen on your iPad, iCloud Keychain can automatically fill in your saved username and password, saving you the hassle of typing them manually.
Auto-fill credit card information: iCloud Keychain can securely store your credit card information and automatically fill it in when making online purchases, making your checkout process faster and more convenient.
Password suggestions and storage: When creating a new online account or updating passwords, iCloud Keychain can generate strong, unique passwords for you and securely store them in your iCloud Keychain. This feature helps you maintain strong passwords across your accounts without the need to remember them.
Cross-device synchronization: Any changes or additions you make to your iCloud Keychain on your iPad will be synced with all your other Apple devices, ensuring that your login credentials and credit card information are always up to date.
By utilizing iCloud Keychain on your iPad, you can streamline your online activities, improve your security, and seamlessly access your passwords and credit card information whenever you need them. Experience the convenience and peace of mind that iCloud Keychain offers!
#
Finding a Lost iPad with Find My iPad on iCloud
One of the biggest concerns when it comes to losing a device is the fear of personal data falling into the wrong hands. Fortunately, Apple provides a powerful tool called “Find My iPad” that allows you to locate and secure your lost iPad remotely. By using the Find My iPad feature within iCloud, you can track the location of your iPad, play a sound to help locate it, remotely lock it, or even erase its data if necessary. Here’s how to find your lost iPad using Find My iPad on iCloud:
Setting up Find My iPad:
- Prepare your iPad: Ensure that the “Find My iPad” feature is enabled on your iPad. To do this, go to “Settings,” tap on your name, and select “Find My.” Toggle on “Find My iPad” and “Send Last Location.”
- Access iCloud: Using a computer or another Apple device, open a web browser and go to www.icloud.com.
- Sign in: Sign in to iCloud using your Apple ID and password.
- Access Find My: Once signed in, click on the “Find iPhone” icon. Note that the name may still refer to “Find iPhone,” but it works for iPads as well.
- Choose your iPad: At the top of the page, you will see a list of devices associated with your Apple ID. Select your lost iPad from the list.
Locating and securing your iPad:
- Tracking its location: If your lost iPad is currently connected to the internet, its approximate location will be displayed on the map in the Find My interface. You can zoom in or out to get a better view of its location.
- Playing a sound: If your iPad is nearby but you can’t locate it visually, you can click on the “Play Sound” option to play a sound on your iPad. This can be helpful in finding a misplaced or hidden device.
- Activating Lost Mode: If you are unable to retrieve your iPad immediately, you can activate Lost Mode. This mode allows you to remotely lock your iPad with a passcode and display a custom message on the lock screen, providing contact information for anyone who finds it.
- Erasing your iPad: If you believe your lost iPad is stolen or irretrievable, you have the option to remotely erase all personal data from the device to protect your privacy. Note that this action will remove all data, including photos, contacts, and apps, and cannot be undone.
By utilizing Find My iPad on iCloud, you can increase the chances of recovering your lost or stolen device while ensuring that your personal information remains protected. Act swiftly to secure your iPad and take appropriate steps to either retrieve it or safeguard your private data.
Remember, it is always recommended to keep Find My iPad enabled on your device to ensure maximum security and peace of mind!
#
Troubleshooting iCloud Issues on the iPad
iCloud is a powerful service that seamlessly integrates with your Apple devices, but sometimes you may encounter issues that prevent iCloud from functioning properly on your iPad. If you’re experiencing any problems with iCloud, don’t worry – there are several troubleshooting steps you can take to resolve the issue. Here are some common iCloud issues and their solutions:
1. Problem: Unable to sign in
If you’re having trouble signing in to iCloud on your iPad, try the following solutions:
- Check internet connection: Ensure that your iPad is connected to a stable internet connection.
- Verify Apple ID credentials: Double-check the Apple ID and password you entered for any errors.
- Restart iPad: Restart your iPad by pressing and holding the Sleep/Wake button until the power off slider appears. Slide it to power off, then turn your iPad back on and try signing in to iCloud again.
- Reset network settings: Go to Settings > General > Reset > Reset Network Settings. Note that this will remove saved Wi-Fi passwords.
2. Problem: iCloud files not syncing
If your iCloud files aren’t syncing properly across devices, try the following solutions:
- Check internet connection: Ensure that your iPad is connected to a stable internet connection.
- Toggle iCloud Drive off and on: Go to Settings > Your Name > iCloud > iCloud Drive. Toggle the switch off and then back on.
- Update iOS: Ensure that your iPad is running the latest version of iOS. Go to Settings > General > Software Update to check for updates.
3. Problem: Photos not uploading to iCloud
If your photos aren’t uploading to iCloud, try the following solutions:
- Check internet connection: Ensure that your iPad is connected to a stable internet connection.
- Enable iCloud Photos: Go to Settings > Your Name > iCloud > Photos and toggle on “iCloud Photos”.
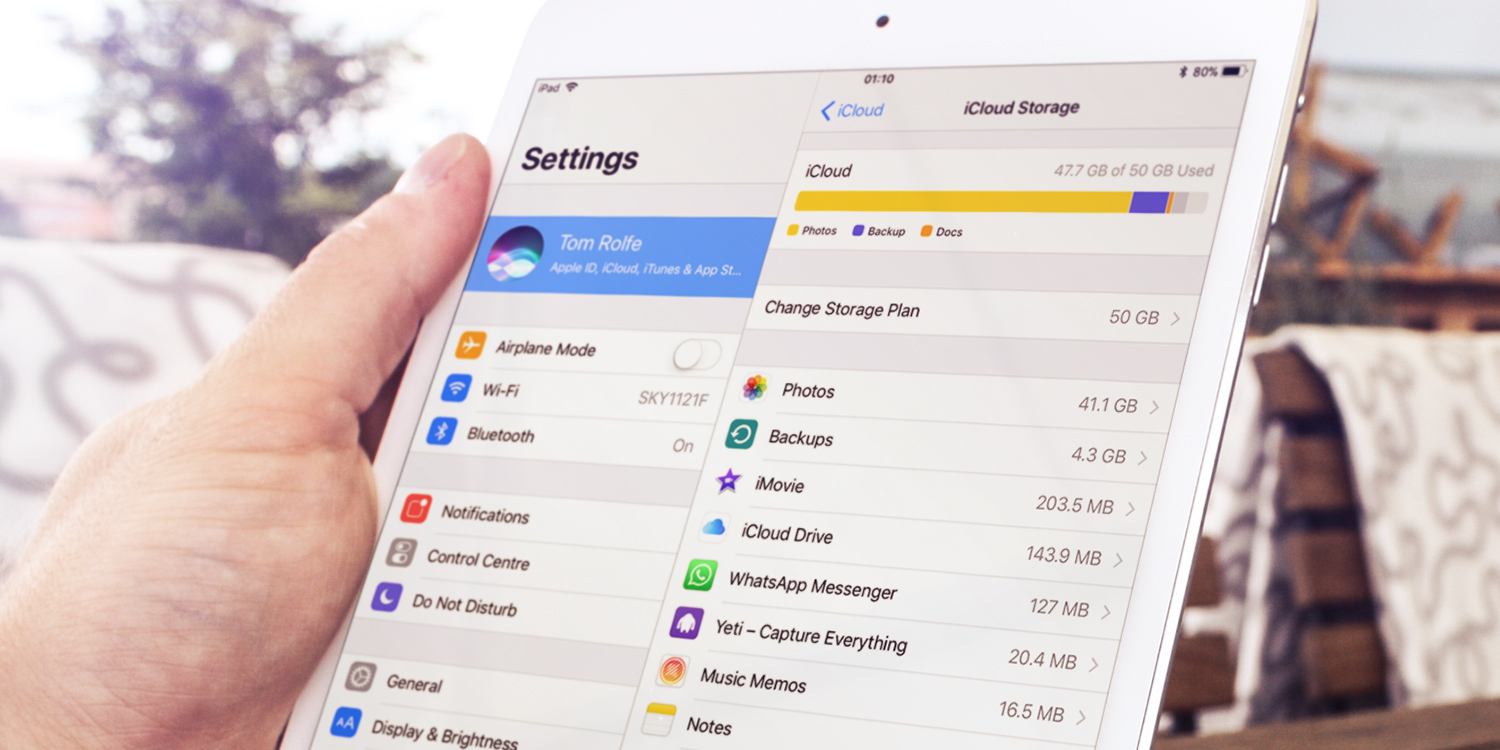
- Ensure enough storage: Make sure you have enough available storage in your iCloud account to upload photos. You can check your storage status in Settings > Your Name > iCloud > Manage Storage.
4. Problem: iCloud backup not working
If iCloud backup is not functioning properly on your iPad, try the following solutions:
- Check internet connection: Ensure that your iPad is connected to a stable internet connection.
- Free up storage: Ensure that you have enough available storage in your iCloud account for the backup. Delete unnecessary files or purchase additional iCloud storage if needed.
- Toggle iCloud Backup off and on: Go to Settings > Your Name > iCloud > iCloud Backup. Toggle the switch off and then back on.
If you’ve tried these troubleshooting steps and the issue persists, you may need to contact Apple Support for further assistance. They can provide specific guidance tailored to your situation and help you resolve any lingering iCloud issues on your iPad.
Remember to regularly update your iPad and iCloud settings to ensure a smooth and trouble-free iCloud experience!