
Overview of Google Reminders
Google Reminders is a powerful tool that helps you stay organized and never miss an important event or task. Whether you need to remember to pay a bill, pick up groceries, or complete a project, Google Reminders has got you covered. This feature is seamlessly integrated into various Google applications, such as Google Calendar, Google Assistant, and Google Keep, making it convenient and accessible across different devices.
One of the key advantages of using Google Reminders is its simplicity and ease of use. With just a few clicks or voice commands, you can create reminders and receive notifications to ensure that you never forget anything important again. The reminders can be set for a specific date and time or be location-based, triggering when you reach a designated place. This flexibility allows you to tailor your reminders to suit your specific needs and preferences.
Google Reminders offers a wide range of features to enhance your productivity. You can set recurring reminders, such as daily, weekly, or monthly tasks, to ensure that important tasks are regularly addressed. Additionally, you can add detailed notes or attach relevant links, photos, or documents to your reminders, providing you with all the necessary information at a glance.
Another useful feature of Google Reminders is the ability to snooze or dismiss reminders. If you are unable to complete a task at the scheduled time, you can simply snooze the reminder to a later time or date. Likewise, if a reminder is no longer relevant, you can dismiss it to declutter your list.
Google Reminders also allows you to organize and group your reminders. You can create different lists or categories to better manage your tasks and ensure that everything is well-organized. Whether it’s personal, work-related, or a specific project, you can easily keep track of various tasks and prioritize accordingly.
Setting Up Google Reminders
Setting up Google Reminders is a straightforward process that can be done in a few simple steps. Whether you prefer using the Google Calendar app or Google Assistant, you can easily configure the settings to start receiving timely reminders.
If you’re using Google Calendar to set up your reminders, follow these steps:
- Open the Google Calendar app on your device or access it via a web browser.
- Create a new event by clicking on the “+” button or selecting an existing event that you want to turn into a reminder.
- Edit the event details and set the desired date and time for your reminder.
- Under the “Notification” section, select the desired reminder option. You can choose to receive notifications via email, pop-up notifications on your device, or both.
- Save the event, and your reminder will be set!
If you prefer using Google Assistant to create reminders, these are the steps you need to follow:
- Activate Google Assistant by saying “Hey Google” or by opening the Google Assistant app on your device.
- Speak out your reminder by saying something like, “Hey Google, remind me to pick up groceries tomorrow at 5 pm.”
- Google Assistant will confirm the details of your reminder and ask for your permission to create it.
- Once you give your confirmation, the reminder will be added to your Google Assistant and will sync across all your devices.
It’s important to note that you need to have a Google account and be signed in to enable Google Reminders. Additionally, ensure that you have granted the necessary permissions for the apps to send you notifications, as this is crucial for receiving timely reminders.
By following these simple steps, you can easily set up Google Reminders and start organizing your tasks and events more effectively.
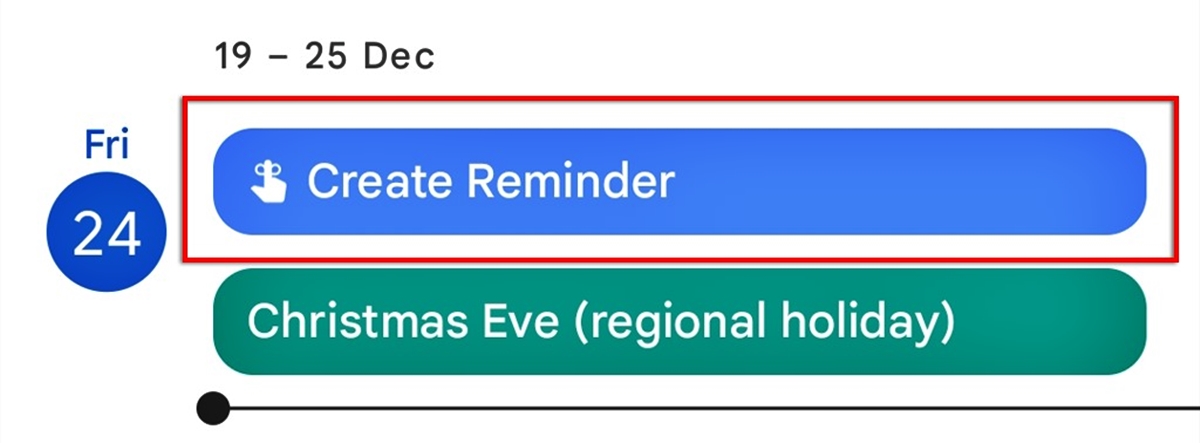
Creating a Reminder
Creating a reminder with Google Reminders is a quick and straightforward process. Whether you prefer using the Google Calendar app, Google Assistant, or Google Keep, you have multiple options for seamlessly adding new reminders.
If you’re using the Google Calendar app to create a reminder, follow these steps:
- Launch the Google Calendar app on your device or access it via a web browser.
- Click on the “+” button to create a new event or select an existing event that you want to turn into a reminder.
- Edit the event details, such as the title and time, to match the reminder you want to create.
- Under the “Notification” section, choose the desired reminder option. You can select to receive notifications via email, pop-up notifications, or both.
- Save the event, and it will be set as a reminder.
To create a reminder using Google Assistant, follow these steps:
- Activate Google Assistant by saying “Hey Google” or by opening the Google Assistant app on your device.
- Speak out your reminder, stating the specific task and time, such as “Hey Google, remind me to call John at 2 pm tomorrow.”
- Google Assistant will confirm the details of your reminder and ask for your confirmation to create it.
- Once you confirm, the reminder will be added to your Google Assistant and synced across your devices.
If you prefer using Google Keep to create reminders, you can follow these steps:
- Open the Google Keep app on your device or access it via a web browser.
- Create a new note by clicking on the “+” button or selecting an existing note where you want to add the reminder.
- Enter the task or event details in the note, and then click on the “Add reminder” button.
- Set the specific date and time for the reminder and click “Save.”
Creating a reminder with Google Reminders gives you the flexibility to choose the method that suits your preference and conveniently integrates with your daily routine.
Managing Reminders
Managing your reminders with Google Reminders is a breeze, thanks to the intuitive interface and user-friendly features. Whether you need to edit, mark as complete or reschedule a reminder, Google Reminders provides you with the tools to stay organized and on top of your tasks.
To modify or edit a reminder, follow these steps:
- If you’re using the Google Calendar app, find the reminder in your calendar and click on it to open the details. From here, you can make any necessary changes, such as updating the title, time, or notification settings.
- If you prefer using Google Keep, simply open the note containing the reminder and click on the reminder icon. You can then edit the reminder details, including the date, time, and notification preferences.
- If you’re using Google Assistant, activate it and say, “Hey Google, edit my reminder for [task].” Google Assistant will guide you through the editing process, allowing you to make the necessary changes to the reminder.
Marking a reminder as complete is as simple as it gets:
- In the Google Calendar app, find the reminder and click on the checkbox or mark it as complete. The reminder will be crossed out to indicate completion.
- In Google Keep, locate the note with the reminder and click on the checkbox next to the reminder. It will be marked as complete and visually indicated as such.
- If you’re using Google Assistant, activate it and say, “Hey Google, mark my reminder as complete.” Google Assistant will confirm and mark the reminder as done.
Rescheduling a reminder is also a straightforward process:
- In the Google Calendar app, select the reminder and click on the modify icon. Then, update the date and time according to your new schedule.
- In Google Keep, open the note with the reminder and click on the reminder icon. Adjust the date and time to your desired rescheduled time.
- If using Google Assistant, activate it and say, “Hey Google, move my reminder for [task] to [new time].” Google Assistant will confirm the update, and the reminder will be rescheduled accordingly.
Managing your reminders with Google Reminders allows you to effortlessly stay on top of your tasks and ensure that nothing falls through the cracks.
Snoozing and Dismissing Reminders
Google Reminders offers the flexibility to snooze or dismiss reminders based on your needs. Whether you need a little more time to complete a task or find a reminder no longer relevant, you can easily handle these situations with just a few clicks or voice commands.
To snooze a reminder and receive a reminder at a later time or date, follow these steps:
- If you’re using the Google Calendar app, open the reminder and select the snooze option. Choose the desired snooze duration, such as 10 minutes, 1 hour, or custom, and the reminder will reappear at the specified time.
- In Google Keep, select the reminder and click on the snooze icon. Choose the snooze duration, and the reminder will be rescheduled accordingly.
- If you’re using Google Assistant, simply say, “Hey Google, snooze my reminder for [task] for [duration].” The reminder will be snoozed, and you will receive it again after the specified time.
To dismiss a reminder and remove it from your list, follow these steps:
- In the Google Calendar app, open the reminder and select the dismiss option. The reminder will be removed from your list and will no longer appear.
- In Google Keep, select the reminder and click on the dismiss icon. The reminder will be dismissed and no longer visible in the note.
- If you’re using Google Assistant, say, “Hey Google, dismiss my reminder for [task].” Google Assistant will confirm the dismissal, and the reminder will be removed from your list.
Snoozing and dismissing reminders with Google Reminders allow you to customize your task management and tailor it to your specific needs. Whether you need a gentle reminder or want to declutter your list, these options make it easy to stay organized and focused on what matters most.
Organizing and Grouping Reminders
Google Reminders offers convenient features to help you organize and group your reminders efficiently. By categorizing your tasks and events, you can easily prioritize and manage your responsibilities with ease.
To organize your reminders in Google Calendar, follow these steps:
- Create different calendars or color-coded labels for specific types of reminders, such as work-related, personal, or project-specific tasks.
- Assign each reminder to the appropriate calendar or label to categorize them accordingly.
- Toggle the visibility of specific calendars or labels to focus on specific tasks or view your reminders as a whole.
- You can also drag and drop reminders to rearrange them within a calendar or label for better organization.
In Google Keep, you can organize your reminders using labels and categories:
- Create labels or categories in Google Keep to group related reminders together.
- Add specific labels or categories to your reminders to classify them accordingly.
- Use the search function in Google Keep to filter and view reminders with specific labels or categories.
- Duplicate reminders and assign them to different labels or categories if they relate to multiple aspects of your life or work.
By organizing and grouping your reminders, you can quickly navigate through your tasks, stay focused on specific areas, and ensure that nothing gets overlooked. Whether you prefer a calendar-based approach in Google Calendar or a label-based system in Google Keep, finding the method that works best for your workflow will greatly enhance your productivity.
Using Voice Commands with Google Reminders
One of the major advantages of Google Reminders is its integration with Google Assistant, allowing you to create and manage reminders using voice commands. This hands-free approach makes it even more convenient to add, modify, and interact with your reminders.
To create a reminder using voice commands with Google Assistant, follow these steps:
- Activate Google Assistant by saying “Hey Google” or by opening the Google Assistant app on your device.
- Speak out your reminder, including the task and the time, such as “Hey Google, remind me to buy groceries at 5 pm tomorrow.”
- Google Assistant will confirm the details of your reminder and ask for your confirmation to create it.
- Once you confirm, the reminder will be added to your Google Assistant and synced across your devices.
Using voice commands, you can also edit or modify existing reminders with ease:
- Activate Google Assistant and say, “Hey Google, edit my reminder for [task].” Google Assistant will guide you through the editing process, allowing you to make necessary changes to the reminder.
- If you want to mark a reminder as complete, simply say, “Hey Google, mark my reminder for [task] as done.” Google Assistant will acknowledge the completion and update the status accordingly.
- To reschedule a reminder using voice commands, say, “Hey Google, move my reminder for [task] to [new time].” Google Assistant will confirm the update, and the reminder will be adjusted accordingly.
Using voice commands with Google Reminders provides you with a convenient and hands-free way to manage your reminders. Whether you’re at home, in the car, or on the go, you can effortlessly interact with your reminders simply by speaking to Google Assistant.
Notifications and Reminders on Different Devices
Google Reminders offers a seamless experience across multiple devices, ensuring that you never miss an important task or event. Whether you’re using a smartphone, tablet, computer, or smart speaker, you’ll receive timely notifications and reminders to keep you on track.
When it comes to notifications and reminders, Google Reminders provides flexibility in how you receive them:
On Mobile Devices:
- If you have the Google Calendar app installed on your mobile device, you’ll receive notifications for your reminders directly on your device. These notifications can be in the form of pop-up alerts, sound alerts, or vibration, depending on your device settings.
- If you have enabled notifications for Google Assistant on your smartphone or tablet, you’ll receive reminders from Google Assistant as push notifications, ensuring that you never miss an important task.
On Computers:
- When you’re using the Google Calendar web version on your computer, you can enable desktop notifications to receive reminders as pop-up alerts even when you’re not actively using the Google Calendar web page.
- If you have Google Assistant enabled on your computer, you’ll receive reminders as push notifications if you have notifications enabled for Google Assistant.
On Smart Speakers or Smart Displays:
- If you have a Google Home or other smart speakers with Google Assistant, you’ll receive auditory reminders that are read out loud and can be accompanied by notifications on your mobile device or computer if they are connected to the same Google account.
- If you have a smart display like Google Nest Hub, reminders will be displayed visually on the screen in addition to being announced audibly.
By syncing your Google account across devices, you can ensure that your reminders are seamlessly delivered to all your devices. This allows you to stay organized and on top of your tasks, no matter which device you’re using at any given time.
Collaborating on Reminders with Others
Google Reminders now offers the ability to collaborate and share reminders with others, making it easier to coordinate tasks and events with family, friends, or colleagues. Whether you’re planning a team project or managing household chores, collaborating on reminders ensures that everyone stays informed and accountable.
To collaborate on reminders in Google Reminders, follow these steps:
- Create a new reminder or select an existing one that you want to share.
- Click on the collaborate icon or the “Share” button.
- Enter the email addresses or names of the people you want to collaborate with.
- Choose the appropriate permission settings, such as allowing others to edit the reminder or just view it.
- Click “Send” to invite the collaborators to access and contribute to the shared reminder.
Once shared, collaborators can make updates, add notes, or mark tasks as complete within the shared reminder. Any changes made by collaborators will be visible to all participants in real-time, ensuring that everybody stays up to date.
Collaborating on reminders can be particularly useful in various scenarios:
Work Projects:
- Teams can create and share reminders for specific project milestones, deadlines, or tasks, allowing everyone to stay informed and accountable.
- Collaborators can update the status of assigned tasks, add important notes, or discuss project-related details within the shared reminder.
Household Chores:
- Family members can collaborate on a shared reminder for household chores, ensuring that everyone knows what needs to be done and when.
- Individuals can mark tasks as complete, add comments or notes, or request assistance within the shared reminder, making it easier to distribute responsibilities.
Social Events:
- When planning a social event, friends can collaborate on a reminder with details such as the date, time, location, and assigned tasks.
- Collaborators can RSVP, suggest changes or additions, and discuss event-related matters within the shared reminder, allowing for effortless coordination.
Collaborating on reminders with Google Reminders streamlines communication, fosters teamwork, and ensures that everyone involved stays on the same page. With real-time updates and shared access, managing tasks and events becomes more efficient and seamless.
Deleting and Archiving Reminders
Managing your reminders effectively also means knowing how to delete or archive them when they are no longer needed or relevant. Google Reminders provides options for removing reminders from your active list while still allowing you to access them if necessary.
To delete a reminder in Google Reminders, follow these steps:
- In the Google Calendar app, find the reminder you want to delete and open its details.
- Locate the delete option and click on it. The reminder will be permanently removed from your list.
- In Google Keep, open the note containing the reminder and click on the delete icon next to the reminder’s details. Confirm the deletion to remove the reminder.
- If you’re using Google Assistant, activate it and say, “Hey Google, delete my reminder for [task].” Google Assistant will remove the reminder from your list.
Archiving a reminder in Google Reminders allows you to retain a record of the reminder without cluttering your active list. Here’s how to archive a reminder:
- In the Google Calendar app, find the reminder you want to archive and open its details.
- Locate the archive option and click on it. The reminder will be moved to your archived list.
- In Google Keep, open the note containing the reminder and click on the archive icon next to the reminder’s details. The reminder will be archived and no longer visible in your active list.
- To access archived reminders in Google Calendar or Google Keep, look for the “Archived” section or use the search function to find specific archived reminders.
Deleting or archiving reminders in Google Reminders allows you to keep your task list organized and focused. By removing completed or irrelevant reminders, you can declutter your active list and maintain a clear overview of tasks that require your attention.
Troubleshooting Google Reminders
Although Google Reminders is designed to be reliable and user-friendly, you may encounter occasional issues or glitches. Understanding common troubleshooting techniques can help you quickly resolve any problems and ensure a smooth experience with Google Reminders.
If you’re experiencing difficulties with Google Reminders, try these troubleshooting steps:
1. Check your internet connection: Ensure that you have a stable internet connection to access and synchronize your reminders across devices. Unstable or slow internet connectivity can cause delays or syncing issues.
2. Update your apps: Make sure you have the latest version of the Google Calendar, Google Keep, or Google Assistant app installed on your device. Outdated apps can sometimes cause compatibility issues.
3. Restart your device: Sometimes, a simple reboot of your device can resolve temporary glitches or issues. Restart your smartphone, tablet, or computer and check if the problem persists.
4. Check notification settings: Verify that you have allowed notifications for Google Calendar and Google Assistant on your device. Incorrect settings could prevent you from receiving timely reminders.
5. Clear app cache and data: If you’re encountering persistent issues, clearing the cache and data of the Google Calendar, Google Keep, or Google Assistant app can sometimes resolve the problem. However, note that clearing data will reset app settings and remove any locally saved data.
6. Disable and re-enable reminders: If specific reminders are not functioning correctly, try disabling and then re-enabling the reminder function on your device. This can help refresh the settings and resolve any conflicting configurations.
7. Contact support: If none of the above steps resolve the issue, reach out to Google support for further assistance. They can provide specific troubleshooting guidance based on your device and software configuration.
By following these troubleshooting techniques, you can overcome common issues and ensure that Google Reminders function smoothly, keeping you organized and on top of your tasks.
Tips and Tricks for Using Google Reminders
Google Reminders offers a plethora of features and functionalities to help improve your task management and organization. Here are some useful tips and tricks to make the most out of Google Reminders:
1. Use natural language: When creating a reminder with Google Assistant, try using natural language instead of rigid commands. For example, say “Remind me to buy milk tomorrow morning” instead of “Set a reminder for buying milk at 9 am tomorrow.”
2. Set location-based reminders: Take advantage of the location-based reminder feature to receive notifications when you arrive or leave a specific place. For instance, create a reminder to pick up groceries and set the location to your local grocery store.
3. Utilize recurring reminders: For tasks or events that repeat regularly, set recurring reminders to save time. Instead of creating individual reminders each time, specify the frequency (such as daily, weekly, or monthly) and let Google Reminders handle the repetition for you.
4. Attach files and links: Add more context to your reminders by attaching files, links, or relevant documents. This way, you’ll have all the necessary information in one place when it’s time to complete the task.
5. Use labels or categories: Organize your reminders with labels or categories to easily distinguish between different types of tasks. This is particularly helpful when you have multiple projects or areas of responsibility.
6. Enable cross-device synchronization: Ensure that your Google account is synced across all your devices, including smartphones, tablets, and computers. This way, you can access and manage your reminders seamlessly, regardless of the device you’re using.
7. Utilize voice commands: Take advantage of voice commands with Google Assistant to create, edit, and manage your reminders hands-free. This feature is especially useful when you’re on the move or have your hands full.
8. Snooze strategically: When snoozing a reminder, choose a realistic time frame that allows you to stay on track. Avoid snoozing reminders for unnecessarily long periods, as it may lead to delaying tasks or forgetting about them altogether.
9. Practice regular review: Set aside regular intervals to review your reminders, ensuring that they align with your current priorities and schedule. This helps you stay organized and avoid cluttering your reminder list with outdated or irrelevant tasks.
10. Leverage collaboration: If you’re working on a project or managing tasks as a team, utilize the collaboration feature to share and assign reminders to team members. This fosters transparency, accountability, and efficient task management.
By implementing these tips and tricks, you can optimize your use of Google Reminders and streamline your task management process, ultimately enhancing your productivity and organization.