
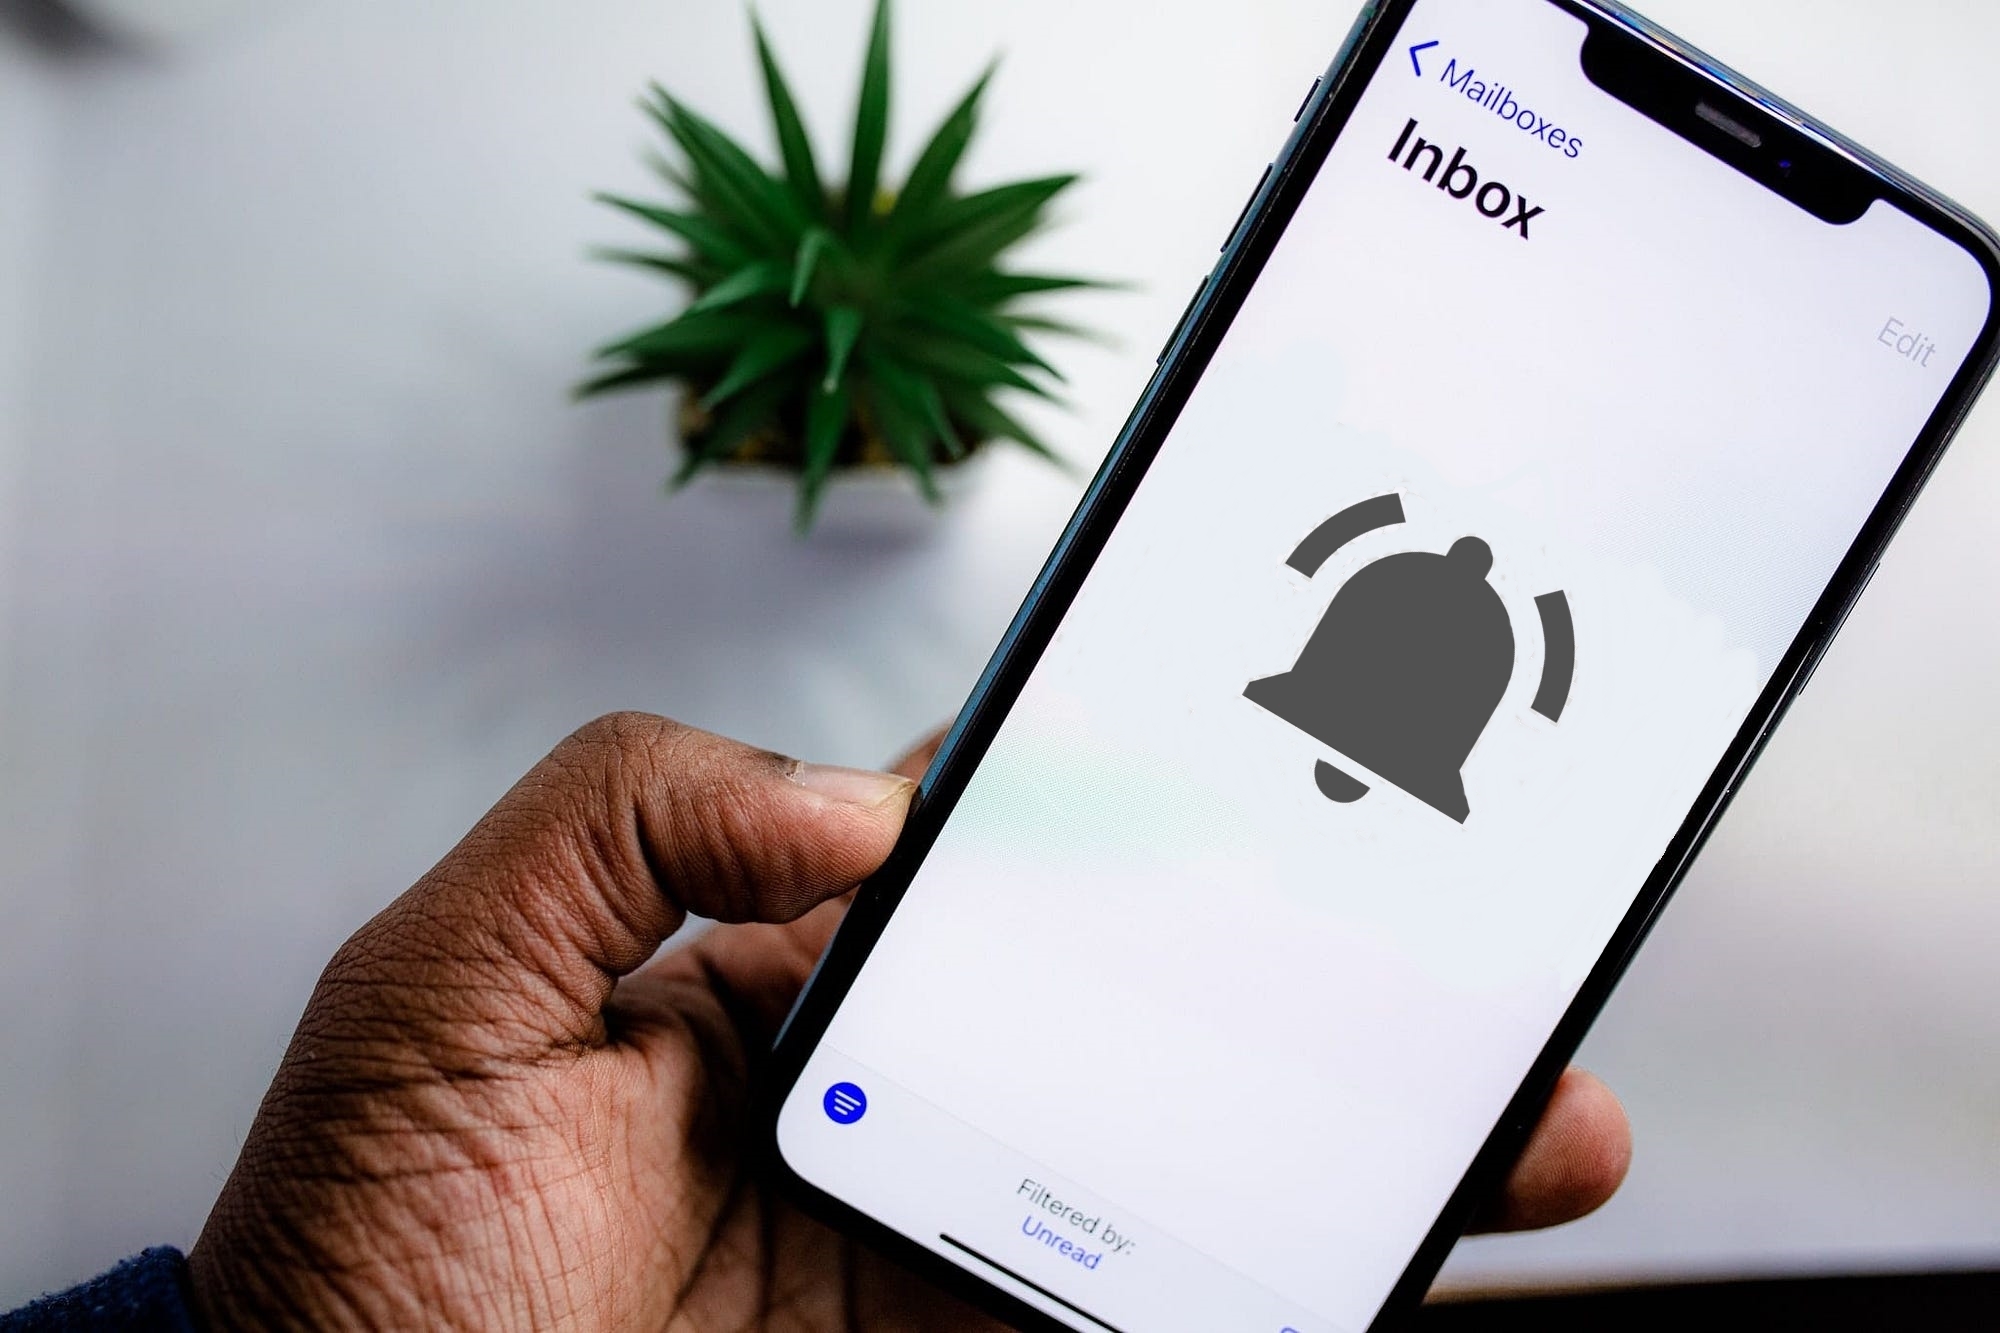
Enable Gmail Notifications on Your iPhone
Staying on top of your Gmail messages is crucial, and enabling notifications on your iPhone is a great way to ensure that you never miss an important email. With a few simple steps, you can set up Gmail notifications to appear in your iPhone’s Notification Center. Here’s how:
1. Access the Settings menu on your iPhone:
To begin, open the Settings app on your iPhone’s home screen. This is the app with the gear icon.
2. Locate the “Notifications” option:
Scroll down the Settings menu and look for the “Notifications” option. Tap on it to proceed.
3. Open “Gmail” in the Notifications menu:
On the Notifications screen, scroll through the list of apps until you find “Gmail.” Tap on it to access the Gmail notification settings.
4. Customize Gmail notification settings:
Inside the Gmail notification settings, you will find various options to customize your notifications according to your preferences.
5. Enable “Allow Notifications”:
Make sure the “Allow Notifications” toggle is enabled. This allows Gmail to send notifications to your iPhone.
6. Choose the type of alerts you prefer:
Under the “Alerts” section, you can choose between “None,” “Banners,” or “Alerts” for the type of notifications you want to receive.
7. Set the “Show Previews” option:
You can decide whether to show previews of Gmail messages in your notifications by selecting “Always,” “When Unlocked,” or “Never.”
8. Configure the “Notification Grouping” setting:
If you receive multiple notifications from Gmail, you can choose to group them together or keep them separated by app.
9. Adjust the “Badge App Icon” setting:
Toggle the switch next to “Badge App Icon” to enable or disable the app icon badge for Gmail, indicating the number of unread messages.
10. Enable or disable the “Sounds” option:
If you prefer to receive sound notifications for Gmail, you can enable the “Sounds” toggle. Otherwise, leave it disabled for silent notifications.
These steps will ensure that Gmail notifications are enabled on your iPhone, allowing you to stay informed and never miss a crucial email.
Access the Settings menu on your iPhone
To enable Gmail notifications on your iPhone, the first step is to access the Settings menu. This is where you’ll find all the necessary options to customize your notification settings. Here’s how to do it:
1. Unlock your iPhone:
If your iPhone is locked, swipe your finger across the screen or press the Home button to unlock it.
2. Locate the “Settings” app:
The Settings app is represented by a gear icon and is usually located on your home screen. Look for the app and tap on it to open.
3. Scroll down to find the “Notifications” option:
In the Settings menu, you’ll see a list of different options. Start scrolling down until you see “Notifications” and tap on it.
4. Look for the “Gmail” app in the list:
Inside the Notifications menu, you’ll see a list of all the apps installed on your iPhone. Look for the “Gmail” app and tap on it to access its notification settings.
5. Customize your Gmail notification settings:
Now that you’ve accessed the Gmail notification settings, you can customize them to your liking. You can choose the type of alerts you prefer, select whether or not to show message previews, adjust notification grouping, and more.
By accessing the Settings menu on your iPhone, you’ll be able to find and modify the necessary options to enable Gmail notifications. Remember to explore the various settings to personalize your notification experience and ensure that you receive timely updates about your Gmail messages.
Locate the “Notifications” option
Once you have accessed the Settings menu on your iPhone, the next step is to locate the “Notifications” option. This is where you’ll find all the settings and controls related to app notifications on your device. Here’s how to find it:
1. Scroll through the Settings menu:
Using your finger, swipe up or down on the screen to scroll through the various options in the Settings menu. Keep scrolling until you come across the “Notifications” option.
2. Look for the “Notifications” icon:
The “Notifications” icon is usually represented by a bell-shaped symbol or a speech bubble. Scan the list of options until you find the recognizable icon and tap on it to proceed.
3. Access the “Notifications” menu:
Once you tap on the “Notifications” icon, it will open up a dedicated menu with all the notification settings for your apps.
4. Explore the “Notifications” menu:
Inside the “Notifications” menu, you will see a list of all the apps installed on your iPhone. This list includes both built-in Apple apps and third-party apps. Scroll through the list to locate the “Gmail” app.
5. Tap on the “Gmail” app:
When you find the “Gmail” app in the list, tap on it to access its specific notification settings.
By following these steps, you will easily locate the “Notifications” option within the Settings menu on your iPhone. Once you access this menu, you’ll be able to customize the notification settings for Gmail and other apps according to your preferences.
Open “Gmail” in the Notifications menu
After accessing the “Notifications” menu in the Settings app on your iPhone, the next step is to locate and open the “Gmail” app in this menu. This will allow you to access and customize the specific notification settings for Gmail. Here’s how to do it:
1. Scroll through the list of apps:
In the “Notifications” menu, you will see a list of all the apps installed on your iPhone. This list includes both system apps and third-party apps. Scroll through the list until you find the “Gmail” app.
2. Locate the “Gmail” app:
The apps are usually listed alphabetically, so it should be relatively easy to find the “Gmail” app in the list. Look for the familiar Gmail logo, which consists of an envelope with a red “M” inside.
3. Tap on the “Gmail” app:
Once you find the “Gmail” app in the list, tap on it to open its specific notification settings.
4. Access the Gmail notification settings:
By tapping on the “Gmail” app, you will be directed to the notification settings screen for Gmail. Here, you will find options to customize how Gmail notifications are displayed on your iPhone.
5. Customize your Gmail notification settings:
Within the Gmail notification settings, you can customize various aspects such as the type of alerts you prefer, whether or not to show message previews, and how notifications are grouped.
By following these steps, you can effectively open the “Gmail” app in the Notifications menu on your iPhone. This will allow you to tailor the notification settings specifically for Gmail, ensuring that you receive notifications in a way that suits your preferences and needs.
Customize Gmail Notification Settings
Once you have accessed the Gmail notification settings on your iPhone, you can begin customizing them according to your preferences. These settings allow you to control how Gmail notifications are displayed and behave on your device. Here’s how you can customize Gmail notification settings:
1. Enable “Allow Notifications”:
The first step is to ensure that the “Allow Notifications” toggle is enabled. This allows Gmail to send notifications to your iPhone. If it’s already enabled, you can proceed to the next step.
2. Choose the type of alerts you prefer:
Under the “Alerts” section, you can choose between different options for the type of notifications you want to receive. You can select “None” for no alerts, “Banners” for notifications that appear briefly at the top of the screen, or “Alerts” for notifications that require action to dismiss.
3. Set the “Show Previews” option:
You can decide whether to show previews of Gmail messages in your notifications by selecting one of the following options:
- “Always”: This displays message previews even when your iPhone is locked.
- “When Unlocked”: This shows message previews only when your iPhone is unlocked.
- “Never”: This disables message previews in notifications altogether.
4. Configure the “Notification Grouping” setting:
If you receive multiple notifications from Gmail, you can choose how they are grouped. This can help you stay organized and easily manage your notifications. You can opt to group them by app or keep them separated by individual notification.
5. Adjust the “Badge App Icon” setting:
The “Badge App Icon” setting controls whether or not the Gmail app displays a numerical badge indicating the number of unread messages. Toggle the switch to enable or disable this feature based on your preference.
6. Enable or disable the “Sounds” option:
If you prefer to receive sound notifications for Gmail, you can enable the “Sounds” toggle. This will play a sound when a new Gmail notification arrives. Conversely, if you wish to receive silent notifications, leave this toggle disabled.
By customizing these settings, you can personalize how Gmail notifications appear on your iPhone. Take the time to fine-tune them to your liking, ensuring that you receive notifications in a way that best suits your workflow and preferences.
Enable “Allow Notifications”
One of the key steps in customizing your Gmail notification settings on your iPhone is to ensure that the “Allow Notifications” toggle is enabled. This setting allows Gmail to send notifications to your device. Here’s how you can enable “Allow Notifications” for Gmail:
1. Locate the “Allow Notifications” toggle:
When you open the Gmail notification settings, you will find an option labeled “Allow Notifications”. It is represented by a toggle switch.
2. Enable the “Allow Notifications” toggle:
To enable Gmail notifications, simply tap on the “Allow Notifications” toggle switch. It should move to the right and turn green, indicating that notifications are now allowed for the Gmail app on your iPhone.
3. Benefits of enabling “Allow Notifications”:
By enabling the “Allow Notifications” toggle, you will start receiving real-time notifications for new emails and important updates in your Gmail account. These notifications will be displayed in the Notification Center, on the Lock Screen, or as banners depending on your settings preferences.
4. Make additional customizations:
Once you have enabled “Allow Notifications”, you can further customize your Gmail notification settings to personalize how notifications are displayed, the type of alerts you prefer, and more. You can explore options such as “Alerts”, “Show Previews”, “Notification Grouping”, “Badge App Icon”, and “Sounds” to fully tailor your Gmail notifications to your liking.
By enabling the “Allow Notifications” toggle for the Gmail app on your iPhone, you ensure that you stay informed about important emails and updates. Don’t forget to adjust the other notification settings to create the perfect notification experience that suits your needs.
Choose the Type of Alerts You Prefer
When customizing your Gmail notification settings on your iPhone, one important aspect to consider is the type of alerts you prefer to receive. This determines how notifications from Gmail will be displayed on your device. Here are the different types of alerts you can choose from:
1. None:
Selecting “None” means that you will not receive any visual or audible alerts for new Gmail notifications. This can be useful if you only want to check your emails manually or if you find notifications distracting.
2. Banners:
Opting for “Banners” will display a banner notification at the top of your screen when a new Gmail message arrives. Banners are temporary and will automatically disappear after a few seconds. They provide a quick summary of the email, including the sender and subject, allowing you to decide whether to open the Gmail app to read the full message or not.
3. Alerts:
Choosing “Alerts” provides a more prominent notification that requires your attention. An alert notification will display the sender, subject, and a short preview of the email. It will remain on the screen until you interact with it, either by dismissing or opening the Gmail app.
4. Customizing your alert style:
You can further customize the appearance of alerts by navigating to the “Alert Style” option in the Gmail notification settings. This allows you to choose between a “Default” style, which is the standard iOS style, or a “Persistent” style, which remains on the screen until you dismiss it.
By selecting the type of alerts that suit your preferences, you can ensure that you receive Gmail notifications in a way that is convenient and not intrusive to your workflow. Whether you opt for subtle banners or more noticeable alerts, choose the option that best meets your needs and enhances your productivity.
Set the “Show Previews” Option
When customizing your Gmail notification settings on your iPhone, one important aspect to consider is the “Show Previews” option. This setting determines whether or not to display previews of Gmail messages in your notifications. Here’s how you can set the “Show Previews” option:
1. Open the Gmail notification settings:
Access the Gmail notification settings on your iPhone by navigating to the Notifications menu in the Settings app and selecting the Gmail app.
2. Locate the “Show Previews” option:
In the Gmail notification settings, you will find an option labeled “Show Previews.” This option controls whether previews of Gmail messages are shown in your notifications.
3. Choose a “Show Previews” setting:
You have three options to choose from:
- Always: Selecting “Always” will display message previews in your notifications, even when your iPhone is locked. This allows you to quickly read the content of the email without unlocking your device.
- When Unlocked: Choosing “When Unlocked” will show message previews in notifications only when your iPhone is unlocked. This provides an extra layer of privacy, as message content won’t be visible on your lock screen.
- Never: Opting for “Never” will disable message previews in notifications altogether. You will only see the sender’s name and subject line in your Gmail notifications.
4. Select your preference:
Choose the “Show Previews” setting that best suits your needs and privacy preferences. You may want to consider the sensitivity and confidentiality of your emails when making this decision.
By setting the “Show Previews” option, you can control the level of information displayed in Gmail notifications on your iPhone. Whether you prefer full message previews or only see limited details, this setting allows you to tailor the Gmail notification experience to your preferences and privacy requirements.
Configure the “Notification Grouping” Setting
When customizing your Gmail notification settings on your iPhone, one important option to consider is the “Notification Grouping” setting. This feature allows you to control how notifications from Gmail are grouped together. Here’s how you can configure the “Notification Grouping” setting:
1. Open the Gmail notification settings:
Access the Gmail notification settings on your iPhone by navigating to the Notifications menu in the Settings app and selecting the Gmail app.
2. Locate the “Notification Grouping” option:
In the Gmail notification settings, you will find an option labeled “Notification Grouping.” This option controls how Gmail notifications are grouped and displayed on your device.
3. Choose a “Notification Grouping” setting:
You have two options to choose from:
- By App: Selecting “By App” will group all notifications from the Gmail app together. This means that you will see a single notification for Gmail, even if you receive multiple emails. This grouping can help reduce notification clutter.
- Automatic: Choosing “Automatic” allows your iPhone to systemically group notifications depending on various factors, such as time, app, and thread. This can be helpful when you receive multiple emails from different Gmail threads.
4. Select your preference:
Based on your personal preference and management style, choose the “Notification Grouping” setting that works best for you. Consider how you want to view and manage your Gmail notifications efficiently.
By configuring the “Notification Grouping” setting, you can customize how Gmail notifications are organized on your iPhone. Whether you prefer a streamlined single notification or want to utilize automatic grouping, this setting allows you to tailor the Gmail notification experience to your liking.
Adjust the “Badge App Icon” Setting
When customizing your Gmail notification settings on your iPhone, you can also adjust the “Badge App Icon” setting. This feature controls whether or not the Gmail app displays a numerical badge indicating the number of unread messages. Here’s how you can adjust the “Badge App Icon” setting:
1. Open the Gmail notification settings:
Go to the Settings app on your iPhone and navigate to the Notifications menu. Locate and tap on the Gmail app to access its specific notification settings.
2. Locate the “Badge App Icon” option:
In the Gmail notification settings, you will find an option labeled “Badge App Icon.” This option controls the badge that appears on the Gmail app icon.
3. Toggle the “Badge App Icon” setting:
Toggle the switch next to “Badge App Icon” to enable or disable this feature. When enabled, the Gmail app icon will display a numerical badge indicating the number of unread messages. When disabled, the badge will not appear.
4. Choose your preference:
Consider your preferences and how you manage your emails. If you find the badge useful for staying updated on the number of unread messages, you may want to keep it enabled. Alternatively, if you prefer a clutter-free app icon without any indicators, you can disable the badge.
By adjusting the “Badge App Icon” setting, you can decide whether or not you want Gmail to display a numerical badge on its app icon. This allows you to easily track the number of unread messages at a glance or keep your app icon clean and minimalist.
Enable or Disable the “Sounds” Option
When customizing your Gmail notification settings on your iPhone, you have the option to enable or disable the “Sounds” feature. This setting controls whether or not Gmail notifications will play a sound when they arrive. Here’s how you can enable or disable the “Sounds” option:
1. Open the Gmail notification settings:
Access the Gmail notification settings on your iPhone by navigating to the Notifications menu in the Settings app and selecting the Gmail app.
2. Locate the “Sounds” option:
In the Gmail notification settings, you will find an option labeled “Sounds.” This option controls whether notifications from Gmail will play a sound when they arrive.
3. Enable or disable the “Sounds” toggle:
Toggle the switch next to “Sounds” to enable or disable this feature. If the switch is turned on and appears green, Gmail notifications will play a sound. If the switch is turned off and appears gray, no sound will play.
4. Choose your preference:
Consider your personal preference and the environment in which you receive notifications. Enabling the “Sounds” option can be helpful when you want an audible cue to alert you of new Gmail messages. On the other hand, disabling it might be preferred if you prefer a silent notification experience.
By enabling or disabling the “Sounds” option, you have control over whether Gmail notifications on your iPhone play a sound or remain silent. This allows you to customize your notification experience based on your preferences and the needs of your current situation.
Customize “Lock Screen” Notifications for Gmail
When customizing your Gmail notification settings on your iPhone, you also have the option to customize how Gmail notifications appear on your Lock Screen. This allows you to control the level of privacy and information visibility for your Gmail notifications. Here’s how you can customize “Lock Screen” notifications for Gmail:
1. Open the Gmail notification settings:
Go to the Settings app on your iPhone and navigate to the Notifications menu. Locate and tap on the Gmail app to access its specific notification settings.
2. Select the “Lock Screen” option:
In the Gmail notification settings, you will see a section labeled “Lock Screen.” Tap on it to access the customization options specifically for Gmail notifications on the Lock Screen.
3. Choose the “Lock Screen” notification style:
Within the “Lock Screen” settings, you can choose from three options:
- Always: This option displays full Gmail notifications on your Lock Screen, even when your device is locked. It allows anyone to view the contents of the notification without unlocking your iPhone.
- When Unlocked: Selecting this option will show Gmail notifications on your Lock Screen, but only when your iPhone is unlocked. This provides a level of privacy, as the notification content won’t be visible on your lock screen.
- Never: Opting for this option disables Gmail notifications from appearing on your Lock Screen altogether. You won’t see any Gmail notifications until you unlock your device and access the Notification Center.
4. Make your selection:
Consider your privacy preferences and the sensitivity of your Gmail notifications. Choose the “Lock Screen” notification style that suits your needs, balancing convenience and privacy.
By customizing the “Lock Screen” notifications for Gmail, you can control how much information is visible and accessible without unlocking your iPhone. This customization provides you with greater control over your privacy and ensures that your Gmail notifications are displayed in a way that aligns with your preferences.
Customize “Notification Center” Notifications for Gmail
When customizing your Gmail notification settings on your iPhone, you also have the option to customize how Gmail notifications appear in the Notification Center. The Notification Center acts as a centralized hub where you can view and manage all your notifications. Here’s how you can customize “Notification Center” notifications for Gmail:
1. Open the Gmail notification settings:
Access the Settings app on your iPhone and navigate to the Notifications menu. Locate and tap on the Gmail app to access its specific notification settings.
2. Select the “Notification Center” option:
In the Gmail notification settings, you will see a section labeled “Notification Center.” Tap on it to access the customization options specifically for Gmail notifications in the Notification Center.
3. Choose the “Notification Center” notification style:
Within the “Notification Center” settings, you can choose from three options:
- Automatic: This option will display Gmail notifications as they come in, automatically adding them to the Notification Center. They will be sorted based on most recent.
- Grouped By App: Selecting this option will group all Gmail notifications together under the Gmail app heading within the Notification Center. This helps to keep your notifications organized, especially if you receive multiple emails.
- Off: Opting for this option will disable Gmail notifications from appearing in the Notification Center. You won’t see any Gmail notifications until you open the Gmail app.
4. Make your selection:
Consider your preferences and how you manage your notifications. Choose the “Notification Center” notification style that aligns with your workflow and helps you stay organized.
By customizing the “Notification Center” notifications for Gmail, you can control how Gmail notifications are displayed and sorted within the Notification Center. This customization allows you to tailor your notification experience and effectively manage your Gmail notifications alongside other app notifications on your iPhone.
Customize “Banners” Notifications for Gmail
When customizing your Gmail notification settings on your iPhone, you can also customize how Gmail notifications appear as banners. Banners are temporary notifications that appear briefly at the top of your screen. Here’s how you can customize “Banners” notifications for Gmail:
1. Open the Gmail notification settings:
Go to the Settings app on your iPhone and navigate to the Notifications menu. Locate and tap on the Gmail app to access its specific notification settings.
2. Select the “Banners” option:
In the Gmail notification settings, you will see a section labeled “Banners.” Tap on it to access the customization options specifically for Gmail notifications displayed as banners.
3. Choose the “Banners” notification style:
Within the “Banners” settings, you have three options to choose from:
- Temporary: This option displays banners that appear briefly at the top of your screen and then automatically disappear. It provides a quick summary of the Gmail notification without interrupting your current activity.
- Persistent: Selecting this option keeps the banner notification displayed on your screen until you dismiss it. This can be helpful if you want to have the Gmail notification visible for a longer period of time.
- Off: Opting for this option disables banners for Gmail notifications. You won’t see any banners for new Gmail messages.
4. Make your selection:
Consider your preferences and how you prefer to be notified. Choose the “Banners” notification style that suits your needs and ensures you can quickly and effectively stay informed about new Gmail messages.
By customizing the “Banners” notifications for Gmail, you can control how the temporary notifications appear on your screen. This allows you to have a personalized notification experience that aligns with your workflow and notification preferences.
Customize “Banner Style” for Gmail
When customizing your Gmail notification settings on your iPhone, you have the ability to customize the “Banner Style” for Gmail notifications. The “Banner Style” determines how the banner notifications are presented on your device. Here’s how you can customize the “Banner Style” for Gmail:
1. Open the Gmail notification settings:
Access the Settings app on your iPhone and navigate to the Notifications menu. Find and tap on the Gmail app to access its specific notification settings.
2. Select the “Banner Style” option:
In the Gmail notification settings, look for the “Banner Style” option and tap on it. This will open up the customization options specifically for the banner notifications of Gmail.
3. Choose a “Banner Style” option:
Within the “Banner Style” settings, you have three options to choose from:
- Temporary: This option displays banner notifications briefly at the top of your screen and then automatically dismisses them. It provides a quick summary of the Gmail notification without interrupting your current activity.
- Persistent: Selecting this option keeps the banner notification displayed on your screen until you dismiss it manually. It allows you to keep the Gmail notification visible for a longer period of time.
- Appropriate for Critical Alerts: This option is suitable for critical alerts that require immediate attention. When selected, the banner notification will persist on the screen until you take action on it.
4. Make your selection:
Consider your preferences and the urgency of the Gmail notifications you receive. Choose the “Banner Style” option that best aligns with your needs, ensuring you can effectively and efficiently manage your Gmail notifications.
By customizing the “Banner Style” for Gmail, you can adapt how the banner notifications are displayed on your iPhone. This allows you to have a personalized notification experience that suits your workflow and the importance of the Gmail notifications you receive.
Set the “Alert Style” for Gmail Notifications
When customizing your Gmail notification settings on your iPhone, you have the option to set the “Alert Style.” The “Alert Style” determines the appearance and behavior of the notifications when they are displayed on your device. Here’s how you can set the “Alert Style” for Gmail notifications:
1. Open the Gmail notification settings:
Access the Settings app on your iPhone and navigate to the Notifications menu. Locate and tap on the Gmail app to access its specific notification settings.
2. Select the “Alert Style” option:
In the Gmail notification settings, you will find the “Alert Style” option. Tap on it to open the customization options specifically for the alert style of Gmail notifications.
3. Choose an “Alert Style” option:
Within the “Alert Style” settings, you have three options to choose from:
- Default: This option displays the standard iOS alert style for Gmail notifications. It appears as a pop-up window in the center of your screen, briefly interrupting your current activity.
- Banners: Selecting this option allows Gmail notifications to appear as banners at the top of the screen. They will not interrupt your current activity and will automatically disappear after a few seconds.
- None: Opting for this option turns off the alert style for Gmail notifications. You will not see any visual alert on your screen when a new Gmail message arrives.
4. Make your selection:
Consider your preferences and how you want to be notified when a new Gmail message arrives. Choose the “Alert Style” option that best suits your needs, allowing you to effectively receive and manage your Gmail notifications.
By setting the “Alert Style” for Gmail notifications, you can customize the appearance and behavior of the notifications on your iPhone. This allows you to have a personalized notification experience that aligns with your workflow and the level of interruption you prefer.
Configure the “Persistent Banner” Option for Gmail
When customizing your Gmail notification settings on your iPhone, you have the option to configure the “Persistent Banner” setting. The “Persistent Banner” determines whether the banner notifications for Gmail remain on the screen until you dismiss them manually. Here’s how you can configure the “Persistent Banner” option for Gmail:
1. Open the Gmail notification settings:
Access the Settings app on your iPhone and navigate to the Notifications menu. Locate and tap on the Gmail app to access its specific notification settings.
2. Select the “Persistent Banner” option:
In the Gmail notification settings, look for the “Persistent Banner” option and tap on it. This will open up the customization options specifically for the banner notifications of Gmail.
3. Enable or disable the “Persistent Banner” setting:
Toggle the switch next to “Persistent Banner” to enable or disable this feature. When enabled, the banner notifications for Gmail will remain on the screen until you dismiss them manually. If disabled, the banner notifications will automatically disappear after a few seconds.
4. Make your selection:
Consider your preferences and how you manage your Gmail notifications. Enabling the “Persistent Banner” setting can be helpful if you want to keep the Gmail notification visible on the screen for a longer period of time. Disabling it may be preferred if you prefer the banner notifications to automatically disappear.
By configuring the “Persistent Banner” option for Gmail, you can control how long the banner notifications remain on the screen. This customization allows you to have a personalized notification experience that suits your preferences and enhances your productivity.
Set the “Notification Sound” for Gmail
When customizing your Gmail notification settings on your iPhone, you have the option to set a specific “Notification Sound” for Gmail. This feature allows you to choose a sound that will play when a new Gmail notification arrives. Here’s how you can set the “Notification Sound” for Gmail:
1. Open the Gmail notification settings:
Access the Settings app on your iPhone and navigate to the Notifications menu. Locate and tap on the Gmail app to access its specific notification settings.
2. Select the “Notification Sound” option:
In the Gmail notification settings, you will find the “Notification Sound” option. Tap on it to open the available sound options.
3. Choose a notification sound:
A list of available sounds will be displayed in the “Notification Sound” menu. Tap on each sound to preview them and find the one that suits your preference. You can choose from a variety of built-in sounds provided by iOS.
4. Set your preferred sound:
Once you’ve found a sound you like, simply select it from the list. Your choice will be automatically saved, and that sound will be assigned to your Gmail notifications.
5. Test the sound:
After setting the notification sound, you can test it by opening the Gmail app and sending a test email to trigger the notification. Ensure that the chosen sound plays as expected.
By setting the “Notification Sound” for Gmail, you can have a distinct sound that alerts you to new Gmail notifications. This customization allows you to personalize your notification experience, making it easier to identify incoming Gmail messages amidst other notifications on your iPhone.
Customize “Notification Grouping” for Gmail
When customizing your Gmail notification settings on your iPhone, you have the option to customize the “Notification Grouping” for Gmail. This feature allows you to control how Gmail notifications are grouped together. Here’s how you can customize “Notification Grouping” for Gmail:
1. Open the Gmail notification settings:
Access the Settings app on your iPhone and navigate to the Notifications menu. Locate and tap on the Gmail app to access its specific notification settings.
2. Select the “Notification Grouping” option:
In the Gmail notification settings, you will find the “Notification Grouping” option. Tap on it to open the available grouping options.
3. Choose a grouping option:
In the “Notification Grouping” menu, you can choose between two grouping options:
- By App: Selecting this option will group all Gmail notifications together, regardless of the email thread. This means you will see a single notification for Gmail, even if you receive multiple emails from different threads.
- Automatic: Choosing this option allows your iPhone to automatically group Gmail notifications based on factors such as time, app, and thread. This can be useful when you receive multiple emails from different threads but want to keep them organized.
4. Make your selection:
Consider how you prefer to manage your Gmail notifications and choose the “Notification Grouping” option that best suits your needs. Whether you prefer all Gmail notifications grouped together or organized automatically, this customization allows you to have a personalized notification experience.
By customizing the “Notification Grouping” for Gmail, you have control over how your Gmail notifications are grouped on your iPhone. This customization enables you to effectively manage and organize your Gmail notifications, ensuring you stay on top of your important emails.
Prioritize Gmail Notifications with “Critical Alerts”
When customizing your Gmail notification settings on your iPhone, you have the option to prioritize certain Gmail notifications using the “Critical Alerts” feature. This allows you to receive important Gmail notifications that require immediate attention, even when your device is in silent mode or Do Not Disturb mode. Here’s how you can prioritize Gmail notifications with “Critical Alerts”:
1. Open the Gmail notification settings:
Access the Settings app on your iPhone and navigate to the Notifications menu. Locate and tap on the Gmail app to access its specific notification settings.
2. Select the “Critical Alerts” option:
In the Gmail notification settings, you will find the “Critical Alerts” option. Tap on it to enable this feature.
3. Grant permission for “Critical Alerts”:
You will be prompted to grant permission for the Gmail app to send “Critical Alerts.” Follow the on-screen instructions to allow this permission.
4. Identify Gmail notifications as “Critical Alerts”:
To prioritize specific Gmail notifications as “Critical Alerts,” you need to mark them as such within the Gmail app. Open the Gmail app on your iPhone, select the desired email thread, and tap on the “More” option (represented by three dots). From the dropdown menu, choose “Mark as Important” or “Priority Inbox” to indicate that it is a critical email.
5. Receive “Critical Alerts” for priority Gmail notifications:
Once you have enabled “Critical Alerts” in the Gmail notification settings and marked certain emails as important within the Gmail app, your iPhone will prioritize these Gmail notifications. You will receive “Critical Alerts” even when your device is in silent mode or Do Not Disturb mode, ensuring that you don’t miss important emails.
By utilizing the “Critical Alerts” feature, you can ensure that vital Gmail notifications receive the attention they deserve. This prioritization ensures that you can stay on top of time-sensitive emails and respond promptly, even when your iPhone is in a silent or do not disturb mode.
Determine How Many Gmail Notifications to Show in “History”
When customizing your Gmail notification settings on your iPhone, you have the option to determine how many Gmail notifications are shown in the “History” section of the Notification Center. The “History” section displays past notifications that you may have missed or dismissed. Here’s how you can set the number of Gmail notifications shown in “History”:
1. Open the Gmail notification settings:
Access the Settings app on your iPhone and navigate to the Notifications menu. Locate and tap on the Gmail app to access its specific notification settings.
2. Select the “Notification Center” option:
In the Gmail notification settings, find and tap on the “Notification Center” option. This will offer controls for customizing how Gmail notifications are shown in the Notification Center.
3. Choose the “History” setting:
Within the “Notification Center” settings, you will find an option to set the “History” for Gmail. Tap on it to see the available options.
4. Select the desired number of notifications:
Choose the number of Gmail notifications you want to see in the “History” section of the Notification Center. The options typically range from 1 to 10, allowing you to set your preferred number based on your needs and preferences.
5. Confirm your selection:
Once you have selected the desired number of Gmail notifications to show in “History,” your choice will be automatically saved. The Notification Center will then display Gmail notifications up to the specified limit.
By determining how many Gmail notifications to show in “History,” you can customize the number of past notifications you have access to in the Notification Center. This customization allows you to refer back to recent Gmail notifications that you may have missed or dismissed, helping you stay informed and organized.
Configure Gmail Notifications for “CarPlay”
If you use CarPlay while driving, you can configure Gmail notifications to be displayed on your car’s infotainment system. This allows you to stay informed about important emails without taking your eyes off the road. Here’s how you can configure Gmail notifications for “CarPlay”:
1. Connect your iPhone to your CarPlay system:
Make sure your iPhone is connected to your car’s infotainment system via a USB cable or Bluetooth.
2. Open the Settings app on your iPhone:
Access the Settings app on your iPhone’s home screen by tapping on its icon.
3. Go to the Notifications settings:
Scroll down the Settings menu and tap on “Notifications”.
4. Locate and tap on the Gmail app:
Scroll through the list of apps until you find the Gmail app. Tap on it to access its specific notification settings.
5. Enable “Allow Notifications” for Gmail:
Make sure the “Allow Notifications” toggle is enabled. This allows Gmail to send notifications to your CarPlay system.
6. Customize Gmail notification settings:
Inside the Gmail notification settings, you can customize how Gmail notifications appear on your CarPlay display.
7. Choose the type of alerts you prefer:
Select the “Alerts” option and choose between “None,” “Banners,” or “Alerts” for the type of notifications you want to receive on CarPlay.
8. Set the “Show Previews” option:
You can decide whether to show previews of Gmail messages in your CarPlay notifications by selecting “Always,” “When Unlocked,” or “Never”.
9. Customize other settings:
Explore other settings like “Notification Grouping,” “Badge App Icon,” and “Sounds” to further customize your Gmail notifications for CarPlay.
By configuring Gmail notifications for CarPlay, you can stay informed about your emails while keeping your focus on the road. Make sure to customize the settings that suit your preferences and ensure a safe and seamless driving experience.
Customize the “Notification Preview” Option
When customizing your Gmail notification settings on your iPhone, you have the option to customize the “Notification Preview” option. This allows you to control the amount of information displayed in the preview of Gmail notifications. Here’s how you can customize the “Notification Preview” option:
1. Open the Gmail notification settings:
Access the Settings app on your iPhone and navigate to the Notifications menu. Locate and tap on the Gmail app to access its specific notification settings.
2. Select the “Notification Preview” option:
In the Gmail notification settings, you will find the “Notification Preview” option. Tap on it to open the available customization options.
3. Choose a “Notification Preview” style:
Within the “Notification Preview” settings, you have three options to choose from:
- Always: This option displays the full content of the Gmail notification in the preview. You can see the sender, subject, and a snippet of the email message without opening the Gmail app.
- When Unlocked: Selecting this option will show the full content of the Gmail notification on the lock screen and in the notification center only when your iPhone is unlocked.
- Never: Opting for this option hides the content of the Gmail notifications in the preview. You will only see the sender and subject line in the notification.
4. Make your selection:
Consider your privacy preferences and the level of detail you want to see in the preview of Gmail notifications. Choose the “Notification Preview” style that best suits your needs.
By customizing the “Notification Preview” option, you can control the level of information displayed in the preview of Gmail notifications. This customization allows you to balance privacy and convenience, ensuring that you have control over how much information is visible at a glance.
Enable Gmail Notifications on Your iPad or iPod Touch
If you have an iPad or iPod Touch, you can enable Gmail notifications to stay updated on important emails and messages. Enabling notifications ensures that you receive timely alerts and stay connected to your Gmail account. Here’s how you can enable Gmail notifications on your iPad or iPod Touch:
1. Open the Settings app:
Locate and tap on the “Settings” app on your iPad or iPod Touch’s home screen. The Settings app is represented by a gear icon.
2. Access the Notifications settings:
Scroll down the list of options and find “Notifications.” Tap on it to access the notification settings for your device.
3. Locate the Gmail app:
In the “Notifications” settings, look for the “Gmail” app. Tap on it to access the notification settings specifically for Gmail on your iPad or iPod Touch.
4. Enable “Allow Notifications” for Gmail:
Make sure the “Allow Notifications” toggle is enabled. This allows Gmail to send notifications to your iPad or iPod Touch.
5. Customize your Gmail notification settings:
Inside the Gmail notification settings, you can customize various aspects of the notifications according to your preferences. You can choose the type of alerts you prefer, select whether or not to show message previews, and more.
6. Exit the Settings app:
Once you have configured the Gmail notification settings to your liking, simply exit the Settings app. The changes you made will automatically be saved and applied to your Gmail notifications.
By enabling Gmail notifications on your iPad or iPod Touch, you can stay updated on important emails and messages, even when you’re not actively using the Gmail app. This ensures that you don’t miss any crucial information and helps you stay connected to your Gmail account on your iOS device.
Troubleshooting: Gmail Notifications Not Appearing in Notification Center
If you’re experiencing issues with Gmail notifications not appearing in the Notification Center on your iPhone or iPad, there are a few troubleshooting steps you can try to resolve the problem. Here are some solutions to consider:
1. Check Notification Settings:
Ensure that you have enabled notifications for the Gmail app in the device’s Settings. Open the Settings app, navigate to Notifications, and verify that the toggle switch next to Gmail is turned on.
2. Check Gmail App Settings:
Within the Gmail app, go to the app’s settings section and check the notification settings. Ensure that Gmail notifications are enabled and configured correctly. You can also try signing out and signing back into your Gmail account within the app.
3. Restart Your Device:
Perform a simple restart of your iPhone or iPad. This can help resolve any temporary software glitches causing the issue with Gmail notifications.
4. Update Gmail App:
Make sure that you have the latest version of the Gmail app installed on your iOS device. Outdated versions may have compatibility issues that can interfere with notifications. Check the App Store for any available updates and install them if needed.
5. Check Do Not Disturb Settings:
Ensure that your device’s Do Not Disturb mode is not turned on. When enabled, Do Not Disturb can suppress all notifications, including Gmail notifications.
6. Reset Notification Settings:
If the above steps didn’t resolve the issue, you can try resetting the notification settings on your device. Go to Settings, tap on Notifications, select Gmail, and then tap “Reset Settings.” Note that this will reset all notification settings for the Gmail app.
7. Contact Gmail Support:
If none of the above solutions work, it’s advisable to reach out to Gmail support for further assistance. They can provide more specific guidance and help troubleshoot the issue.
By following these troubleshooting steps, you should be able to resolve the issue of Gmail notifications not appearing in the Notification Center on your iOS device. Remember to check settings, update the app, and restart your device to ensure a smooth notification experience with Gmail.