
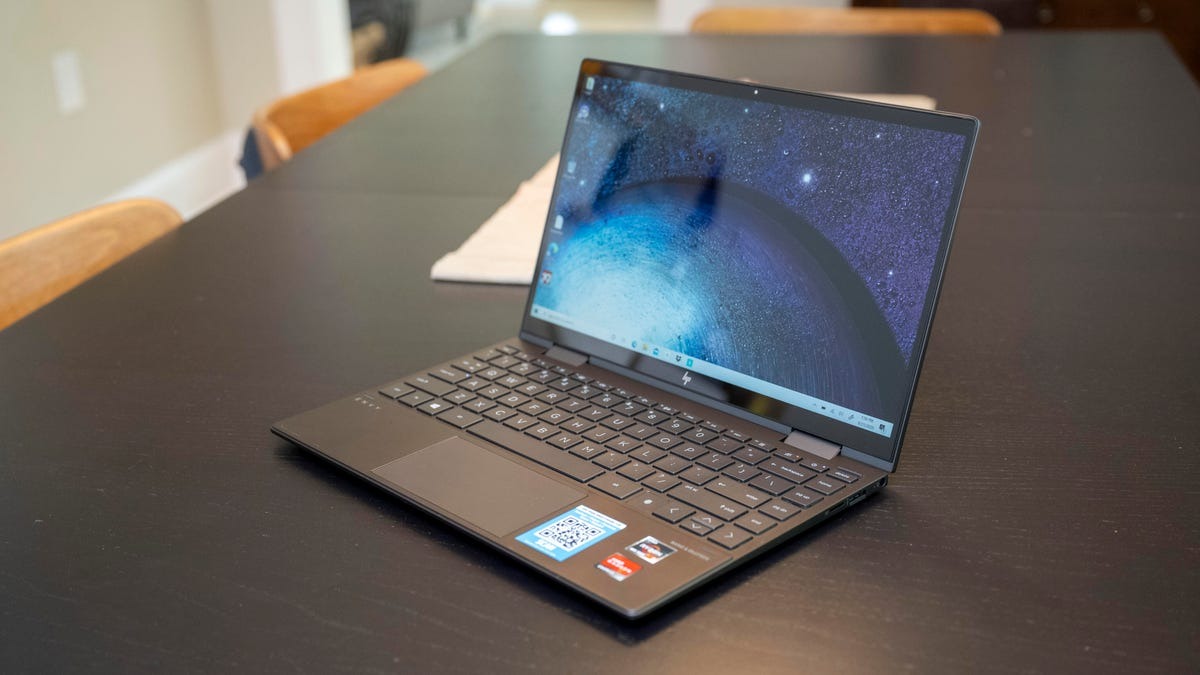
Common Methods for Taking Screenshots
Taking screenshots on an Envy laptop is a simple task that can be accomplished using several methods. Whether you need to capture a moment from a video, save an important document, or share a funny meme, here are some common methods for taking screenshots on an Envy laptop:
Method 1: Using Windows + Print Screen: The easiest and fastest way to take a screenshot is by using the Windows key in conjunction with the Print Screen key. Simply press Windows + Print Screen simultaneously, and the screenshot will be saved automatically in the Screenshots folder within the Pictures directory.
Method 2: Using Windows + Shift + S: For more flexibility in capturing specific areas of the screen, you can use the Windows key along with the Shift key and the “S” key. This will enable the “Snipping” tool, allowing you to select and capture the desired portion of the screen. Once selected, the screenshot will be copied to the clipboard, and you can paste it into an image editing software or a document.
Method 3: Using the Snipping Tool: Another built-in option is the Snipping Tool, which provides additional functionality for capturing screenshots. To access it, simply search for “Snipping Tool” in the Windows search bar and open the application. From there, you can choose to capture a free-form snip, rectangular snip, window snip, or full-screen snip. After capturing the desired portion, you can save the screenshot in your preferred location.
Method 4: Using the Snip & Sketch App: In newer versions of Windows 10, the Snip & Sketch app has replaced the Snipping Tool. This app offers enhanced features and a more user-friendly interface for capturing screenshots. Press Windows + Shift + S to open the Snip & Sketch app, and then select the desired area. After taking the screenshot, you can edit it, annotate it, and save it to your preferred location.
Method 5: Using Third-Party Software: If you require advanced screenshot options such as delayed captures, scrolling captures, or annotations, you might consider using third-party software. There are numerous options available online, including Lightshot, Snagit, and Greenshot. Simply download and install the software of your choice, and follow the instructions provided to take screenshots with added features.
Method 1: Using Windows + Print Screen
One of the easiest and quickest ways to take a screenshot on an Envy laptop is by using the combination of the Windows key and the Print Screen key. This method captures the entire screen and saves it as an image file.
To take a screenshot using this method, follow these simple steps:
- Make sure you have the content you want to capture displayed on your screen.
- Locate the Windows key on your keyboard. It is usually situated between the left Ctrl and Alt keys and has the Windows logo on it.
- Press and hold the Windows key.
- While holding the Windows key, locate the Print Screen key. On most Envy laptops, the Print Screen key is labeled as “PrtSc” or “PrtScn” and is usually located in the upper-right section of the keyboard.
- Press the Print Screen key while still holding down the Windows key.
- Release both keys.
Once you have completed the steps, your screenshot will be automatically saved to a designated folder on your computer. Typically, the screenshot is saved in the Screenshots directory within the Pictures folder.
To access your saved screenshot, open the File Explorer and navigate to the Pictures folder. Inside the Pictures folder, you should find a subfolder named “Screenshots.” Your captured screenshot will be stored there with a timestamp indicating when it was taken.
From here, you can easily view, edit, or share your screenshot with others. Open the screenshot in any image viewer or editing software to make any necessary adjustments or annotations. You can also copy and paste the screenshot into documents, emails, or social media platforms to share it with friends, colleagues, or your online community.
Using the Windows key in combination with the Print Screen key is a quick and convenient method for capturing your entire screen. However, if you only need to capture a specific area or window, you may want to explore other methods, such as using the Snipping Tool or the Snip & Sketch app.
Method 2: Using Windows + Shift + S
If you need more control over the portion of the screen you want to capture, you can use the combination of the Windows key, the Shift key, and the “S” key. This method launches the “Snipping” tool, allowing you to select and capture a specific area.
Follow these steps to take a screenshot using Windows + Shift + S:
- Ensure that the content you want to screenshot is visible on your Envy laptop screen.
- Locate the Windows key on your keyboard. It is typically located between the left Ctrl and Alt keys and features the Windows logo.
- Press and hold down the Windows key.
- While still holding down the Windows key, locate the Shift key on your keyboard. It is usually positioned above the Ctrl key on the left side.
- Without releasing the Windows key, press the Shift key.
- While still holding both the Windows and Shift keys, press the “S” key.
After performing these key combinations, the screen will appear slightly dimmed, and your cursor will change into a crosshair or plus sign symbol, depending on the version of Windows you are using. Click and drag the cursor to select the desired area of the screen that you want to capture.
Once you release the mouse button, the selected area will be copied to the clipboard. You can now paste the screenshot into an image editing software, a document, or any other application that supports image insertion.
It’s important to note that using Windows + Shift + S only captures the selected area temporarily in the clipboard. This allows you to immediately paste and use the screenshot, eliminating the need to save it as a separate file. However, if you want to save the screenshot as an image file for future use, you can paste it into an image editing software such as Paint or Photoshop, and then save it from there.
The Windows + Shift + S method provides greater flexibility when it comes to capturing specific areas of your screen. Whether you need to highlight a particular section of a website, capture a specific error message, or create a customized screenshot, this method allows for precision and customization.
Method 3: Using the Snipping Tool
The Snipping Tool is a built-in screenshot tool that offers more advanced options for capturing screenshots on your Envy laptop. It allows you to take custom screenshots of a specific area or even a specific window on your screen. Here’s how you can use the Snipping Tool:
- Open the Windows search bar by clicking on the Start button and typing “Snipping Tool” into the search box.
- Click on the Snipping Tool app that appears in the search results to open it.
- Once the Snipping Tool is open, you can choose from various snip types located in the toolbar. The available options include Free-form, Rectangular, Window, and Full-screen snips.
- Select the type of snip you want to use by clicking on the corresponding button in the Snipping Tool toolbar.
- After choosing your desired snip type, a crosshair cursor will appear.
- Click and drag the cursor to select the area you want to capture. If you chose the Window snip type, click on the window you want to capture.
- Once you release the mouse button, the captured screenshot will open in the Snipping Tool editing window.
- You can make annotations, highlight specific areas, or add text to the screenshot using the editing tools in the Snipping Tool.
- When you’re satisfied with the edits, click on the “File” menu and choose “Save As” to save the screenshot to your desired location.
The Snipping Tool provides more versatility in capturing screenshots compared to the previous methods. It allows you to precisely select the area you want to capture, making it ideal for capturing specific sections of a document, web page, or application window. Additionally, the built-in editing tools in the Snipping Tool enable you to enhance and annotate your screenshots without the need for external editing software.
However, it’s worth noting that in newer versions of Windows 10, such as the October 2018 Update and later, the Snipping Tool has been replaced by the Snip & Sketch app, which offers a similar set of features with an improved interface. If you’re using a newer version of Windows 10, you might consider using the Snip & Sketch app for your screenshot needs.
Method 4: Using the Snip & Sketch App
In newer versions of Windows 10, such as the October 2018 Update and later, the Snip & Sketch app has replaced the Snipping Tool as the default screenshot tool. This app provides an improved user interface and additional features to capture and edit screenshots on your Envy laptop.
To use the Snip & Sketch app to take screenshots, follow these steps:
- Press the Windows key and the Shift key simultaneously to launch the Snip & Sketch app. Alternatively, you can search for “Snip & Sketch” in the Windows search bar and open the app from the results.
- Once the Snip & Sketch app is open, click on the “New” button located in the top-left corner of the app window.
- By default, the app will allow you to capture a rectangular snip of the entire screen. Click and drag the cursor to select the desired area you want to capture.
- After releasing the mouse button, the captured screenshot will open in the Snip & Sketch editing window.
- Within the editing window, you can use various tools to annotate, crop, highlight, or add text to your screenshot.
- Once you have made the desired edits, click on the “Save” button in the top-right corner to save the screenshot to your preferred location.
The Snip & Sketch app offers a seamless and intuitive experience for capturing and editing screenshots. It provides a range of functionalities, such as capturing specific areas, adding annotations, and saving screenshots in various file formats. The app also allows you to easily share your screenshots directly from the editing window to different applications or contacts.
With the Snip & Sketch app, you can quickly capture and edit screenshots without the need for external software, making it a convenient option for everyday use on your Envy laptop.
Method 5: Using Third-Party Software
If you require more advanced screenshot features or additional customization options, utilizing third-party software can be a great solution. There are a variety of third-party software available online that can enhance your screenshot-taking capabilities on your Envy laptop. Here’s how you can use third-party software to take screenshots:
- Start by researching and selecting a reputable third-party software that suits your needs. Some popular options include Lightshot, Snagit, and Greenshot.
- Once you have chosen the software, go to the official website and download the installation file.
- Run the installation file and follow the on-screen instructions to install the software on your Envy laptop.
- Once installed, launch the third-party software and familiarize yourself with its interface and features.
- Depending on the software, you may have various screenshot options available, such as capturing specific regions, capturing scrolling web pages, delayed captures, and more.
- Use the provided tools and options to capture the desired screenshot according to your preferences.
- After capturing the screenshot, the third-party software may provide additional editing features to enhance or annotate the screenshot.
- Once you are satisfied with the edits, save the screenshot to your preferred location.
Third-party software often offers advanced features and customization options that may not be available in built-in screenshot tools. These features can include the ability to capture specific elements on the screen, apply filters or effects to the screenshots, and even record your screen as a video.
When choosing third-party software, consider factors such as user reviews, the software’s reputation, and its compatibility with your Envy laptop. Ensure that you download from trusted sources to minimize the risk of malware or adware being installed on your device.
Overall, using third-party software for taking screenshots allows you to tailor the process to your specific needs. Whether you require additional editing options, more control over the screenshots, or specialized capture capabilities, third-party software can provide a solution that meets your requirements.
Troubleshooting Tips for Screenshots
While taking screenshots on an Envy laptop is usually a straightforward process, there may be instances where you encounter issues or encounter unexpected results. Here are some troubleshooting tips to help you overcome common problems and ensure successful screenshots:
Tip 1: Check the Keyboard Layout: Different laptop models may have slight variations in the keyboard layout. If you find that the standard screenshot shortcut keys mentioned earlier are not working, ensure that you are pressing the correct keys according to your Envy laptop’s keyboard layout. Refer to the laptop’s user manual or manufacturer’s website for specific instructions related to screenshots.
Tip 2: Update Graphics Drivers: Outdated or incompatible graphics drivers can sometimes cause issues with capturing screenshots. To resolve this, ensure that you have the latest graphics drivers installed on your Envy laptop. You can visit the manufacturer’s website or use a driver updating software to check for and install any available updates.
Tip 3: Disable Third-Party Software: Certain third-party software, particularly those related to screen recording or display enhancement, can interfere with the screenshot function. If you are facing difficulties in taking screenshots, try temporarily disabling any third-party software that you have installed and then attempt taking a screenshot again.
Tip 4: Restart Your Envy Laptop: Sometimes, a simple restart can resolve temporary glitches or conflicts that may be preventing screenshots from functioning correctly. Restarting your Envy laptop can refresh system processes and clear any temporary issues that might be affecting the screenshot feature.
Tip 5: Use Alternative Methods: If you continue to experience difficulties with the built-in screenshot methods, consider using alternative methods such as third-party screenshot software or the snipping tools mentioned earlier in this article. These alternative methods often provide additional features and may work more reliably on your Envy laptop.
Tip 6: Seek Technical Support: If all else fails and you are still unable to capture screenshots on your Envy laptop, consider reaching out to technical support. Contact the manufacturer’s customer support or consult online forums to seek assistance from others who may have experienced similar issues.
By following these troubleshooting tips, you can overcome common hurdles that may arise when attempting to take screenshots on your Envy laptop. Remember to stay patient and explore alternative methods when necessary to find a solution that works best for your specific situation.
Tip 1: Check the Keyboard Layout
One of the reasons you may encounter difficulties in capturing screenshots on your Envy laptop is due to variations in the keyboard layout. Different laptop models may have slight differences in key placement or labeling, which can affect the standard screenshot shortcut keys. It’s essential to ensure that you are pressing the correct keys according to your specific Envy laptop’s keyboard layout. Here’s how you can check and adjust your keyboard layout:
Step 1: Refer to the Laptop’s User Manual or Manufacturer’s Website
First, consult the user manual that came with your Envy laptop. The user manual should provide specific instructions regarding the keyboard layout and any customized keys related to screenshot functions. If you don’t have the physical user manual, you can visit the manufacturer’s website and search for your laptop model to find detailed instructions and documentation.
Step 2: Observe the Keyboard Layout
Take a close look at your laptop’s keyboard to identify any labels or symbols related to screenshot functions. Look for keys such as “PrtSc,” “Print Screen,” or any other key that indicates the ability to capture screenshots. These keys are typically located in or around the Function (F) keys or the numeric keypad area.
Step 3: Try Different Key Combinations
If the standard screenshot shortcut keys mentioned earlier in this article don’t work on your Envy laptop, don’t fret. Experiment with different key combinations to find the correct one for your specific keyboard layout. For example, you can try using the “Fn” (Function) key in conjunction with the standard screenshot keys or experiment with other modifier keys like the “Alt” or “Ctrl” key along with the screenshot key.
Step 4: Adapt to the Keyboard Layout
If you discover that your Envy laptop’s keyboard layout differs significantly from the usual shortcut keys, it may require some adjustment on your part. Take the time to get used to the layout and understand the specific key combinations needed for capturing screenshots. You can make a mental note or create a cheat sheet as a reference until you become familiar with the keyboard layout.
By checking the keyboard layout and adapting accordingly on your Envy laptop, you can ensure that you are pressing the correct keys to capture screenshots effectively. Every laptop model is unique, so taking the time to understand your specific keyboard layout will help you overcome any discrepancies and enable seamless screenshot capturing.
Tip 2: Update Graphics Drivers
Outdated or incompatible graphics drivers can sometimes cause issues with capturing screenshots on your Envy laptop. Keeping your graphics drivers up to date is crucial to ensure that your laptop’s hardware functions optimally, including its ability to capture screenshots. Here’s how you can update your graphics drivers:
Step 1: Identify your Graphics Card
First, you need to identify the graphics card installed on your Envy laptop. You can do this by following these steps:
- Right-click on the Start button or press Windows key + X to open the Power User Menu.
- Select “Device Manager” from the list of options.
- In the Device Manager window, locate and expand the “Display adapters” category.
- The graphics card model will be listed under the “Display adapters” category. Make a note of the model name or number.
Step 2: Visit the Manufacturer’s Website
With the graphics card model information at hand, visit the website of the graphics card manufacturer. Common graphics card manufacturers include AMD, Intel, and NVIDIA. Navigate to their respective support or driver download sections on the website.
Step 3: Find and Download the Latest Driver
Using the model name or number of your graphics card, search for the latest driver available for download on the manufacturer’s website. Make sure to select the driver that matches your specific Envy laptop’s graphics card model, operating system, and other relevant specifications.
Step 4: Install the Updated Graphics Driver
Once you’ve downloaded the latest graphics driver, locate the downloaded file on your Envy laptop. Double-click on the file to initiate the installation process. Follow the on-screen instructions provided by the driver installer to complete the installation. It may be necessary to restart your laptop after the installation process is finished.
Step 5: Test the Screenshot Functionality
After updating the graphics driver and restarting your Envy laptop, test the screenshot function to see if the issue has been resolved. Try capturing a screenshot using the methods described earlier in this article to ensure that the updated graphics driver has resolved any compatibility or performance-related issues.
Regularly updating your graphics drivers is crucial for maintaining the functionality of your Envy laptop, including the ability to capture screenshots. By following these steps and keeping your graphics drivers up to date, you can ensure optimal performance and resolve any potential issues that may prevent you from taking screenshots successfully.
Tip 3: Disable Third-Party Software
Third-party software installed on your Envy laptop, especially those related to screen recording or display enhancement, can sometimes interfere with the screenshot function. If you are experiencing difficulties in taking screenshots, it is worth trying to temporarily disable any third-party software that you have installed. Here’s how you can disable third-party software to troubleshoot issues with capturing screenshots:
Step 1: Identify and Locate Third-Party Software
Make a list of the third-party software that you suspect could be causing conflicts with the screenshot function. These can include screen recorders, display capture tools, or other utilities that modify or enhance the screen display. Identify the software and note down their names or the filenames of their executable files.
Step 2: Access Task Manager
Open the Task Manager by right-clicking on the taskbar and selecting “Task Manager” from the context menu. Alternatively, you can press Ctrl + Shift + Esc to open the Task Manager directly.
Step 3: Disable Third-Party Software Processes
In the Task Manager window, navigate to the “Processes” or “Details” tab, depending on your Windows version. Look for processes related to the third-party software you identified earlier. Right-click on each process and choose either “End Task” or “End Process” to disable and terminate them. Repeat this process for each relevant process associated with the third-party software.
Step 4: Test the Screenshot Functionality
After disabling the third-party software processes, attempt to capture a screenshot using the methods explained earlier in this article. Test whether the screenshot function is now working correctly. If the issue is resolved and you are able to take screenshots, it indicates that one or more of the disabled third-party software was causing conflicts with the screenshot function.
Step 5: Re-enable Third-Party Software
If the screenshot function is working properly after disabling the third-party software, you can try re-enabling them one by one to identify the specific software causing the conflict. Restart your Envy laptop, and then enable each third-party software individually. Test the screenshot function after enabling each software to determine if any one of them creates conflicts. This way, you can pinpoint the problematic software and choose whether to permanently disable it or seek updated versions or alternatives.
Disabling third-party software temporarily is a useful troubleshooting step to isolate conflicts or issues that may interfere with capturing screenshots on your Envy laptop. By following these steps, you can identify and address any conflicts caused by specific third-party software, ensuring a smooth and uninterrupted screenshot capturing experience.