
Checking Power Connection
One of the first things you should do when troubleshooting an HP laptop that won’t start or respond is to check the power connection. It may sound obvious, but sometimes the problem is as simple as a loose or disconnected power cord.
Follow these steps to ensure a proper power connection:
- Check the power adapter: First, make sure that the power adapter is securely plugged into both the laptop and the electrical outlet. Double-check for any loose connections or frayed wires that may be preventing the flow of electricity. If you suspect any damage, consider using a different power adapter.
- Inspect the battery: If your HP laptop has a removable battery, check to see if it is properly inserted and locked in place. Remove the battery and then reinsert it firmly to ensure a secure connection. If the battery is no longer holding a charge, you may need to replace it.
- Reset the power strip or surge protector: If you are using a power strip or surge protector, it is worth resetting it by unplugging it from the electrical outlet, waiting a few seconds, and then plugging it back in. This can help resolve any temporary electrical issues that may be affecting the power supply.
- Try a different electrical outlet: Test the laptop with a different electrical outlet to eliminate the possibility of a faulty outlet causing the problem.
It is important to note that sometimes the power connection issue may not be visibly apparent. In such cases, try using a different power adapter or testing the laptop with the battery removed to further isolate the problem.
By checking the power connection and ensuring it is secure and functional, you can rule out any simple issues that may be preventing your HP laptop from starting up. If the problem persists, it is time to move on to additional troubleshooting steps.
Performing a Soft Reset
If your HP laptop is unresponsive or frozen, performing a soft reset can often resolve the issue. This process will restart the laptop without affecting any of your files or data, allowing the system to start fresh.
Follow these steps to perform a soft reset:
- Hold down the power button: Locate the power button on your HP laptop, usually located on the top or side of the keyboard area. Press and hold down the power button for at least 15 seconds.
- Release the power button: After holding down the power button for 15 seconds, release it. The laptop may power off and then turn back on or simply restart.
- Wait for the laptop to complete the reset process: Allow your HP laptop to go through the reset process and boot up as normal. This may take a few minutes, so be patient.
If your HP laptop still doesn’t respond after performing a soft reset, try repeating the process a couple more times. In some cases, it may take multiple attempts for the reset to successfully resolve the issue.
Performing a soft reset can help fix software glitches or temporary system errors that may be causing your HP laptop to malfunction. It is a simple yet effective troubleshooting step that is often recommended before moving on to more advanced solutions.
It is important to note that a soft reset will not delete any of your files or personal data. However, if the problem persists even after performing multiple soft resets, it may be necessary to try a hard reset or explore other troubleshooting options.
Performing a Hard Reset
If your HP laptop is still unresponsive after trying a soft reset, performing a hard reset can help resolve more stubborn issues. A hard reset is a more forceful method of restarting the laptop and can clear any lingering problems that may be causing it to malfunction.
Follow these steps to perform a hard reset on your HP laptop:
- Turn off the laptop: If your laptop is on, shut it down by selecting the “Shut down” option from the Start menu or by holding down the power button until the system powers off.
- Disconnect peripherals: Unplug any peripheral devices, such as USB drives or external monitors, from your laptop.
- Remove the power source: If your laptop has a removable battery, disconnect the power adapter and remove the battery from the laptop. If your laptop has a built-in battery that cannot be removed, skip this step.
- Press and hold the power button: With the power source disconnected, press and hold the power button for at least 15 seconds. This will discharge any remaining electrical charge in the laptop.
- Reconnect the power source: If you removed the battery, reinsert it into the laptop. Connect the power adapter to the laptop.
- Power on the laptop: Press the power button to turn on your HP laptop. The laptop should start up normally.
A hard reset can help clear temporary memory and reset hardware settings, potentially resolving more complex issues that may be hindering your HP laptop’s performance or functionality.
After performing a hard reset, monitor your laptop closely to see if the issue has been resolved. If the problem persists, you may need to explore other troubleshooting options or seek assistance from HP support.
Remember to save any unsaved work before performing a hard reset, as the process will abruptly shut down your laptop.
Removing and Reinserting the Battery
If your HP laptop is experiencing power-related issues such as not turning on or not holding a charge, removing and reinserting the battery can sometimes help resolve these problems. This process can help ensure a proper connection between the battery and the laptop, potentially resolving any issues caused by loose connections or minor electrical glitches.
Follow these steps to remove and reinsert the battery on your HP laptop:
- Ensure the laptop is powered off: If your laptop is currently on, shut it down properly by selecting the “Shut down” option from the Start menu.
- Locate the battery release latch: Depending on your HP laptop model, the battery release latch may be located on the bottom of the laptop or on the side.
- Slide or press the latch: Slide or press the battery release latch in the appropriate direction to unlock the battery.
- Remove the battery: Once the latch is unlocked, gently lift the battery out of its compartment.
- Wait for a few seconds: Leave the battery out of the laptop for at least 10-20 seconds to allow any residual power to dissipate.
- Reinsert the battery: Align the battery with the compartment and firmly push it back into place until the latch clicks and locks it in.
- Power on the laptop: Press the power button to turn on your HP laptop and check if the power-related issue has been resolved.
If your HP laptop has a built-in battery that cannot be removed, skip this troubleshooting step and proceed to the next one.
Removing and reinserting the battery can help refresh the electrical connection and potentially resolve power-related issues. If the problem persists after performing this step, it is advisable to explore other troubleshooting methods or seek professional assistance from HP support.
Resetting the BIOS Settings
If you are encountering hardware-related issues or experiencing unusual behavior on your HP laptop, resetting the BIOS (Basic Input/Output System) settings can be a useful troubleshooting step. The BIOS is responsible for controlling the hardware components of your laptop, and resetting its settings can help resolve any conflicts or inconsistencies that may be causing the problem.
Follow these steps to reset the BIOS settings on your HP laptop:
- Shut down your laptop: Make sure your laptop is turned off completely before proceeding with the BIOS reset.
- Access the BIOS setup menu: Turn on your HP laptop and continuously press the specified key (such as F2, F10, or Del) to access the BIOS setup menu. The specific key may vary depending on your laptop model.
- Navigate to the “Reset to Default” option: Use the arrow keys on your keyboard to navigate through the BIOS menu. Look for an option that allows you to reset the BIOS settings to their default values. It may be labeled as “Reset to Default,” “Load Default Settings,” or something similar.
- Select the reset option: Highlight the reset option and press Enter to initiate the reset process. You may be prompted to confirm your selection.
- Save and exit: After resetting the BIOS settings, navigate to the “Exit” or “Save Changes and Exit” option in the BIOS menu. Choose this option to save the changes and exit the BIOS setup. The laptop will then restart.
Resetting the BIOS settings can help resolve hardware-related issues on your HP laptop, such as boot problems, unrecognized devices, or incorrect configurations. However, it is important to note that resetting the BIOS will revert all settings back to their default values, so any custom configurations or changes you have made will be lost.
If the problem persists after resetting the BIOS settings, it may be necessary to explore other troubleshooting steps or seek assistance from HP support.
Powering On with No Battery
If your HP laptop is not powering on or showing any signs of life, even when connected to a power source, it may be worth trying to power it on without the battery. This troubleshooting step can help determine if the battery is causing the issue or if there is a different underlying problem.
Here’s how you can attempt to power on your HP laptop without the battery:
- Shut down your laptop: Make sure your laptop is turned off completely.
- Disconnect the power adapter: Unplug the power adapter from your laptop and the electrical outlet.
- Remove the battery: If your laptop has a removable battery, gently remove it from its compartment. Refer to your user manual or manufacturer’s instructions if you are unsure about how to remove the battery.
- Connect the power adapter: Plug the power adapter back into your laptop and the electrical outlet.
- Power on your laptop: Press the power button to turn on your HP laptop and see if it powers on without the battery.
If your HP laptop powers on successfully without the battery, it indicates that the battery may be faulty or causing interference with the normal functioning of the laptop. You can try cleaning the battery contacts or replacing the battery if necessary.
Alternatively, if your laptop does not power on even without the battery, it suggests that there may be another underlying issue, such as a faulty power adapter, motherboard problem, or system malfunction. In such cases, it is recommended to seek professional assistance from HP support or a qualified technician.
Keep in mind that operating your laptop without a battery is not a long-term solution. It is essential to have a properly functioning battery to ensure uninterrupted usage and protection against power fluctuations or outages.
Updating Device Drivers
Outdated or incompatible device drivers can often cause performance issues or malfunctions on your HP laptop. Updating the device drivers can help ensure optimal compatibility and functionality of the hardware components, potentially resolving any issues related to drivers.
Follow these steps to update the device drivers on your HP laptop:
- Identify the outdated drivers: Open the Device Manager on your HP laptop by right-clicking on the Start button and selecting “Device Manager” from the menu. Look for any devices with a yellow exclamation mark or question mark, indicating outdated or problematic drivers.
- Access the driver update options: Right-click on the device with the outdated driver and select “Update driver” from the context menu. Alternatively, you can also visit the official HP support website to download the latest drivers for your specific laptop model.
- Choose the update method: There are two options to update the driver – automatically or manually.
- Automatic update: Select the automatic update option if available. This will allow Windows to search for the latest driver version and install it on your laptop.
- Manual update: If the automatic update is not available or doesn’t work, you can choose the manual update option. Visit the HP support website, enter your laptop model details, and download the latest driver for the specific device. Follow the on-screen instructions to install the downloaded driver. Repeat this process for any other devices with outdated drivers.
- Restart your laptop: After updating the drivers, it is recommended to restart your HP laptop to ensure the changes take effect.
Updating device drivers can enhance the performance, stability, and compatibility of your HP laptop. It ensures that the hardware components are utilizing the latest features and bug fixes, reducing the likelihood of driver-related issues.
If updating the device drivers doesn’t resolve the problem or if you encounter any difficulties during the process, you can seek assistance from HP support or professional technicians who can provide further guidance.
Running System Diagnostics
When your HP laptop is experiencing various issues, such as crashes, freezes, or hardware malfunctions, running system diagnostics can help identify any underlying problems. HP laptops often come with built-in diagnostic tools that can perform comprehensive tests on the hardware components and provide detailed reports on any detected issues.
Here are the steps to run system diagnostics on your HP laptop:
- Access the BIOS or UEFI setup: Restart your laptop and repeatedly press the specified key (such as F2, F10, or Esc) to access the BIOS or UEFI setup menu. The specific key may depend on your laptop model.
- Navigate to the diagnostics option: In the BIOS or UEFI setup menu, look for an option related to system diagnostics or hardware tests. It may be labeled as “Diagnostics,” “PC Health,” or “System Configuration.”
- Select the diagnostics tool: Once you find the diagnostics option, select it and follow the on-screen instructions to initiate the diagnostics tool.
- Run the diagnostics test: The diagnostics tool will perform a series of tests on your laptop’s hardware components, including the CPU, memory, hard drive, and more. It may take a while to complete the tests, so be patient.
- Review the diagnostic report: Once the tests are completed, the diagnostics tool will generate a report highlighting any detected issues. Take note of any error messages, error codes, or suggested troubleshooting steps provided in the report.
The system diagnostics tool can pinpoint underlying hardware problems and provide valuable insights into the cause of the issues you are experiencing. It is an effective way to troubleshoot and identify faulty hardware components that may require repair or replacement.
If you encounter any difficulties running the system diagnostics or if the tool does not detect any issues despite the ongoing problems, it is advisable to seek assistance from HP support or a professional technician who can provide further guidance.
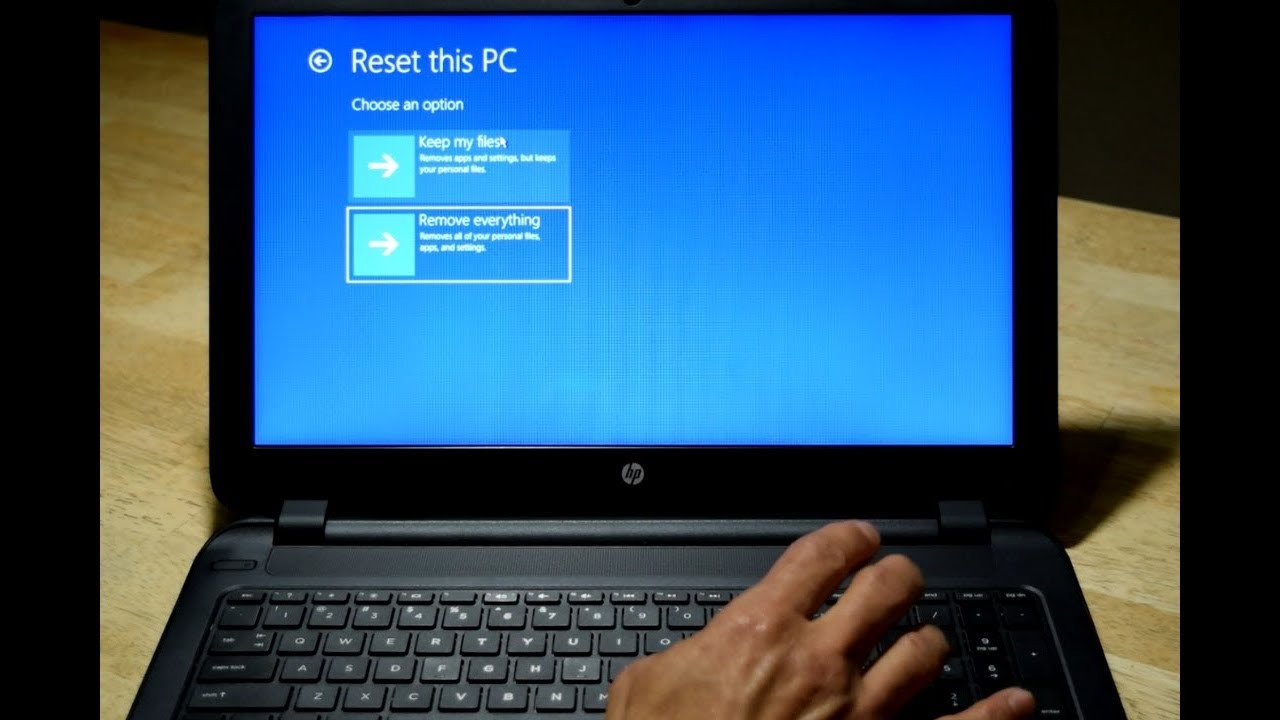
Reinstalling Operating System
If your HP laptop is plagued by persistent software issues, errors, or system crashes, reinstalling the operating system can be an effective solution. Reinstalling the operating system will wipe the existing software and reinstall a fresh copy, allowing for a clean start and potentially resolving any software-related problems.
Before proceeding with the reinstallation, it is crucial to back up your important files and data to prevent permanent loss. Once you have a backup, follow these steps to reinstall the operating system on your HP laptop:
- Create installation media: Obtain installation media for the operating system you wish to install. This can be a USB drive or a DVD. You can often download the installation media directly from the official Microsoft website or use recovery tools provided by HP.
- Boot from the installation media: Connect the installation media to your HP laptop and restart it. Press the specified key (such as F12 or Esc) to access the boot options menu and select the installation media as the boot device.
- Follow the on-screen prompts: The installation process will guide you through the necessary steps. Select the language, time zone, and keyboard preferences, and then choose the option to install a fresh copy of the operating system.
- Format the drive and install the OS: When prompted, select the drive on which you want to install the operating system. Choose the option to format the drive, which will erase all existing data. Proceed with the installation.
- Complete the installation: Allow the installation process to complete, which may take some time. Follow any additional instructions to set up your user account, personalize settings, and connect to the internet.
- Install necessary drivers and software: After the operating system is installed, you will need to download and install the necessary drivers for your HP laptop from the official HP support website. Additionally, reinstall any software programs you need for your workflow.
Reinstalling the operating system provides a fresh start and can resolve software-related issues that may have been causing your HP laptop to malfunction. Ensure that you have a stable internet connection and have all the necessary drivers and software ready before proceeding with the reinstallation.
If you are unsure about the process or encounter any difficulties during the reinstallation, you can refer to the official HP documentation or reach out to HP support for further assistance.