
Causes of a Black Screen on an HP Laptop
Encountering a black screen on your HP laptop can be a frustrating experience, especially if you rely on your device for work or personal use. There can be several reasons why your HP laptop is displaying a black screen, and understanding these causes can help you troubleshoot and resolve the issue. Here are some common causes to be aware of:
- Hardware or power issues: One possible cause of a black screen is a problem with the hardware or power supply. It could be a loose connection, a faulty battery, or a malfunctioning power adapter. Checking the power source and ensuring that it’s properly connected is the first step to take.
- External devices: Sometimes, external devices connected to your laptop can cause a black screen. Disconnect all external devices, such as USB drives, printers, or monitors, and then restart your laptop to see if the issue is resolved.
- Software or driver problems: Outdated or incompatible graphics drivers can lead to a black screen. It’s crucial to keep your drivers up to date to ensure smooth performance. Additionally, a recent software update or installation may have caused conflicts, resulting in the black screen. Checking the display settings and updating drivers can help resolve this issue.
- Safe mode errors: If your laptop consistently boots into safe mode and displays a black screen, it could indicate a problem with a specific driver or software installed on your device. Running your laptop in safe mode can help identify and troubleshoot the underlying issue.
- Windows update glitches: Occasionally, Windows updates can cause problems, including a black screen. Running Windows Update and installing any available updates may resolve the issue.
- System restore: If you recently made changes to your laptop’s settings or installed new software before encountering the black screen, performing a system restore can revert your laptop back to a previous working state.
- Faulty LCD screen: It’s possible that your laptop’s LCD screen has a hardware issue, such as a loose connection or a defective backlight. Testing the LCD screen or contacting HP support can help diagnose and resolve this problem.
These are some of the common causes of a black screen on an HP laptop. Understanding the root cause of the issue can significantly aid in troubleshooting and finding a solution. With each cause, there are specific actions you can take to resolve the problem. Remember to always follow the recommended steps and seek professional assistance if needed.
Check the Power Source
When your HP laptop displays a black screen, the first and most fundamental step is to check the power source. A loose connection or a faulty power supply can prevent your laptop from booting up properly. Here’s what you can do:
1. Check the power adapter: Make sure the power adapter is plugged into a functioning power outlet and securely connected to your HP laptop. Sometimes, the connection may become loose over time, leading to power problems. If you’re using a power strip or extension cord, try connecting the laptop directly to a power outlet to rule out any issues with the additional connections.
2. Inspect the charging cable: Examine the power adapter’s charging cable for any signs of damage, such as frayed wires or bent connectors. If you notice any problems, it’s crucial to replace the cable with a new one to ensure a stable power supply to your laptop.
3. Test with a different power adapter: If you have access to another compatible power adapter, try using it to charge your laptop. This will help determine whether the issue lies with the power adapter or the laptop itself. If the black screen persists with a different adapter, the problem may be related to other factors.
4. Check the battery: If your HP laptop has a removable battery, try removing it from the laptop and connecting the power adapter directly. If the black screen issue is resolved, the battery might be causing a power problem. In such cases, replacing the battery could be a potential solution. However, if your laptop has a built-in battery, you can skip this step.
5. Verify the charging indicator lights: Many HP laptops feature LED lights that indicate the charging status. Check if the lights near the power adapter connection or on the front panel of your laptop are illuminated. If the lights are not on or are flashing irregularly, it could indicate a power issue.
6. Perform a hard reset: If all else fails, try performing a hard reset on your laptop. Shut down the laptop, unplug the power adapter, and remove the battery if possible. Press and hold the power button for about 15 seconds to discharge any residual power. Reconnect the power adapter (and battery, if applicable) and turn on the laptop to see if the black screen issue is resolved.
By checking the power source and ensuring that it is properly connected and functioning, you can eliminate a common cause of a black screen on an HP laptop. However, if the issue persists, it may be necessary to explore other troubleshooting steps.
Disconnect External Devices
External devices connected to your HP laptop can sometimes interfere with its normal booting process, leading to a black screen. To troubleshoot this issue, it’s important to disconnect all external devices and peripherals. Here’s what you can do:
1. Unplug USB devices: Disconnect all USB devices, including flash drives, external hard drives, printers, and any other peripherals connected to your laptop. These devices can sometimes cause conflicts during the booting process, resulting in a black screen.
2. Remove HDMI or VGA connections: If you have an external monitor connected to your laptop using an HDMI or VGA cable, disconnect it. Sometimes, your laptop may be set to extend the display to an external monitor, leading to a black screen on the laptop’s built-in display. Removing the external connection can help resolve this issue.
3. Disconnect docking stations or port replicators: If you use a docking station or port replicator, disconnect it from your laptop. These devices can introduce additional connections and configurations that may cause conflicts and result in a black screen.
4. Remove memory cards: If you have any memory cards inserted into the laptop’s card reader, remove them. Although rare, certain memory card configurations can lead to booting issues, including black screens.
5. Unplug audio devices: Disconnect any external speakers, headphones, or other audio devices that are plugged into your laptop. Audio devices can sometimes interfere with the booting process, causing a black screen.
6. Restart your laptop: After disconnecting all external devices, restart your laptop and check if the black screen issue is resolved. If the laptop boots up normally without displaying a black screen, one of the disconnected devices may have been causing the problem.
By removing external devices and peripherals, you can eliminate potential conflicts that may be causing the black screen on your HP laptop. If the issue persists even after disconnecting external devices, further troubleshooting steps are necessary.
Perform a Hard Reset
If your HP laptop continues to display a black screen, performing a hard reset can help resolve the issue. A hard reset involves shutting down the laptop, disconnecting the power source, and discharging any residual power. Here’s how to perform a hard reset:
1. Shut down the laptop: Press and hold the power button until the laptop completely shuts down. If the screen is already black, you may need to press and hold the power button for a few seconds.
2. Disconnect the power adapter: Unplug the power adapter from both the laptop and the power outlet. This step ensures that the laptop is completely disconnected from any power source.
3. Remove the battery (if applicable): If your HP laptop has a removable battery, gently remove it from the laptop. This step is optional and only relevant if your laptop has a removable battery. If your laptop has a built-in battery, you can skip this step.
4. Press and hold the power button: Press and hold the power button on your laptop for about 15 seconds. This discharges any remaining electricity stored in the laptop’s components and clears out any residual power.
5. Reconnect the power source: Plug the power adapter back into the laptop and ensure it is securely connected to both the laptop and the power outlet. If you removed the battery, reinsert it into the laptop.
6. Turn on the laptop: Press the power button to turn on your laptop. If the hard reset was successful, your HP laptop should boot up normally without displaying a black screen.
If performing a hard reset resolves the black screen issue, it may have been caused by a temporary software or hardware glitch. However, if the problem persists, further troubleshooting steps are required to identify and resolve the underlying cause.
Check the Display Settings
If your HP laptop is still experiencing a black screen, it’s important to check the display settings as they may be causing the issue. Here are some steps to follow:
1. Brightness adjustment: Press the “Fn” key on your keyboard, usually located near the bottom left, along with the brightness adjustment key. Increase the brightness level to ensure that the screen is not dimmed, causing it to appear black.
2. External display settings: If you have connected an external monitor to your HP laptop, it’s possible that the display settings have been configured to only show on the external display. Press the “Windows” key + “P” to open the display settings menu. Select “PC screen only” to ensure that the laptop’s display is active.
3. Dual monitor settings: If you use a dual monitor setup, it’s worth checking the display settings to ensure that both monitors are configured correctly. Open the display settings menu by pressing the “Windows” key + “P” and select “Duplicate” or “Extend” to activate both monitors.
4. Resolution settings: Incorrect resolution settings can sometimes cause a black screen. Right-click on the desktop and select “Display settings” from the context menu. Ensure that the resolution is set to the recommended value for your laptop’s display.
5. Graphics driver settings: Access the graphics driver settings by right-clicking on the desktop and selecting “Graphics options” or a similar option from the context menu. Ensure that the settings are configured correctly and try adjusting them if necessary.
6. External display connection: If you have recently connected or disconnected an external display, your laptop’s display settings may still be configured for the external monitor. Connect or disconnect the external display again, ensuring a proper connection, to reset the display settings.
By checking and adjusting the display settings on your HP laptop, you can eliminate misconfigurations that may be causing the black screen issue. However, if the problem persists, additional troubleshooting steps may be required to identify and resolve the underlying cause.
Update Graphics Drivers
If you’re facing a black screen issue on your HP laptop, outdated or incompatible graphics drivers could be the culprit. Updating the graphics drivers can often resolve this problem. Here’s how you can update the graphics drivers:
1. Identify the graphics card: Determine the model and manufacturer of your graphics card. You can do this by opening the Device Manager. Right-click on the Start button, choose Device Manager, and expand the Display Adapters category. Note down the name and model of your graphics card.
2. Visit the manufacturer’s website: Go to the website of the graphics card manufacturer, such as Nvidia, AMD, or Intel. Search for the latest drivers available for your specific graphics card model. Make sure to download the drivers that are compatible with your operating system version.
3. Uninstall existing drivers: Before installing the new drivers, it’s best to uninstall the existing ones. Right-click on the Start button, choose Device Manager, and expand the Display Adapters category. Right-click on your graphics card and select Uninstall. Follow the on-screen instructions to complete the uninstallation process. Restart your laptop after the uninstallation is complete.
4. Install the updated drivers: Once the existing drivers are uninstalled, run the downloaded file for the updated graphics drivers. Follow the installation instructions provided by the manufacturer. It’s recommended to choose the custom installation option to ensure a clean installation. Restart your laptop after the driver installation is complete.
5. Automatic driver update: Alternatively, you can use driver update software or the Device Manager to automatically search for and install the latest graphics drivers. In the Device Manager, right-click on your graphics card, select Update Driver, and follow the prompts to check for and install any available updates.
6. Verify driver installation: After updating the graphics drivers, verify that the new drivers are installed correctly. Open the Device Manager and check the Display Adapters category to see if your graphics card is listed with the updated driver version.
Keeping your graphics drivers up to date is important not only for addressing black screen issues but also for optimal performance and compatibility. If updating the graphics drivers doesn’t resolve the black screen problem, further troubleshooting may be required to identify the underlying cause.
Use Safe Mode to Troubleshoot
If you’re still encountering a black screen on your HP laptop, using Safe Mode can help troubleshoot and identify the cause of the problem. Safe Mode starts your laptop with minimal drivers and services, allowing you to isolate and address any conflicts. Here’s how to use Safe Mode:
1. Restart your laptop: Click on the Start menu, then select the Power button, followed by Restart. Alternatively, if your laptop is unresponsive, press and hold the power button until it shuts down, and then turn it on again.
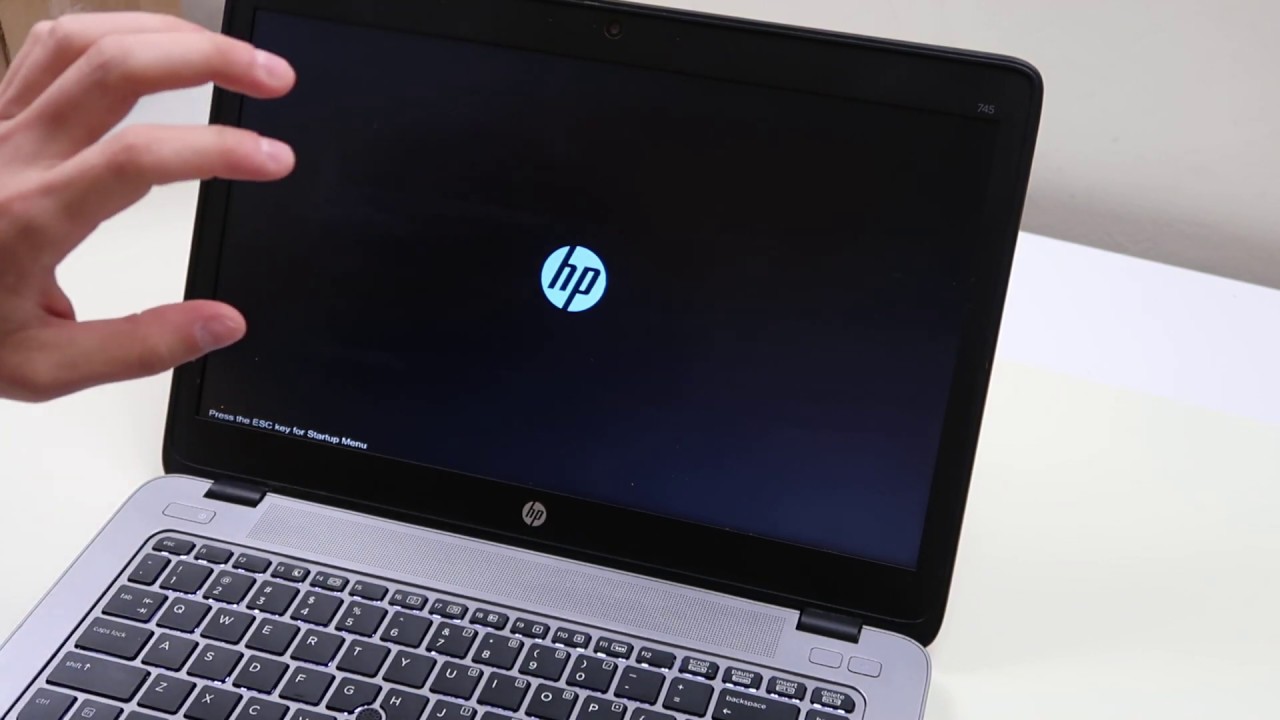
2. Access the Advanced Startup Options: As your laptop boots up, repeatedly press the F8 key until the Advanced Startup Options menu appears. If the F8 key doesn’t work, consult your laptop’s user manual or search online for the specific key combination to access the startup options on your HP laptop.
3. Select Safe Mode: In the Advanced Startup Options menu, use the arrow keys to navigate to the “Safe Mode” option and press Enter. Your laptop will now start in Safe Mode with limited functionality and essential drivers.
4. Troubleshoot in Safe Mode: Once in Safe Mode, observe if the black screen issue persists. If the black screen does not appear, it suggests that a driver or software conflict is causing the problem. You can start by uninstalling recently installed applications or drivers that may be responsible. Use the Device Manager to check for any devices marked with a yellow exclamation mark, indicating a driver issue.
5. Scan for malware: In Safe Mode, it’s also a good idea to run a thorough scan for malware and viruses using your preferred antivirus software. Malware can sometimes cause conflicts that result in a black screen.
6. Exit Safe Mode: When you’re done troubleshooting in Safe Mode, you can exit by restarting your laptop. Go to the Start menu, click on the Power button, and select Restart. Your laptop will boot up normally, using the default settings and drivers.
Using Safe Mode to troubleshoot can help you identify potential conflicts or software issues that might be causing the black screen on your HP laptop. If the black screen problem persists even in Safe Mode, further investigation and troubleshooting steps may be necessary.
Run Windows Update
If you’re experiencing a black screen on your HP laptop, it’s crucial to ensure that your operating system is up to date. Outdated software or missing updates can sometimes cause compatibility issues and result in a black screen. Running Windows Update can help resolve these problems. Here’s how to run Windows Update:
1. Open Windows Update: Click on the Start menu, then select “Settings.” In the Settings menu, click on “Update & Security.”
2. Check for updates: In the “Windows Update” section, click on the “Check for updates” button. Windows will now search for available updates for your operating system.
3. Install updates: If updates are found, click on the “Install” or “Install updates” button to begin the installation process. Depending on the number and size of the updates, this process may take some time. Ensure that your laptop is connected to a stable internet connection during this process.
4. Restart your laptop: After the updates are installed, you will be prompted to restart your laptop. Click on “Restart now” to complete the installation process. It’s important to save any open documents or files as your laptop will restart during this step.
5. Check for additional updates: Once your laptop restarts, repeat the above steps to check for and install any remaining updates. Windows Update may require multiple iterations to ensure that your laptop is fully up to date.
6. Verify the update: After all updates are installed, go back to the “Windows Update” section in the “Update & Security” settings and ensure that there are no more available updates. This will confirm that your operating system is up to date.
Running Windows Update regularly ensures that you have the latest bug fixes, security patches, and performance improvements from Microsoft. Keeping your operating system updated can help resolve compatibility issues that may be causing the black screen on your HP laptop. If the black screen problem persists even after updating, further troubleshooting steps may be necessary.
Perform a System Restore
If you’re still encountering a persistent black screen on your HP laptop, performing a system restore can help revert your device back to a previous state when it was functioning properly. System restore allows you to undo recent changes without affecting your personal files. Here’s how to perform a system restore:
1. Access System Restore: Click on the Start menu and type “System Restore” in the search bar. Select “Create a restore point” from the results. This will open the System Properties window.
2. Choose a restore point: In the System Properties window, click on the “System Restore” button. This will launch the System Restore wizard. Select “Choose a different restore point” and click “Next.”
3. Select a restore point: You will see a list of available restore points along with corresponding dates and descriptions. Choose a restore point that predates the occurrence of the black screen issue. You can also check the “Show more restore points” option for additional choices. Click “Next” to proceed.
4. Begin the system restore: Review the selected restore point and ensure that it matches the date and description you desire. Click “Finish” and then confirm by clicking “Yes” to start the system restore process.
5. Wait for the restoration: The system restore process may take some time to complete. Your laptop will restart during this process, so make sure to save any open documents or files. Let the process run its course without interruption.
6. Check for resolution: Once the system restore is finished and your laptop restarts, check if the black screen issue has been resolved. Your laptop should now be restored to a previous state when it was functioning properly.
Performing a system restore can be an effective way to address the black screen issue if it is caused by recent software installations, updates, or system changes. However, keep in mind that system restore will revert your laptop’s settings to a previous state, so any changes made after the selected restore point will be lost. If the black screen problem persists, further troubleshooting may be necessary.
Test the LCD Screen
If you’ve tried the previous troubleshooting steps and are still facing a black screen on your HP laptop, it’s essential to test the LCD screen itself. A hardware issue with the screen could be causing the problem. Here’s how to test the LCD screen:
1. External monitor connection: Connect your laptop to an external monitor using an HDMI or VGA cable. Ensure the external monitor is powered on and set to the correct input source. If the external monitor displays the laptop’s screen properly, it indicates that the black screen issue is specific to the laptop’s LCD screen.
2. Function key toggle: On your laptop’s keyboard, look for a function key labeled with an icon representing a screen or monitor. It is usually labeled as “Fn” and accompanied by a numbered function key (e.g., F4 or F8). Press the function key along with the “Fn” key to toggle between the laptop’s display modes. Try different combinations to see if the screen turns on.
3. Check for backlight: In a dark or dimly lit room, turn on your laptop and look closely at the screen. If you can see a faint image or backlight, it suggests that the LCD screen is functioning, but the backlighting component may have a problem. In such cases, a professional repair may be required.
4. LCD screen replacement: If none of the previous steps produce any display on the laptop screen, it may indicate a faulty LCD screen. Contact HP support or consult a professional technician to assess the issue and determine whether a screen replacement is necessary.
5. Warranty coverage: If your HP laptop is still under warranty, you may be eligible for a free repair or replacement of the LCD screen. Check the warranty documentation or contact HP support to inquire about warranty coverage for your laptop.
Testing the LCD screen helps to narrow down the cause of the black screen issue. If the screen functions properly when connected to an external monitor but remains black on the laptop, or if there are signs of backlighting, it suggests an issue with the LCD screen itself. Seeking professional assistance or contacting HP support is recommended to further diagnose and resolve the problem.
Contact HP Support
If you have gone through the previous troubleshooting steps and are still experiencing a black screen on your HP laptop, it may be time to contact HP support. Their knowledgeable support team can provide guidance and assistance in resolving the issue. Here’s how to get in touch with HP support:
1. Visit the HP Support website: Go to the HP Support website at www.support.hp.com. This is the official support portal where you can access various resources and get assistance for your HP laptop.
2. Browse the support options: On the HP Support website, you’ll find different support options. Explore the “Support” or “Help” section to access troubleshooting guides, manuals, and frequently asked questions (FAQs). These resources may have solutions specific to your laptop model and the black screen issue you are facing.
3. Contact HP support directly: If you are unable to find a solution or need personalized assistance, you can reach out to HP support directly. Look for the “Contact HP” or “Contact Support” option on the website. HP provides various contact methods, including phone support, live chat, and email support. Choose the method that is most convenient for you.
4. Provide necessary information: When contacting HP support, be prepared to provide specific details about your laptop, such as the model number, serial number, and a description of the black screen issue you are experiencing. This information will help the support team better understand your problem and provide appropriate guidance.
5. Follow the support representative’s instructions: Once you have connected with an HP support representative, follow their instructions for troubleshooting or further diagnosing the issue. They may guide you through additional steps or recommend a course of action, such as sending the laptop for repairs.
6. Warranty coverage: If your HP laptop is still under warranty, inform the support representative about it. They can guide you on available warranty services, including potential repair or replacement options for your laptop.
Contacting HP support ensures that you have access to expert assistance tailored to your specific laptop model. Their support team is trained to handle various technical issues, including the black screen problem you are encountering. Be patient and cooperative throughout the support process, and they will help you find the best solution for your HP laptop.