
Necessary Tools
Before replacing the battery of your Kindle Fire, it’s important to have the necessary tools on hand to ensure a smooth and successful battery replacement process. Here are the tools you will need:
- Small Screwdriver Set: You’ll need a set of small screwdrivers to remove the screws holding the back cover and battery in place.
- Plastic Opening Tools: Plastic opening tools are helpful for prying open the back cover of your Kindle Fire without causing damage to the device.
- Tweezers: Tweezers can be used to gently disconnect and reconnect the battery connector from the device.
- Replacement Battery: You’ll need a new, compatible battery to replace the old one. Make sure to purchase a battery that is specifically designed for your Kindle Fire model.
- Anti-Static Wrist Strap: An anti-static wrist strap is optional but recommended, as it prevents static electricity from damaging the internal components of your Kindle Fire during the battery replacement process.
By having these tools ready, you’ll be fully equipped to replace the battery of your Kindle Fire with ease and efficiency. Make sure to gather all the tools in a well-organized work area before starting the battery replacement process. This will help ensure that you have everything you need within reach and minimize any chances of misplacing or losing small components.
Step 1: Power Off the Kindle Fire
Before you begin the battery replacement process, it is crucial to power off your Kindle Fire. This ensures your safety and prevents any potential damage to the device.
To power off your Kindle Fire, follow these steps:
- Press and hold the power button located on the top or side of your device.
- A dialog box with the option to power off your Kindle Fire will appear on the screen.
- Tap the “Power off” or “Shutdown” option. This will initiate the power down process.
- Wait for your Kindle Fire to completely turn off. You will notice that the screen goes blank, and the device will no longer respond to your touch or button presses.
It is important to ensure that your Kindle Fire is powered off before proceeding to the next steps. This prevents any potential electrical shock or damage that may occur while handling the internal components of the device.
Once your Kindle Fire is powered off, you can now proceed to the next step of removing the back cover to access the battery compartment.
Step 2: Remove the Back Cover
With your Kindle Fire powered off, you are now ready to remove the back cover to gain access to the battery compartment.
Follow these steps to remove the back cover:
- Locate the small notch or groove on the bottom side of the Kindle Fire. This is where you will insert a plastic opening tool.
- Insert the plastic opening tool into the notch or groove. Gently apply pressure to pry open the back cover.
- Slowly move the plastic opening tool along the edges of the device to release the clips holding the back cover in place. Be careful not to apply excessive force to avoid damaging the cover or internal components.
- Continue prying open the back cover until all the clips are released. You may hear a clicking sound as the clips disengage.
- Once all the clips are released, carefully lift off the back cover from the device.
Ensure that you keep track of the screws and any other components that may be attached to the back cover. Set them aside in a safe place to avoid misplacing them during the battery replacement process.
By following these steps, you have successfully removed the back cover of your Kindle Fire. Now you can proceed to the next step of disconnecting the battery connector.
Step 3: Disconnect the Battery Connector
Now that you have removed the back cover of your Kindle Fire, you can proceed to disconnect the battery connector. This step is crucial to ensure your safety and prevent any potential electrical damage during the battery replacement.
Follow these steps to disconnect the battery connector:
- Locate the battery connector, which is a small plastic component attached to the motherboard.
- Gently grasp the battery connector by the edges using a pair of tweezers.
- Carefully and slowly lift the battery connector upward to disconnect it from the motherboard.
- Ensure that you do not apply excessive force while disconnecting the battery connector to avoid damaging the delicate components.
Once the battery connector is disconnected, it is essential to handle it with care and avoid touching any other electrical components on the motherboard. This helps prevent the risk of static electricity discharge and potential damage to the device.
By following these steps, you have successfully disconnected the battery connector of your Kindle Fire. Now you can proceed to the next step of removing the screws holding the battery in place.
Step 4: Remove the Screws Holding the Battery
With the battery connector disconnected, you can now proceed to remove the screws that secure the battery in place. Removing these screws will allow you to replace the old battery with a new one.
Follow these steps to remove the screws holding the battery:
- Using a small screwdriver from your toolset, carefully unscrew the screws that are holding the battery in place.
- Place the screws in a safe and easily accessible location to avoid misplacing them during the battery replacement process.
- As you remove the screws, take note of their size and placement, as they may vary depending on the specific Kindle Fire model you have.
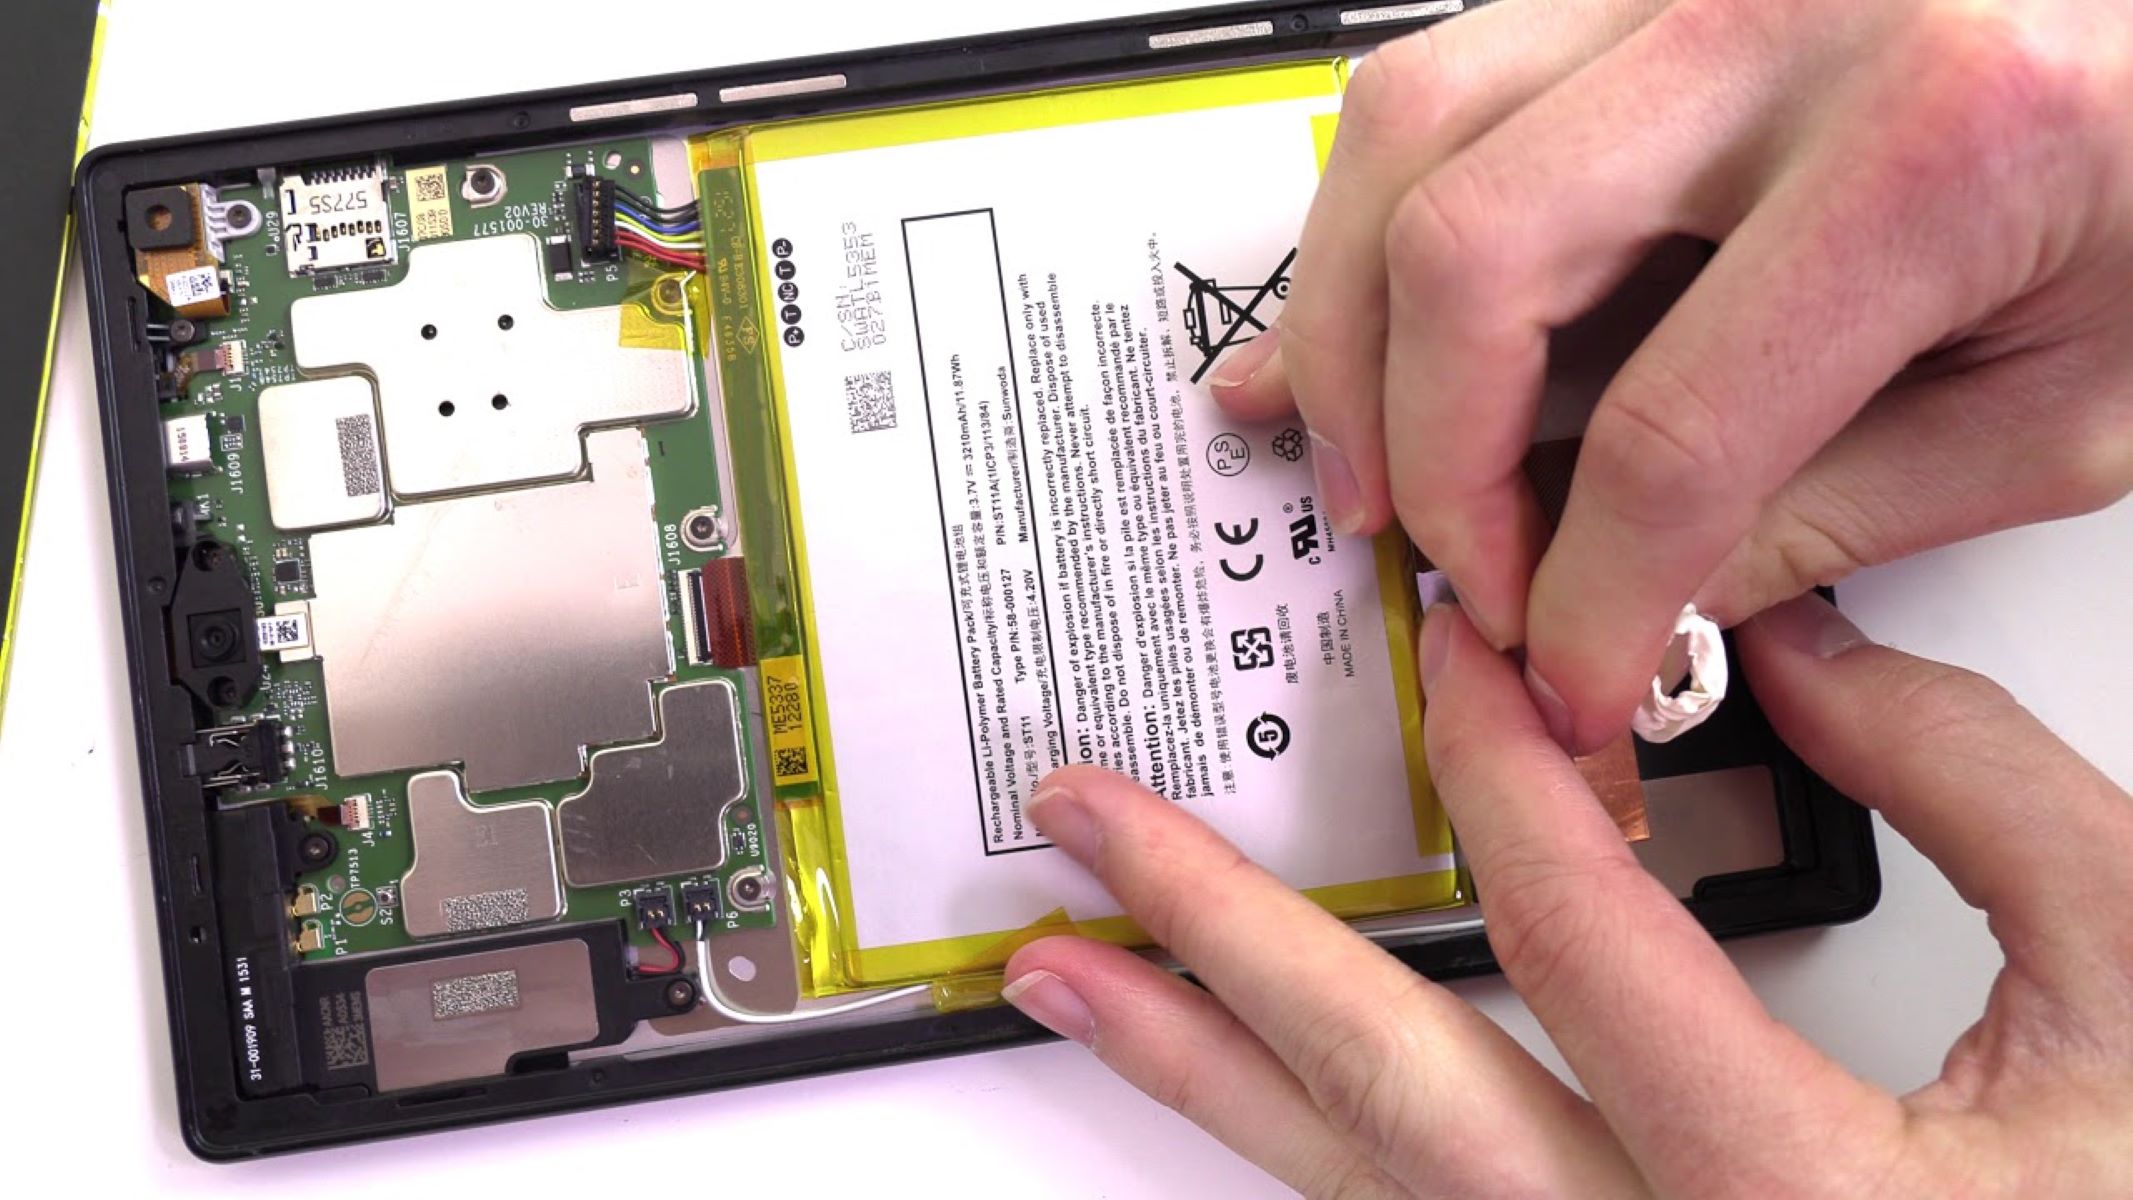
- Once all the screws are removed, set them aside and gently lift the battery from the device.
It’s important to handle the battery with care and avoid applying excessive force while removing it. Be mindful of any adhesive or tape that may be securing the battery in place, and gently detach it if necessary.
By following these steps, you have successfully removed the screws holding the battery of your Kindle Fire. Now you can proceed to the next step of replacing the old battery with a new one.
Step 5: Replace the Old Battery with a New One
Now that you have removed the screws holding the old battery in place, you can proceed to replace it with a new battery. This step is crucial to ensure the proper functioning of your Kindle Fire.
Follow these steps to replace the old battery with a new one:
- Position the new battery in the same orientation as the old battery, ensuring that the connectors align properly.
- Gently lower the new battery into the designated area, taking care not to apply excessive force or damage any components.
- If there was adhesive or tape securing the old battery, you can use double-sided adhesive tape or adhesive strips to secure the new battery in place. Make sure to align the battery properly.
- Press down gently to ensure that the new battery is secure. Take care not to damage the battery or any other internal components during this step.
It is important to use a compatible battery that is specifically designed for your Kindle Fire model. Using an incorrect or incompatible battery may result in poor performance or potential damage to the device.
By following these steps, you have successfully replaced the old battery with a new one in your Kindle Fire. Now you can proceed to the next step of securing the battery with screws.
Step 6: Secure the Battery with Screws
After replacing the old battery with a new one, the next step is to secure the battery in place using the screws you previously removed. Properly securing the battery ensures stability and prevents any potential issues during the operation of your Kindle Fire.
Follow these steps to secure the battery with screws:
- Take the screws that you removed earlier and align them with the designated screw holes on the battery.
- Using a small screwdriver from your toolset, carefully tighten the screws to secure the battery. Be cautious not to overtighten, as it may damage the device.
- Verify that the battery is securely in place by gently pressing on it. Ensure that it does not move or shift inside the device.
It’s crucial to use the correct screws and ensure they are tightened properly. Using the wrong screws or overtightening them can cause damage to the device or affect the performance of your Kindle Fire.
By following these steps, you have successfully secured the new battery in your Kindle Fire. Now you can proceed to the next step of reconnecting the battery connector.
Step 7: Reconnect the Battery Connector
With the new battery securely in place, the next step is to reconnect the battery connector. This step is crucial to ensure that the battery can provide power to your Kindle Fire properly.
Follow these steps to reconnect the battery connector:
- Locate the battery connector on the motherboard of your Kindle Fire.
- Take the battery connector that you previously disconnected, ensuring that it is properly aligned with the corresponding port on the motherboard.
- Gently insert the battery connector into the port on the motherboard until it is fully inserted. Be careful not to apply excessive force while doing this.
- Ensure that the battery connector is securely connected and properly seated in its designated port.
It is important to handle the battery connector with care and avoid touching any other components on the motherboard. This helps prevent the risk of static electricity discharge or damage to the device.
By following these steps, you have successfully reconnected the battery connector of your Kindle Fire. Now you can proceed to the next step of putting back the back cover.
Step 8: Put Back the Back Cover
With the battery reconnected, you are now ready to put back the back cover of your Kindle Fire. This step will help protect the internal components and give your device a finished appearance.
Follow these steps to put back the back cover:
- Align the back cover with the edges of your Kindle Fire, ensuring that all the clips align with the corresponding slots on the device.
- Gently press down on the back cover, applying even pressure along the edges, until you hear a series of clicks. This indicates that the clips are securely in place.
- Make sure that the back cover is flush with the device and there are no gaps or misalignment.
It’s important to be gentle while putting back the back cover to avoid damaging the clips or the device itself. Take your time and ensure that the back cover is properly aligned and securely attached.
By following these steps, you have successfully put back the back cover of your Kindle Fire. Now you can proceed to the next step of powering on the device.
Step 9: Power On the Kindle Fire
With the battery replaced and the back cover securely in place, it’s time to power on your Kindle Fire. This step will ensure that everything is working correctly and that your device is ready for use.
Follow these steps to power on your Kindle Fire:
- Press and hold the power button located on the top or side of your device.
- You will see the screen come to life, and the Kindle Fire logo will appear.
- Continue holding the power button until the device fully powers on.
- Once powered on, you will be greeted with the lock screen or home screen of your Kindle Fire, indicating that the device is functioning properly.
During the power-on process, your Kindle Fire may take a few moments to boot up and load the operating system. This is normal and should not cause any concern.
By following these steps, you have successfully powered on your Kindle Fire after replacing the battery. Now you can proceed to the final step of verifying the battery replacement.
Step 10: Verify the Battery Replacement
After completing the battery replacement process and powering on your Kindle Fire, it’s crucial to verify that the new battery is functioning correctly. This step ensures that your device is running smoothly and that the battery replacement was successful.
Follow these steps to verify the battery replacement:
- Check the battery icon on the screen. It should indicate that the battery is charging or at an appropriate level of charge.
- Monitor the battery usage and performance over the next few days. Make sure the battery is holding a charge, and the device is running without any issues or sudden power drainage.
- Use your Kindle Fire as you normally would, observing if there are any unusual behaviors or unexpected shutdowns related to the battery.
- If you notice any abnormalities or issues, consider resetting your device or consulting a professional technician for further assistance.
It’s important to give your Kindle Fire some time to recalibrate and adjust to the new battery. In some cases, it may take a few charging cycles for the battery to reach its optimal performance.
By following these steps and ensuring that the battery replacement is successful, you can enjoy your Kindle Fire with a reliable and long-lasting battery.