
Reasons for Removing the Taskbar from a Second Monitor
Having a second monitor can greatly improve productivity and multitasking capabilities. However, some users may find the taskbar on the second monitor to be distracting or unnecessary. There are several reasons why someone might want to remove the taskbar from a second monitor:
- Maximizing screen space: By removing the taskbar from the second monitor, you can maximize the available screen space for your work or multimedia content. This is especially useful for tasks that require a large workspace such as video editing or graphic design.
- Reducing visual clutter: With multiple windows open across both monitors, having a taskbar on each screen can create visual clutter and make it harder to focus. Removing the taskbar from the second monitor can help create a cleaner and more streamlined workspace.
- Minimizing distractions: Some users may find the taskbar on the second monitor to be distracting, especially if it constantly displays notifications or system icons. By removing the taskbar, you can minimize distractions and create a more immersive work or gaming environment.
- Customizing the workspace: Removing the taskbar from the second monitor allows you to customize the appearance and layout of your dual monitor setup. You can choose to display only essential icons or move the taskbar to a different location, giving you more control over your workspace.
- Enhancing privacy: If you use your second monitor for personal activities or presentations, removing the taskbar can help protect your privacy. It prevents others from unintentionally seeing your notifications or accessing your open programs.
These reasons highlight the advantages of removing the taskbar from a second monitor. Whether you prefer a more spacious and visually clean workspace or want greater control over your dual monitor setup, there are various methods available to help you achieve this. The following sections will outline different methods you can use to remove or customize the taskbar on a second monitor.
Method 1: Use Windows Settings to Hide the Taskbar
Windows operating system provides built-in settings to customize the appearance and behavior of the taskbar, including the ability to hide it on your second monitor. Follow these steps to remove the taskbar from your second monitor:
- Right-click on the taskbar of your main monitor and select “Taskbar settings” from the context menu.
- In the Taskbar settings window, scroll down to the “Multiple displays” section.
- Under the “Show taskbar on all displays” option, toggle it off to disable the taskbar on the second monitor.
Once you have disabled the taskbar on the second monitor, it will no longer be visible, providing you with a clutter-free workspace. However, you can still access the taskbar by moving the mouse cursor to the bottom of the second monitor screen.
This method is quick and convenient as it utilizes the native settings of the Windows operating system. However, please note that this method may not be available on older versions of Windows or if you have customized your taskbar settings using third-party software.
It’s important to mention that hiding the taskbar on the second monitor using Windows settings does not remove it completely. If you prefer a more permanent solution without any traces of the taskbar on your second monitor, you may need to explore alternate methods mentioned in the following sections.
Method 2: Use Third-Party Software to Remove the Taskbar
If the built-in Windows settings are limited or unavailable, you can turn to third-party software to remove the taskbar from your second monitor. There are several dedicated applications available that offer advanced customization options for multi-monitor setups. Here’s how you can utilize third-party software to remove the taskbar:
- Research and identify a reputable third-party software specifically designed for managing taskbars on multiple monitors.
- Download and install the selected software on your computer.
- Launch the software and configure the settings to hide or remove the taskbar on the second monitor.
- Apply the changes and test whether the taskbar has been successfully removed from the second monitor.
These third-party software solutions often provide additional features and customization options, such as the ability to define hotkeys, customize taskbar appearance, and control window management on multiple monitors. They offer a more comprehensive approach to managing the taskbar across multiple screens, ensuring a seamless and tailored user experience.
It’s important to note that when using third-party software, be cautious and do thorough research to choose a reliable and trusted application. Ensure that the software is compatible with your operating system version and regularly updated to avoid any potential compatibility issues or security vulnerabilities.
By using third-party software, you can have more control and flexibility in removing the taskbar from your second monitor, tailoring the experience to your specific needs and preferences.
Method 3: Use AutoHotkey Script to Hide the Taskbar
If you prefer a more hands-on approach and have experience with scripting, you can use AutoHotkey to create a custom script that will hide the taskbar on your second monitor. AutoHotkey is a powerful scripting language that allows you to automate tasks and customize various aspects of your Windows environment. Follow these steps to utilize an AutoHotkey script:
- Download and install AutoHotkey from the official website (https://www.autohotkey.com/).
- Create a new blank text file and open it in a text editor.
- Write or copy the following AutoHotkey script:
#NoTrayIcon
SetTitleMatchMode, 2
Loop
{
IfWinExist(“ahk_class Shell_TrayWnd”)
{
WinGet, hWnd, ID, ahk_class Shell_TrayWnd
WinHide, ahk_id %hWnd%
}
Sleep, 1000
}
- Save the file with a `.ahk` extension, for example, `hide_taskbar.ahk`.
- Double-click the `.ahk` file to run the AutoHotkey script.
Once the script is running, it will continuously check for the presence of the taskbar on the second monitor and hide it if detected. This method offers a more permanent solution as the script will run in the background and ensure that the taskbar remains hidden.
Using an AutoHotkey script gives you the flexibility to customize the script further based on your requirements. You can adjust the sleep duration or add additional conditions for hiding the taskbar based on specific criteria.
Keep in mind that AutoHotkey scripting requires a basic understanding of scripting, and any modifications should be done with caution. Additionally, make sure to test the script and ensure it functions correctly on your setup before relying on it for extended periods.
Method 4: Use DisplayFusion to Customize Taskbar on Second Monitor
DisplayFusion is a feature-rich software specifically designed to enhance multi-monitor setups. It offers advanced customization options and management tools for taskbars on multiple monitors. If you want more control over the taskbar on your second monitor, DisplayFusion can be a great solution. Follow these steps to customize the taskbar using DisplayFusion:
- Download and install DisplayFusion from the official website (https://www.displayfusion.com/).
- Launch DisplayFusion and go to the “Taskbar” tab in the main window.
- Select the second monitor from the drop-down menu at the top.
- Customize various options, such as taskbar position, size, buttons, and visibility settings, to suit your preferences.
- Apply the changes and observe the modifications made to the taskbar on the second monitor.
With DisplayFusion, you can not only hide the taskbar on the second monitor but also customize its appearance and behavior. You can choose to show only selected items, rearrange taskbar buttons, enable or disable features like system tray icons, and much more.
DisplayFusion is packed with additional features beyond taskbar customization, such as window management, wallpaper management, and multi-monitor shortcuts. It provides a comprehensive suite of tools to enhance your multi-monitor experience.
While DisplayFusion offers a free version, certain advanced features may require a Pro license. It’s recommended to explore the various options and settings available in DisplayFusion to take full advantage of its capabilities in customizing and managing the taskbar on your second monitor.
Method 5: Use Dual Monitor Tools to Control Taskbar on Second Monitor
Dual Monitor Tools is a collection of small utilities designed to enhance the functionality and management of dual monitor setups. One of the tools included in this collection is the Taskbar Controller, which allows you to control and customize the taskbar on your second monitor. Follow these steps to use Dual Monitor Tools for controlling the taskbar:
- Download and install Dual Monitor Tools from the official website (https://dualmonitortool.sourceforge.io/).
- Launch Dual Monitor Tools and open the Taskbar Controller.
- From the drop-down menu, select the second monitor.
- Toggle the “Taskbar visible” option to hide or show the taskbar on the second monitor.
- Adjust other settings, such as taskbar position, background color, or custom button order, based on your preferences.
- Apply the changes and observe the modifications made to the taskbar on the second monitor.
Dual Monitor Tools provides a user-friendly interface with various options to customize the appearance and behavior of the taskbar on your second monitor. It allows you to hide or show the taskbar, change its position, modify button order, enable or disable specific features, and more.
In addition to the Taskbar Controller, Dual Monitor Tools offers other useful tools like Swap Screen, which allows you to easily swap screens between monitors, and Wallpaper Changer, which helps manage wallpapers on multiple monitors.
This free and lightweight software is a handy solution for controlling and managing the taskbar on your second monitor, offering flexibility and convenience in customizing your dual monitor setup.
Method 6: Use Taskbar Hide to Remove Taskbar from Second Monitor
If you are looking for a straightforward and easy-to-use solution to remove the taskbar from your second monitor, Taskbar Hide is a handy tool to consider. Taskbar Hide is a lightweight software that allows you to hide or show the taskbar on specific monitors with just a few clicks. Follow these steps to remove the taskbar from your second monitor using Taskbar Hide:
- Download and install Taskbar Hide from a trusted source.
- Launch Taskbar Hide and you’ll see a list of all connected monitors.
- Select your second monitor from the list.
- Click the “Hide Taskbar” button to remove the taskbar from the selected monitor.
Taskbar Hide instantly hides the taskbar on the chosen monitor, providing you with a clean and distraction-free workspace. The taskbar can be restored by simply clicking the “Show Taskbar” button in Taskbar Hide.
One advantage of Taskbar Hide is its simplicity and ease of use. It does not require complex configurations or settings, making it accessible to users with varying levels of technical expertise.
Please note that Taskbar Hide focuses specifically on hiding the taskbar and does not offer extensive customization options like some other tools. If you are looking for advanced customization features, you may want to explore other methods or software mentioned in earlier sections.
Overall, Taskbar Hide is a straightforward solution for quickly removing the taskbar from your second monitor, providing you with a clutter-free workspace without any unnecessary distractions.
Method 7: Use Taskbar Commander to Customize Taskbar on Second Monitor
If you are looking for a powerful tool that offers extensive customization options for the taskbar on your second monitor, Taskbar Commander is an excellent choice. Taskbar Commander allows you to take full control of your taskbar, including customizing its appearance, behavior, and positioning on multiple monitors. Follow these steps to customize the taskbar on your second monitor using Taskbar Commander:
- Download and install Taskbar Commander from a trusted source.
- Launch Taskbar Commander, and you’ll be presented with a range of customization options.
- Select your second monitor from the dropdown menu or list of connected displays.
- Explore the various settings available, such as taskbar position, size, visibility, task grouping, and more.
- Make your desired adjustments to the taskbar on the second monitor.
- Apply the changes and observe the modifications made to the taskbar on your second monitor.
Taskbar Commander provides you with granular control over every aspect of the taskbar on your second monitor. You can not only hide or show the taskbar but also adjust its position, customize button properties, enable or disable various features, and much more.
Furthermore, Taskbar Commander allows you to save multiple taskbar configurations as profiles. This feature is particularly beneficial if you frequently switch between different setups or prefer different taskbar layouts for specific tasks.
Please note that Taskbar Commander may have a learning curve due to the extensive customization options and settings it offers. It is recommended to explore the software’s documentation or help files to fully understand and utilize all the available features.
With Taskbar Commander, you can create a tailor-made taskbar experience on your second monitor, ensuring optimal productivity and personalization in your dual monitor setup.
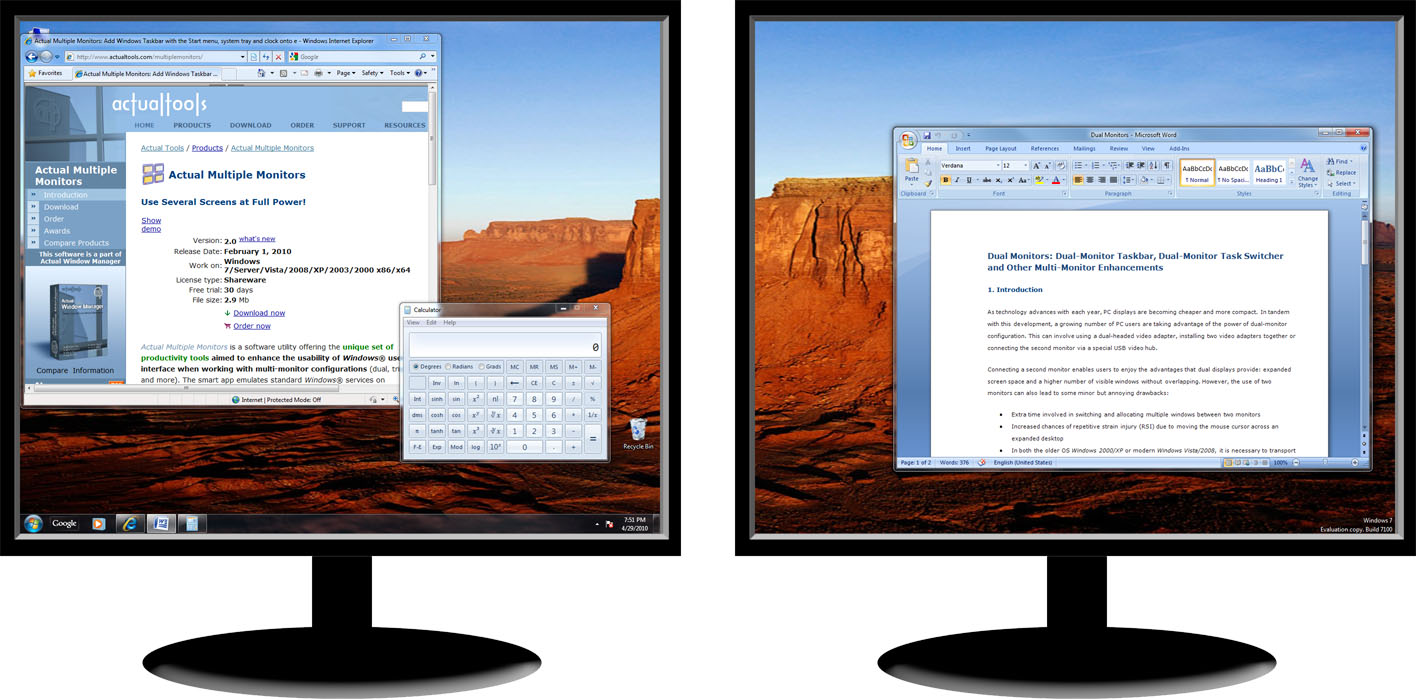
Method 8: Use Actual Multiple Monitors to Enhance Taskbar Functionality
If you’re looking for a comprehensive solution to customize and enhance the functionality of the taskbar on your second monitor, Actual Multiple Monitors is a powerful software package that can greatly enhance your multi-monitor experience. Actual Multiple Monitors offers numerous features and customization options for taskbars across multiple displays. Follow these steps to utilize Actual Multiple Monitors to enhance the taskbar functionality:
- Download and install Actual Multiple Monitors from the official website (https://www.actualtools.com/).
- Launch Actual Multiple Monitors and navigate to the “Taskbar” section in the program options.
- Here you can customize various aspects of the taskbar, including appearance, behavior, and functionality.
- Adjust taskbar position, size, buttons, and color to your preference.
- Enable additional features like multi-monitor taskbars, individual taskbars for each monitor, custom hotkeys, and more.
- Apply the changes and observe the modifications made to the taskbar on your second monitor.
Actual Multiple Monitors offers a wide range of advanced features beyond taskbar customization. It provides you with the ability to seamlessly manage windows across multiple monitors, configure display settings, create virtual desktops, and even mirror certain parts of your desktop on different monitors.
One notable feature of Actual Multiple Monitors is the ability to have individual taskbars for each monitor, allowing you to have separate taskbars with different buttons and functionality on each screen.
With Actual Multiple Monitors, you can have a fully personalized and functional taskbar experience on your second monitor, significantly improving productivity and ease of use in your multi-monitor setup.
It’s worth noting that Actual Multiple Monitors is a highly comprehensive software package with many options and settings. Take some time to familiarize yourself with the program’s functionalities to make the most out of its features and tailor the taskbar experience to your specific needs.
Potential Issues and Troubleshooting
While removing or customizing the taskbar on a second monitor can enhance your dual monitor setup, it is important to be aware of potential issues that may arise during the process. Here are some common issues you might encounter and troubleshooting steps to resolve them:
- Incompatibility: Certain methods or software may not be compatible with your operating system version or other installed applications. Ensure that the method or software you choose is compatible with your system and meets the necessary requirements.
- Unsupported Features: Some older versions of Windows may not support certain customization features or settings. Make sure you are using a compatible version of the operating system to access all the desired functionalities.
- Conflicting Software: If you have multiple software applications that control or modify the taskbar on your computer, conflicts may occur. Check for any conflicting software and consider uninstalling or disabling them to avoid interference.
- System Resources: Customizing the taskbar, especially with third-party software, may require system resources. If you notice a decrease in performance or system slowdowns, try optimizing your computer’s resources by closing unnecessary programs or upgrading hardware if necessary.
- Unexpected Behavior: In some cases, the customized taskbar might behave unexpectedly or revert to default settings. Try restarting the software or computer and reapplying the customization settings to resolve this issue.
- Support and Updates: If you encounter persistent issues or need help with the customization process, reach out to the software developer’s support team or consult online resources and forums dedicated to dual monitor setups. Stay updated with the latest software versions as updates often bring bug fixes and improvements.
Remember to backup your system and data before making any significant changes or installing new software to mitigate the risk of data loss or system instability.
By being aware of potential issues and following applicable troubleshooting steps, you can overcome obstacles and ensure a smooth and customized taskbar experience on your second monitor.