
Tools and Materials Needed
Before you begin the process of removing the wire from your HTC Vive, it’s important to gather all the necessary tools and materials. Having everything prepared ahead of time will make the process much smoother and help prevent any potential issues. Here are the tools and materials you will need:
- Small screwdriver set
- Zip ties or cable management clips
- Adhesive hooks or cable clips
- Cable ties or Velcro straps
- Cleaning supplies (optional)
The small screwdriver set will come in handy for unscrewing any mounting tips or brackets holding the wire in place. The zip ties or cable management clips will be used to neatly secure the wire and prevent it from tangling. Adhesive hooks or cable clips can be used to keep the wire attached to the walls or ceiling, if necessary. Cable ties or Velcro straps are useful for organizing the wires and keeping them in place.
While not necessary, having some cleaning supplies on hand can be helpful for tidying up any dust or residues that may have accumulated during the removal process. This can include a soft cloth, mild cleaning solution, and compressed air for blowing away any debris.
By ensuring you have all the tools and materials ready to go, you’ll be well-prepared to undertake the process of removing the wire from your HTC Vive. With everything in place, you can proceed to the next steps without any interruptions or delays.
Step 1: Preparing the Area
Before you start removing the wire from your HTC Vive, it’s important to prepare the area to ensure a smooth and hassle-free process. Here are the steps to follow:
- Clear the space: Begin by clearing the surrounding area of any obstructions or potential hazards. This includes moving furniture, decor, and any other items that may impede your movement or cause damage.
- Find a clean surface: Identify a clean and flat surface where you can safely lay down the HTC Vive and its components. This will provide you with ample space to work and minimize the risk of any accidental damage.
- Gather your tools and materials: Retrieve the tools and materials you collected earlier for the wire removal process. Having them within easy reach will save you time and make the process more efficient.
- Disconnect any power sources: Before you begin working on the HTC Vive, make sure to disconnect any power sources. This includes unplugging the power cord from the headset and wall socket.
- Allow for ventilation: Since the HTC Vive can generate heat during use, it’s important to ensure proper ventilation in the area. This will prevent overheating and prolong the lifespan of the device.
By following these steps and preparing the area beforehand, you can create an organized and safe environment for removing the wire from your HTC Vive. This will help you carry out the process smoothly and prevent any potential mishaps.
Step 2: Disconnecting the HTC Vive
Once you have prepared the area, the next step is to disconnect the HTC Vive from any connected devices. This will ensure that the wire removal process is done safely and without any complications. Follow these steps to disconnect the HTC Vive:
- Turn off the HTC Vive: Begin by turning off the HTC Vive headset. This can be done by pressing the power button located on the side or top of the headset. Make sure the device is completely powered down before proceeding.
- Disconnect the HDMI cable: Locate the HDMI cable that is connected to the headset. Carefully detach the cable by gently pulling the connector out of the port on the headset. Take care not to apply excessive force or twist the cable to avoid damaging it.
- Unplug the USB cable: Next, locate the USB cable connected to the headset. Similar to the HDMI cable, gently unplug the USB connector from the port on the headset. Be mindful of not putting any strain on the cable or port during this process.
- Remove the power cord: If your HTC Vive is powered by an external power adapter, unplug the power cord from the headset. Again, exercise caution to prevent any unnecessary tension on the cable or port.
With these steps completed, your HTC Vive should now be disconnected from any external devices, ensuring that the wire removal process can be carried out smoothly and safely.
Step 3: Removing the Mounting Tips
Before you can remove the wire from your HTC Vive, you may need to detach any mounting tips or brackets that are securing the wire in place. Follow these steps to remove the mounting tips:
- Inspect the wire: Take a close look at the wire attached to your HTC Vive. Identify any mounting tips or brackets that are holding the wire onto surfaces such as walls or ceilings.
- Use a small screwdriver: Depending on the type of mounting tip, you may need to use a small screwdriver to loosen and remove the screws. Carefully unscrew each mounting tip, taking note of their position and orientation.
- Gently remove the mounting tips: Once the screws are removed, gently lift and detach the mounting tips from the surface. Take care not to damage the walls or ceiling as you remove them, especially if they were attached using adhesive.
- Keep track of screws and mounting tips: It’s important to keep track of the screws and mounting tips as you remove them. Place them in a small container or bag to ensure they are not misplaced or lost during the wire removal process.
By following these steps, you can safely remove the mounting tips that are securing the wire of your HTC Vive. This will allow you to proceed with detaching the cable from the headset and removing it from the walls or ceiling, if applicable.
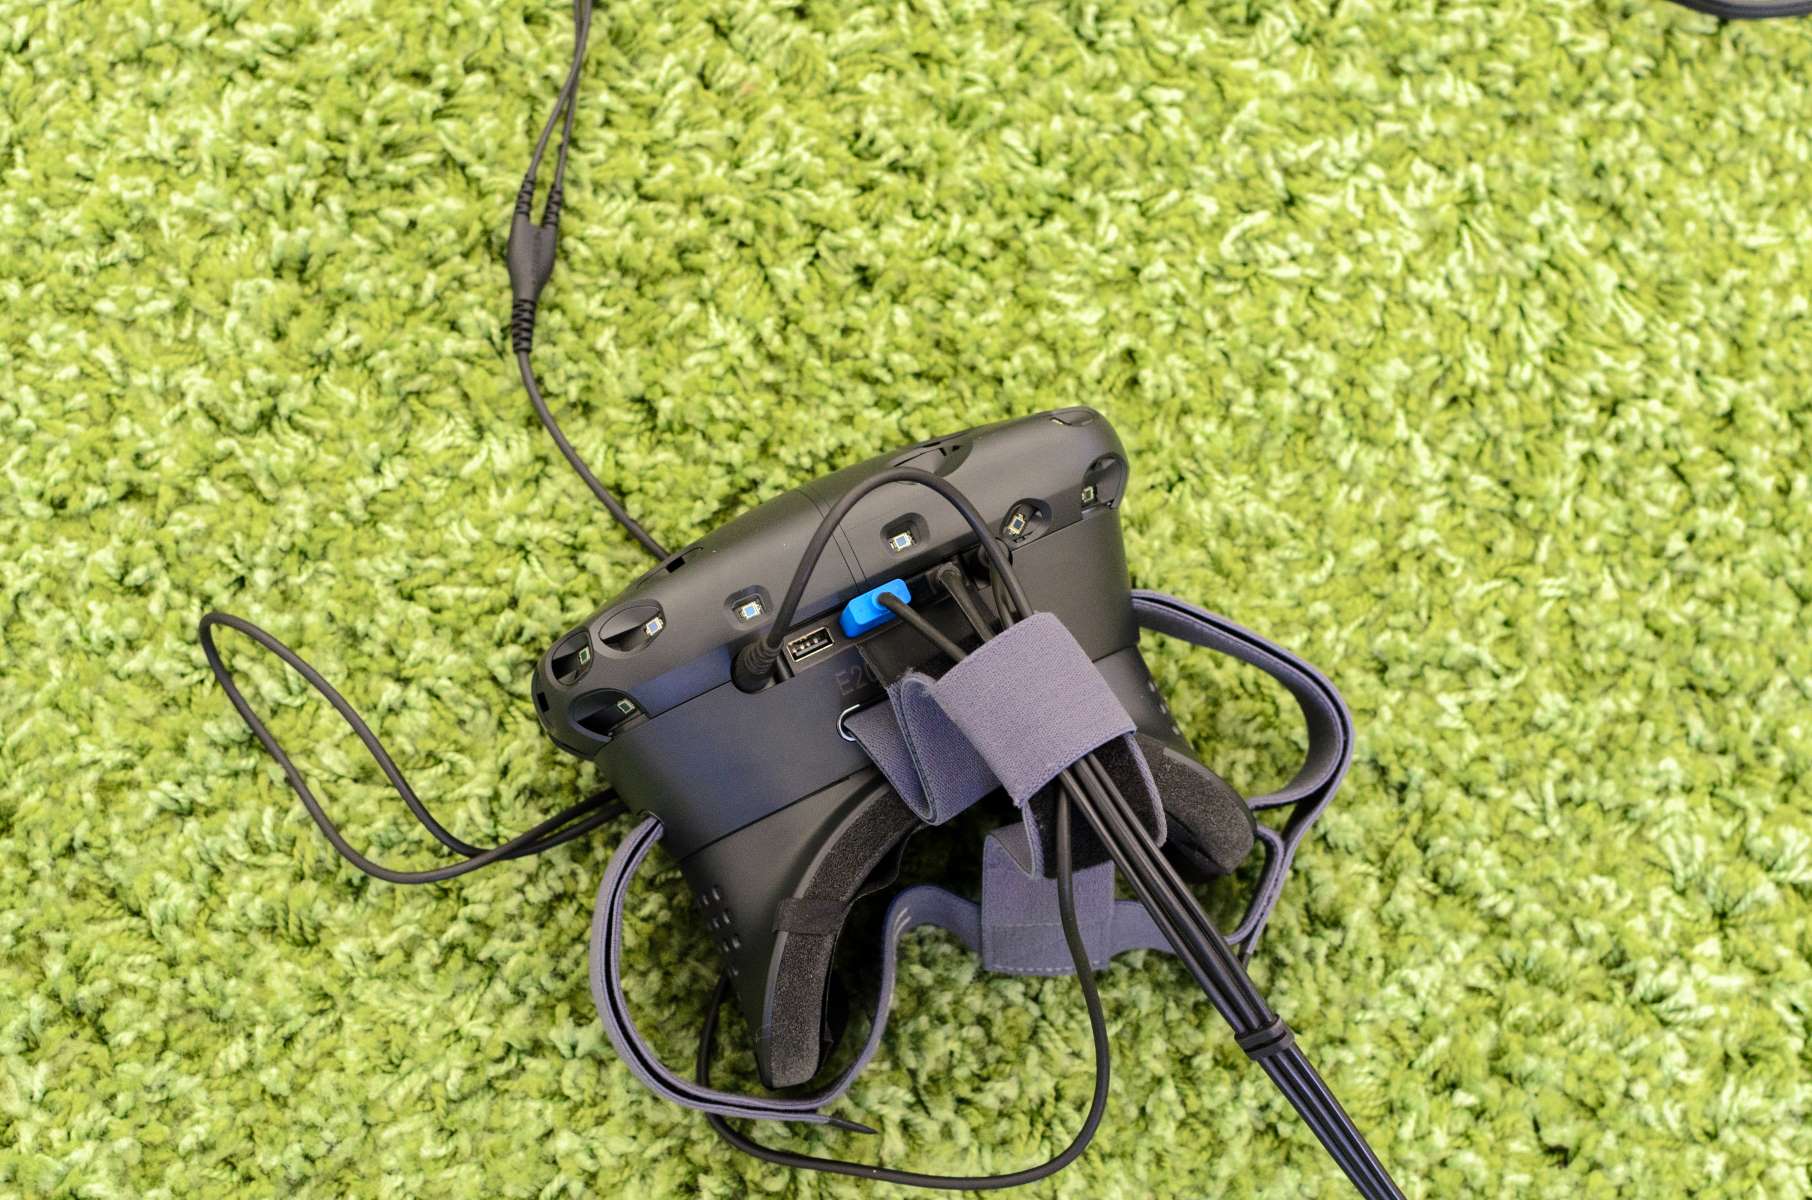
Step 4: Detaching the Cable from the Headset
Now that you have removed the mounting tips, it’s time to detach the cable from the headset itself. Follow these steps to safely disconnect the cable from your HTC Vive headset:
- Locate the cable connector: On the side or back of your HTC Vive headset, you will find the cable connector. It is typically a small, rectangular port where the cable is plugged in.
- Gently unplug the cable: Firmly but gently grasp the cable connector and carefully unplug it from the headset. Avoid pulling on the actual cable itself, as this may cause damage.
- Inspect the connector: Take a moment to inspect the cable connector and make sure it is free from any dirt, debris, or damage. A clean and undamaged connector will ensure a smoother removal process and allow for easy reattachment in the future if desired.
- Safely store the cable: Once the cable is detached from the headset, carefully coil it up and secure it with a zip tie, cable tie, or Velcro strap. This will prevent tangling and keep the cable organized.
By following these steps, you can safely detach the cable from your HTC Vive headset. With the cable disconnected, you can now move on to removing it from the walls or ceiling, if it was mounted, and organizing the remaining cables.
Step 5: Removing the Cable from the Walls or Ceiling
If you have mounted the cable of your HTC Vive on the walls or ceiling, this step will guide you on how to properly remove it. Follow these steps to safely take down the cable:
- Inspect the cable: Examine the cable that is attached to the walls or ceiling. Look for any adhesive hooks, cable clips, or cable ties that are securing the cable in place.
- Remove adhesive hooks or cable clips: Using your fingers, gently peel off any adhesive hooks or clips that are attached to the cable. Take your time to prevent damaging the walls or ceiling, especially if the adhesive is strong.
- Untie cable ties or Velcro straps: If the cable is held in place by cable ties or Velcro straps, carefully untie or release them to free the cable. Pay attention to the positioning of the ties or straps so you can easily reorganize the cables later if needed.
- Slowly pull the cable: Once any attachments have been removed, slowly and carefully pull the cable away from the walls or ceiling. If necessary, use a twisting motion while pulling to minimize any potential damage to the paint or surface.
By following these steps, you can safely remove the cable of your HTC Vive from the walls or ceiling. Remember to take your time and exercise caution to avoid any unnecessary damage. With the cable removed, you can proceed to the next step of organizing and cleaning up the remaining cables.
Step 6: Cleaning up and Organizing the Cables
With the main cable of your HTC Vive removed, it’s time to clean up and organize the remaining cables. Follow these steps to ensure a neat and organized setup:
- Inspect the remaining cables: Take a moment to look at the cables that are still connected to your HTC Vive. Check for any tangled or twisted cables that need to be straightened out.
- Use zip ties or Velcro straps: Gather the remaining cables together and use zip ties or Velcro straps to secure them together. This will help keep the cables organized and prevent them from getting tangled or bent.
- Arrange the cables: Position the cables in a way that avoids any unnecessary strain or tension. Make sure that they are positioned in a way that feels comfortable and unrestricted during use.
- Cable management solutions: If desired, you can explore various cable management solutions such as cable clips or adhesive hooks to keep the cables tidy and out of the way. These can be attached to your desk or the wall near your setup.
By following these steps, you can clean up and organize the remaining cables of your HTC Vive. This will help maintain a clutter-free environment and make future setups or adjustments easier. With the cables organized, you can move on to the final step of testing your HTC Vive without the main cable.
Step 7: Testing the HTC Vive without the Cable
After removing the cable and organizing the remaining cables, it’s time to test your HTC Vive without the main cable. This step will help ensure that everything is working properly. Follow these steps to test your HTC Vive:
- Reconnect the remaining cables: Ensure that all the remaining cables, such as the USB and power cables, are securely reconnected to your computer or power source.
- Power on the HTC Vive: Turn on your HTC Vive headset and wait for it to power up. You should see the display come to life and any built-in tracking systems activate.
- Launch VR application: Start up your preferred VR application or game on your computer. Make sure that it recognizes the HTC Vive headset and is ready for use.
- Put on the headset and test functionality: Carefully put on the HTC Vive headset and test its functionality. Move around and ensure that the tracking systems are working correctly, and the audio and visuals are clear and immersive.
- Test controllers: If you have VR controllers, ensure that they are properly connected and test their functionality as well. Check if they accurately track your movements and if the buttons and triggers are responsive.
By following these steps, you can successfully test your HTC Vive without the main cable. If everything is functioning as expected, you have successfully removed the wire and can enjoy a wireless VR experience. If any issues arise, double-check the connections, consult the HTC Vive user manual, or contact customer support for further assistance.