
Choose the right PC specifications
When it comes to optimizing your HTC Vive experience and reducing lag, having the right PC specifications is crucial. Your computer’s hardware will significantly impact the performance of the VR headset. Here are some key considerations when choosing the right PC specifications:
1. Processor (CPU): Look for a powerful CPU that can handle the demanding requirements of VR. A multi-core processor, such as an Intel Core i5 or i7, will provide the processing power needed for smooth VR performance.
2. Graphics card (GPU): The graphics card is essential for rendering high-quality visuals in virtual reality. Opt for a mid-range or high-end GPU, such as an NVIDIA GeForce GTX 1060 or higher, or an AMD Radeon RX 480 or higher, to ensure smooth VR gameplay without lag or stuttering.
3. RAM: VR applications require a significant amount of memory to run smoothly. Aim for at least 8GB of RAM, but consider upgrading to 16GB or more if your budget allows. More RAM will help prevent bottlenecks and improve overall performance.
4. Storage: VR games and applications can be large in size, so it’s important to have ample storage space. Consider getting a solid-state drive (SSD) for faster loading times and smoother performance. A combination of an SSD for the operating system and a larger hard drive for game storage is a good option.
5. Ports: Make sure your PC has the necessary ports required for connecting the HTC Vive. The headset requires an HDMI port for video output and USB ports (preferably USB 3.0) for data transfer. Check your PC’s specifications to ensure compatibility.
By choosing a PC with the right specifications, you can ensure that your HTC Vive runs smoothly and minimizes lag. Investing in a powerful CPU, a capable graphics card, sufficient RAM, and appropriate storage will greatly enhance your VR experience. Remember to double-check the compatibility of your PC’s ports with the HTC Vive to guarantee a seamless connection.
Update your graphics card drivers
One major factor that can contribute to lag and performance issues with the HTC Vive is outdated or incompatible graphics card drivers. Keeping your graphics card drivers up to date is crucial for optimal VR performance. Here’s how to update your graphics card drivers:
1. Identify your graphics card: First, you need to determine the make and model of your graphics card. This information can usually be found in your computer’s Device Manager or by using a third-party system information tool.
2. Visit the manufacturer’s website: Once you know the details of your graphics card, go to the manufacturer’s website. For NVIDIA cards, visit the NVIDIA website; for AMD cards, visit the AMD website. Look for a section dedicated to drivers or support.
3. Download the latest drivers: Look for the most recent drivers for your specific graphics card model. Download the appropriate driver package for your operating system, taking note of any other requirements or instructions provided by the manufacturer.
4. Install the drivers: After downloading the driver package, open the installation file and follow the on-screen instructions to install the updated drivers. The installation process may require you to restart your computer, so ensure that you save any important work before proceeding.
5. Check for updates regularly: Graphics card manufacturers often release driver updates to address compatibility issues, improve performance, and provide optimizations for specific games or VR experiences. Make it a habit to check for updates regularly and install them when available.
By keeping your graphics card drivers up to date, you can ensure that your HTC Vive is running on the latest software, benefiting from bug fixes and performance enhancements. Updated drivers can often resolve lag and stuttering issues, providing a smoother and more immersive virtual reality experience.
Check for software conflicts
Software conflicts can often be the cause of lag and performance issues with the HTC Vive. Incompatible or conflicting programs running in the background can disrupt the smooth operation of the VR headset. Here are some steps you can take to check for software conflicts:
1. Close unnecessary applications: Before launching your VR game or experience, close any unnecessary applications running in the background. Resource-intensive programs, such as video editing software or antivirus scanners, can consume system resources and impact VR performance.
2. Disable background processes: Use the Task Manager on your computer to identify and disable any unwanted or unnecessary background processes. These processes can include auto-updaters, cloud sync services, or other programs that are not essential for VR gameplay.
3. Disable antivirus or security software temporarily: In some cases, antivirus or security software can interfere with the functioning of the HTC Vive. Temporarily disable these programs while using the VR headset to see if it resolves any lag or performance issues. Remember to re-enable them after your VR session.
4. Update or reinstall conflicting software: If you suspect that a specific software program is causing conflicts with the HTC Vive, check for updates or consider reinstalling the program. Sometimes, newer versions or fresh installations can resolve compatibility issues.
5. Check for conflicting VR software: If you have previously installed other virtual reality software or drivers, such as Oculus or Windows Mixed Reality, they may conflict with the HTC Vive. Uninstall any conflicting software and ensure that only the necessary HTC Vive drivers and software are installed.
By checking for software conflicts, you can identify and resolve any issues that may be impacting the performance of your HTC Vive. Closing unnecessary applications, disabling background processes, and updating or reinstalling conflicting software can help eliminate lag and ensure a smooth VR experience.
Optimize your PC’s performance
To reduce lag and improve the performance of your HTC Vive, optimizing your PC’s performance is essential. By making a few adjustments and tweaks, you can enhance the overall functionality of your computer for a smoother VR experience. Here are some ways to optimize your PC’s performance:
1. Clean up your hard drive: Over time, your hard drive can become cluttered with unnecessary files and programs, which can slow down your PC. Use disk cleanup tools or manually delete files you no longer need to free up space and improve performance.
2. Defragment your hard drive: If you have a traditional hard drive (not an SSD), defragmenting it can help organize and optimize the storage of data. Use the built-in defragmentation tool in your operating system to rearrange files and improve access times.
3. Manage startup programs: Too many programs set to run at startup can significantly slow down your PC’s boot time and overall performance. Use the Task Manager or System Configuration tool to disable unnecessary startup programs and improve system responsiveness.
4. Update your operating system: Keeping your operating system up to date is crucial for optimal performance. Regularly check for updates and install them to ensure your PC has the latest features and security patches.
5. Scan for malware and viruses: Malware and viruses can wreak havoc on your PC’s performance. Use reputable antivirus software to scan and remove any malicious threats that could be impacting your system’s speed.
6. Adjust power settings: Ensure that your PC is set to High Performance mode or a balanced power plan. Lower power settings can limit the resources available to VR applications and cause lag or stuttering.
7. Update drivers and firmware: In addition to keeping your graphics card drivers up to date, make sure to update other drivers, such as those for your motherboard, network adapter, and sound card. Additionally, check for firmware updates for your HTC Vive headset.
8. Monitor temperature and cooling: Overheating can lead to system slowdowns. Ensure that your PC is adequately cooled with fans or liquid cooling systems. Regularly monitor temperatures and clean out any dust or debris from the cooling components.
By optimizing your PC’s performance, you can alleviate lag and ensure a smoother operation of your HTC Vive. Cleaning up your hard drive, defragmenting, managing startup programs, updating your operating system and drivers, and maintaining proper cooling can all contribute to an enhanced VR experience.
Close unnecessary background applications
When using the HTC Vive, having unnecessary background applications running can consume valuable system resources and contribute to lag and performance issues. Closing these applications before launching your VR experience can help optimize your PC’s performance and ensure smoother gameplay. Here are some steps to close unnecessary background applications:
1. Identify resource-intensive applications: Open the Task Manager on your computer and go to the Processes tab. Look for applications that are using a significant amount of CPU or memory. These resource-intensive applications can include web browsers with multiple tabs open, video editing software, or software running automatic updates.
2. Close applications manually: Once you have identified the resource-intensive applications, close them one by one. Right-click on the application in the Task Manager and select “End Task” or close the application through its own interface. Make sure to save any important work before closing the application.
3. Disable startup applications: Some applications automatically start running in the background when you boot up your computer. These applications can consume system resources even if you are not actively using them. To disable startup applications, open the Task Manager and go to the Startup tab. Right-click on any unwanted applications and select “Disable”.
4. Use third-party software: There are several third-party software programs available that can help you identify and close unnecessary background applications with a single click. These programs can provide a more convenient and efficient way to manage resource-intensive applications.
5. Disable unnecessary services: Some applications may have associated services running in the background that you can disable. Use the Services app in the Control Panel or search for “Services” in the Start menu to access the list of services running on your computer. Identify any unnecessary services and set their startup type to “Manual” or “Disabled”.
By closing unnecessary background applications, you can free up system resources and allocate them to the VR experience, reducing the chances of lag or stuttering. Regularly check and close resource-intensive applications, disable startup applications, and consider using third-party software to streamline the process. These steps will help optimize your PC’s performance for a smoother and more enjoyable HTC Vive experience.
Allocate more resources to the HTC Vive
To ensure optimal performance and reduce lag with the HTC Vive, allocating more resources to the VR headset can make a significant difference. By prioritizing system resources for the HTC Vive, you can enhance the overall VR experience. Here are some steps to allocate more resources to the HTC Vive:
1. Close resource-intensive applications: Before diving into your VR experience, close any resource-intensive applications running in the background. These applications can consume system resources, leading to lag and decreased performance in the HTC Vive. Shutting them down will free up resources for the VR headset.
2. Set the HTC Vive to high priority: You can adjust the priority of the HTC Vive application in the Task Manager to ensure it receives higher priority in resource allocation. Open the Task Manager, go to the Processes tab, right-click on the HTC Vive application, and set its priority to “High” or “Realtime”. This will prioritize resources for a smoother VR experience.
3. Adjust VR game settings: Within the settings of individual VR games, there are usually options to adjust graphical details, resolution, and other performance-related settings. Lowering graphical settings or reducing the resolution can allocate more resources to the HTC Vive, reducing lag and improving performance.
4. Upgrade system components: If your PC is struggling to allocate sufficient resources to the HTC Vive, consider upgrading certain components. Increasing the amount of RAM, upgrading to a more powerful processor, or installing a faster solid-state drive (SSD) can enhance resource allocation and improve overall performance.
5. Use VR-specific optimization tools: Some software tools are specifically designed to optimize resource allocation for VR applications. These tools can help identify and close unnecessary background processes, allocate resources to the HTC Vive, and fine-tune settings for optimal performance.
By allocating more resources to the HTC Vive, you provide the necessary power and performance for a smoother and more immersive VR experience. Closing resource-intensive applications, setting higher priority for the HTC Vive, adjusting game settings, upgrading system components, and utilizing optimization tools are all effective strategies to optimize resource allocation and reduce lag.
Adjust the rendering settings in SteamVR
SteamVR allows users to fine-tune the rendering settings to optimize performance and reduce lag in the HTC Vive. By adjusting these settings, you can find the right balance between visual quality and smooth gameplay. Here’s how you can adjust the rendering settings in SteamVR:
1. Open SteamVR settings: Launch SteamVR and click on the SteamVR menu in the top-left corner of the SteamVR window. Then, select “Settings” from the drop-down menu.
2. Navigate to the Video settings: In the SteamVR settings window, click on the “Video” tab. This section allows you to adjust the resolution, refresh rate, and supersampling settings for the HTC Vive.
3. Consider lowering the resolution: If you’re experiencing lag or performance issues, lowering the resolution can help improve performance. Reduce the resolution to a lower value and see if it provides smoother gameplay without sacrificing too much visual quality.
4. Adjust the refresh rate: The refresh rate determines how many times per second the image is refreshed on the HTC Vive display. Lowering the refresh rate can free up resources and potentially improve performance, but it may also affect the smoothness of the VR experience.
5. Experiment with supersampling: Supersampling refers to increasing the resolution of the rendered image beyond the native resolution of the headset. While supersampling improves image quality, it can also put a strain on system resources. Adjust the supersampling level to find the right balance between visual fidelity and performance.
6. Consider enabling motion smoothing or reprojection: Both motion smoothing and reprojection are techniques that can help maintain a smooth VR experience even when the system is struggling to meet the target frame rate. These features are particularly useful for demanding VR games or experiences.
7. Apply changes and test performance: Once you have adjusted the rendering settings to your liking, click “Apply” to save the changes. Launch a VR game or experience to test the performance and observe if the changes have reduced lag and improved overall gameplay.
By adjusting the rendering settings in SteamVR, you can find the optimal balance between visual quality and performance for your HTC Vive. Experiment with resolution, refresh rate, supersampling, and consider enabling motion smoothing or reprojection. Fine-tuning these settings can help reduce lag and provide a smoother and more immersive VR experience.
Reduce the graphics quality in VR games
If you are experiencing lag or performance issues in VR games, one effective solution is to reduce the graphics quality settings. Virtual reality games often have graphical options that can be adjusted to optimize performance without sacrificing too much visual fidelity. Here are some steps to reduce the graphics quality in VR games:
1. Launch the game’s settings: Open the VR game that you want to optimize and look for a settings or options menu within the game. This is typically accessible from the main menu or in-game pause menu.
2. Adjust graphical settings: Look for options related to graphics quality, such as texture quality, shadow resolution, anti-aliasing, or effects. Lower the settings to a lower preset or adjust them individually to find the right balance between performance and visual quality.
3. Decrease the resolution: Some VR games offer the option to adjust the resolution within the settings. Lowering the resolution can significantly improve performance, but keep in mind that it may affect the overall sharpness and clarity of the visuals.
4. Disable or lower post-processing effects: Post-processing effects, such as motion blur, depth of field, or ambient occlusion, can impact performance. Consider disabling or reducing the intensity of these effects to free up system resources.
5. Disable or reduce advanced graphical features: Some games include advanced graphical features like real-time reflections, dynamic lighting, or tessellation. These features not only demand more GPU power but also have a significant impact on performance. Disable or lower them to improve frame rates.
6. Experiment with different presets: Many VR games offer predefined graphical presets, such as low, medium, high, or ultra. Test different presets to find the optimal balance between performance and visual quality that works best for your system.
7. Restart the game: After making changes to the graphics settings, it is often necessary to restart the game for the new settings to take effect. Ensure that you save your progress before exiting the game.
By reducing the graphics quality in VR games, you can free up system resources to improve framerate and reduce lag. Adjusting settings like texture quality, resolution, post-processing effects, and other advanced graphical features can help optimize performance without compromising gameplay experience. Experiment with different settings and presets to find the optimal balance between performance and visual quality for a smoother and more enjoyable VR gaming experience.
Use a wired internet connection
A strong and stable internet connection is essential for a seamless virtual reality experience with the HTC Vive. While Wi-Fi can be convenient, using a wired internet connection can offer better reliability and reduce the chances of lag or disconnections. Here are some reasons why you should consider using a wired internet connection:
1. Stability and reliability: Wired connections, such as Ethernet cables, provide a more stable and reliable internet connection compared to Wi-Fi. With a wired connection, you can minimize issues like signal interference, network congestion, and fluctuations in speed, ensuring a smooth and uninterrupted VR experience.
2. Lower latency: Latency, or the delay between when a command is issued and when it is executed, can impact responsiveness in VR games and applications. Wired connections generally have lower latency compared to wireless connections, allowing for faster and more accurate interactions within the virtual environment.
3. Consistent bandwidth: For VR experiences that involve streaming content or playing multiplayer games, a consistent and high-speed internet connection is crucial. Wired connections can provide a more consistent and reliable bandwidth, ensuring that you have enough bandwidth to handle the data demands of VR applications.
4. Eliminates signal interference: Wi-Fi signals can be affected by various factors, such as distance, walls, other electronic devices, or neighboring networks. These signal interferences can cause drops in connection or reduced speeds. Using a wired connection eliminates these potential sources of interference, providing a more stable and consistent internet connection.
5. Prevents bandwidth sharing: Wi-Fi connections are shared among all devices connected to the network, which can impact the available bandwidth for the HTC Vive. With a wired connection, you can ensure that the VR headset has dedicated bandwidth, minimizing the chances of lag or interruptions due to other devices using the network simultaneously.
6. Easy setup: Setting up a wired internet connection is typically straightforward. All you need is an Ethernet cable and a router or modem with an available Ethernet port. Simply connect one end of the cable to the HTC Vive’s link box and the other end to your router or modem.
By using a wired internet connection, you can enhance the stability, reliability, and overall performance of your HTC Vive experience. Enjoy a smoother and more immersive virtual reality experience by eliminating potential Wi-Fi-related issues and ensuring a consistent and fast internet connection through a wired connection.
Restart your PC and VR headset regularly
To maintain optimal performance and address potential issues, it is important to regularly restart both your PC and VR headset. Restarting can help clear temporary files, refresh system resources, and resolve software conflicts. Here are some reasons why you should make it a habit to restart your PC and VR headset regularly:
1. Clears temporary files and caches: Over time, temporary files and caches can accumulate on your PC and headset, potentially slowing down performance. Restarting clears these temporary files, freeing up valuable system resources and ensuring a fresh start for your VR experience.
2. Resets system settings: Restarting your PC and VR headset can fix software-related issues by resetting system settings to their default state. This can rectify any misconfigurations or conflicts that may be causing lag or other performance problems.
3. Refreshes memory and resources: Memory leaks or excessive resource usage can occur during prolonged use of both the PC and the VR headset. By restarting regularly, you allow the system to refresh memory allocation and release any unnecessary resources, improving overall performance.
4. Updates software and drivers: Restarting your PC and VR headset can prompt updates for both system software and device drivers. These updates often include bug fixes, security patches, and performance enhancements that can improve the stability and performance of the VR experience.
5. Fixes software conflicts: Restarting your PC and VR headset can help resolve software conflicts that may have arisen during the course of usage. By closing all running applications and starting them fresh, you can eliminate any conflicts that may be causing issues with the HTC Vive.
6. Prevents memory and performance degradation: Continuous usage of the PC and VR headset can lead to memory fragmentation and performance degradation over time. Regularly restarting allows the system to regain its efficiency, ensuring a smoother and more responsive VR experience.
7. Re-establishes connections: Over time, connectivity issues may arise between the PC and the VR headset. Restarting both devices can re-establish these connections, ensuring a stable and reliable connection for optimal performance.
Make it a habit to restart your PC and VR headset on a regular basis to maintain optimal performance and resolve potential issues. By clearing temporary files, resetting system settings, refreshing memory and resources, and updating software, you can enhance the stability and overall VR experience.
Keep your VR headset clean and dust-free
Maintaining a clean and dust-free VR headset is essential for both optimal performance and a comfortable user experience. Dust and debris can accumulate on the lenses, sensors, and other parts of the headset, affecting the visual quality and tracking accuracy. Here are some tips to keep your VR headset clean:
1. Use a microfiber cloth: When cleaning the lenses of your VR headset, use a gentle microfiber cloth. Avoid using rough or abrasive materials, as they can scratch the lenses. Gently wipe the lenses in a circular motion to remove fingerprints, smudges, or dust particles.
2. Avoid liquid cleaners: Do not use liquid cleaners directly on the headset or lenses, as they can seep into sensitive components and cause damage. If necessary, lightly dampen the microfiber cloth with water or a lens cleaning solution specifically designed for optics.
3. Clean the face padding: The face padding of the VR headset can collect oils, sweat, and dirt over time. Remove the padding and gently clean it using mild soap and water. Make sure to completely dry it before reattaching it to the headset to prevent moisture buildup.
4. Store in a clean and dry space: When not in use, store your VR headset in a clean and dry space to prevent dust from settling on the lenses or other components. Consider using a protective case or covering to further shield it from dust and potential damage.
5. Avoid direct sunlight: Exposure to direct sunlight can damage the lenses of the VR headset. When not in use, keep the headset away from windows or any other sources of direct sunlight. Store it in a cool, dark place to maintain its longevity.
6. Regularly clean the tracking sensors: Dust or debris on the tracking sensors can affect the accuracy of motion tracking. Use a soft, dry cloth to gently wipe the sensors, ensuring there is no buildup on them.
7. Keep the cables untangled: Tangled or twisted cables can cause strain and potential damage to the headset. Regularly untangle and straighten the cables to prevent any issues with connectivity or performance.
By keeping your VR headset clean and dust-free, you can enjoy a better visual experience and accurate motion tracking. Regularly clean the lenses, face padding, and tracking sensors using appropriate materials and techniques. Ensure proper storage and cable management to maintain the longevity and functionality of your VR headset.
Check for firmware updates for the HTC Vive
Regularly checking for firmware updates for your HTC Vive is crucial for maintaining optimal performance and compatibility with the latest software. Firmware updates often include bug fixes, performance improvements, and new features that can enhance your VR experience. Here are some steps to check for firmware updates:
1. Launch SteamVR: Ensure that SteamVR is properly installed on your computer. Launch Steam and navigate to the Library tab. Look for SteamVR in your list of installed applications and double-click to launch it.
2. Check for updates in SteamVR: Once SteamVR is launched, click on the dropdown menu at the top left of the window and select “Check for Updates.” SteamVR will then scan for any available updates to the firmware of the HTC Vive.
3. Follow the on-screen instructions: If any firmware updates are found, SteamVR will prompt you to download and install them. Follow the on-screen instructions to proceed with the update process. Make sure that your HTC Vive is connected and powered on during the update.
4. Restart your HTC Vive: After the firmware update process is complete, it is recommended to restart your HTC Vive. This will ensure that the changes made by the firmware update take effect and the system is properly refreshed.
5. Enable automatic firmware updates: To ensure that your HTC Vive stays up to date with the latest firmware releases, you can enable automatic firmware updates in SteamVR. To do this, open SteamVR and go to the dropdown menu at the top left of the window. Select “Settings” and navigate to the “Developer” tab. Check the box next to “Enable automatic firmware updates” to allow SteamVR to automatically install future updates as they become available.
By regularly checking for firmware updates for your HTC Vive, you can ensure that your VR headset is running on the latest software version. Firmware updates often address performance issues, compatibility problems, and add new features to enhance your VR experience. Make it a habit to check for updates and install them promptly to keep your HTC Vive up to date and functioning optimally.
Use USB 3.0 ports for better connectivity
When using the HTC Vive, it is recommended to connect the headset and its peripherals to USB 3.0 ports on your computer for optimal performance and connectivity. USB 3.0 ports provide faster data transfer speeds and improved power delivery, which are essential for a seamless VR experience. Here’s why you should utilize USB 3.0 ports:
1. Higher data transfer speeds: USB 3.0 ports offer significantly faster data transfer speeds compared to USB 2.0 ports. This is crucial for transmitting the large amount of data required by the HTC Vive, such as head tracking information and high-resolution visuals, without lag or delays. Faster data transfer speeds can result in a smoother VR experience.
2. Better power delivery: USB 3.0 ports provide increased power delivery, which is vital for supporting power-hungry devices like the HTC Vive headset and its peripherals. This allows the headset to receive adequate power for optimal performance and ensures that all components function properly without voltage drops or insufficient power supply.
3. Reduced latency: The faster data transfer speeds and improved power delivery of USB 3.0 ports help reduce latency, which is crucial for maintaining a responsive and accurate VR experience. Lower latency ensures that movements and interactions within the virtual environment are translated in real-time, enhancing the sense of immersion and improving overall gameplay.
4. Compatibility with USB 2.0 devices: While it is recommended to use USB 3.0 ports for the HTC Vive, it is important to note that USB 3.0 ports are backward compatible with USB 2.0 devices. This means you can still connect USB 2.0 peripherals, such as controllers or other accessories, to USB 3.0 ports without any issues.
5. Identifying USB 3.0 ports: USB 3.0 ports can be easily distinguished from USB 2.0 ports by the blue coloring inside the port or the “SS” (SuperSpeed) logo next to it. Additionally, your computer’s user manual or motherboard documentation should indicate which ports are USB 3.0.
By utilizing USB 3.0 ports for the HTC Vive and its peripherals, you can ensure faster data transfer, improved power delivery, reduced latency, and a more reliable VR experience. Check your computer for available USB 3.0 ports and connect the headset and accessories accordingly to maximize performance and enjoy a seamless virtual reality experience.
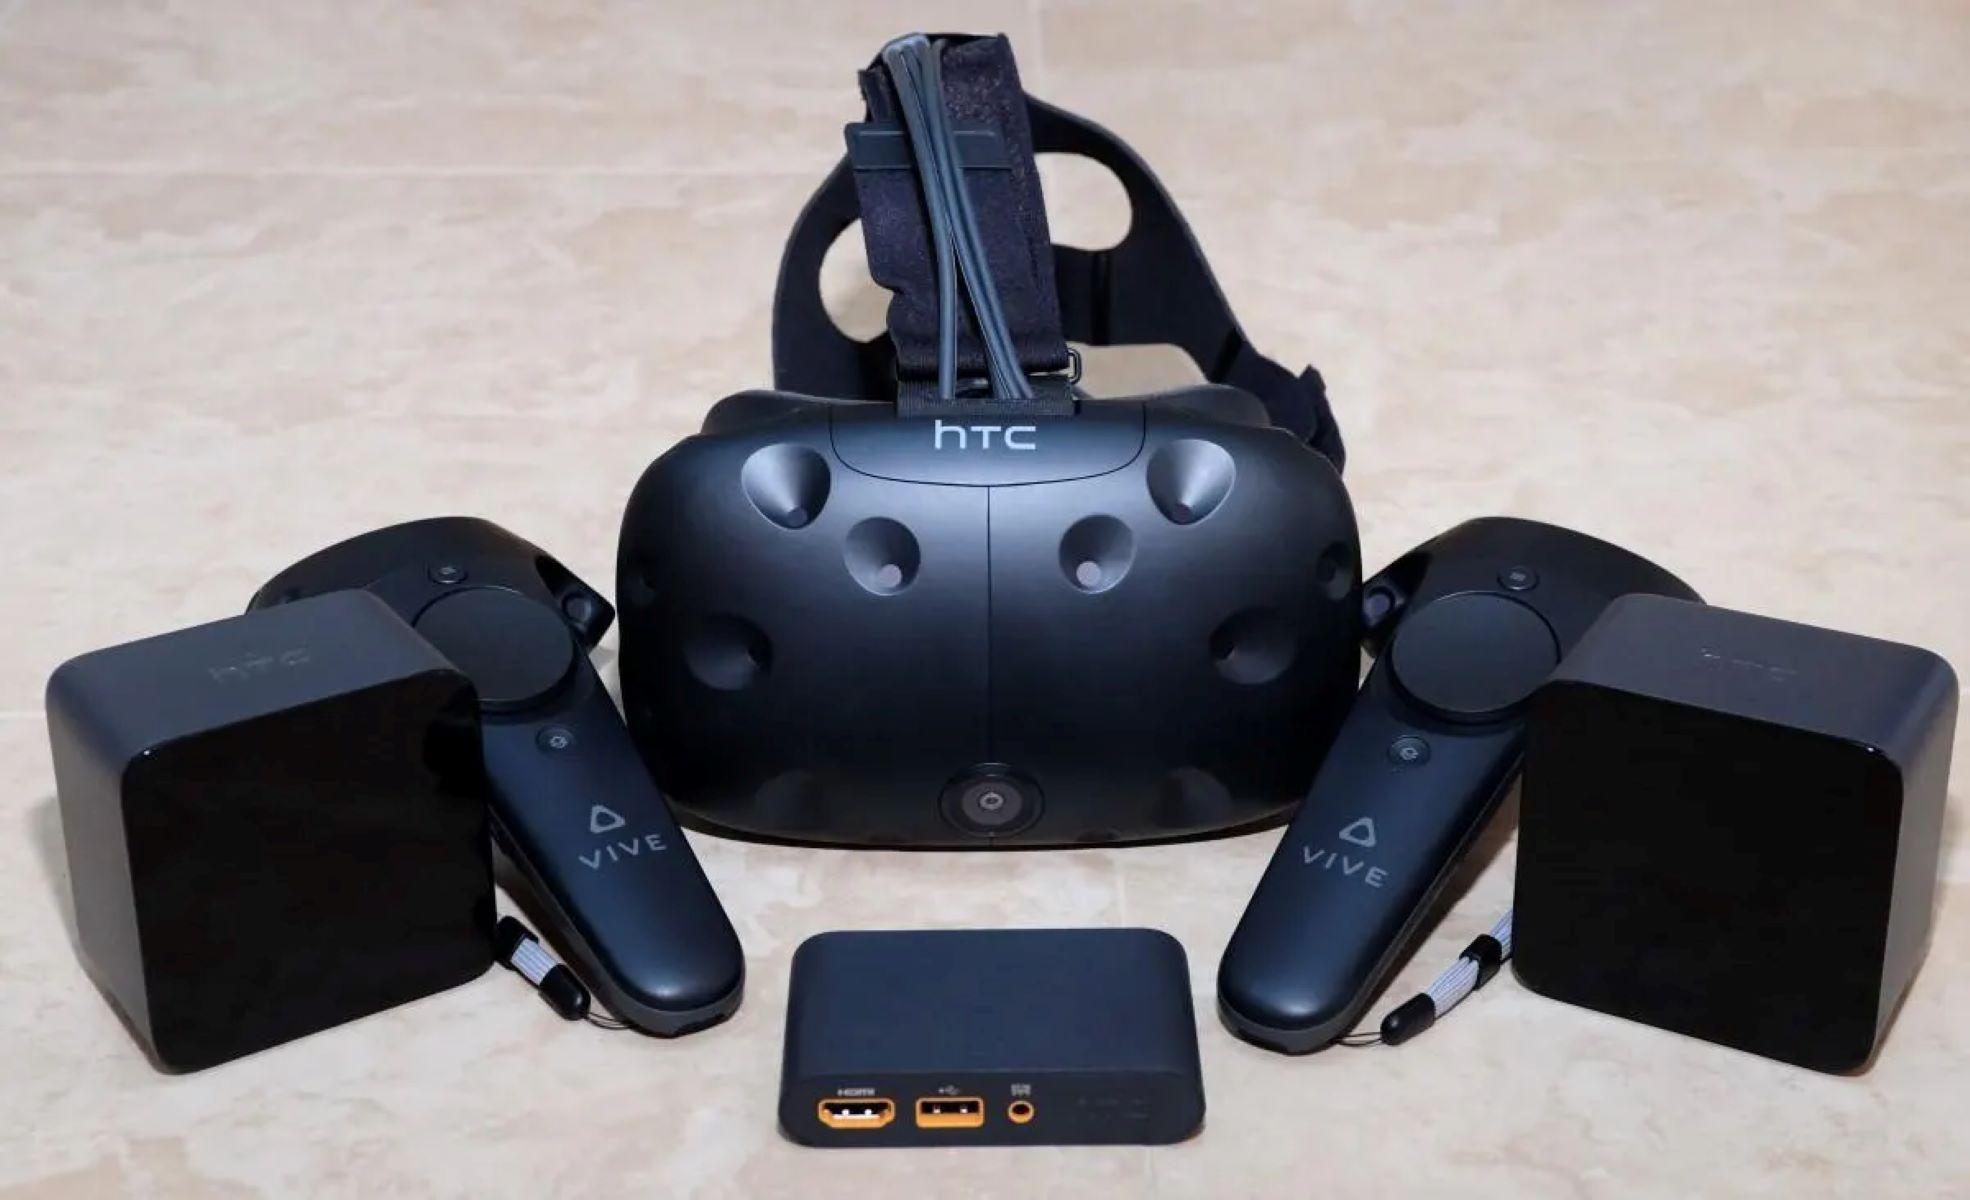
Make sure the tracking stations are properly set up
Proper setup and positioning of the HTC Vive tracking stations are crucial for accurate tracking and optimal performance. The tracking stations allow the headset and controllers to be tracked in 3D space, providing a seamless and immersive VR experience. Here are some tips to ensure your tracking stations are properly set up:
1. Mount the tracking stations securely: Ensure that the tracking stations are securely mounted on stable surfaces, such as walls or tripods. Make sure they are positioned at a height and angle that covers the play area and provides a clear line of sight to the HTC Vive headset and controllers.
2. Position the tracking stations diagonally: For best results, position the tracking stations diagonally across the play area. This helps maximize the coverage and tracking accuracy, as it creates a triangular tracking zone that covers a wider range of movements.
3. Avoid reflective surfaces: Reflective surfaces, such as mirrors or glass, can interfere with the tracking of the HTC Vive. Ensure that the tracking stations are positioned away from reflective surfaces to minimize any potential tracking issues caused by reflections.
4. Check for obstructions: Make sure that there are no objects, furniture, or other obstacles blocking the line of sight between the tracking stations and the headset/controllers. Clear any obstructions to ensure uninterrupted tracking and smooth movement within the VR environment.
5. Ensure proper synchronization: The tracking stations should be synchronized with the HTC Vive headset. Follow the instructions provided by HTC to properly sync the tracking stations to the VR system. This synchronization process helps ensure accurate tracking and alignment between the headset and controllers.
6. Keep the tracking stations clean: Dust or dirt on the tracking stations can reduce tracking accuracy. Clean the tracking stations regularly using a soft, lint-free cloth to remove any dust or smudges. This helps ensure optimal tracking performance and reduces the chances of tracking issues.
7. Follow the manufacturer’s guidelines: Always refer to the manufacturer’s guidelines and instructions for setting up and positioning the tracking stations. These guidelines provide detailed information and recommendations to help optimize tracking performance and minimize potential tracking problems.
By properly setting up and positioning the tracking stations, you can ensure accurate tracking and a more immersive VR experience with the HTC Vive. Mount the tracking stations securely, position them diagonally, avoid reflective surfaces, check for obstructions, synchronize properly, keep them clean, and follow the manufacturer’s guidelines. Taking these steps will help maximize tracking accuracy and enhance your overall VR experience.
Ensure the room is well-lit for better tracking
Creating the right lighting conditions in the room where you use your HTC Vive is crucial for optimal tracking and overall VR experience. Proper lighting helps the tracking system accurately detect the movement of the headset and controllers, resulting in a more immersive and responsive VR environment. Here are some tips to ensure your room is well-lit for better tracking:
1. Avoid direct sunlight: Direct sunlight can interfere with the tracking system by causing reflections or glare on the headset and controllers. Close curtains or blinds to block out direct sunlight and avoid positioning the tracking stations in areas where they are directly exposed to sunlight.
2. Use diffuse lighting: Instead of relying on bright, direct lighting, opt for diffused or indirect lighting sources in the room. This helps minimize harsh shadows and reflections that can impact the accuracy of the tracking system. Using soft, evenly spread lighting creates a more uniform environment for tracking.
3. Avoid extreme contrasts: Lighting conditions with extreme contrasts, such as a brightly lit area with a dark corner, can make it challenging for the tracking system to maintain accurate tracking. Try to ensure consistent lighting throughout the room to reduce potential tracking issues caused by contrasts.
4. Illuminate the play area: Ensure that the play area itself is well-lit to optimize tracking performance. Consider using additional lighting sources strategically placed near the tracking stations to provide better visibility for the sensors. This helps the tracking system gather more precise data and improve tracking accuracy.
5. Eliminate shadows and obstructions: Shadows or obstructions can interfere with the tracking system. Check for any objects or furniture that might cast shadows on the play area or block the tracking stations’ line of sight. Rearrange or remove these obstructions to minimize tracking disruption.
6. Consider adjustable lighting: If possible, install adjustable lighting fixtures or use lamps with dimming capabilities. This allows you to adjust the lighting conditions according to your specific VR needs. Dimming the lights slightly during the VR session can help enhance visibility while still maintaining an immersive experience.
7. Keep the room well-maintained: Regularly clean the surfaces, windows, and any reflective objects in the room to eliminate dirt, smudges, or fingerprints that could impact the tracking performance. A clean environment helps reduce the chances of tracking issues caused by obstructions or reflections.
By ensuring that the room is well-lit, you can significantly improve the tracking accuracy and responsiveness of your HTC Vive. Avoid direct sunlight, use diffuse lighting, maintain consistent lighting conditions, illuminate the play area, eliminate shadows and obstructions, consider adjustable lighting, and keep the room well-maintained. Following these tips will help create an optimized tracking environment for a more immersive and enjoyable VR experience.
Use a shorter, high-quality HDMI cable
The HDMI cable plays a crucial role in transmitting high-quality audio and video signals between your PC and the HTC Vive headset. Using a shorter and high-quality HDMI cable can contribute to a more reliable and immersive VR experience. Here are some reasons why you should consider using a shorter, high-quality HDMI cable:
1. Reduced signal loss and degradation: Longer HDMI cables can suffer from signal loss and degradation, resulting in a decrease in image quality or intermittent connectivity issues. By using a shorter cable, you minimize the distance over which the signal travels, reducing the chances of signal degradation and maintaining optimal audiovisual quality.
2. Better performance and faster response: A high-quality HDMI cable with good shielding and conductors can ensure faster data transmission and a more responsive VR experience. The improved performance of a quality cable reduces latency and contributes to smoother interactions within the virtual environment.
3. Enhanced compatibility: Some longer HDMI cables, especially those longer than 15 feet, may have compatibility issues with certain devices or configurations. Using a shorter cable decreases the likelihood of encountering compatibility problems, making it more reliable in different VR setups.
4. Reduced cable management and clutter: With a shorter HDMI cable, you have less cable length to manage and organize. This reduces the chances of tangling, tripping hazards, and cable clutter in your VR setup, leading to a cleaner and more streamlined gaming area.
5. Better flexibility and ease of use: Shorter HDMI cables are often more flexible and easier to route than longer cables. Their increased flexibility allows for easier installation and positioning of your VR setup. It also reduces strain on the connectors and prevents excessive bending or kinking of the cable.
6. Check for HDMI version compatibility: When choosing a high-quality HDMI cable, ensure that it supports the HDMI version required by your HTC Vive and graphics card. Compatibility between the device, cable, and HDMI version is essential for optimal performance and to make the most of the VR headset’s capabilities.
When selecting a shorter, high-quality HDMI cable for your HTC Vive, consider factors such as durability, shielding, and HDMI version compatibility. Prioritize reputable brands and cables that have undergone testing and certification to ensure reliable performance. By using an appropriate cable, you can enjoy a more stable and immersive VR experience without any compromise in audiovisual quality.
Optimize the positioning of the base stations
The proper positioning of the base stations in your HTC Vive setup is essential for accurate tracking and optimal performance. The base stations emit infrared light that is detected by the headset and controllers, enabling precise positional tracking within the virtual environment. Here are some tips to optimize the positioning of the base stations:
1. Mount the base stations securely: Ensure that the base stations are securely mounted on stable surfaces, such as walls or tripods. Make sure they are positioned at a height and angle that covers the play area and provides a clear line of sight to the headset and controllers.
2. Position the base stations diagonally: For the best tracking results, position the base stations diagonally across the play area. This creates a triangular coverage zone and ensures that the headset and controllers are visible to at least one base station at all times, minimizing tracking errors.
3. Avoid obstructions: Make sure there are no objects, furniture, or other obstructions blocking the line of sight between the base stations and the headset/controllers. Clear any obstructions to ensure uninterrupted tracking and smooth movement within the virtual environment.
4. Angle the base stations downward: Tilt the base stations downward to cover the play area at a slight angle. This helps maximize tracking accuracy by ensuring that the base stations capture the movements of the headset and controllers from a more optimal perspective.
5. Consider different mounting options: Experiment with different mounting options to find the most suitable position for your specific play area. Wall mounts, tripods, or other adjustable mounting solutions can help you position the base stations in the ideal locations for optimal tracking coverage.
6. Ensure synchronization and power: Properly synchronize the base stations with the HTC Vive headset, following the manufacturer’s instructions. Make sure they are connected to a power source and powered on to ensure they are functioning correctly.
7. Test and adjust: After positioning the base stations, test your tracking performance in different areas of the play area. Move around and perform various motions to verify that the tracking is accurate and reliable. If you encounter tracking issues in specific areas, consider adjusting the position or angle of the base stations to improve tracking quality.
By optimizing the positioning of the base stations in your HTC Vive setup, you can ensure accurate tracking and improve the overall performance of your virtual reality experience. Mount the base stations securely, position them diagonally, avoid obstructions, angle them downward, consider different mounting options, ensure synchronization and power, and test and adjust as needed. These steps will help you achieve reliable and precise positional tracking for an immersive and enjoyable VR experience.
Disable any power saving features
When using the HTC Vive, it is important to disable any power saving features on your computer that may interfere with the headset’s performance. Power saving settings are designed to conserve energy but can sometimes disrupt the functionality and responsiveness of the VR experience. Here are some steps to disable power saving features:
1. Power plan settings: Open the power plan settings on your computer. In Windows, you can access this by going to Control Panel > Hardware and Sound > Power Options. Make sure your power plan is set to “High Performance” or a mode that does not invoke aggressive power-saving measures.
2. USB selective suspend: USB selective suspend is a feature that allows Windows to power down USB devices to save power. However, this can cause issues with the HTC Vive’s connectivity and performance. To disable USB selective suspend, go to Control Panel > Hardware and Sound > Power Options > Change plan settings > Change advanced power settings. Locate USB settings and set “Selective suspend setting” to “Disabled”.
3. Hard drive power saving: Hard drives spin down to save power when not in use. However, this can introduce lag when data needs to be retrieved during VR gameplay. Disable hard drive power saving by going to Control Panel > Hardware and Sound > Power Options > Change plan settings > Change advanced power settings. Look for “Hard disk” or “HDD” options and set the “Turn off hard disk after” setting to “Never” or a reasonable time that matches your VR sessions.
4. Wireless adapter power saving: If you are using a wireless adapter for your VR setup, ensure that any power saving features specific to the adapter are disabled. These may include options to reduce power during periods of inactivity or low data transfer. Refer to the adapter’s documentation or software settings to adjust the power saving options as needed.
5. Monitor power settings: Adjust your computer’s monitor power settings to prevent it from turning off or going into standby mode during your VR sessions. This ensures a consistent and uninterrupted visual experience. Go to Control Panel > Hardware and Sound > Power Options and adjust the settings under “Turn off the display” and “Put the computer to sleep”.
6. Keep drivers up to date: Regularly update your drivers, including those for the motherboard, graphics card, and any other devices related to the VR setup. Updated drivers often include improvements and optimizations that help prevent power-saving conflicts and enhance overall performance.
By disabling power saving features, you can avoid any potential disruptions to the functionality and responsiveness of your HTC Vive. Adjust power plan settings, disable USB selective suspend, prevent hard drive power saving, address wireless adapter power settings, adjust monitor power settings, and keep drivers up to date. These steps will help ensure a consistent and smooth VR experience without any unnecessary power-saving interruptions.
Use a dedicated USB controller for the HTC Vive
Using a dedicated USB controller for the HTC Vive can help ensure optimal performance and avoid potential issues related to bandwidth and compatibility. A dedicated USB controller provides a dedicated pathway for the VR headset’s data transfer and reduces the risk of conflicts with other USB devices. Here are some reasons why you should consider using a dedicated USB controller for the HTC Vive:
1. Bandwidth allocation: The HTC Vive requires a significant amount of bandwidth for transmitting data between the headset and the computer. Using a dedicated USB controller ensures that the VR headset has access to the necessary bandwidth without contention from other USB devices. This helps maintain a reliable and smooth VR experience.
2. Reduces latency: A dedicated USB controller helps minimize latency, the delay in transferring data between the headset and the computer. By having a dedicated pathway for data transfer, you can reduce the chances of latency-related issues, resulting in a more responsive and immersive VR experience.
3. Prevents connectivity issues: Sharing the USB controller with other devices, especially bandwidth-intensive peripherals, can lead to connectivity issues for the HTC Vive. A dedicated USB controller ensures that the VR headset has a stable and reliable connection, enhancing tracking accuracy and minimizing potential disconnections during gameplay.
4. Avoids conflicts with other devices: Some USB devices, such as webcams, external hard drives, or audio interfaces, can interfere with the performance of the HTC Vive if they share the same USB controller. A dedicated USB controller reduces the risk of conflicts and helps maintain the stability and operation of both the VR headset and other USB devices.
5. Improved compatibility: Certain USB controllers may have better compatibility with the HTC Vive. Dedicated USB controllers are often designed and optimized specifically for VR usage, ensuring seamless integration and compatibility with the VR headset’s requirements.
6. Expansion possibilities: Using a dedicated USB controller for the HTC Vive leaves additional USB ports available on your computer for connecting other devices. This allows for greater flexibility when connecting peripherals while ensuring that the VR headset has its own dedicated resources.
Before purchasing a dedicated USB controller, ensure that it is compatible with your computer’s operating system and meets the required specifications for the HTC Vive. Make sure to follow the manufacturer’s instructions for installing and configuring the dedicated USB controller for optimal performance.
By using a dedicated USB controller for the HTC Vive, you can ensure that the VR headset has dedicated bandwidth, reduce latency, prevent connectivity issues, avoid conflicts with other devices, enhance compatibility, and provide expansion possibilities. This dedicated USB controller will help optimize the performance and reliability of your VR experience.
Consider upgrading your PC’s components if necessary
If you’re experiencing persistent lag or performance issues with your HTC Vive, it may be necessary to consider upgrading certain components of your PC. Upgrading specific hardware can provide a significant boost in overall performance and ensure a smoother and more immersive VR experience. Here are some components to consider upgrading if necessary:
1. Graphics card (GPU): The graphics card is a vital component for a smooth VR experience. If your current GPU is struggling to handle the demands of VR games and applications, upgrading to a more powerful and VR-ready graphics card can significantly improve performance. Look for GPUs with higher VRAM capacity and better processing capabilities.
2. Processor (CPU): A powerful CPU is crucial for handling the complex calculations and data processing required by VR applications. Upgrading to a faster and more capable CPU can enhance overall system performance and reduce lag. Look for processors with higher core counts and clock speeds to ensure optimal performance.
3. Memory (RAM): VR applications require a significant amount of memory to run smoothly. Upgrading your PC’s RAM to a higher capacity, such as 16GB or more, can prevent memory bottlenecks and provide better multitasking capabilities. This can result in improved performance and reduced lag during VR gameplay.
4. Storage (Solid State Drive): Upgrading from a traditional hard drive to a solid-state drive (SSD) can lead to faster loading times and improved overall system responsiveness. With an SSD, VR games and applications can load quicker, reducing wait times and enhancing the overall VR experience.
5. Power Supply Unit (PSU): VR setups often require additional power to run smoothly. If you’re experiencing stability issues or if your current PSU does not provide sufficient power, consider upgrading to a higher wattage PSU to avoid potential power-related performance problems.
6. Motherboard: Sometimes, upgrading your motherboard may be necessary if your current motherboard is not compatible with newer component technologies or is limiting the performance potential of your PC. A newer and more advanced motherboard can provide better support for VR devices and improve overall system performance.
Consider consulting with a knowledgeable computer specialist or researching specific component compatibility before upgrading. Additionally, ensure that your PC casing has sufficient space and proper cooling for the new components to prevent overheating issues.
By upgrading your PC’s components as necessary, you can significantly enhance the performance and overall VR experience with your HTC Vive. Analyze your specific hardware requirements, identify any performance bottlenecks, and select the appropriate components to optimize your PC for virtual reality.