
Why removing a coin from Ledger Nano S is important
Removing a coin from your Ledger Nano S device is an essential step to manage your cryptocurrency portfolio effectively. Whether you want to sell your coins, transfer them to another wallet, or simply declutter your Ledger device, knowing how to remove a coin is crucial.
One of the primary reasons for removing a coin from your Ledger Nano S is to maintain security. By keeping only the coins you actively use on your device, you reduce the potential risk of exposure to unauthorized access. The Ledger Nano S is designed to store multiple cryptocurrencies, and by removing unused or less frequently used coins, you minimize the attack surface and potential vulnerabilities.
Another reason to remove a coin is to optimize the performance of your Ledger Nano S. While the device is capable of handling a diverse range of cryptocurrencies, a large number of installed coin applications can impact its efficiency. By removing unnecessary coins, you free up storage space and ensure smoother operation.
Additionally, removing a coin can be necessary when you want to consolidate your portfolio or reallocate your investments. As the values of different cryptocurrencies fluctuate, it may be prudent to reevaluate your holdings. By removing certain coins, you have the flexibility to focus on the ones that align with your investment strategy and goals.
Moreover, removing a coin from your Ledger Nano S allows you to update the associated wallet software or firmware more easily. Coin developers and Ledger constantly release new versions and updates to enhance security and functionality. By removing a coin and then reinstalling it, you ensure that you have the most up-to-date version of the coin’s application on your device.
By understanding the importance of removing a coin from your Ledger Nano S, you can ensure the security, performance, and efficiency of your cryptocurrency management. It is essential to regularly review your coin holdings and make strategic decisions based on your financial goals and risk tolerance. Removing a coin is a straightforward process that can have significant benefits for your overall cryptocurrency portfolio management.
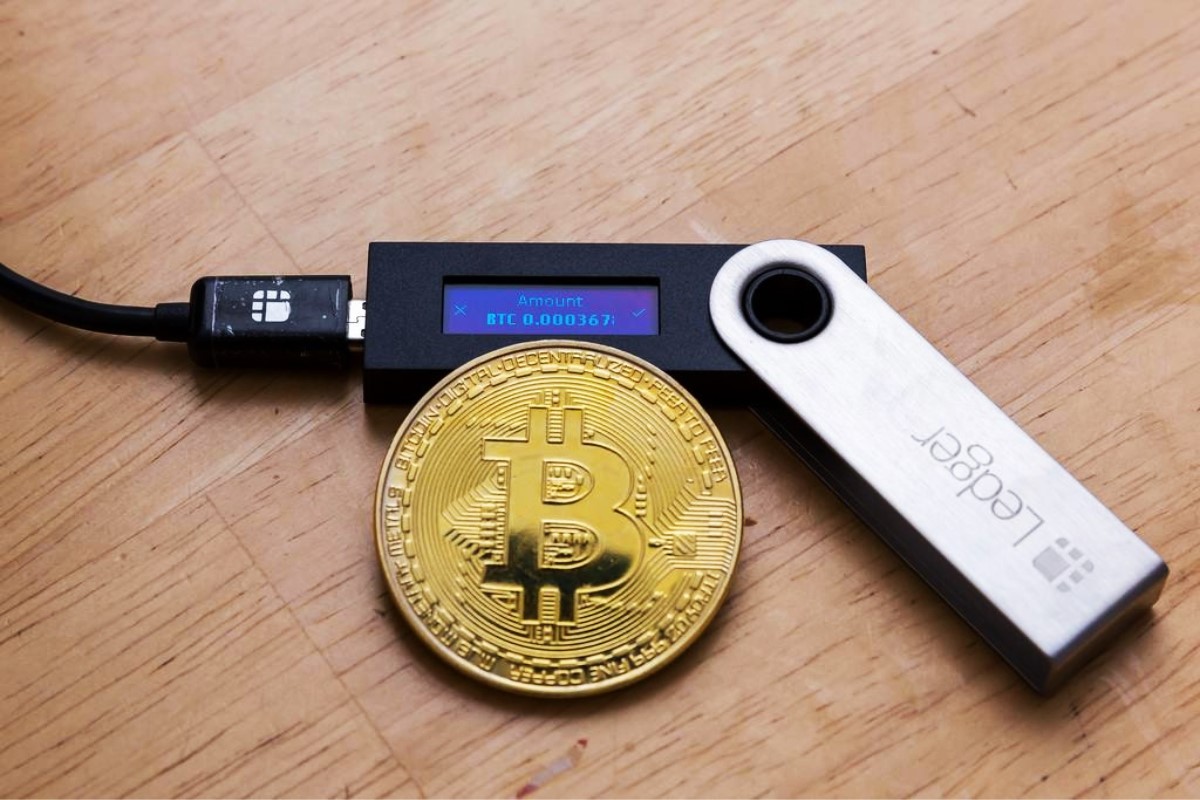
Step 1: Accessing your Ledger Nano S device
Before you can start removing a coin from your Ledger Nano S device, you need to first access the device itself. Follow these steps to access your Ledger Nano S:
- Connect your Ledger Nano S device to your computer using the USB cable that came with it.
- Enter your PIN code on the Ledger Nano S. The PIN code is set by you during the initial device setup and is required for accessing the device.
- Once you have entered the correct PIN code, you will see the main menu on the Ledger Nano S display. Use the buttons on the device to navigate through the menu options.
- Use the left or right button on the Ledger Nano S to select the “Crypto” option from the main menu. Press both buttons simultaneously to confirm your selection.
- Depending on the firmware version of your Ledger Nano S, you may need to select the specific coin application that corresponds to the coin you want to remove. Use the buttons on the device to scroll through the available coin applications, and press both buttons simultaneously to open the selected application.
- Once you have accessed the coin application on your Ledger Nano S, you are ready to proceed with removing the coin from your device.
It is important to note that if you have enabled the “Passphrase” feature on your Ledger Nano S, you will be prompted to enter your passphrase after entering your PIN code. The passphrase adds an additional layer of security to your device and should be entered carefully to avoid any potential loss of funds.
By following these steps, you can easily access your Ledger Nano S device and prepare it for removing a coin. It is essential to have the device connected and correctly entered your PIN code to proceed with the coin removal process.
Step 2: Open the Ledger Live application
After accessing your Ledger Nano S device, the next step in the process of removing a coin is to open the Ledger Live application on your computer. Ledger Live is the official companion software provided by Ledger to manage your cryptocurrencies on the Ledger Nano S.
Follow these steps to open the Ledger Live application:
- If you have not already done so, download and install the Ledger Live application from the official Ledger website (https://www.ledger.com/ledger-live).
- Once the Ledger Live application is installed, launch it on your computer.
- Connect your Ledger Nano S device to your computer if you haven’t already done so.
- On the Ledger Live application, you will be prompted to choose between setting up a new device or using an existing one. Select the option “Use a device you already own” to proceed.
- Follow the on-screen instructions provided by the Ledger Live application to set up the connection between your Ledger Nano S and the Ledger Live software.
- Once the connection is established, you will see the Ledger Live dashboard, which displays an overview of your cryptocurrency accounts and portfolio.
By opening the Ledger Live application and establishing a connection with your Ledger Nano S device, you have gained access to the powerful features and functionalities offered by Ledger. Ledger Live provides a user-friendly interface for managing your cryptocurrencies, including adding and removing coin accounts, tracking your portfolio performance, and executing transactions.
It is worth noting that the Ledger Live application regularly receives updates to ensure optimal security and performance. It is recommended to keep your Ledger Live application up to date by installing the latest available updates from the Ledger website or through the application itself.
Now that you have opened the Ledger Live application and successfully connected your Ledger Nano S device, you are ready to proceed to the next step, which is selecting the coin you want to remove from your device.
Step 3: Select the coin you want to remove from your device
Once you have opened the Ledger Live application and established the connection with your Ledger Nano S device, you can proceed with selecting the specific coin that you want to remove from your device. Here’s how to do it:
- On the Ledger Live dashboard, you will see a list of all the cryptocurrency accounts associated with your Ledger Nano S.
- Scroll through the list or use the search function to locate the account associated with the coin you wish to remove.
- Click on the account to select it.
- The account details will then be displayed, including the coin’s name, balance, and transaction history.
It’s essential to double-check that you have selected the correct coin account before proceeding further. Mistakenly selecting the wrong account could result in the removal of a different coin, which may have irreversible consequences.
Remember that you can only remove a coin that has its corresponding application installed on your Ledger Nano S device. If you don’t see the account for the specific coin you want to remove, it means that you need to install the coin’s application on your device before proceeding.
The selection process in the Ledger Live application allows you to easily identify and choose the exact coin you wish to remove from your Ledger Nano S device. Once you have confirmed the selection, you can proceed to the next step, which involves navigating to the Settings page for further actions.
Step 4: Navigate to the Settings page
After selecting the coin account you want to remove from your Ledger Nano S device, the next step is to navigate to the Settings page within the Ledger Live application. Here’s how to do it:
- On the account details page for the selected coin, look for the navigation menu on the left-hand side of the Ledger Live application.
- Click on the “Settings” option in the navigation menu. This will open the Settings page.
The Settings page provides various configuration and management options for your cryptocurrencies and your Ledger Nano S device. It allows you to tweak settings, manage security features, and perform other relevant actions.
By navigating to the Settings page, you have access to the necessary tools and options to proceed with removing the selected coin from your Ledger Nano S. The Settings page serves as a hub for managing the specific coin account and customizing its settings according to your preferences.
It is important to note that the specific options and settings available on the Settings page may vary depending on the coin you have selected. Different coins have different functionalities, and the Settings page will display the options specific to the selected coin.
With the Settings page open and ready, you can now proceed to the next step, which involves clicking on the “Remove account” option to initiate the coin removal process from your Ledger Nano S device.
Step 5: Click on the “Remove account” option
Once you have navigated to the Settings page in the Ledger Live application, the next step is to click on the “Remove account” option. This action will initiate the process of removing the selected coin account from your Ledger Nano S device. Here’s how to do it:
- On the Settings page, look for the “Remove account” option. It is typically located in the account-specific settings section.
- Click on the “Remove account” option to proceed.
By clicking on the “Remove account” option, you are signaling your intent to remove the selected coin account from your Ledger Nano S device. This action will prompt a series of prompts and notifications to confirm your decision and ensure the security of your funds.
It is vital to exercise caution and double-check that you have selected the correct account for removal. Once the account is removed, any associated funds or transaction history will no longer be accessible on your Ledger Nano S.
Before clicking on the “Remove account” option, you may want to consider creating a backup of your account information, such as the wallet address and recovery phrase. This backup can serve as a safety net in case you need to recover the account or access its funds in the future.
After clicking on the “Remove account” option, you will follow a series of on-screen prompts and notifications to confirm the removal. These prompts may include warnings about the irreversible nature of the action and requests for additional confirmation.
By successfully clicking on the “Remove account” option and going through the necessary prompts, you are ready to proceed with the removal process. The selected coin account will be removed from your Ledger Nano S device, freeing up storage space and simplifying your cryptocurrency management.
Step 6: Follow the prompts to confirm the removal
After clicking on the “Remove account” option in the Ledger Live application, you will be presented with a series of prompts and notifications to confirm the removal of the selected coin account from your Ledger Nano S device. It is important to carefully follow these prompts to ensure the secure and accurate execution of the removal process. Here’s how to proceed:
- Read the on-screen prompts carefully to understand the consequences of removing the account and any associated data.
- Depending on the Ledger Live version and firmware of your Ledger Nano S device, you may need to enter your device’s PIN code or passphrase to confirm the removal.
- After confirming your identity, you will typically be prompted to review and approve the removal transaction.
- Take a moment to verify that the information displayed on the confirmation screen corresponds to the account you want to remove.
- If everything looks correct, proceed with confirming the removal by following the on-screen instructions.
- Depending on the cryptocurrency blockchain, the removal process may take a few moments to complete.
During the confirmation process, it is crucial to pay attention to any warnings or notices provided by the Ledger Live application. These notifications are designed to protect your funds and prevent accidental removal of accounts.
It is worth noting that removing a coin account from your Ledger Nano S device does not result in the loss of your funds. Your funds are stored on the blockchain, and removing the account only removes the access to those funds from your device. By restoring the account in the future using the appropriate recovery phrase, you can regain access to your funds.
By following the prompts and confirming the removal, you have successfully initiated the process of removing the selected coin account from your Ledger Nano S device. Once the removal process is completed, you will no longer see the account associated with the coin on your Ledger Nano S or the Ledger Live application.
Step 7: Verify that the account has been successfully removed
After confirming the removal of the coin account from your Ledger Nano S device, it is important to verify that the removal process was successful. This step ensures that the selected coin account is no longer accessible on your device. Here’s how to verify the removal:
- Disconnect your Ledger Nano S device from your computer.
- Reconnect your Ledger Nano S device to your computer using the USB cable.
- Enter your device’s PIN code on the Ledger Nano S device to unlock it.
- Once unlocked, navigate through the device’s menu to locate the list of installed coin applications.
- Scroll through the list to find the coin application that corresponds to the removed account.
- If the removed account was successfully removed, you should not see the corresponding coin application in the list.
Verifying the removal of the account by checking the list of coin applications on your Ledger Nano S device is a simple yet important step. It confirms that the selected coin account has been successfully removed from your device.
In addition to checking the device itself, you can also verify the removal within the Ledger Live application. Open the application and navigate to the account list or portfolio section to ensure that the removed account is no longer displayed.
If you find that the removed account is still present either on the device or within the Ledger Live application, it is recommended to repeat the removal process to ensure its complete removal. Double-check that you have followed all the necessary steps and prompts accurately and try again.
By verifying that the account has been successfully removed, you can be confident in the streamlined and updated state of your Ledger Nano S device. Any associated funds or transaction history will no longer be accessible, contributing to a more efficient and secure cryptocurrency management.
Step 8: Repeat the process for any additional coins you wish to remove
If you have multiple coins that you want to remove from your Ledger Nano S device, you can repeat the process outlined in the previous steps for each coin. Here’s how to proceed:
- Once you have verified the successful removal of the first coin account, disconnect your Ledger Nano S device from your computer.
- Reconnect your Ledger Nano S device to your computer using the USB cable.
- Follow steps 1 to 7 to access the Ledger Nano S device, open the Ledger Live application, select the next coin account to remove, and complete the removal process.
- Continue repeating steps 1 to 7 for each additional coin account you want to remove.
By repeating the removal process for each additional coin you wish to remove, you can ensure that your Ledger Nano S device is free of any unwanted or unused coin accounts. This will optimize the storage space and performance of your device, as well as provide a more streamlined and focused cryptocurrency management experience for your active holdings.
It is important to exercise caution and carefully select the coins you want to remove. Always double-check that you have chosen the correct coin accounts for removal to avoid accidentally removing an account that still contains funds or has important transaction history.
Remember, removing a coin account from your Ledger Nano S device does not result in the deletion or loss of your funds. The funds associated with the removed account still exist on the blockchain and can be accessed again in the future by restoring the account using the appropriate recovery phrase.
By repeating the removal process for each additional coin, you can confidently manage and customize your cryptocurrency portfolio on your Ledger Nano S device, ensuring that only the coins you actively use and monitor are present.
Important considerations before removing a coin from your Ledger Nano S
Before you proceed with removing a coin from your Ledger Nano S device, there are several important considerations to keep in mind. These considerations will help ensure a smooth and secure removal process. Here are the key points to consider:
1. Double-check the coin and account: Before removing a coin account, confirm that you have selected the correct coin and account. Verifying the details ensures that you are removing the intended account and avoids accidental removal of a different coin or account.
2. Create a backup: It is highly recommended to create a backup of important information, such as the account’s wallet address and recovery phrase, before removing a coin account. This backup provides an extra layer of security and allows you to restore the account if needed in the future.
3. Consider the consequences: Understand the implications of removing a coin account. Removing an account does not delete or transfer the associated funds; it only removes the access to those funds from your Ledger Nano S device. Make sure you are prepared for the consequences and any potential impact on your cryptocurrency holdings.
4. Verify the removal: After removing a coin account, verify that the removal was successful. Check both your Ledger Nano S device and the Ledger Live application to ensure that the removed account is no longer visible. This step provides confirmation that the removal process was properly executed.
5. Keep your device and software up to date: Regularly update the firmware of your Ledger Nano S device and the Ledger Live application. Firmware and software updates often include critical security patches and improvements. Keeping your device and software up to date enhances the overall security of your cryptocurrency holdings.
6. Proceed with caution during the removal process: Take your time and carefully follow the prompts and instructions throughout the removal process. Pay close attention to any warnings or notices provided by the Ledger Live application. Proceeding with caution ensures that you do not accidentally remove the wrong account or encounter any issues during the removal process.
By considering these important factors before removing a coin from your Ledger Nano S device, you can streamline the removal process and maintain the security and integrity of your cryptocurrency holdings. Taking the necessary precautions ensures that your Ledger Nano S device remains an effective and secure tool for managing your digital assets.