
Understand the Importance of Recovering a Trezor
As a Trezor user, you are already aware of the importance of securing your digital assets. A Trezor is a hardware wallet that provides an extra layer of protection by storing your cryptocurrencies offline. It is designed to keep your private keys safe from online threats like hacking and phishing attacks.
However, despite its advanced security features, there may be instances where you need to recover your Trezor. This could be due to a lost or damaged device or simply the need to access your funds on a new device. Regardless of the reason, understanding the importance of properly recovering your Trezor is crucial to ensure the safety and accessibility of your cryptocurrencies.
Recovering a Trezor involves restoring the device to its original state using the recovery phrase. This recovery phrase is a sequence of words that serves as a backup of your private keys. It is generated and displayed to you when you first set up your Trezor, and it is essential to keep it in a secure location.
The recovery phrase is what allows you to regain access to your cryptocurrencies in case your Trezor is lost, stolen, or damaged. Without it, your funds would be locked and irretrievable. Therefore, it is of utmost importance to prioritize the recovery process and ensure you have the necessary tools and resources before attempting it.
By recovering your Trezor, you regain control of your digital assets and can continue managing and transacting with your cryptocurrencies securely. It provides peace of mind, knowing that even if something happens to your physical device, your funds are still accessible through the recovery phrase.
Whether you are a seasoned cryptocurrency investor or just starting, understanding the importance of recovering a Trezor is crucial. It is a proactive step to safeguard your investments and protect yourself against any potential risks or unforeseen circumstances.
Now that you grasp the significance of recovering a Trezor, let’s delve into the step-by-step process of how to recover your device and access your cryptocurrencies again.
Gather the Necessary Tools and Resources
Before starting the recovery process, it is essential to gather all the necessary tools and resources. This ensures a smooth and efficient recovery of your Trezor device and enables you to access your cryptocurrencies without any complications.
Here are the tools and resources you will need:
- Trezor device: Ensure that you have your physical Trezor device handy. This is the hardware wallet that you will be recovering.
- Computer or mobile device: You will need a computer or mobile device with a USB port to connect your Trezor and perform the recovery process. Ensure that it is fully charged or connected to a power source.
- USB cable: You will require a USB cable that is compatible with your Trezor device to establish a connection between the device and your computer or mobile device. Make sure the USB cable is in good condition and reliable.
- Recovery seed card or backup: Locate the recovery seed card or backup that was provided to you when you initially set up your Trezor. This card contains the recovery phrase needed for the recovery process. Keep it in a secure location.
- Trezor Bridge: Download and install the Trezor Bridge software on your computer. This software allows your computer to communicate with the Trezor device during the recovery process.
- Trezor Wallet: Install the Trezor Wallet application on your computer or mobile device. This is the interface that enables you to manage and access your cryptocurrencies stored on the Trezor device.
Gathering these tools and resources beforehand ensures that you have everything you need for a successful recovery process. It saves you time and prevents any unexpected interruptions during the recovery.
Now that you have gathered all the necessary tools and resources, you are ready to proceed with the recovery process. Follow the step-by-step instructions carefully to regain access to your Trezor and your valuable cryptocurrencies.
Step 1: Power Up the Trezor
The first step in recovering your Trezor is to power up the device. To do this, follow these instructions:
- Connect one end of the USB cable to your Trezor device and the other end to your computer or mobile device. Ensure that the connection is secure.
- If your Trezor has a touch screen, press and hold the button located on the top of the device to turn it on. If your Trezor has a physical button, press and hold it to power up the device.
- Once powered on, you will see the Trezor logo or a welcome screen on the device’s display. This indicates that the device is successfully powered up and ready for the recovery process.
It is essential to power up your Trezor correctly to initiate the recovery process. The device should be connected to your computer or mobile device via the USB cable, and the power button or touch screen should be activated to turn on the Trezor.
Keep in mind that it may take a few seconds for the device to power up and display the appropriate screen. Be patient and wait for the Trezor logo or welcome screen to appear.
Once you have successfully powered up your Trezor, you are ready to move on to the next step, which involves unlocking your device. This is a crucial step in the recovery process as it allows you to access the device’s settings and restore your cryptocurrencies using the recovery phrase.
Continue reading the next section for step-by-step instructions on how to properly unlock your Trezor and proceed with the recovery process.
Step 2: Unlock the Trezor
After powering up your Trezor, the next step in the recovery process is to unlock the device. Unlocking the Trezor allows you to access its settings and enter the recovery phrase to restore your cryptocurrencies. Follow these instructions to unlock your Trezor:
- On your computer or mobile device, open the Trezor Wallet application that you previously installed.
- Connect your Trezor device to your computer or mobile device using the USB cable.
- If prompted, select the appropriate option on the Trezor display to unlock the device. This may involve entering a PIN or using the touch screen to confirm the unlock.
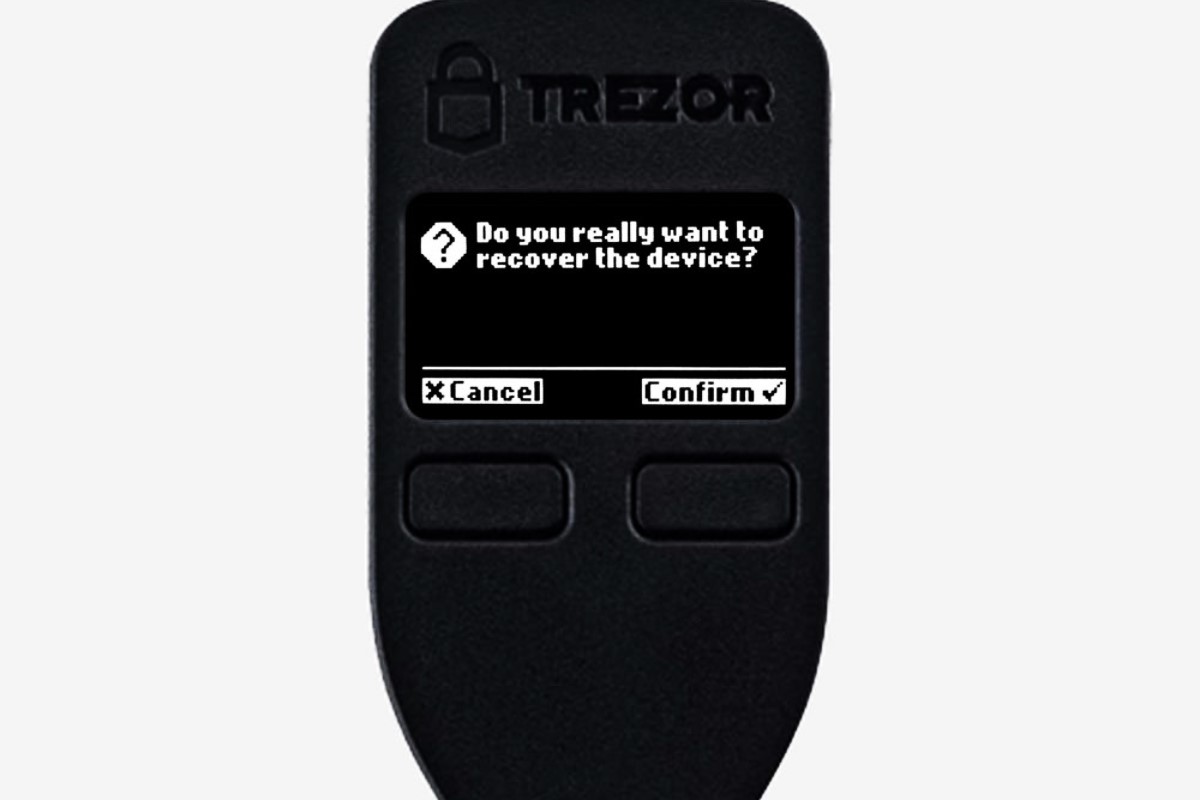
- In the Trezor Wallet application, you should now see the option to choose the recovery mode. Select “Recover Wallet” or a similar option to initiate the recovery process.
It is important to ensure that your Trezor is properly connected to your computer or mobile device during the unlocking process. The Trezor Wallet application serves as the interface for accessing and managing your cryptocurrencies stored on the device.
Once you have successfully unlocked your Trezor, you are now ready to move on to the next step, which involves entering the recovery phrase. This recovery phrase is a vital component of the recovery process as it allows you to restore your cryptocurrencies and regain access to your funds.
Continue reading the next section to learn how to enter the recovery phrase correctly and complete the recovery process successfully.
Step 3: Enter the Recovery Phrase
Entering the recovery phrase is a crucial step in the Trezor recovery process. This recovery phrase serves as a backup of your private keys and allows you to regain access to your cryptocurrencies. Follow these instructions to enter the recovery phrase correctly:
- In the Trezor Wallet application, you will be prompted to enter the recovery phrase. Make sure you have your recovery seed card or backup ready, as it contains the sequence of words you need to enter.
- On the device’s display, you will see a series of words. Use the device’s buttons or touch screen to navigate through the words.
- Using the Trezor Wallet application on your computer or mobile device, enter each word of the recovery phrase in the exact order as displayed on the Trezor device. Take your time and double-check each word to ensure accuracy.
- Once you have entered the entire recovery phrase, the device will prompt you for confirmation. Verify that all the words are entered correctly.
- If the recovery phrase is entered correctly, the Trezor device will proceed to the next step in the recovery process. If there is an error or any words are not entered correctly, the device will display an error message, and you will need to start the process again.
It is crucial to be careful and precise when entering the recovery phrase to avoid any mistakes. Each word must be entered in the correct order as displayed on the Trezor device. Mistakes or inaccuracies in entering the recovery phrase can result in the loss of access to your cryptocurrencies.
Now that you have entered the recovery phrase correctly, you are ready to move on to the next step, which involves confirming the recovery phrase. This step ensures that the entered recovery phrase is accurate and matches the backup you have.
Continue reading the next section to learn how to confirm the recovery phrase and proceed with the Trezor recovery process.
Step 4: Confirm the Recovery Phrase
Confirming the recovery phrase is a crucial step in the Trezor recovery process. This step ensures that the recovery phrase you entered matches the original backup and verifies the accuracy of the entered words. Follow these instructions to confirm the recovery phrase:
- On your Trezor device’s display, you will be prompted to confirm the recovery phrase.
- Randomly select each word from the recovery phrase displayed on the device and enter them on your computer or mobile device using the Trezor Wallet application.
- Take your time and carefully compare each word from the device’s display with the corresponding word you entered on your computer or mobile device. Ensure the words match exactly.
- If all the words match correctly, the Trezor device will proceed to the next step in the recovery process. If there is a mismatch or any word is entered incorrectly, the device will display an error message, and you will need to start the process again.
Confirming the recovery phrase is crucial to ensure the accuracy of the entered words and the restoration of your cryptocurrencies. It provides an additional layer of security and prevents any potential errors or discrepancies in the recovery process.
Take your time and be diligent when comparing and confirming each word from the recovery phrase. Accuracy is paramount to successfully completing this step and ensuring the safe retrieval of your funds.
Now that you have confirmed the recovery phrase, you are ready to proceed to the next step, which involves setting a new PIN for your Trezor device. This PIN serves as an additional layer of security and protects your device from unauthorized access.
Continue reading the next section to learn how to set a new PIN and secure your Trezor device.
Step 5: Set a New PIN
Setting a new PIN for your Trezor device is an important step in the recovery process. A PIN acts as an additional layer of security by preventing unauthorized access to your device and the cryptocurrencies it holds. Follow these instructions to set a new PIN for your Trezor:
- In the Trezor Wallet application on your computer or mobile device, you will be prompted to set a new PIN after confirming the recovery phrase.
- Choose a PIN that is easy for you to remember but difficult for others to guess. Avoid using obvious sequences or commonly used PINs.
- Enter your chosen PIN using the Trezor Wallet application. The PIN can be a combination of numbers from 0 to 9.
- Once you have entered the PIN, the device will prompt you to confirm it. Re-enter the same PIN to confirm and ensure accuracy.
- If the entered PIN and the confirmation match, the Trezor device will accept the new PIN, and it will be successfully set.
Setting a new PIN adds an extra layer of security to your Trezor device. It is essential to choose a PIN that is both secure and memorable. Avoid sharing your PIN with anyone and make sure to memorize it instead of writing it down.
Once you have successfully set the new PIN, your Trezor device is now secured with this PIN, offering protection against unauthorized access.
Now that you have set a new PIN for your Trezor, you are ready to proceed to the next step, which involves installing the appropriate firmware on your device. This firmware ensures that your Trezor operates smoothly and is up to date with the latest security features.
Continue reading the next section to learn how to install the firmware and complete the recovery process.
Step 6: Install the Appropriate Firmware
Installing the appropriate firmware is an essential step in the Trezor recovery process. Firmware is the software that runs on your Trezor device, and keeping it updated ensures optimal functionality and security. Follow these instructions to install the appropriate firmware:
- In the Trezor Wallet application on your computer or mobile device, you will be prompted to install the firmware after setting the new PIN.
- Ensure that your Trezor device is still connected to your computer or mobile device via the USB cable.
- Click on the option to install the firmware in the Trezor Wallet application. The application will guide you through the installation process.
- Follow the on-screen instructions carefully and do not disconnect your Trezor device during the firmware installation.
- Once the firmware installation is complete, your Trezor device will be updated with the latest firmware version.
Installing the appropriate firmware ensures that your Trezor device is equipped with the latest security patches and features. It safeguards your cryptocurrencies and provides peace of mind while using your device.
During the firmware installation, it is crucial to follow the instructions provided by the Trezor Wallet application. This ensures a smooth and successful installation process without any interruptions or errors.
Now that you have installed the appropriate firmware on your Trezor, you are ready to move on to the next step, which involves reconnecting and testing the device to ensure everything is functioning correctly.
Continue reading the next section to learn how to reconnect and test your Trezor device after the firmware installation.
Step 7: Reconnect and Test the Trezor
After installing the appropriate firmware on your Trezor device, the final step in the recovery process is to reconnect and test the device. This ensures that everything is functioning correctly and that you can access your cryptocurrencies without any issues. Follow these instructions to reconnect and test your Trezor:
- If your Trezor device was disconnected during the firmware installation, reconnect it to your computer or mobile device using the USB cable.
- In the Trezor Wallet application, you should see that your device is now recognized and connected. It may prompt you to enter your PIN to unlock the device.
- Once the device is connected and unlocked, navigate through the Trezor Wallet application to verify that your account balances and transaction history are displayed correctly. This confirms that your Trezor device is fully functional and successfully recovered.
- If you had any specific settings or preferences on your Trezor device before the recovery, make sure to reconfigure them to match your preferences.
- You can also carry out a test transaction by sending a small amount of cryptocurrency to and from your Trezor device to ensure that the transaction process is smooth and secure.
Reconnecting and testing your Trezor device confirms that the recovery process was successful and that you can now securely manage your cryptocurrencies. Ensure that all the necessary information, such as account balances and transaction history, is accurately displayed in the Trezor Wallet application.
If you encounter any issues during the reconnection or testing process, refer to the troubleshooting section or contact Trezor support for assistance.
Congratulations! You have successfully recovered your Trezor device and regained access to your valuable cryptocurrencies. Your digital assets are now safely stored and protected.
Remember to regularly update your firmware and practice good security measures, such as keeping your recovery phrase securely stored offline and setting strong PINs, to ensure the ongoing security of your Trezor device and your cryptocurrencies.
Troubleshooting Common Issues
While the Trezor recovery process is designed to be straightforward, there may be instances where you encounter specific issues or challenges. Here are some common issues you might face during the recovery process and tips on how to troubleshoot them:
- Device not recognized: If your Trezor device is not being recognized by the Trezor Wallet application, ensure that the USB cable is securely connected. Try using a different USB port or cable to rule out any connection issues. You can also try restarting your computer or mobile device.
- Incorrect recovery phrase: If you enter an incorrect recovery phrase or make a mistake during the recovery process, the device will display an error message. Double-check the words and their order when entering the recovery phrase. If necessary, start the recovery process again from the beginning.
- Forgotten PIN: If you have forgotten your PIN, you can initiate the recovery process with your recovery phrase. Follow the instructions provided on the Trezor device’s display to recover your device using the recovery phrase. However, keep in mind that the recovery process will erase all data on the Trezor device and restore it to its factory settings.
- Outdated firmware: If your Trezor device has an outdated firmware version, it might not be compatible with the Trezor Wallet application. Make sure to install the latest firmware by following the instructions provided in the recovery process. This ensures that your device is up to date with security patches and the latest features.
- Online connectivity issues: If you encounter issues connecting to the Trezor Wallet application online, check your internet connection and ensure that there are no firewall or proxy settings blocking the connection. You can also try accessing the Trezor Wallet application on a different device or network to troubleshoot connectivity issues.
If you are facing any other issues or the troubleshooting suggestions do not resolve your problem, it is advisable to reach out to Trezor support for further assistance. They are the experts in troubleshooting and can provide specific guidance tailored to your situation.
Remember, patience and attention to detail are crucial during the recovery process. Take your time, double-check your actions, and follow the instructions carefully to ensure a successful recovery of your Trezor device.
By being aware of common issues and their troubleshooting steps, you can overcome any obstacles that may arise and confidently recover your Trezor device to secure your valuable cryptocurrencies.