
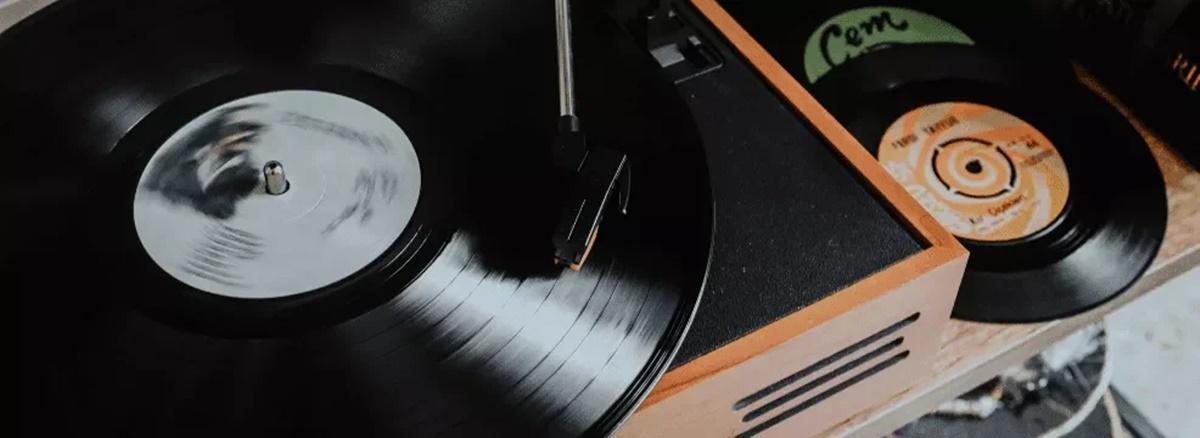
Choosing the Right Equipment
Preserving vinyl records on CD requires the use of the right equipment to ensure high-quality audio transfers. Here are some essential components you’ll need:
– Turntable: Invest in a high-quality turntable that has a stable and smooth rotation. Look for a model that allows you to adjust the tracking force and anti-skate settings for optimal playback.
– Cartridge: Choose a cartridge that is well-suited for vinyl playback and has a stylus specifically designed for handling records. A quality cartridge will help capture the nuances of the audio more accurately.
– Preamp: Ensure your turntable has a built-in preamp or purchase a separate one if needed. The preamp will amplify the signal from the cartridge to a level suitable for the recording device.
– Audio Interface: Connect your turntable and preamp to an audio interface that can convert analog signals to digital formats. Look for an interface with a high sampling rate to capture the audio with utmost clarity.
– Computer: You’ll need a computer with ample storage capacity, processing power, and audio editing software. Make sure your computer is compatible with the audio interface you choose.
– Blank CDs: Stock up on blank CDs that offer good playback quality and have sufficient storage capacity for your recordings.
– Cables and Accessories: Don’t forget to have audio cables, such as RCA or XLR cables, as well as any necessary adapters or connectors to ensure proper connections between your equipment.
When choosing your equipment, prioritize quality and functionality. Investing in reliable and well-regarded brands will ensure a smoother and more accurate audio transfer process.
Cleaning the Vinyl Records
Before starting the vinyl-to-CD conversion process, it’s crucial to clean the records to ensure the best possible sound quality. Here are the steps to follow:
1. Remove Dust and Debris: Gently brush the record’s surface with a carbon fiber brush or an antistatic brush to remove any loose dust or debris. Start from the center and gently brush towards the outer edges in a circular motion.
2. Use a Cleaning Solution: Apply a record cleaning solution to a microfiber cloth or a specialized record cleaning brush. Make sure to use a solution specifically designed for vinyl records and avoid alcohol-based cleaners, as they can damage the vinyl.
3. Clean in a Circular Motion: Holding the record by the edges, clean the surface in a gentle circular motion, moving from the center to the outer edges. Avoid applying excessive pressure that could cause damage to the grooves.
4. Rinse and Dry: Rinse the record with distilled water to remove any leftover cleaning solution. Gently pat dry the record with a lint-free cloth or leave it to air dry in a vertical position to prevent water spots.
5. Inspect for Lingering Dirt or Stains: Examine the record carefully under a bright light to check for any remaining dirt, stains, or fingerprints. If necessary, repeat the cleaning process on specific areas using a specialized record cleaning kit.
6. Store in Protective Sleeves: Once the record is clean and dry, place it in a new anti-static inner sleeve to protect it from dust and scratches. Store the record in the original album cover or a separate outer sleeve for additional protection.
Regular cleaning and proper storage are essential for preserving the longevity and sound quality of vinyl records. By ensuring records are clean and free from debris, you’ll achieve better results when converting them to CD.
Setting Up the Recording Equipment
Once you have your equipment ready, it’s time to set up the recording system for transferring vinyl records to CD. Follow these steps to ensure optimal recording quality:
1. Connect the Turntable: Connect your turntable to the preamp using the appropriate cables. Ensure that all connections are secure and properly plugged in.
2. Connect the Audio Interface: Connect the output of the preamp to the input of the audio interface using suitable cables. Again, double-check that the connections are secure.
3. Connect the Audio Interface to the Computer: Connect the audio interface to your computer using a USB or Firewire cable, depending on the interface. Ensure proper driver installation for the interface on your computer.
4. Configure Audio Recording Software: Open your audio recording software on your computer. Select the appropriate input source in the software preferences to match the audio interface input you are using.
5. Calibrate Recording Levels: Set the recording levels on your audio interface and software. It’s essential to avoid clipping or distortion while ensuring a strong, clean audio signal.
6. Adjust Sample Rate and Bit Depth: Set the desired sample rate and bit depth for the recording. Higher sample rates and bit depths capture more detail, but also require more storage space.
7. Prepare Recording Software: Set your recording software to create a separate audio file for each track, or set markers to indicate where the tracks begin and end. This will make it easier to create individual tracks when editing.
8. Test the Setup: Before starting the actual recording, do a test run to ensure that everything is working correctly. Play a few seconds of a record and monitor the audio levels to confirm optimal signal quality.
By properly setting up your recording equipment, you’ll ensure accurate and high-quality audio transfer from the vinyl records to your CD.
Adjusting the Sound Levels
When transferring vinyl records to CD, it’s important to carefully adjust the sound levels to achieve balanced and optimal audio quality. Follow these steps to ensure proper adjustment of sound levels:
1. Monitor the Input Levels: Start by playing a record and monitoring the input levels on your recording software. Make sure the levels are not too low, which can result in a weak and noisy recording, or too high, which can cause distortion and clipping.
2. Utilize Peak Metering: Most recording software provides peak-level metering, which displays the highest point of audio signal. Aim to keep the levels below 0 dB to prevent distortion.
3. Adjust the Gain: Use the gain control on your audio interface or preamp to adjust the input signal strength. Increase the gain if the levels are too low, and decrease it if they are too high. Gradually adjust the gain until the peaks of the audio signal reach close to 0 dB without exceeding it.
4. Monitor the Output Volume: Set the output volume level on your audio interface or computer to an appropriate level. Ensure that the output is not too low, as it can result in a weak-sounding recording, or too high, which can cause distortion.
5. Listen for Balanced Sound: While adjusting the sound levels, listen carefully to the audio playback. Ensure that the sound is balanced, with all instruments and frequencies sounding clear and distinguishable. Make necessary adjustments to the gain or output volume to achieve a pleasing and well-balanced sound.
6. Perform Multiple Test Recordings: It’s advisable to perform multiple test recordings and make minor adjustments to the sound levels between each recording. This will help you fine-tune the settings and achieve the best possible audio quality.
Remember, adjusting the sound levels is crucial to capturing the full dynamic range of the vinyl record and ensuring a clean and accurate transfer to CD. Take your time to find the right balance and make adjustments as needed to achieve optimal results.
Starting the Recording Process
Once you have set up and adjusted the sound levels of your recording equipment, it is time to start the actual recording process. Follow these steps to begin transferring your vinyl records to CD:
1. Prepare the Vinyl Record: Choose the vinyl record you wish to transfer to CD. Ensure that it is clean and free from dust and debris by following the cleaning process outlined earlier in this guide.
2. Place the Vinyl Record on the Turntable: Carefully place the vinyl record onto the turntable, ensuring that it is centered properly.
3. Start the Recording Software: Open your recording software on your computer and click on the “Record” or “Start” button to begin the recording process.
4. Start the Turntable: Start the turntable and allow it to reach its intended speed (33 1/3, 45, or 78 RPM) before the needle touches the record.
5. Carefully Lower the Needle: Gently lower the needle onto the vinyl record’s lead-in groove, ensuring a smooth and controlled landing.
6. Monitor the Recording: Keep an eye on the recording software to ensure that the audio is being captured correctly. Monitor the levels and ensure that there are no unexpected dropouts or distortions.
7. Allow the Record to Play: Allow the vinyl record to play through from start to finish or until you have captured all desired tracks. It is important to maintain a quiet environment during the recording process to minimize background noise.
8. Stop the Recording: Once the record has finished playing, click the “Stop” button on the recording software to end the recording process.
9. Save the Recorded Audio: Save the recorded audio file in a suitable location on your computer. Name it accordingly and include any necessary metadata to help organize your recordings.
Starting the recording process requires careful handling of both the vinyl record and the recording software. Take your time to ensure accurate and consistent results, and be attentive to any issues that may arise during the recording.
Monitoring the Recording
While transferring vinyl records to CD, it is crucial to continuously monitor the recording process to ensure optimal audio quality. Here are some essential steps to effectively monitor the recording:
1. Use Headphones or Studio Monitors: Connect a pair of high-quality headphones or studio monitors to your audio interface or computer. These devices provide a more accurate representation of the recorded audio compared to regular computer speakers.
2. Listen for Distortions or Artifacts: Pay close attention to the audio playback and listen for any distortions, clipping, or artifacts. These unwanted sound abnormalities can be indicative of issues with the recording levels, equipment setup, or vinyl condition.
3. Monitor Signal Levels: Keep an eye on the signal levels displayed on the recording software. Ensure that the level does not exceed 0 dB, as this can result in distortion. Aim for a consistent and balanced signal level throughout the recording.
4. Check for Background Noise: Listen for any unwanted background noise that may have been captured during the recording process. This could include hums, hisses, or pops. Address and troubleshoot any noise-related issues to achieve a cleaner recording.
5. Identify Vinyl Issues: If you encounter skipping, scratching, or other issues specific to the vinyl record, it is crucial to address them promptly. Pause the recording, inspect the record surface, and ensure that the playback equipment is properly aligned and calibrated.
6. Take Note of Audio Artifacts: Make a mental or written note of any specific audio artifacts that may need further attention during the editing process. These could include clicks, pops, or background noise that may require removal or reduction in post-production.
7. Monitor Track Breaks: If you plan to create separate tracks from the recording, listen for natural pauses between songs or sections. Take note of the approximate time stamps or use the track markers set during the recording to help with later editing.
8. Make Real-Time Adjustments: If you notice any audio inconsistencies or issues during the monitoring process, make necessary adjustments in real-time. These can include tweaking recording levels, eliminating background noise, or addressing technical glitches promptly.
Monitoring the recording process allows you to identify and address any issues that may affect the audio quality of the transferred vinyl record. Take the time to listen carefully and make adjustments as needed to ensure a smooth and accurate transfer of the audio.
Creating Track Breaks
When transferring vinyl records to CD, creating track breaks is essential to divide the recording into individual songs or sections. Follow these steps to create track breaks effectively:
1. Review the Recording: Carefully listen to the recorded audio to identify natural breaks or pauses between songs. These breaks can be instrumental solos, silent transitions, or audience applause.
2. Set Markers: Use the editing features in your recording software to set markers at the beginning and end of each track. This can be done manually by clicking on the timeline or using keyboard shortcuts for easier and more precise marking.
3. Zoom In for Accuracy: Zoom in on the waveform of the audio track to ensure accurate placement of the markers. This allows you to pinpoint the exact spot where each track should begin and end.
4. Fine-Tune the Markers: Adjust the position of the markers as needed to align them with the desired track breaks. It is important to avoid cutting off any important audio or leaving gaps between tracks.
5. Preview the Segments: Listen to the audio segments before and after each marker to ensure a smooth transition between tracks. Make any necessary adjustments to the markers to achieve a seamless flow.
6. Check the Timing: Pay attention to the timing between tracks to ensure that there are no abrupt transitions or inconsistencies in the overall duration of each song. Adjust the markers if needed to maintain a consistent timing.
7. Save and Export: Save your edited track markers and export the audio files as separate tracks, each representing an individual song or section of the vinyl record. Choose appropriate file formats and naming conventions for easy organization.
8. Listen to the Final Tracks: After creating the track breaks, listen to each individual track to verify that the transitions are smooth and there are no audio artifacts or abrupt changes. Make further adjustments if necessary.
Creating track breaks allows you to navigate through the recorded vinyl record easily and enjoy each song separately on the CD. Take the time to accurately set the markers and ensure a seamless division of the audio.
Editing and Enhancing the Audio
After transferring vinyl records to CD, it’s important to perform editing and enhancement techniques to improve the quality and overall listening experience. Here are some steps to consider:
1. Remove Unwanted Noise: Use noise reduction techniques to eliminate background noise, clicks, pops, or any other unwanted artifacts present in the recording. Apply filters or plugins designed for audio restoration and remove noise while preserving the integrity of the original audio.
2. Equalize the Audio: Adjust the equalization (EQ) settings to balance the frequency response of the tracks. Enhance the overall tonal quality by boosting or cutting specific frequency ranges, ensuring that the audio sounds well-balanced and pleasing to the ear.
3. Apply Dynamic Range Compression: Use compression to even out the dynamic range of the tracks. This technique helps to control abrupt volume changes and ensures a consistent listening experience. Adjust the compression settings carefully to maintain the natural dynamics of the music.
4. Enhance Stereo Imaging: Utilize stereo imaging techniques to widen the soundstage and create a more immersive listening experience. Add depth and spaciousness to the audio by adjusting the stereo width, panning, and reverb settings.
5. Normalize the Levels: Normalize the volume levels of the tracks to ensure consistency. This process brings the peak levels of each track to a standardized level, avoiding large volume differences between songs.
6. Trim and Fade: Trim any unnecessary silence or dead space at the beginning or end of each track. Apply fade-in and fade-out effects to ensure smooth transitions between tracks, avoiding abrupt starts and endings.
7. Enhance Clarity and Definition: Use audio enhancement tools such as harmonic exciters, de-essers, or stereo enhancers to improve the clarity and definition of the audio. Be cautious not to overdo these enhancements and maintain the natural characteristics of the original recording.
8. Monitor Throughout the Editing Process: Continuously listen to the audio during the editing process to ensure that the changes made are enhancing the overall quality of the tracks. Make necessary adjustments and re-evaluate the changes to achieve the desired results.
Editing and enhancing the audio allows you to polish the transferred vinyl records, improving the overall sound quality and listening experience on the CD. Take the time to carefully apply these techniques, making sure to preserve the integrity and character of the original recordings.
Burning the Audio onto CD
Once you have finished editing and enhancing the audio tracks, it’s time to burn them onto a CD for easy playback and preservation. Follow these steps to ensure a successful burning process:
1. Prepare a Blank CD: Insert a blank, recordable CD into your computer’s CD burner. Ensure that it is compatible with the type of CD you are using, whether it’s CD-R or CD-RW.
2. Open CD Burning Software: Launch your preferred CD burning software. There are various software options available, both paid and free. Choose one that suits your needs and is compatible with your operating system.
3. Create a New Audio CD: Select the option to create a new audio CD within the CD burning software. This will open a blank CD project where you can add and arrange the audio tracks for burning.
4. Import Audio Tracks: Import the edited and enhanced audio tracks into the CD burning software. Drag and drop the files or use the software’s import function to add the tracks to the project.
5. Arrange the Track Order: Arrange the tracks in the desired order by dragging them within the CD burning software. Consider the flow and sequence of the songs for a cohesive listening experience.
6. Add CD Text and Metadata: Enter the necessary CD text and metadata, such as the album title, artist name, and track titles. This information will be displayed when the CD is played in compatible devices.
7. Preview the CD Layout: Use the CD burning software’s preview function to review the final layout of the CD. Ensure that the track order, CD text, and any other details are accurate and as intended.
8. Burn the Audio onto CD: Once you are satisfied with the CD layout, click the “Burn” or “Write” button in the CD burning software. The software will begin the process of writing the audio tracks onto the blank CD.
9. Monitor the Burning Process: Keep an eye on the CD burning software as it progresses through the burning process. Some software will provide progress indicators or a completion status to notify you when the burning is complete.
10. Finalize the CD: After the burning process is finished, choose the option to finalize or close the CD within the software. Finalizing the CD ensures its compatibility with a wide range of CD players and prevents further recording or editing on the disc.
Burning the audio tracks onto a CD preserves your vinyl record collection in a digital format for easy playback and archiving. Take care to follow these steps accurately to create a high-quality CD that can be enjoyed for years to come.
Labeling the CD
Labeling the CD is an important step to provide information about its contents and ensure easy identification. Follow these guidelines to effectively label your CD:
1. Use a Permanent Marker: Select a high-quality permanent marker that is specifically designed for writing on CDs. Avoid using ballpoint pens or any sharp objects that could damage the disc’s surface.
2. Write the Title and Artist: Clearly write the title of the album or compilation on the CD’s label side. Include the artist’s name or any other relevant information that helps identify the content.
3. Include Track Listing: Optionally, you can list the track titles or numbers on the CD label to provide additional information to the listener. This is especially useful for multi-track CDs or compilations.
4. Avoid Crowded Text: Ensure that your handwriting is legible and easy to read. Avoid crowding the text to enhance readability. If necessary, use multiple lines or abbreviations to fit the information within the available space.
5. Maintain Neatness and Consistency: Aim for neat and consistent label designs. Use consistent font sizes and styles throughout. Consider using uppercase letters or a mixture of uppercase and lowercase for better aesthetics.
6. Designate the Side: Indicate which side of the CD serves as the playback side by writing “play” or using an arrow pointing towards the outer edge of the disc.
7. Don’t Cover the Center Hole: Avoid writing over the center hole of the CD or covering it with adhesive labels. The center hole is essential for proper CD alignment and should remain unobstructed.
8. Consider a Printed Label: Alternatively, you can use a CD label template and a printer to create a more professional-looking label. Ensure that the labels you use are suitable for CDs and won’t cause any damage.
9. Protect the Label: Apply a clear adhesive sleeve or use a CD storage case with a built-in label holder to protect the label from smudging or fading over time.
Labeling the CD helps organize your collection and provides important information for easy identification. Take the time to label your CDs accurately to enhance their overall professionalism and usability.
Storing the Vinyl Records
To preserve the quality and longevity of your vinyl records, proper storage is crucial. Follow these guidelines to ensure your vinyl records are stored safely:
1. Keep the Records Upright: Store your vinyl records vertically, standing on their edges. This helps prevent warping or damage to the records over time. Use record storage boxes or specially designed record shelves to keep them upright and properly supported.
2. Avoid Extreme Temperatures: Keep your records away from extreme temperature fluctuations, as heat and cold can cause warping or damage to the vinyl. Optimal temperature for vinyl storage is around 65-70°F (18-21°C).
3. Control Humidity Levels: Maintain a moderate humidity level for your records to prevent mold or mildew growth. Ideally, the humidity should be around 40-50%. Consider using a dehumidifier or humidity control products to regulate the humidity in the storage area.
4. Shield from Direct Sunlight: Protect your records from direct sunlight, as UV rays can damage the artwork and vinyl surface. Store them in a shaded area or use opaque record sleeves to shield them from the sun’s harmful rays.
5. Use Anti-Static Inner Sleeves: Place your vinyl records in anti-static inner sleeves to prevent static charges and dust accumulation. These sleeves help keep the records clean and reduce the risk of surface scratches or pops during playback.
6. Avoid Pressure or Stacking: Do not stack heavy items on top of your records, as this can cause warping or damage. Avoid overpacking the storage area to prevent excessive pressure on the records and sleeves.
7. Handle Records with Clean Hands: When handling your vinyl records, make sure your hands are clean and free from dirt or oils. Fingerprints and smudges can affect the playback quality and potentially damage the vinyl surface.
8. Store Covers Separately: Store the record covers separately from the vinyl itself. Keeping the covers in good condition ensures their protection and preserves the artwork for future enjoyment.
9. Regularly Clean the Records: Regularly clean your vinyl records to remove dust and debris that may accumulate over time. Use a carbon fiber brush or a specialized record cleaning brush to gently remove any particles before and after each playback.
10. Keep the Storage Area Organized: Maintain an organized storage system, allowing easy access to your records and reducing the risk of mishandling or accidentally damaging them. Consider organizing your records alphabetically, by genre, or any other system that works for you.
Proper storage of vinyl records is essential to preserve their sound quality and overall condition. By following these guidelines, you can ensure that your collection remains in excellent shape for many years to come.