
System Requirements
To fully enjoy the immersive virtual reality experience offered by the Oculus Rift, it is essential to ensure that your computer meets the necessary system requirements. Before diving into the world of virtual reality, let’s take a look at what your computer needs to bring to the table.
First and foremost, your computer should have a powerful processor to handle the demanding graphics and 3D rendering. Oculus recommends at least an Intel i5-4590 processor or its AMD equivalent. Additionally, a minimum of 8GB of RAM is required to ensure smooth performance.
Next, the graphics card plays a crucial role in delivering stunning visuals. The Oculus Rift requires a graphics card that is at least equivalent to an NVIDIA GTX 970/AMD R9 290. An inadequate graphics card may result in laggy or distorted visuals, compromising your virtual reality experience.
Storage space is another consideration. The Oculus Rift requires a significant amount of space for storing VR games, experiences, and applications. Oculus suggests having at least 8GB of free space on your hard drive, with an additional 1-3GB for game updates and future content.
Additionally, ensuring that your computer has an available HDMI 1.3 video output is essential for connecting the Oculus Rift headset. This will enable the direct transmission of high-quality video and audio to the headset.
Furthermore, your computer should have at least three USB 3.0 ports available. These ports will be used to connect the Oculus sensors and the Oculus Touch controllers. It is crucial to have the sensors properly connected for accurate tracking and to fully utilize the Oculus Touch controllers for a truly immersive experience.
Lastly, it is advisable to have a reliable internet connection to install and update the Oculus software, as well as to access the ever-growing library of VR content available.
Unboxing the Oculus Rift
Excitement fills the air as you unbox your brand new Oculus Rift. Unveiling the components of this cutting-edge virtual reality system is an important first step towards entering a whole new world of immersive experiences. Let’s dive into the unboxing process and discover what awaits you.
When you open the box, you’ll find the main components neatly arranged inside. The Oculus Rift headset, complete with built-in headphones and an attached cable, takes center stage. Carefully remove it from the packaging and set it aside for now.
Beneath the headset, you’ll find the Oculus Touch controllers, carefully secured in their own compartment. These handheld controllers are designed to provide natural and intuitive interactions within the virtual environment.
Next, you’ll discover the Oculus Sensor. This compact device is responsible for tracking your movements, ensuring accurate positioning within the virtual realm. Place it aside for now, as we’ll set it up later.
Also included in the box are important accessories such as a cloth for cleaning the lenses, AA batteries for the Oculus Touch controllers, and an Xbox One wireless controller. These additional components enhance your overall experience and provide alternative control options.
As you continue unboxing, you’ll find a small package containing the necessary cables. These cables are essential for connecting your Oculus Rift system to your computer. Make sure to keep them secure and organized, as they will be instrumental in getting everything up and running smoothly.
Lastly, you’ll find the Oculus remote control. This handy device allows you to navigate menus and control certain functions of the Oculus Rift without having to put on the headset. Keep it easily accessible, as it will come in handy during setup and while exploring the VR world.
With everything unboxed, take a moment to immerse yourself in the anticipation of what lies ahead. The Oculus Rift is now ready to be connected and set up. Get ready for a mind-blowing journey into virtual reality.
Preparing Your Computer
Before delving into the captivating world of virtual reality with your Oculus Rift, it’s crucial to ensure that your computer is properly prepared to handle the demands of this immersive experience. By following these steps, you’ll be on your way to a seamless and enjoyable virtual reality adventure.
Firstly, make sure that your computer meets the minimum system requirements outlined by Oculus. Check that you have the recommended processor, RAM, graphics card, and available storage space. This will ensure smooth performance and prevent any potential issues.
Next, ensure that all the necessary software is up to date. This includes your operating system, graphics card drivers, and any other relevant software. Outdated software can often result in compatibility issues and hinder the performance of your Oculus Rift.
It’s also important to close any unnecessary programs or processes running in the background. Virtual reality experiences can be resource-intensive, so freeing up system resources will allow your computer to focus on delivering an optimal VR experience.
Furthermore, it’s a good idea to temporarily disable any antivirus or firewall software that may interfere with the Oculus Rift software installation or operation. You can re-enable them once the setup is complete, ensuring your computer remains protected.
Another crucial aspect of preparing your computer for the Oculus Rift is ensuring proper airflow and ventilation. VR experiences can put a strain on your computer’s hardware, leading to increased temperatures. Make sure your computer is positioned in a well-ventilated area or consider using additional cooling solutions, such as fans or liquid cooling systems.
Lastly, ensure that you have ample space around your computer setup. Virtual reality experiences often involve physical movement and interaction. Clear the area of any obstacles that could hinder your movements and potentially cause accidents.
By taking these necessary steps to prepare your computer, you’ll be setting the stage for a smooth and enjoyable Oculus Rift experience. With your hardware and software optimized, you’re now ready to embark on a thrilling journey into virtual reality.
Connecting the Cables
Now that you have prepared your computer, it’s time to connect the necessary cables to set up your Oculus Rift. Properly connecting the cables is crucial for a seamless VR experience. Follow these steps to ensure everything is connected correctly:
1. Start by locating the HDMI cable. Connect one end of the HDMI cable to the HDMI output port on your computer’s graphics card. Connect the other end to the HDMI input port on the Oculus Rift headset. This cable will transmit high-quality video and audio to the headset.
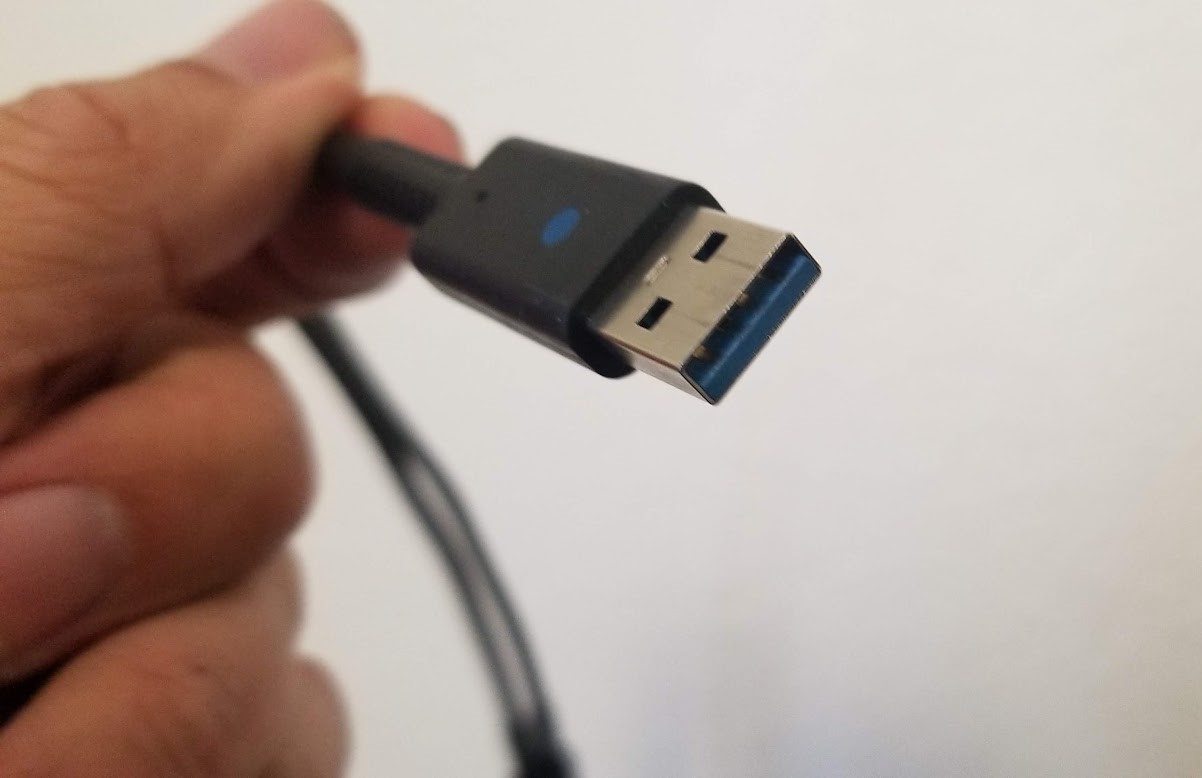
2. Next, find the USB cable. Connect one end of the USB cable to an available USB 3.0 port on your computer. Connect the other end to the USB port on the Oculus Rift headset. This cable will ensure the communication between the headset and your computer.
3. Locate the Oculus Sensor and connect it to an available USB 3.0 port on your computer using the sensor’s USB cable. It’s recommended to position the sensor in a location that provides a wide and clear view of your playing area.
4. If you have the Oculus Touch controllers, locate their USB cables. Plug one end of each USB cable into an available USB 3.0 port on your computer. Connect the other end of each cable to the USB ports located on the side of each Oculus Touch controller. These cables will power and connect the controllers to your computer.
5. Double-check all the connections to ensure they are secure and properly inserted. Loose connections can result in intermittent tracking or malfunctioning of the Oculus Rift system.
Once all the cables are properly connected, you are one step closer to diving into the virtual reality world. Now is a good time to make sure your computer is powered on and ready to go. With the cables securely in place, you’ll be able to enjoy a smooth and immersive VR experience with your Oculus Rift.
Setting up the Sensors
Properly setting up the sensors is crucial for accurate tracking and optimal performance of your Oculus Rift system. The sensors track your movements and help create a seamless virtual reality experience. Follow these steps to set up the sensors:
1. Start by identifying the ideal locations for your sensors. Oculus recommends placing the sensors on opposite sides of your play area, facing towards the center. This arrangement allows for maximum coverage and accurate tracking.
2. Position the first sensor by placing it on a stable surface or mounting it securely on a tripod. Point the sensor towards the center of your play area, ensuring it has a clear line of sight to the area where you’ll be moving.
3. Repeat the same process for the second sensor, placing it on the opposite side of your play area. Make sure it is also facing towards the center and has a clear line of sight.
4. Once the sensors are in their designated positions, connect them to your computer using the USB cables provided. Ensure the connections are secure and properly inserted into available USB 3.0 ports.
5. After connecting the sensors, it’s time to configure them. Open the Oculus software on your computer and go to the Devices section. Follow the on-screen instructions to calibrate and configure the sensors. This process ensures optimal tracking and accuracy.
6. During the configuration process, you may be prompted to perform a sensor setup. Follow the instructions provided by the Oculus software to set up each sensor individually. This step helps fine-tune the tracking of your Oculus Rift system.
7. Once the sensors are configured, it’s a good idea to test their functionality. Put on your Oculus Rift headset and stand in the center of your play area. Look around and move within the tracked space to ensure there are no tracking issues or blind spots.
By carefully setting up and configuring the sensors, you’ll ensure accurate and reliable tracking for your Oculus Rift system. This will contribute to a more immersive and enjoyable virtual reality experience. Now that the sensors are in place, you’re ready to embark on your VR adventures.
Positioning the Headset
Properly positioning the Oculus Rift headset is crucial for a comfortable and immersive virtual reality experience. By following these steps, you’ll ensure that the headset fits securely and provides optimal visuals:
1. Start by adjusting the straps. Place the headset on your head and adjust the top strap so that it rests comfortably on the top of your head. Next, adjust the side straps to achieve a snug fit, ensuring that the headset doesn’t slide or move during use.
2. Position the lenses. Align the lenses of the headset with your eyes. Adjust the distance between the lenses, using the dial located on the bottom of the headset, until the visuals appear clear and sharp. This adjustment allows for a personalized visual experience based on your unique eye spacing.
3. Adjust the IPD (Interpupillary Distance). On some Oculus Rift models, there is a slider underneath the front of the headset that allows you to adjust the IPD. Slide it back and forth until the visuals appear crisp and comfortable to your eyes. This adjustment ensures that the distance between the lenses matches your specific IPD, enhancing the 3D effect and reducing eye strain.
4. Check the comfort. Ensure that the headset feels comfortable on your face. Adjust the straps and the positioning of the headset as needed until you find the perfect balance between comfort and stability. Take the time to make any necessary adjustments before diving into your virtual reality experience.
5. Remove any obstructions. Double-check that there are no obstructions, such as hair or clothing, between the headset and your face. Clearing any obstacles will help improve the fit and prevent discomfort during use.
6. Clean the lenses. Before starting your virtual reality session, take a moment to clean the lenses of the headset using a microfiber cloth or the provided lens cloth. This will ensure that your visuals are clear and free from any smudges or dirt.
Once the Oculus Rift headset is properly positioned and adjusted for your comfort, you’re ready to step into the virtual world. Enjoy the immersive experiences and prepare yourself for a truly awe-inspiring virtual reality adventure.
Adjusting the Straps
To ensure a comfortable and secure fit, adjusting the straps of your Oculus Rift headset is essential. The proper strap adjustments not only enhance your comfort but also contribute to a more immersive virtual reality experience. Follow these steps to adjust the straps:
1. Begin by placing the Oculus Rift headset on your head. Hold the headset with one hand to support its weight while adjusting the straps with the other.
2. Start with the top strap. Position it over the top of your head, ensuring that it sits securely and comfortably. Adjust the length of the strap using the Velcro or buckle system, depending on your headset model. Tighten or loosen the strap until it feels snug but not too tight.
3. Move on to the side straps. These straps should sit above and behind your ears to provide stability and balance to the headset. Adjust the length of each side strap to achieve a comfortable fit. Make sure the straps are not too loose, as this can cause the headset to slide during use.
4. Adjust the back strap. This strap rests at the back of your head and helps distribute the weight of the headset evenly. Tighten or loosen the back strap until it provides a secure fit without causing any discomfort or pressure.
5. Test the fit and comfort. Once you have adjusted all the straps, take a moment to check the overall fit of the headset. Move your head around to ensure that it remains stable and doesn’t slide or shift. Pay attention to any pressure points or discomfort and make additional adjustments as needed.
6. Optimize for individual preferences. Every person’s head shape and size vary, so experiment with different strap adjustments to find the most comfortable fit for you. Take note of the adjustments that provide the best balance of stability and comfort, as this will enhance your overall virtual reality experience.
Remember to adjust the straps each time you put on the Oculus Rift headset to ensure a consistent and comfortable fit. By taking the time to properly adjust the straps, you’ll be able to fully immerse yourself in the virtual world with ease and comfort.
Pairing the Oculus Touch Controllers
The Oculus Touch controllers are essential for interacting with the virtual reality environment and adding a sense of realism to your Oculus Rift experience. To fully utilize their functionality, you’ll need to pair them with your Oculus Rift headset. Follow these steps to pair the Oculus Touch controllers:
1. Begin by turning on your computer and ensuring that the Oculus software is running. Make sure the Oculus Rift headset is connected and properly positioned on your head.
2. Locate the Oculus button on each controller. This button is situated in the center of the circular area on the face of the controller.
3. Press and hold the Oculus button on each controller simultaneously for a few seconds. This action will initiate the pairing process.
4. Check the Oculus software on your computer. You should see a prompt or notification indicating that the controllers are being detected and paired.
5. Once the pairing process is complete, the Oculus Touch controllers will be ready for use. You’ll see their corresponding virtual representations in the virtual reality environment.
6. To ensure that the controllers are functioning properly, take a moment to test their tracking and responsiveness. Move the controllers around and observe their movements in the virtual environment.
7. If you encounter any issues with the pairing or tracking of the Oculus Touch controllers, you can try the following troubleshooting steps: make sure the controllers have fresh batteries, ensure there are no obstructions between the controllers and the sensors, or reposition the sensors for better tracking.
With the Oculus Touch controllers successfully paired, you now have the ability to interact with the virtual world using intuitive gestures and motions. Enjoy the freedom of movement and the immersive experience offered by the Oculus Touch controllers as you navigate and interact within your virtual reality adventures.
Installing the Oculus Software
Before diving into the world of virtual reality with your Oculus Rift, you’ll need to install the Oculus software on your computer. This software is essential for managing your Oculus Rift system, accessing the Oculus Store, and updating your VR experiences. Follow these steps to install the Oculus software:
1. Start by opening a web browser on your computer and navigating to the official Oculus website at www.oculus.com.
2. Look for the “Setup” or “Download” option on the website’s main page. Click on it to start the software download process.
3. Once the download is complete, locate the installation file and run it on your computer. Follow the on-screen instructions to initiate the installation process.
4. During the installation, you may be prompted to agree to the terms and conditions, customize the installation settings, or choose the installation location. Review the options and make any necessary selections before proceeding.
5. After the installation is complete, launch the Oculus software on your computer. You may need to create an Oculus account or log in with your existing account details.
6. Follow the on-screen instructions to set up your Oculus Rift system, including connecting the headset and sensors, configuring audio settings, and calibrating the controllers.
7. Once the setup is complete, you’ll have access to the Oculus Store, where you can browse and download a wide variety of VR games, experiences, and applications.
8. It’s important to keep your Oculus software up to date to ensure compatibility and access to the latest features and content. The Oculus software will automatically check for updates, but you can also manually check for updates by navigating to the settings section within the software.
By installing the Oculus software on your computer, you gain access to a wide range of VR experiences and functionality. The software serves as the gateway to your virtual reality adventures, allowing you to explore captivating worlds and engage with immersive content.
Running the Oculus Setup
After installing the Oculus software on your computer, the next step is to run the Oculus setup. This process ensures that your Oculus Rift system is properly configured and ready for use. Follow these steps to run the Oculus setup:
1. Launch the Oculus software on your computer. Make sure your Oculus Rift headset is properly connected and positioned on your head.
2. When you open the Oculus software, it will guide you through the initial setup process. Follow the on-screen instructions to get started.
3. The setup process may prompt you to update the software or firmware of your Oculus Rift system. If an update is available, allow the software to install it to ensure you have the latest features and improvements.
4. Next, you will be prompted to configure the audio settings for your Oculus Rift. Choose the desired audio output and input settings that will provide the best audio experience for you. This step is important to ensure that you can hear and communicate effectively within the virtual reality environment.
5. You may also need to adjust the visual settings during the setup process. This includes setting the desired refresh rate and graphics quality based on your computer’s capabilities. These settings can be adjusted later if needed.
6. After configuring the audio and visual settings, the Oculus setup will guide you through the process of setting up the Oculus Touch controllers. Follow the on-screen instructions to pair and calibrate the controllers, allowing for precise and responsive interactions within virtual reality.
7. Once the setup is complete, the Oculus software will prompt you to put on the Oculus Rift headset and take a moment to familiarize yourself with the controls and navigation within the virtual environment. Use this opportunity to explore the menus, interactions, and options available.
8. If you encounter any issues or have specific preferences, the Oculus setup also provides options to customize your VR experience further. You can adjust the Guardian System, which helps define your playable area and provides a safety boundary. Additionally, you can customize various comfort settings, such as enabling seated experiences or adjusting the VR comfort level.
By running the Oculus setup, you ensure that your Oculus Rift system is properly configured and optimized for your specific needs. This not only enhances the overall experience but also ensures a comfortable and enjoyable virtual reality adventure.
Calibrating the Guardian System
The Guardian System is a crucial feature of the Oculus Rift that helps define your playable area and prevents you from running into walls or objects while immersed in virtual reality. Calibrating the Guardian System is an important step to ensure your safety and enhance your VR experience. Follow these steps to calibrate the Guardian System:
1. Start by putting on your Oculus Rift headset and ensuring that the Oculus software is running on your computer.
2. Once you are in the virtual reality environment, press the Oculus button on one of the Oculus Touch controllers to open the menu.
3. From the menu, select “Settings” and then choose “Guardian” or “Guardian System” from the options presented.
4. Follow the on-screen instructions to begin the calibration process. The Guardian System will guide you through defining your boundaries within the physical space.
5. During the calibration process, you will be prompted to use one of the Oculus Touch controllers to trace the perimeter of your play area. Simply follow the instructions on the screen, and use the controller to point and draw the boundaries on the ground.
6. As you trace the boundaries, make sure to include any obstacles or objects that you want to be alerted about when you approach them during your VR experience. This will help prevent any unintended collisions or accidents.
7. After defining the boundaries, the Guardian System will prompt you to confirm and save the settings. Review the boundaries you have set and make any necessary adjustments before finalizing the calibration.
8. Once the calibration is complete, the Guardian System will create a virtual wall that appears when you approach the physical boundaries you defined. This serves as a visual reminder to ensure you don’t venture too close to obstacles or restricted areas.
9. You can also customize additional Guardian System settings, such as the sensitivity of the virtual wall or the floor height adjustment, to further optimize your VR experience and safety.
Calibrating the Guardian System ensures a safe and immersive virtual reality experience within your defined play area. By properly setting up the Guardian System, you can explore and interact in the virtual world with confidence, knowing that the boundaries you have set will help keep you safe from real-world obstacles.
Testing the VR Experience
After setting up your Oculus Rift, connecting the cables, and calibrating the Guardian System, it’s time to embark on a virtual reality adventure. However, before diving into your favorite games or experiences, it’s essential to test the VR experience and ensure everything is functioning as expected. Follow these steps to test your VR experience:
1. Put on your Oculus Rift headset and make sure it is properly positioned and adjusted for optimal comfort and visual clarity.
2. Pick up the Oculus Touch controllers and ensure that they are paired and tracking your movements accurately. Move the controllers around and verify that their virtual representations in the VR environment accurately mirror your actions.
3. Take a few moments to familiarize yourself with the Oculus Touch controller buttons and controls. This will make it easier to navigate menus, interact with objects, and perform actions within the virtual world.
4. Start with a simple VR experience or game to get a feel for the virtual reality environment. Explore the menus, interact with objects, and assess the overall graphics and performance.
5. Move around within your defined play area and test the tracking of the Oculus sensors. Check if the sensors are accurately detecting your movements and if there are any blind spots where tracking might be less reliable.
6. Pay attention to any motion sickness or discomfort that you may experience. It’s common for some individuals to initially feel a bit disoriented or dizzy as they adjust to the virtual reality environment. If needed, take short breaks and gradually build up your tolerance for longer VR sessions.
7. Adjust the visual settings and graphics options within the VR experience to find the optimal balance between performance and visual quality. Experiment with different settings to suit your preference and the capabilities of your computer.
8. Test the audio output and ensure that the sound quality is clear and immersive. Use headphones for a more immersive experience and to avoid disturbing others around you.
9. During the testing phase, take note of any issues or glitches that you encounter. If necessary, consult the Oculus support resources or community forums for troubleshooting tips and solutions.
By testing the VR experience, you can ensure that everything is functioning properly and identify any potential issues that may hinder your enjoyment. This step allows you to fine-tune your setup, discover new features, and prepare for incredible virtual reality adventures.