
Choosing the Right Spot for Tree Planting
Planting trees in the virtual world of Animal Crossing can be a rewarding and aesthetically pleasing experience. However, choosing the right spot for tree planting is crucial for the tree’s growth and overall appearance. Here are some important factors to consider when selecting the perfect location:
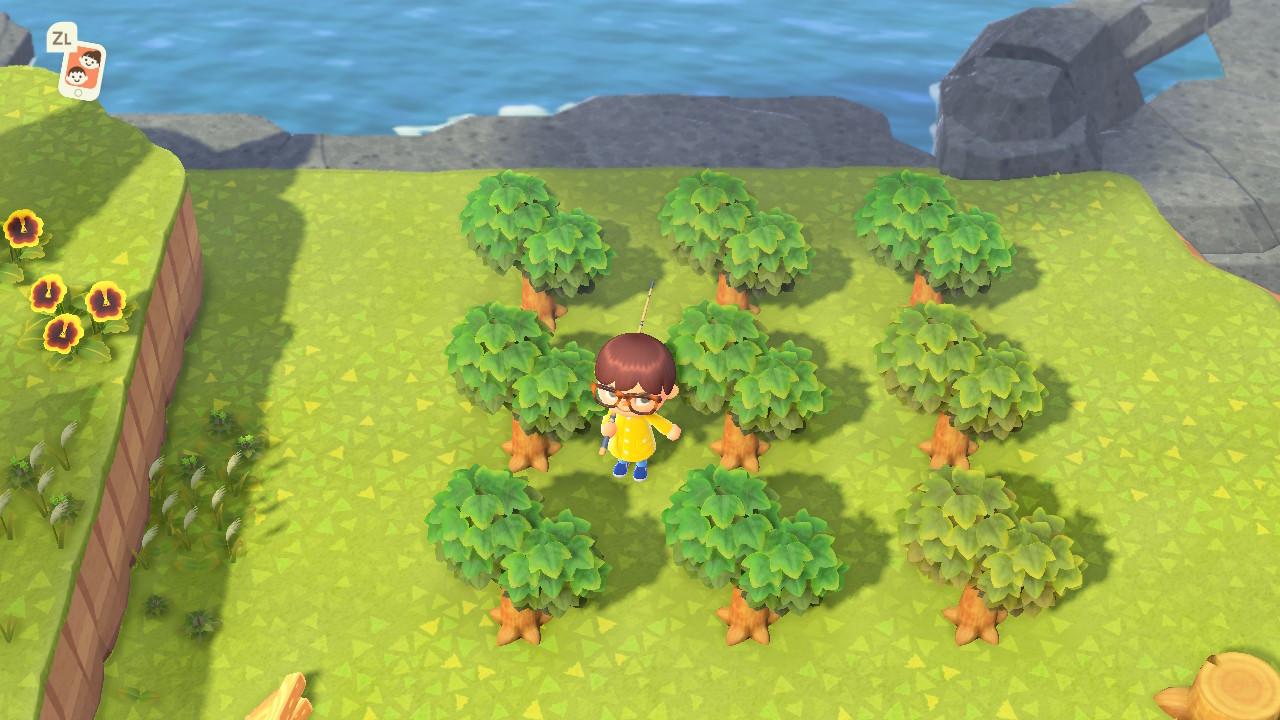
1. Spacing: Make sure to leave enough space between trees to allow for optimal growth. Trees should be placed at least one space apart in each direction to prevent overcrowding and allow for easy access.
2. Accessibility: Consider the accessibility of the area where you plan to plant the tree. Avoid placing trees near cliffs, rivers, or heavily populated areas, as they may obstruct pathways or interfere with the movement of characters and players.
3. Lighting: Trees require an adequate amount of sunlight to thrive. Choose a spot that receives sufficient natural light throughout the day. Avoid planting trees in shaded areas or near buildings that may cast shadows, as this can hinder their growth.
4. Soil Quality: Different tree species thrive in different soil types. Consider the type of soil in the designated spot and choose tree species that are well-suited to that soil type. If the soil is of poor quality, consider amending it with organic matter or fertilizer to provide essential nutrients.
5. Landscaping and Aesthetics: Take into account the overall landscaping and aesthetics of your island. Consider how the tree will complement existing features, such as rivers, cliffs, and buildings. Plan the placement of trees strategically to create visual interest and balance in your island design.
By carefully selecting the right spot for tree planting, you can ensure that your trees grow healthy and add beauty to your Animal Crossing island. Keep these factors in mind when planning your tree planting project and enjoy the satisfying experience of nurturing your virtual greenery.
Gathering Materials for Tree Planting
Before you embark on your tree planting journey in Animal Crossing, it’s important to gather the necessary materials to ensure a successful and seamless process. Here are the essential items you’ll need:
1. Shovel: The shovel is an indispensable tool for tree planting. Ensure you have a sturdy and reliable shovel to dig holes and prepare the ground for the tree.
2. Tree Saplings: Acquiring tree saplings is the first step towards planting trees. Saplings can be obtained in various ways, such as purchasing them from the garden store or receiving them as gifts from in-game events or villagers.
3. Watering Can: Adequate watering is crucial for the initial growth of the tree. Ensure you have a functional watering can to provide the necessary hydration to the saplings.
4. Fertilizer: Although not essential, using fertilizer can significantly enhance the growth and health of the tree. You can either purchase fertilizer from the garden store or craft it using the DIY recipes you acquire throughout the game.
5. Pathing Materials: If you want to create designated paths or walkways around the trees, gather materials such as stone, brick, or custom designs to beautify the area surrounding the trees.
6. Decorative Items: To add a personal touch to your tree planting project, consider incorporating decorative items like flowerbeds, garden fences, or outdoor lighting. These additions can enhance the visual appeal and make the area around the trees more inviting.
By gathering these essential materials before starting your tree planting endeavors, you’ll ensure that you have everything you need to create a vibrant and flourishing landscape in your Animal Crossing world. So, prepare your tools, stock up on saplings, and get ready to transform your island with a plethora of beautiful trees.
Preparing the Ground for Tree Planting
Preparing the ground properly is a vital step in ensuring the healthy growth of trees in Animal Crossing. By taking the time to prepare the ground adequately, you provide a suitable environment for the tree’s roots to establish themselves. Here’s how you can prepare the ground for tree planting:
1. Clear the Area: Start by removing any weeds, rocks, or other obstacles from the designated planting area. This will provide a clean and open space for the tree to grow without any interference.
2. Soften the Soil: Use your shovel to loosen the soil in the planting area. Gently dig into the ground and turn over the soil to break up any compacted layers. This will promote better root penetration and allow the tree to absorb nutrients more effectively.
3. Remove Grass: If there is grass present in the planting area, consider removing it before planting the tree. Although not necessary, removing the grass will prevent competition for nutrients and water between the tree and the surrounding grass.
4. Create a Planting Hole: Next, dig a hole that is slightly larger and deeper than the tree’s root ball. The hole should be wide enough to accommodate the roots without bending or crowding them. Gently place the tree in the hole, ensuring that it is planted at the same depth as it was in its original container.
5. Refill the Hole: Carefully fill in the hole with the loosened soil, ensuring that there are no air pockets around the roots. Press the soil gently but firmly to secure the tree in place.
6. Water the Tree: Once the tree is securely planted, give it a thorough watering. This will help settle the soil around the roots and provide hydration to the young sapling.
By following these steps to prepare the ground for tree planting, you give your trees the best start possible in their growth journey. Take your time and ensure that the planting area is well-prepared, and soon you’ll witness the beauty of your flourishing trees in Animal Crossing.
Digging a Hole for Tree Planting
Digging a proper hole for tree planting in Animal Crossing is crucial for the tree’s successful establishment and growth. By creating a suitable hole, you provide adequate space for the tree’s roots to spread out and access essential nutrients. Here’s how you can dig a hole for tree planting:
1. Assess the Tree’s Root Ball: Before digging, take a moment to assess the size of the tree’s root ball. The root ball is the clump of soil and roots that hold the tree in its container. This will give you an idea of the approximate size and depth of the hole you need to dig.
2. Choose the Right Tools: Use a shovel or a digger tool to dig the hole. Ensure that your chosen tool is sharp and in good condition, as this will make the digging process easier and more efficient.
3. Measure the Hole: The hole’s size should be slightly larger and deeper than the root ball. A good rule of thumb is to make the hole at least twice as wide as the root ball and just deep enough to accommodate it without burying the tree’s trunk too deeply.
4. Start Digging: Begin digging at the designated spot by inserting the shovel or digger tool into the ground at an angle. Use a rocking motion to loosen the soil. Work your way around the perimeter of the hole, gradually moving towards the center to create a uniform hole shape.
5. Check for Levelness: As you dig, periodically check the hole’s levelness. Ensure that the hole is not deeper on one side, as this can lead to the tree being planted at an improper angle. Adjust the depth and width of the hole if necessary.
6. Remove Excess Soil: As you dig, place the excess soil in a wheelbarrow or a designated area nearby. This will prevent the soil from getting in the way while planting the tree and make it easier to fill in the hole once the tree is in place.
7. Inspect the Hole: Before planting the tree, closely inspect the hole to ensure there are no obstructions, such as rocks or large roots, that could hinder the tree’s growth. Remove any obstacles that you come across during the inspection.
By following these steps, you’ll be able to dig a proper hole for tree planting in Animal Crossing. Remember to take your time and be mindful of the tree’s root ball size and depth requirements. With a well-dug hole, your tree will have a solid foundation for growth and thrive in your virtual world.
Planting the Tree
Planting a tree in Animal Crossing involves carefully placing the tree in its designated spot and ensuring that it is securely positioned for optimal growth. Here’s a step-by-step guide on how to plant a tree:
1. Prepare the Hole: Once the hole for planting has been dug, make sure it is the correct size and depth to accommodate the tree’s root ball. If necessary, adjust the hole to ensure a proper fit for the tree.
2. Remove the Tree from its Container: Carefully remove the tree from its nursery pot or container. Gently loosen the roots if they appear tightly bound or tangled.
3. Place the Tree in the Hole: Lower the tree into the hole, ensuring that the base of the trunk is level with the surrounding ground. Avoid planting the tree too deeply, as it can suffocate the roots or hinder proper growth.
4. Backfill the Hole: Gradually backfill the hole with soil, using your hands or a small shovel. Gently pat down the soil as you go to eliminate air pockets. Ensure that the tree remains straight and centered in the hole throughout the process.
5. Water the Tree: After planting, water the tree thoroughly to settle the soil and provide essential hydration to the roots. This helps the tree establish itself in its new environment.
6. Mulch the Base: Consider applying a layer of mulch around the base of the tree. Mulch helps retain moisture, suppresses weed growth, and maintains consistent soil temperatures. Be careful not to pile the mulch against the trunk, as this can lead to rot.
7. Monitor and Provide Care: Keep an eye on the newly planted tree and provide proper care. Water the tree regularly, especially during hot and dry periods. Ensure that neighboring plants or structures do not obstruct its growth. Monitor for signs of pests or diseases and take appropriate action if needed.
By following these steps, you can successfully plant a tree in Animal Crossing. Remember to handle the tree gently and provide it with proper care and maintenance as it grows. Soon, you’ll have a flourishing tree that adds beauty and charm to your virtual world.
Watering the Tree
Proper watering is essential for the health and growth of trees in Animal Crossing. Adequate hydration helps ensure that the tree’s roots can absorb nutrients and sustain itself. Here are some guidelines to follow when watering your trees:
1. Timing: It’s best to water trees in the morning or late afternoon when the sun is not at its peak. This allows the water to penetrate the soil and reach the tree’s roots before evaporation occurs.
2. Frequency: The frequency of watering depends on the weather conditions and the moisture levels of the soil. As a general rule, water newly planted trees more frequently to help them establish their root systems. Once the tree is established, regular watering once or twice a week should suffice. However, adjust the frequency based on rainfall and drought conditions.
3. Watering Amount: The amount of water you provide to your trees will vary depending on the species, size, and soil conditions. As a general guideline, aim to water the tree’s root zone thoroughly, ensuring that the soil is moist but not waterlogged. A slow and deep watering is more effective than a quick and shallow one.
4. Watering Techniques: To water trees, use a watering can or a hose with a soft spray attachment. Direct the water at the base of the tree, allowing it to soak into the soil rather than spraying it over the foliage. This directs the water to the root zone where it is needed most.
5. Mulching: Applying a layer of mulch around the base of the tree helps retain moisture and reduce water evaporation from the soil. Mulch also regulates soil temperature and suppresses weed growth, which can compete with the tree for water and nutrients.
6. Observing Signs of Thirst: Keep an eye out for signs that the tree needs more water. Some indications include wilting leaves, dry soil, or a browning appearance. Adjust your watering schedule as needed to prevent under watering or overwatering.
7. Rainwater Utilization: Take advantage of natural rainfall to supplement your tree’s water needs. If it has rained recently, check the moisture levels of the soil before watering. Avoid watering unnecessarily if the soil is already adequately moist.
By providing appropriate and consistent watering, you’ll help your trees thrive and flourish in Animal Crossing. Regular monitoring and adjustments to your watering routine will ensure that your trees receive the optimal hydration they need for healthy growth.
Protecting the Tree from Weeds and Pests
Keeping your trees in Animal Crossing healthy and vibrant involves protecting them from weeds and pests that can hinder their growth. By implementing a few preventive measures, you can help your trees thrive. Here are some tips for protecting your trees:
1. Weed Control: Regularly check the area around your trees for weeds. Weeds compete with trees for nutrients and water, hindering their growth. Remove weeds by pulling them from the root or using a handheld weeder. Consider applying a layer of mulch around the base of the tree to suppress weed growth.
2. Pest Identification: Be familiar with common pests that may affect your trees. Look out for signs of infestation, such as holes in leaves, discolored foliage, or unusual bumps on the tree. Identify the pest causing the problem to determine the appropriate course of action.
3. Natural Repellents: Use natural repellents to deter pests from damaging your trees. For example, spraying a mixture of water and mild dish soap can discourage aphids or other soft-bodied insects. Additionally, planting companion plants that naturally repel pests can help protect your trees.
4. Barrier Methods: Implement physical barriers to prevent pests from reaching your trees. You can use tree wraps or protective sleeves to discourage insect infestation and protect young saplings from nibbling animals.
5. Regular Inspection: Regularly inspect your trees for signs of pests or disease. Pay close attention to the leaves, branches, and trunk. Catching and addressing issues early on can prevent extensive damage and help maintain tree health.
6. Integrated Pest Management: Adopt an integrated pest management approach. This involves combining preventive measures, such as pruning affected branches and maintaining a healthy environment, with targeted treatments only when necessary, such as using safe and organic insecticides.
7. Consult Experts: If you’re unsure about pest identification or need assistance with controlling pests, consult with experts or local resources. They can provide guidance on effective pest management strategies tailored to your specific tree species and local conditions.
By proactively protecting your trees from weeds and pests, you can ensure their long-term vitality and beauty in Animal Crossing. Incorporate these preventive measures into your maintenance routine to create a healthy environment for your trees to flourish.
Caring for the Tree in Different Seasons
Caring for your trees in Animal Crossing involves adapting your maintenance routine to the changing seasons. Each season brings unique challenges and requirements for tree care. Here are some tips for caring for your trees throughout the different seasons:
Spring: During spring, your trees will be entering their growing season. Ensure that the soil is adequately moist as the temperatures rise. Regularly check for signs of pests or diseases, as they may become more active during this time. Prune any dead or damaged branches to promote healthy growth.
Summer: Summer brings hot and dry conditions, so be diligent about watering your trees. Deep, infrequent watering is more effective than light and frequent applications. Mulch around the base of the tree to retain moisture and regulate soil temperature. Prune away any overcrowded branches that may impede airflow and cause damage during storms.
Fall: As fall arrives, continue to water your trees, especially if there is a lack of rainfall. Monitor for falling leaves and clear them away from the base of the tree to prevent disease or pest infestation. Consider using fallen leaves as compost or mulch to nourish the soil around the tree.
Winter: In winter, it is crucial to protect your trees from harsh weather conditions. If you live in a region with freezing temperatures, you may need to insulate your trees using tree wraps or burlap to prevent frost damage. Clear away any heavy snow accumulation from the branches to prevent breakage.
Year-Round Care: Regardless of the season, there are some general care practices you should follow. Regularly inspect your trees for signs of pests, diseases, or damage. Prune any dead or diseased branches to maintain overall tree health. Fertilize the soil as needed to provide essential nutrients. Maintain a clean and tidy area around your trees, removing any fallen debris or weeds that may affect their growth.
By adapting your care routine to the specific needs of each season, you can help your trees thrive and adapt to the changing environment in Animal Crossing. Keep a close eye on your trees throughout the year and provide the necessary care to ensure their ongoing health and beauty.
Pruning the Tree for Growth and Aesthetics
Pruning is an essential aspect of tree care in Animal Crossing. Pruning involves selectively removing branches and foliage to promote healthy growth, improve the tree’s structure, and enhance its overall aesthetics. Here are some tips for pruning your trees for both growth and aesthetics:
1. Understand Pruning Goals: Before you begin pruning, determine your desired outcome. Are you pruning for growth, aesthetics, or both? Understanding your goals will guide your pruning decisions.
2. Prune Dead or Diseased Branches: Start by identifying and removing any dead, damaged, or diseased branches. These branches can be a threat to the overall health of the tree and should be pruned as soon as possible.
3. Improve Tree Structure: Look for branches that are crossing or rubbing against each other. These branches can create wounds and weaken the tree’s structure. Remove the less desirable branch to allow the healthier or better-positioned branch to flourish.
4. Thin Out Overcrowded Areas: If you notice areas of dense foliage, consider selectively thinning out some of the branches. Thinning helps improve air circulation and sunlight penetration, reducing the risk of diseases and promoting healthy growth.
5. Maintain Proper Branch Spacing: Check for branches that are too close together or growing in undesirable directions. Prune these branches to maintain proper spacing and improve the tree’s overall shape and structure.
6. Consider Tree Aesthetics: Pruning can also be done to enhance the visual appeal of your trees. Aim for a balanced and natural-looking shape. Prune to maintain a pleasing size, remove any unsightly or crossing branches, and create a more visually appealing landscape.
7. Prune During the Right Time: Consider the best time to prune based on the type of tree you are working with. Some trees prefer pruning during their dormant season, while others benefit from pruning immediately after their main growing season. Research the specific pruning requirements for each tree species.
8. Use Proper Pruning Techniques: Use sharp and clean pruning tools to make precise cuts. Make cuts just outside the branch collar, avoiding leaving stubs or cutting too close to the main trunk. Proper techniques minimize damage and promote faster healing.
Remember that pruning too much or too aggressively can harm the tree. Be cautious and methodical in your approach. If you are unsure about pruning techniques or the best course of action, consult local resources, gardening guides, or seek advice from experienced gardeners.
By effectively pruning your trees, you can encourage healthy growth, maintain proper structure, and enhance the aesthetic appeal of your Animal Crossing landscape. Take the time to prune your trees thoughtfully, and you’ll be rewarded with beautiful and thriving trees in your virtual world.
Moving the Tree to a Different Location
Occasionally, you may find it necessary to move a tree to a different location in Animal Crossing. Whether you want to create a new landscape design or address issues with the tree’s current placement, moving a tree requires careful handling to ensure its successful relocation. Here are the steps to move a tree to a different location:
1. Choose the New Location: Select a suitable spot where you want to move the tree. Consider factors such as spacing, accessibility, lighting conditions, and its compatibility with the surrounding landscape. Plan ahead to ensure the new location provides an optimal environment for the tree’s growth.
2. Prepare the New Hole: Dig a hole in the desired location that is similar in size and depth to the tree’s existing root ball. This will minimize stress on the tree as it adjusts to its new surroundings. Ensure the soil quality in the new hole is suitable for the tree species.
3. Water the Tree: Before moving the tree, deeply water the soil around its root zone. This helps hydrate the tree and make it easier to remove from the current location.
4. Dig around the Tree: Carefully dig around the tree, starting at a reasonable distance from the trunk to avoid damaging the roots. Use a shovel or garden fork to gently loosen the soil and free the root ball from the surrounding ground.
5. Lift and Transport: With the assistance of another player or using tools like shovels, carefully lift the tree while supporting the root ball. Take caution not to tilt or damage the trunk or branches during the moving process.
6. Plant the Tree in the New Hole: Lower the tree into the prepared hole in the new location, ensuring that it is at the same depth it was previously planted. Align the tree in a straight and upright position, and backfill the hole with soil, firmly but gently pressing it down to eliminate air pockets.
7. Water and Mulch: Immediately water the tree in its new location, allowing the moisture to penetrate the soil and settle around the roots. Apply a layer of mulch around the base of the tree to help retain moisture and regulate soil temperature.
8. Provide Extra Care: After moving, closely monitor the tree for signs of stress, such as wilting or yellowing leaves. If needed, water the tree more frequently during the first few weeks to aid its recovery. Avoid pruning or fertilizing the tree immediately after the move to allow it to acclimate to its new surroundings.
Moving a tree to a different location in Animal Crossing requires patience and careful execution. By following these steps and providing extra care during the transition, you can successfully relocate your tree and give it the best chance for continued growth and vitality.