
Overview of iPad’s Settings
The Settings app on your iPad is your gateway to managing and customizing various aspects of your device. From adjusting the display brightness to configuring network settings, accessing privacy options, and much more, the Settings app gives you full control over your iPad’s functionality and personalization. Understanding how to navigate and access the settings can help you optimize your iPad experience.
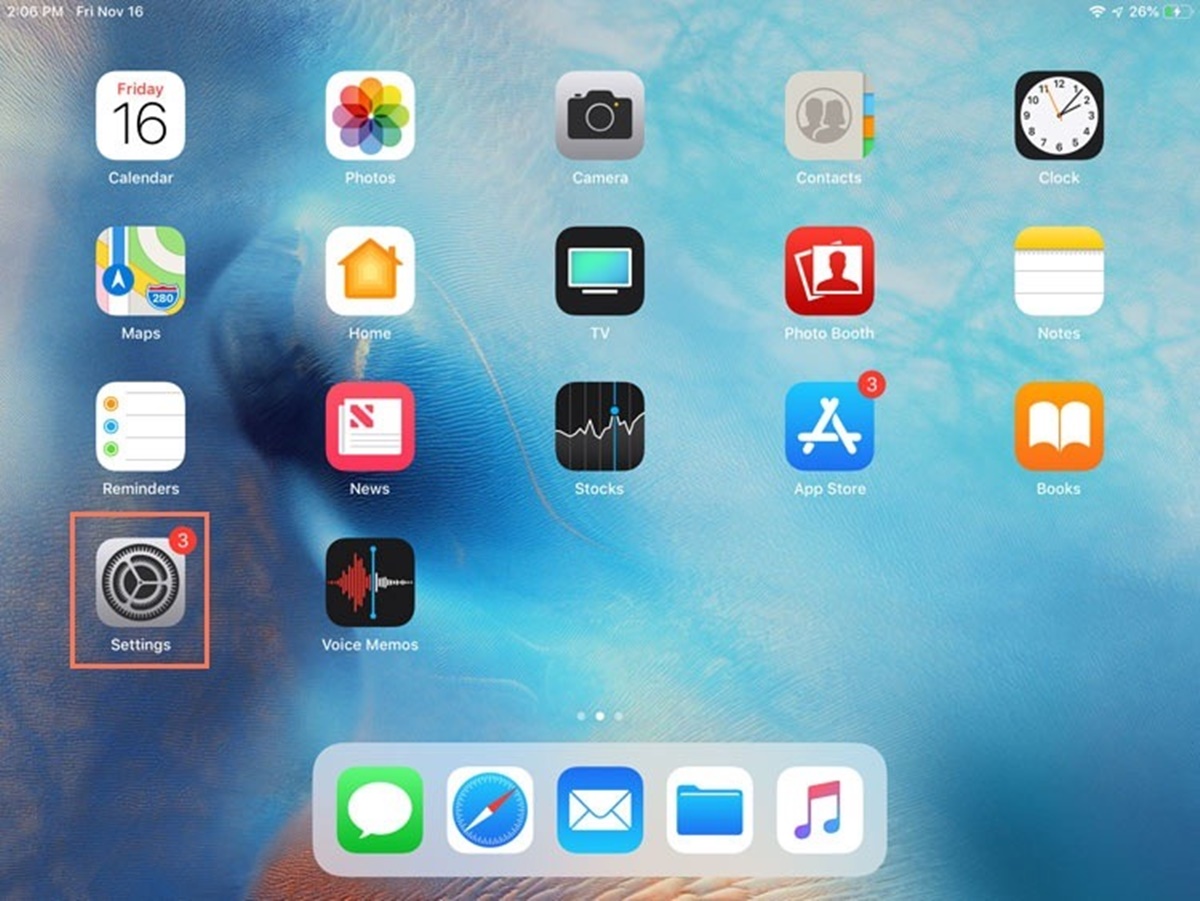
To open the Settings app, you have multiple methods at your disposal. One way is to locate the app icon on your home screen and tap on it. The Settings app icon features a gray gear wheel on a white background, making it easily recognizable. Another method is to use the Control Center. Simply swipe down from the top-right corner of the screen to reveal the Control Center, and then tap on the gear wheel icon to access the Settings. Additionally, you can utilize the Spotlight Search by swiping down on the home screen and typing “Settings” in the search bar at the top.
Once inside the Settings app, you’ll find a plethora of options categorized into different sections. These sections include Display & Brightness, Sounds & Haptics, Notifications, Privacy, General, Accessibility, Keyboard, Wi-Fi, Bluetooth, VPN, Cellular, Battery, and more. Each section contains specific settings related to its category, allowing you to customize your iPad according to your preferences and needs.
The “Display & Brightness” section enables you to adjust the brightness level, choose between light and dark mode, and modify text size and boldness. The “Sounds & Haptics” section lets you customize ringtones, system sounds, and haptic feedback settings. In the “Notifications” section, you can manage app notifications, enable or disable Do Not Disturb mode, and configure alert styles.
Privacy and security settings are crucial for safeguarding your personal information. The “Privacy” section provides control over app permissions, location services, and access to contacts, photos, and other sensitive data. The “General” section offers options for managing software updates, background app refresh, and resetting various settings. Accessibility options, such as voiceover, display accommodations, and touch accommodations, can be found in the dedicated “Accessibility” section.
Other settings include modifying keyboard behavior, language, and shortcuts in the “Keyboard” section, configuring Wi-Fi network connections and Bluetooth devices in their respective sections, managing cellular data settings in the “Cellular” section, checking battery health and enabling low power mode in the “Battery” section, and customizing app-specific options within the individual app settings menu.
If you ever encounter issues or want to start fresh, the Settings app also allows you to reset and restore your iPad’s settings to their default configurations in the “General” section.
In summary, the Settings app on your iPad plays a significant role in tailoring your device to your preferences and needs. By exploring the various settings categories and understanding how to access and navigate through them, you can optimize your iPad’s functionality and make it truly yours. Experiment with the different options available and customize your iPad experience to suit your individuality.
Method 1: Using the Settings App Icon
One of the simplest and most straightforward ways to open the Settings app on your iPad is by using the app icon located on your home screen. The Settings app icon is easy to identify and consists of a gray gear wheel on a white background. By following these simple steps, you can access the Settings app in no time.
First, unlock your iPad and navigate to the home screen. Look for the Settings app icon among the other icons on your screen. It is typically located on one of the main pages of your home screen or in a folder called “Utilities” or “Tools.”
Once you have located the Settings app icon, tap on it to open the app. It will launch the Settings app, giving you access to various settings and customization options for your iPad.
Inside the Settings app, you will find a series of categories, such as Display & Brightness, Sounds & Haptics, Notifications, Privacy, General, Accessibility, and more. Each category contains a range of settings that you can adjust according to your preferences and needs.
To navigate within the Settings app, simply swipe up or down to scroll through the different options. Tap on a category to explore the settings within that category. For example, if you tap on Display & Brightness, you will be able to modify the brightness level, choose between light and dark mode, adjust text size and boldness, and more.
To go back to the previous screen or category, tap on the “Back” button located at the top-left corner of the screen. If you want to return to the main screen of the Settings app, tap on the “Settings” button at the top-left corner.
Remember to explore the different sections and settings available in the Settings app to personalize your iPad experience. Familiarize yourself with the options and make adjustments as needed to suit your preferences and requirements. From managing Wi-Fi and Bluetooth connections to adjusting privacy and security settings, the Settings app offers a wide range of customization features to enhance your iPad usage.
Using the Settings app icon to open the app is a quick and convenient method that allows you to access and manage various settings on your iPad. Once you are comfortable navigating and making adjustments within the Settings app, you can fully personalize your iPad to match your unique needs and preferences without any hassle.
Method 2: Using the Control Center
Another convenient method to access the Settings app on your iPad is by utilizing the Control Center. The Control Center provides quick access to various settings and functions of your device, including the Settings app.
To open the Control Center, start by unlocking your iPad and swiping down from the top-right corner of the screen. This action will reveal the Control Center panel, which contains a range of toggles, shortcuts, and controls.
Once the Control Center is displayed, look for the icon that resembles a gear wheel. This gear wheel icon represents the Settings app. Tap on the gear wheel icon, and it will directly open the Settings app on your iPad.
Now that you are inside the Settings app, you can explore and configure different settings according to your preferences and requirements. You can navigate through the various categories and make adjustments such as modifying display and brightness settings, managing sounds and haptic feedback, customizing notifications, and more.
To return to your previous screen or exit the Settings app, simply swipe up from the bottom of the screen to close the Control Center. You will be taken back to your home screen or the app you were previously using.
Using the Control Center to access the Settings app offers a convenient and time-saving method, as you can open the app without having to search for the app icon on your home screen or through the Spotlight Search. The Control Center provides quick and direct access to the most commonly used settings, allowing you to make adjustments effortlessly.
It’s important to note that the settings available in the Control Center may vary depending on your iPad model and the version of iOS you are using. Apple continuously introduces updates and new features, so make sure to keep your iPad up to date to access the latest settings and functionalities.
Utilizing the Control Center to access the Settings app is an efficient and user-friendly approach that enables you to manage and customize your iPad settings seamlessly. Whether you want to adjust display preferences, configure sounds, or manage notifications, the Control Center offers a convenient shortcut to the Settings app, allowing you to personalize your iPad experience with ease.
Method 3: Using the Spotlight Search
The Spotlight Search feature on your iPad allows you to quickly find and open various apps and settings, including the Settings app. By utilizing this powerful search tool, you can access the Settings app without having to manually navigate through your home screen or use the Control Center. Here’s how you can use Spotlight Search to open the Settings app on your iPad.
To start, unlock your iPad and go to the home screen by pressing the home button or swiping up from the bottom (depending on your iPad model). Once you’re on the home screen, swipe down from the middle of the screen. This action will reveal the Spotlight Search bar at the top of the screen.
Next, tap on the search bar and type “Settings”. As you type, the Spotlight Search will display results matching your search query in real-time. Look for the “Settings” option in the search results. It will be labeled with the gray gear wheel icon, similar to the icon of the Settings app.
Once you locate the Settings option, tap on it. This will directly open the Settings app on your iPad, allowing you to access and modify the various settings and preferences available.
Inside the Settings app, you can navigate through the different categories and options by swiping up or down on the screen. The categories in the Settings app cover a wide range of settings, such as Display & Brightness, Sounds & Haptics, Privacy, General, Accessibility, and many more.
To go back to the previous screen or category, tap on the “Back” button located at the top-left corner of the screen. If you want to return to the main screen of the Settings app, tap on the “Settings” button at the top-left corner.
Spotlight Search provides a quick and convenient way to access the Settings app on your iPad. Whether you’re in the middle of using another app or navigating through your home screen, Spotlight Search allows you to locate and open the Settings app with just a few taps.
It is worth noting that the Spotlight Search feature is not limited to opening apps. You can also search for contacts, emails, documents, and even web search results using this versatile tool. It’s a powerful feature that enhances the overall usability and efficiency of your iPad.
By utilizing the Spotlight Search to open the Settings app, you can easily manage and customize your iPad settings without the need to manually locate the app icon or navigate through menus. Take advantage of this convenient tool to access the Settings app quickly and efficiently, making your iPad experience more personalized and tailored to your preferences.
Opening Specific Settings within the Settings App
Within the Settings app on your iPad, you can access and modify specific settings for various functions and features of your device. Whether you want to tweak the display brightness, adjust sound preferences, configure privacy options, or manage network connections, you can easily navigate to the desired settings category using the following steps.
To begin, open the Settings app on your iPad using one of the methods described earlier, such as tapping on the app icon or accessing it via the Control Center or Spotlight Search.
Once you are inside the Settings app, you will see a list of different categories, with each category representing a specific area of your iPad’s settings. Some common categories include Display & Brightness, Sounds & Haptics, Notifications, Privacy, General, Accessibility, and more.
To open a specific category and access its corresponding settings, simply tap on the desired category from the list. Tap on Display & Brightness, for example, to access settings related to the display and brightness controls.
Within each category, you will find a range of options and settings that you can adjust to suit your preferences. For instance, in the Display & Brightness category, you can modify the screen brightness level, enable or disable dark mode, adjust text size and boldness, and more.
To navigate back to the main screen of the Settings app from a specific category, tap on the “Back” button at the top-left corner of the screen. This will take you back to the list of categories, allowing you to explore other settings options or access a different category.
If you know the specific setting you are looking for but are unsure which category it belongs to, you can utilize the search bar at the top of the Settings app. Simply enter keywords related to the setting you are trying to find, and the search results will display relevant options and categories.
By opening specific settings within the Settings app, you can fine-tune your iPad’s functionality to better suit your needs. Whether you want to adjust the display and brightness, configure sound preferences, manage privacy settings, or customize various aspects of your device, the Settings app provides a centralized location for all these adjustments.
Take the time to explore the different categories and settings available within the Settings app. Familiarize yourself with the options and make adjustments as needed to enhance your iPad experience and tailor it to your preferences.
Remember, each category within the Settings app contains specific settings related to its function. By navigating through these categories, you can access and modify a wide range of options that contribute to the overall usability and personalization of your iPad.
Customizing the Display and Brightness Settings
The display and brightness settings on your iPad allow you to adjust the visual aspects of your device, ensuring an optimal viewing experience. From modifying the screen brightness to enabling Dark Mode and adjusting text size, the display and brightness settings offer various customization options. Here’s how you can personalize the display and brightness settings on your iPad.
To access the display and brightness settings, open the Settings app on your iPad by using one of the methods mentioned earlier. Once inside the app, locate and tap on the “Display & Brightness” category from the list of options.
Within the Display & Brightness category, you will find several settings that you can modify. The first option is the brightness control, represented by a slider. Slide the bar to the left to decrease the brightness or to the right to increase it. Adjusting the brightness level can help optimize your viewing experience, especially in different lighting conditions.
Below the brightness slider, you will find two options: “Light” and “Dark” mode. Light mode displays content on a white background, while Dark mode presents content on a dark background. Tap on your preferred mode to activate it. Dark mode is known for its reduced eye strain, especially in low-light environments.
Below the appearance options, you will find two additional settings: “Text Size” and “Bold Text.” Text size allows you to adjust the size of the text displayed throughout your iPad’s interface. Drag the slider to the left to decrease the text size or to the right to increase it. The “Bold Text” toggle enables you to make the text on your iPad bolder for improved legibility.
In addition to these settings, some iPads may include additional options under the Display & Brightness category. These options can vary based on your iPad model and the version of iOS you are using. Examples of additional settings include “Auto-Brightness,” which adjusts the screen brightness based on ambient lighting conditions, and “Night Shift,” which reduces blue light emissions to help promote better sleep.
Exploring and customizing the display and brightness settings on your iPad allows you to optimize your visual experience. Adjusting the brightness level, choosing between light and dark mode, modifying text size, and activating bold text are just a few ways to personalize your iPad’s display to suit your preferences and needs.
Take the time to experiment with the various display and brightness settings to find the perfect configuration for you. Whether you prefer a bright and vibrant display or a subdued and eye-friendly interface, the options available within the display and brightness settings allow you to tailor your iPad’s visual experience to your liking.
Remember, your display and brightness settings can impact both battery life and eye comfort. Adjust these settings accordingly to strike a balance between visual preference and device efficiency.
Adjusting Sound and Haptics Settings
The sound and haptics settings on your iPad allow you to customize the audio and vibration feedback of your device, ensuring an immersive and personalized experience. From adjusting ringtone volume to enabling haptic feedback, these settings offer various options to enhance your audio and tactile interactions. Here’s how you can tailor the sound and haptics settings on your iPad.
To access the sound and haptics settings, open the Settings app on your iPad using one of the methods mentioned earlier. Once inside the app, locate and tap on the “Sounds & Haptics” category from the list of options.
Within the Sounds & Haptics category, you will find several settings that you can modify. The first option is the “Ringer and Alerts” volume control, which adjusts the volume level for incoming calls, notifications, and alerts. Drag the slider to the left to decrease the volume or to the right to increase it.
Below the volume control, you will find the “Ringtone” section. Tap on this option to choose a specific ringtone for your incoming calls. You can select from a range of built-in ringtones or choose a custom ringtone that you have added to your device.
Next, you will see options for “Vibrate on Ring” and “Vibrate on Silent.” Toggle these switches according to your preference. If enabled, your iPad will vibrate when it rings or receives notifications, even if it is in silent mode.
Below the vibration settings, you will find further options for configuring other sound-related settings. These options may include “Text Tone,” “New Mail,” “Calendar Alerts,” and more, depending on your iPad model and software version. Tap on each option to choose your preferred sound or customize the settings accordingly.
In addition to sound settings, the Sounds & Haptics category may also feature options for haptic feedback. Haptic feedback provides subtle vibrations or taps to enhance the overall user experience. Look for the “System Haptics” toggle and enable it to enjoy haptic feedback throughout your iPad.
Exploring and adjusting the sound and haptics settings on your iPad allows you to personalize your audio and tactile interactions with the device. Whether you prefer a specific ringtone, different volume levels for various notifications, or the immersive feeling of haptic feedback, these settings offer a range of customization options.
Take the time to experiment with the sound and haptics settings to find the perfect configuration for you. Adjust the volume levels, choose your favorite ringtone, and enable or disable vibration and haptic feedback according to your preferences and needs.
Remember, adjusting the sound and haptics settings on your iPad can contribute to a more enjoyable and tailored user experience. Whether you want to enjoy your favorite tunes, receive notifications discreetly, or feel subtle vibrations when interacting with your iPad, these settings empower you to customize your device according to your personal preferences.
Managing Notifications and Do Not Disturb Settings
Managing notifications and utilizing the Do Not Disturb feature on your iPad allows you to control interruptions and optimize your focus and productivity. With the ability to customize notification preferences and schedule quiet time, you can ensure that notifications align with your needs and preferences. Here’s how you can effectively manage notifications and utilize the Do Not Disturb settings on your iPad.
To access the notification settings, open the Settings app on your iPad using one of the methods mentioned earlier. Once inside the app, locate and tap on the “Notifications” category from the list of options.
Within the Notifications category, you will find a list of all the applications installed on your iPad that have notification capabilities. Tap on an app to access its specific notification settings.
For each app, you can customize its notification settings according to your preferences. You can choose between various notification styles, such as banners or alerts, enable or disable sounds and vibration, and determine whether notifications appear on the lock screen.
Additionally, you can utilize the “Allow Notifications” toggle to enable or disable notifications for a particular app altogether. This setting can be helpful if you want to temporarily pause notifications from a specific app without completely uninstalling it.
To manage notifications in a more centralized manner, utilize the “Notification Grouping” option. This allows you to choose how notifications are organized and presented. You can opt for automatic grouping, which groups notifications by app, or select the “By App” option to view notifications from each app individually.
Furthermore, your iPad provides a powerful feature called Do Not Disturb, which allows you to schedule quiet time or manually enable it whenever you need uninterrupted focus. To access the Do Not Disturb settings, go back to the main Notifications screen and scroll down to find the “Do Not Disturb” section.
Within the Do Not Disturb settings, you can choose to enable the feature manually, or you can schedule specific times during which your iPad will automatically enter Do Not Disturb mode. This is particularly useful during meetings, work sessions, or when you need uninterrupted sleep during designated hours.
You can also configure Do Not Disturb so that calls and notifications from selected contacts or repeated calls will bypass the feature in case of emergencies or urgent matters.
Do Not Disturb can significantly improve your productivity and reduce distractions, allowing you to focus on important tasks, relax, or enjoy uninterrupted sleep. By customizing the notification settings and utilizing the Do Not Disturb feature on your iPad, you are in control of your device’s interruptions and can create a more efficient and personalized user experience.
Take the time to review and modify the notification settings for each app according to your preferences. Additionally, make use of the Do Not Disturb settings to schedule quiet time or enable it as needed.
Remember, effectively managing notifications and utilizing the Do Not Disturb feature can enhance your iPad experience by minimizing interruptions and allowing you to focus on what matters most to you. Whether you are working, studying, or simply enjoying some leisure time, these settings empower you to optimize your productivity and maintain a distraction-free environment.
Controlling Privacy and Security Settings
Controlling privacy and security settings on your iPad is crucial for safeguarding your personal information and ensuring a secure digital environment. With the ability to manage app permissions, secure your device with passcodes, and protect your data, you can have peace of mind while using your iPad. Here’s how you can effectively control privacy and security settings on your device.
To access the privacy settings, open the Settings app on your iPad using one of the methods mentioned earlier. Once inside the app, locate and tap on the “Privacy” category from the list of options.
Within the Privacy category, you will find a range of settings related to app permissions and data access. Tap on a specific setting to view and modify its options.
For example, the “Location Services” option allows you to control which apps can access your location information. You can choose to enable or disable location access for each app individually or allow location access only while using the app.
The “Contacts” setting provides control over whether apps can access your contacts. You can grant or deny access to specific apps, ensuring your contact information remains secure.
Similarly, you can manage permissions for other sensitive data, such as photos, camera, microphone, and more. Each setting within the Privacy category allows you to determine which apps can access specific data on your iPad.
In addition to privacy settings, your iPad offers robust security options to protect your device and data. To access the security settings, go back to the main Settings screen, scroll down, and tap on the “Face ID & Passcode” or “Touch ID & Passcode” category, depending on your iPad model and software version.
Within the security settings, you can set up a passcode, allowing you to secure your iPad and prevent unauthorized access. You can choose between a 4-digit passcode or a more secure custom alphanumeric passcode.
If your iPad supports Face ID or Touch ID, you can configure these biometric authentication methods for enhanced security and convenience. Enabling Face ID or Touch ID allows you to unlock your iPad or authorize app downloads and transactions with a simple facial or fingerprint scan.
Additionally, you can enable the “Erase Data” option, which erases all data on your iPad after ten unsuccessful passcode attempts, ensuring that your personal information remains protected even if your device falls into the wrong hands.
Controlling privacy and security settings should be an ongoing practice to maintain a secure digital environment. Regularly review app permissions, update your passcodes, and enable biometric authentication methods for added security.
By taking control of your privacy and security settings on your iPad, you can protect your personal data and enjoy a safer digital experience. It is essential to be mindful of the permissions you grant to apps and regularly update your device’s security settings to stay ahead of any potential threats.
Remember, your privacy and security settings play a vital role in securing your personal information and ensuring a safe browsing and app experience on your iPad. Take the necessary steps to control these settings and enjoy peace of mind while using your device.
Exploring the General Settings Options
The General settings category on your iPad gives you access to a wide range of options that provide customizability and control over various aspects of your device. From managing software updates to adjusting Siri settings, exploring the General settings allows you to tailor your iPad experience to your preferences. Here’s how you can navigate and explore the General settings options on your iPad.
To access the General settings, open the Settings app on your iPad using one of the methods mentioned earlier. Once inside the app, locate and tap on the “General” category from the list of options.
Within the General category, you will find a list of settings that cover a broad range of functions. Let’s explore some of the key settings you may find within the General category.
The first setting you may encounter is the “About” section, which provides information about your iPad, such as its model name, software version, storage capacity, and more. This section also displays important details like your iPad’s serial number, Wi-Fi and Bluetooth addresses, and legal information.
Scrolling down further, you will find options to manage software updates. The “Software Update” setting allows you to check for and install the latest iOS updates. Keeping your iPad updated with the latest software ensures access to new features, bug fixes, and security improvements.
Next, you will see the “Keyboard” setting, where you can make customizations to the keyboard behavior and settings. You can enable features like auto-capitalization, autocorrect, and predictive text. This setting also allows you to add and manage keyboard languages and configure keyboard shortcuts.
The “Language & Region” setting provides options to modify the language and region settings on your iPad. You can choose your preferred language, set region-specific formats for date and time, and select the appropriate region for relevant services, such as Apple Pay and Maps.
In the “Siri & Search” setting, you can access options to configure Siri’s behavior and settings. You can enable or disable Siri, choose to activate Siri with a voice command or a button press, and customize the language and voice for Siri’s responses.
As you continue exploring, you may come across settings such as “Reset,” which allows you to reset various aspects of your iPad to their default configurations, and “Accessibility,” which offers a range of options to make your iPad more accessible for users with disabilities.
It is worth noting that the General settings category may offer additional options depending on your iPad model and software version. Apple periodically introduces new features and updates, so make sure to keep your iPad up to date to access the latest settings and functionalities.
Taking the time to explore and familiarize yourself with the General settings options allows you to personalize your iPad and make it better suited to your preferences and needs. Review each setting, make necessary adjustments, and experiment with the available options to optimize your iPad experience.
Remember, the General settings offer a wealth of customization and control options for your iPad. By exploring and utilizing these settings, you can tailor your device to suit your personal preferences and enhance your overall user experience.
Understanding Accessibility Options in Settings
The Accessibility options in the Settings app on your iPad provide a range of features designed to make the device more user-friendly and accessible to individuals with disabilities. These options allow you to customize the interface, improve visual and hearing aids support, enable assistive touch, and more. Understanding and utilizing the Accessibility options can enhance the usability and inclusivity of your iPad. Here’s how you can explore and configure Accessibility settings.
To access the Accessibility settings, open the Settings app on your iPad using one of the methods mentioned earlier. Once inside the app, locate and tap on the “Accessibility” category from the list of options.
Within the Accessibility category, you will discover a variety of settings and features designed to meet different accessibility needs. Let’s explore some of the key options you may encounter.
The first option you may encounter is “Vision,” which provides a range of visual accessibility features. Here, you can adjust display settings like text size, bold text, and contrast. You can enable features such as VoiceOver, which provides spoken feedback for users with visual impairments, or Magnifier, which turns your iPad into a handy magnifying glass.
Continuing down the Accessibility settings list, you will find options such as “Hearing,” which includes support for hearing aids connectivity and audio balance adjustments. Here, you can enable features like Live Listen, which allows your iPad to work as a remote microphone to help you hear conversations better.
Another essential setting is “Motor,” which provides assistance for individuals with motor skill challenges. You can enable features such as AssistiveTouch, which creates customizable virtual buttons to replace physical gestures, and Switch Control, which lets you control your iPad using external switches or adaptive devices.
Below the Motor settings, you will find options like “Interaction” and “Siri & Control.” These settings offer further customization options for the iPad’s user interface and the way you interact with the device. Here you can modify gesture controls, switch control styles, and enable voice control for hands-free operation.
Additionally, explore the “Accessibility Shortcut” setting, which allows you to customize the accessibility features that can be quickly accessed by triple-clicking the home or side button of your iPad. This makes it more convenient to enable or disable frequently-used accessibility features on the go.
Remember, each Accessibility setting provides different features and customization options. Take the time to explore each setting, read the descriptions, and enable the options that are beneficial for you or individuals who may require accessibility assistance.
By understanding and utilizing the Accessibility options on your iPad, you can make the device more usable and accessible for a wider range of users. Whether it’s adjusting visual settings, enabling assistive technologies, or customizing interaction controls, these features enhance inclusivity and allow everyone to enjoy the functionality of the iPad.
Apple is committed to ensuring that its devices are accessible to all users. The Accessibility options on the iPad exemplify this commitment by providing a comprehensive suite of features that cater to diverse accessibility needs. Take advantage of these settings to create a user-friendly and inclusive experience on your iPad.
Modifying Keyboard Settings
The keyboard settings on your iPad allow you to customize the behavior, appearance, and language options of the on-screen keyboard. By modifying these settings, you can enhance your typing experience, adjust autocorrect functionality, and even change the language layout to better suit your needs. Understanding and utilizing the keyboard settings can improve your efficiency and productivity. Here’s how you can modify the keyboard settings on your iPad.
To access the keyboard settings, open the Settings app on your iPad using one of the methods mentioned earlier. Once inside the app, locate and tap on the “Keyboard” category from the list of options.
Within the Keyboard category, you will find a variety of settings and options to customize your typing experience. Let’s explore some of the key options you may encounter.
The first setting you may encounter is “Auto-Capitalization.” By enabling this setting, your iPad will automatically capitalize the first letter of each sentence. This can save you time and effort of manually capitalizing letters.
Continuing down the Keyboard settings list, you will find options such as “Auto-Correction” and “Check Spelling.” When enabled, Auto-Correction suggests corrections for misspelled words as you type. Check Spelling underlines misspelled words, allowing you to manually correct them.
Another important setting is “Predictive.” By enabling this option, your keyboard will display word suggestions above the keyboard as you type. This predictive text feature can help you type more quickly and with fewer errors.
You can also customize the keyboard appearance in the settings. The “Keyboard Clicks” setting enables or disables the sound feedback when you tap on the keys. You can turn it on if you prefer an audible confirmation of keystrokes.
The “Shortcuts” option allows you to create custom keyboard shortcuts for certain phrases or words. This feature is handy if you frequently type specific phrases or acronyms and want to save time by using a shortcut instead of the full text.
To modify the language and layout of the keyboard, tap on “Keyboards” and then “Add New Keyboard.” Here, you can choose from a wide range of languages and layouts that are supported on your iPad. Adding a new keyboard allows you to switch between languages and adapt the keyboard to your multilingual needs.
Under the keyboard settings, you may also find additional options depending on your iPad model and software version. Explore these options to further personalize your typing experience.
By modifying the keyboard settings on your iPad, you can enhance your productivity, accuracy, and typing speed. Experiment with different settings and configurations to find the optimal combination that works best for you.
Take advantage of the keyboard settings to create a comfortable and efficient typing experience on your iPad. Whether it’s adjusting autocorrect, enabling predictive text, or adding multiple language keyboards, these settings empower you to tailor the keyboard to your individual preferences and language requirements.
Remember, the keyboard settings offer a range of customization options that can improve your typing experience on the iPad. Explore and adjust these settings as per your needs to enhance your productivity and make the most out of your device.
Configuring Wi-Fi, Bluetooth, and VPN Settings
The Wi-Fi, Bluetooth, and VPN settings on your iPad allow you to connect to wireless networks, pair with Bluetooth devices, and set up virtual private network (VPN) connections. By configuring these settings, you can enjoy internet connectivity, connect to external devices, and secure your online activities. Understanding how to configure Wi-Fi, Bluetooth, and VPN settings empowers you to make the most out of your iPad’s wireless capabilities. Here’s how you can set up and customize these settings on your device.
To access the wireless settings, open the Settings app on your iPad using one of the methods mentioned earlier. Within the app, locate and tap on the “Wi-Fi” or “Bluetooth” category from the list of options, depending on which setting you wish to configure.
To connect to a Wi-Fi network, ensure the “Wi-Fi” toggle is turned on. Your iPad will automatically search for available networks. Tap on the desired network from the list, enter the appropriate password if required, and wait for your iPad to establish a connection. Once connected, your iPad will remember the network and automatically connect to it whenever it’s within range.
To configure Bluetooth settings, ensure the “Bluetooth” toggle is turned on. Your iPad will start scanning for nearby Bluetooth devices. Select the device you wish to pair with and follow the on-screen prompts to complete the pairing process. Once paired, you can use the Bluetooth device to stream audio, share files, and perform other supported actions.
The VPN settings can be accessed by returning to the main Settings screen and tapping on the “General” category. Scroll down and tap on “VPN”. Here, you have the option to either configure a VPN connection manually or connect to a VPN service provided by a third party app. If you choose to configure a VPN manually, you will need to enter the necessary details provided by your VPN provider.
Keep in mind that:
- Wi-Fi settings also allow you to forget saved networks, enable auto-join for networks, or configure proxy settings if required.
- Bluetooth settings offer options to rename your device, manage connected devices, and enable or disable features like Handoff and Audio Routing, depending on your iPad model and software version.
- VPN settings allow you to manage multiple VPN configurations, toggle the “Connect on Demand” feature, and configure proxy settings.
By configuring Wi-Fi, Bluetooth, and VPN settings on your iPad, you can enjoy the benefits of wireless connectivity, conveniently connect to Bluetooth devices, and secure your internet traffic with VPN. Take the time to explore these settings, customize them to your preferences, and ensure you stay connected and protected while using your iPad’s wireless capabilities.
Remember, staying connected to trusted Wi-Fi networks and properly pairing Bluetooth devices is essential for a seamless experience. Additionally, setting up a VPN ensures your connections are secure and your data remains private. With the right configurations in place, you can enjoy the full potential of your iPad’s wireless features.
Managing Cellular and Data Settings
Managing cellular and data settings on your iPad gives you control over your mobile network connection and allows you to optimize your data usage. By configuring these settings, you can monitor data usage, enable or disable cellular data, and manage cellular plans and services. Understanding how to manage cellular and data settings empowers you to make efficient use of your iPad’s cellular capabilities. Here’s how you can effectively manage these settings.
To access the cellular and data settings, open the Settings app on your iPad using one of the methods mentioned earlier. Within the app, locate and tap on the “Cellular” or “Mobile Data” category from the list of options.
In the Cellular settings, you can view information about your cellular plan, including your carrier’s name, signal strength, and available cellular data usage. You can also enable or disable Cellular Data with a simple toggle switch. When Cellular Data is enabled, your iPad can connect to the internet using your carrier’s network.
Scrolling down further within the Cellular settings, you can find a list of apps and their respective data usage information. This allows you to monitor and manage the amount of data each app consumes. You can choose to disable cellular data for specific apps to reduce data usage or enable it for apps that you want to have access to cellular connectivity.
To further manage your data usage, you can set up a cellular data limit or enable the AssistiveTouch feature. By setting a data limit, your iPad will track the amount of data you use and provide a warning when you are about to reach the limit. AssistiveTouch, on the other hand, allows you to perform common cellular data actions like enabling or disabling it, accessing settings, or checking your data usage with just a tap.
Additionally, the Cellular settings may offer options to manage your carrier settings and view additional information about your cellular plan. You can also access settings related to Personal Hotspot, which allows you to share your iPad’s cellular data connection with other devices.
Remember, managing cellular and data settings is crucial for controlling your data usage and optimizing your cellular connectivity. By monitoring your cellular data usage and enabling or disabling data access for specific apps, you can prevent exceeding your monthly data limit and avoid unwanted charges.
Be mindful of your data usage and consider connecting to available Wi-Fi networks whenever possible to reduce reliance on cellular data. This will help conserve your data allowance and avoid unnecessary costs.
By effectively managing your cellular and data settings on your iPad, you can make the most out of your data plan while staying connected wherever you go. Take the time to explore these settings, customize them according to your preferences, and ensure that you can efficiently manage your cellular data usage while using your iPad on the go.
Accessing Battery and Energy Saving Settings
Accessing the battery and energy-saving settings on your iPad allows you to monitor battery usage, prolong battery life, and optimize power management. By configuring these settings, you can keep track of battery health, enable low power mode, and customize settings to conserve energy. Understanding how to access and utilize the battery and energy-saving settings helps you maximize your iPad’s battery performance. Here’s how you can effectively access and configure these settings.
To access the battery and energy-saving settings, open the Settings app on your iPad using one of the methods mentioned earlier. Once inside the app, locate and tap on the “Battery” or “Battery Health” category from the list of options.
Within the Battery settings, you can view valuable information about your battery’s usage. This includes the percentage of battery usage by different apps and services over the past 24 hours or last 10 days. Analyzing this information helps identify power-hungry apps and allows you to adjust or close them to conserve energy.
In the Battery settings, you may also find the option to enable “Low Power Mode.” This feature temporarily reduces power consumption by disabling certain background activities, visual effects, and automatic downloads. Enabling Low Power Mode can significantly extend your battery life when you are running low on power or need to conserve battery for an extended period.
To manage battery health, tap on “Battery Health” (if available). Here, you can view important information about your battery’s maximum capacity and peak performance capability. You can also enable the “Optimized Battery Charging” feature to reduce battery aging and prolong its overall lifespan.
Keep in mind that the Battery and Energy Saving settings may vary depending on your iPad model and software version. Apple periodically introduces new features and updates, so it’s important to keep your device updated to access the latest battery and energy-saving settings.
By accessing the battery and energy-saving settings, you gain better control over your iPad’s battery usage, increase battery life, and optimize power management. Monitoring battery usage, enabling Low Power Mode when needed, and managing battery health ensures that you can make the most out of your iPad’s battery performance.
Remember to charge your iPad regularly and avoid extreme temperatures that can affect battery performance. Additionally, connecting to Wi-Fi instead of using cellular data can help preserve battery life.
By effectively accessing and configuring the battery and energy-saving settings on your iPad, you can enjoy prolonged battery life and a more efficient power management system. Take the time to explore and customize these settings to suit your needs, ensuring you can rely on your iPad for longer periods without worrying about battery drain.
Customizing App Settings within the Settings App
Customizing app settings within the Settings app on your iPad allows you to personalize the behavior and preferences of individual apps installed on your device. These settings enable you to tailor each app to your liking, adjusting features, permissions, notifications, and various other options. Understanding how to access and customize app settings within the Settings app empowers you to optimize your app experience. Here’s how you can effectively customize app settings on your iPad.
To access the app settings within the Settings app, open the Settings app on your iPad using one of the methods mentioned earlier. Once inside the app, scroll down or navigate to find the specific app that you want to customize.
Tap on the desired app to access its settings. Depending on the app, you may find a variety of options and customization features. Let’s explore some of the common settings you may encounter when customizing an app within the Settings app.
The first setting you may encounter is “Permissions” or “Privacy.” Here, you can manage the app’s access to various features and data on your iPad. This includes permissions such as camera access, microphone access, location services, and more. Toggle the switches on or off according to your preferences and privacy concerns.
Continuing down the list, you may find settings related to notifications. These settings allow you to control how the app delivers notifications, including the type of alerts, sounds, and badges. You can customize the notification settings to ensure you receive timely and relevant updates, or you can disable notifications completely if preferred.
Other settings within the app may include preferences for appearance, behavior, and syncing. The available options depend on the specific app and developers’ choices. Examples of such settings may include font size, theme selection, autoplay settings for videos, and syncing options with cloud services or other devices.
Some popular apps may even have their own dedicated settings menu within the Settings app, where you can find advanced options and configurations specifically for that app. These settings may include account management, data storage settings, preferences for personalized recommendations, privacy controls, and more.
Remember that not all apps will have extensive customization options within the Settings app. Some apps may solely rely on in-app settings for customization. However, it’s always worth checking the Settings app to see if there are any app-specific settings available.
By customizing app settings within the Settings app, you can personalize your app experience and tailor each app to your preferences and needs. Take the time to explore the available options for individual apps, adjust the settings as desired, and optimize the behavior and usage of every app on your iPad.
Remember to regularly review and adjust app settings to align with changes in your preferences or requirements. App settings might evolve with updates, so revisiting these settings allows you to stay in control of your app experience.
By effectively customizing app settings within the Settings app, you can enhance your app usage, optimize app functionalities, and curate a personalized app experience that aligns with your preferences and needs. Take advantage of these settings to make the most out of each app on your iPad.
Resetting and Restoring iPad’s Settings
Resetting and restoring your iPad’s settings can be a helpful troubleshooting step or a way to clean up and start fresh. By resetting your device’s settings, you can revert customizations and configurations back to their factory defaults, ensuring a clean slate for your iPad. Here’s how you can reset and restore your iPad’s settings.
To access the reset and restore options, open the Settings app on your iPad using one of the methods mentioned earlier. Once inside the app, scroll down and locate the “General” category. Tap on it to open the General settings.
Within the General settings, scroll down again to find the “Reset” option. Tap on it to access various reset options available for your iPad.
There are several reset options you can choose from based on your needs:
- “Reset All Settings”: This option will reset all the settings on your iPad back to their original factory defaults. It will not delete any of your apps, data, or media, but it will remove any customizations or configurations you have made.
- “Erase All Content and Settings”: This option will completely erase all data and settings on your iPad, returning it to the same state as when you first purchased it. This will delete all your apps, media, and personal data, so make sure to backup everything important before proceeding.
- Other reset options: There are additional options such as resetting network settings, keyboard dictionary, home screen layout, and location, but these options are more targeted and will not erase all content and settings.
After selecting the desired reset option, you may be prompted to enter your passcode or Apple ID password to confirm the action. Once confirmed, your iPad will commence the reset process, and you may need to follow on-screen instructions to complete the reset.
It is essential to note that resetting and restoring your iPad’s settings should be done with caution, as it will remove customizations and configurations. Make sure to back up any important data before performing a reset to avoid data loss.
By resetting and restoring your iPad’s settings, you can troubleshoot software issues, improve performance, or start fresh with a clean slate. It’s an effective way to resolve certain software-related problems or to customize your iPad’s settings to your preferences from scratch.
Remember to consider alternative troubleshooting methods or seek assistance from Apple Support if resetting the settings does not resolve the issue you are facing.
By understanding how to reset and restore your iPad’s settings, you can effectively manage and customize your device. Just be mindful of the consequences and backup your important data before performing any resets to ensure a smooth and hassle-free process.