
What You Will Need
Before you begin opening your HTC Vive headset, there are a few essential items you will need to ensure a smooth and successful setup. Here is a list of things you will need:
- A desktop computer or a laptop with powerful specifications to handle virtual reality (VR) experiences.
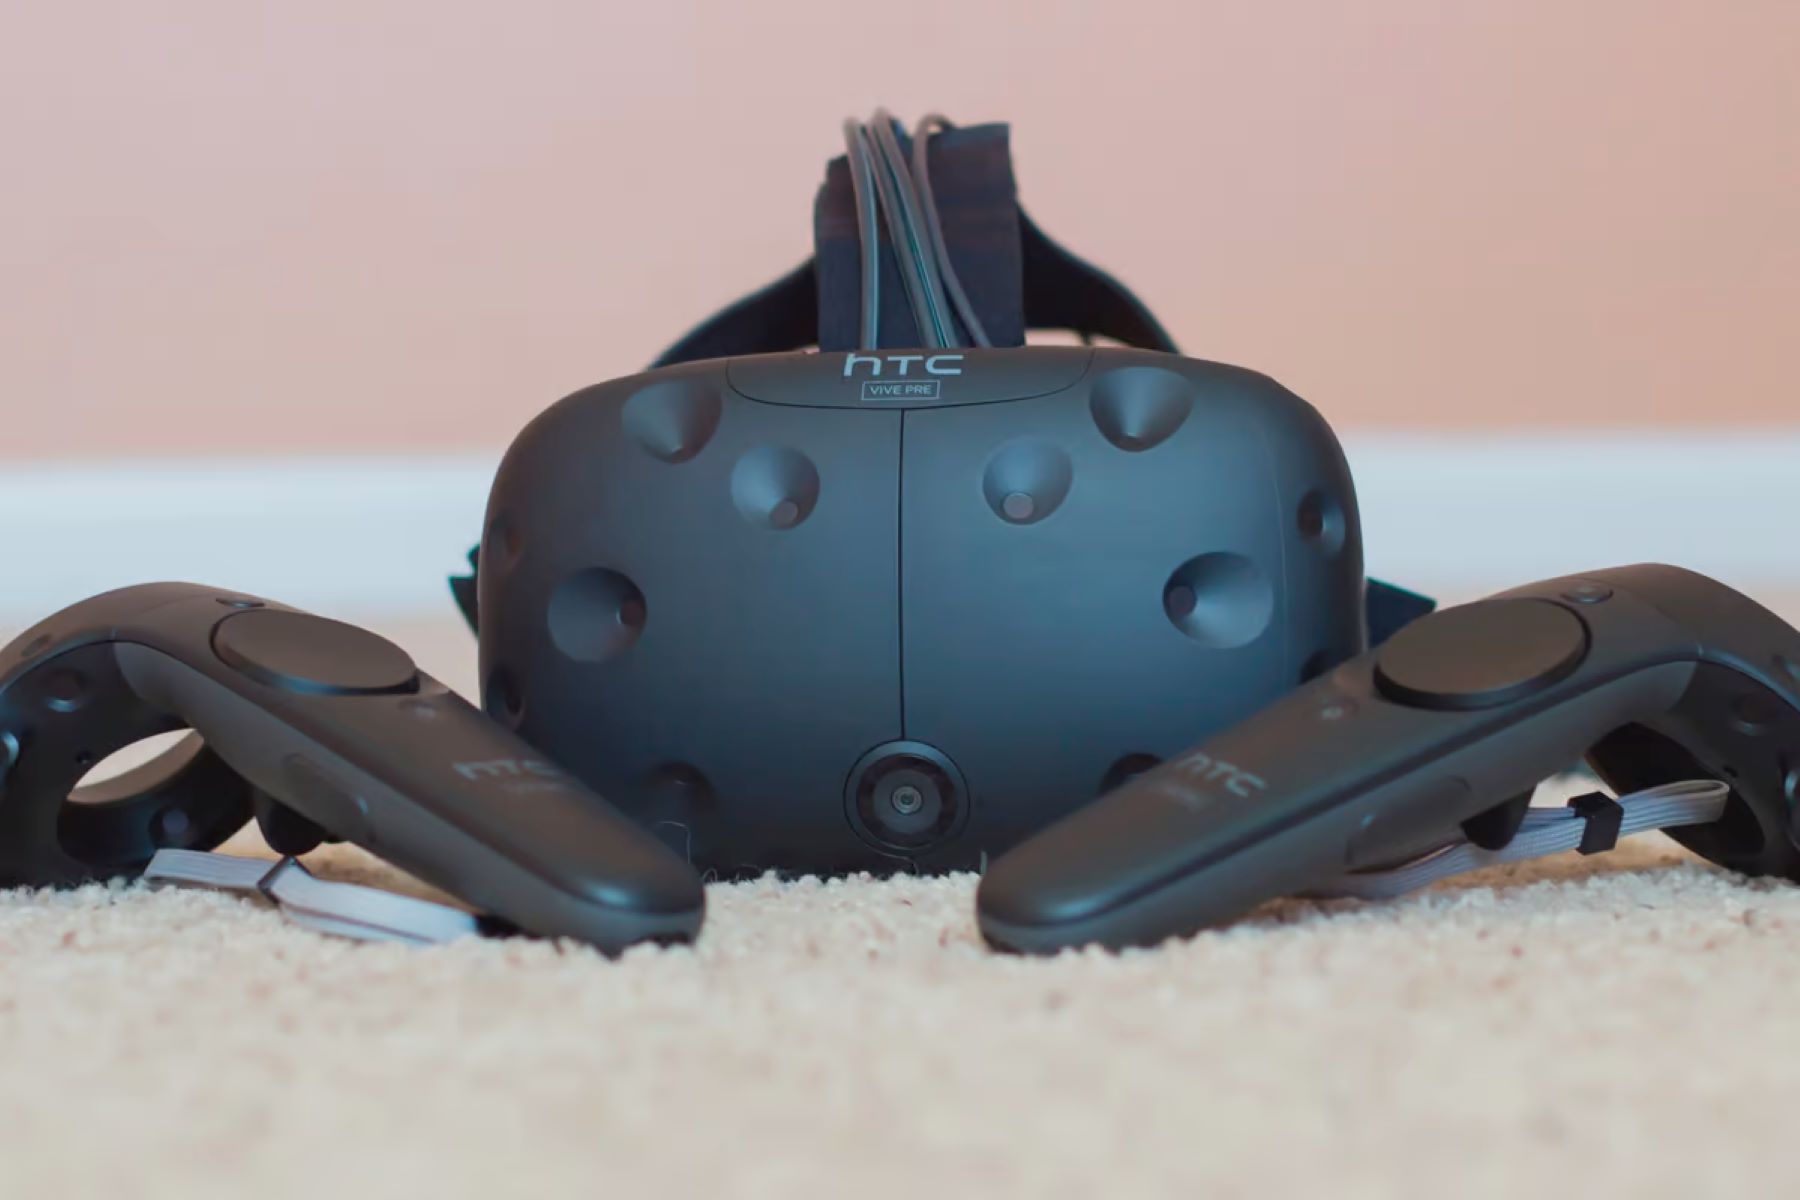
- An HTC Vive headset package, which includes the headset, two base stations, and two motion controllers.
- Adequate space in your room for room-scale VR experiences. Ideally, an area of at least 6.5 feet by 5 feet is recommended.
- An available power outlet near your computer setup for plugging in the base stations and connecting the headset.
- A stable internet connection to download and install the necessary software.
- A HDMI or DisplayPort cable to connect the headset to your computer, depending on the available ports.
- A USB cable for connecting the headset to your computer.
- Optional accessories like VR-compatible games, headphones, and a comfortable gaming chair to enhance your VR experience.
Having these items ready before starting the setup process will save you time and ensure a smooth installation of your HTC Vive headset. Take the time to gather all the necessary components and prepare your room for the best VR experience possible.
Step 1: Prepare the Area
Before you begin unboxing and setting up your HTC Vive headset, it’s crucial to prepare the area where you’ll be using the VR system. Follow these steps to ensure a suitable environment for optimal VR experiences:
- Clear the space: Start by removing any obstacles or furniture that could potentially interfere with your movements while wearing the headset. Ensure there’s enough room for you to move around freely without the risk of colliding with objects.
- Secure loose items: Store away any loose cables, fragile items, or valuable objects that could be accidentally damaged during your VR sessions. This includes securing cords and cables to prevent tripping hazards.
- Consider lighting: Make sure the room is adequately lit, but avoid direct sunlight or bright light sources that may interfere with the tracking system of the headset and controllers. Natural light can cause tracking issues, so it’s recommended to use dimmable lights or curtains.
- Set up the base stations: Find suitable spots to mount the base stations at opposite corners of the play area. Ensure they are stable and securely mounted to provide accurate tracking. Use the included mounting brackets or tripods for easy installation.
- Check for reflective surfaces: Remove or cover any mirrors, glass surfaces, or reflective objects in the play area to prevent interference with the tracking system.
Taking the time to properly prepare the area before setting up your HTC Vive will greatly enhance your VR experience. By clearing the space, securing loose items, considering lighting conditions, setting up the base stations correctly, and eliminating reflective surfaces, you’ll create an optimal environment for immersive virtual reality adventures.
Step 2: Unboxing the HTC Vive
Now that you have prepared the area, it’s time to unbox your HTC Vive headset and get ready for the exciting setup process. Follow these steps to unbox your HTC Vive:
- Find a clear, spacious surface: Choose a clean and clutter-free area where you can lay out all the components of the HTC Vive for easy access.
- Open the packaging: Carefully open the box, ensuring not to damage any of the contents. Inside, you will find the headset, two base stations, two motion controllers, adapter cables, and various accessories.
- Remove the protective coverings: Take off any protective film or stickers from the headset lenses, base stations, and controllers. This will ensure optimal clarity and tracking performance.
- Inspect the components: Take a moment to inspect each component for any visible damage or defects. If you notice any issues, contact HTC Vive support for assistance.
- Follow the instructions: Read the provided instruction manual or follow the on-screen instructions for a detailed guide on how to assemble and set up the HTC Vive headset.
Unboxing the HTC Vive is an exciting step that marks the beginning of your immersive VR journey. By handling the components with care and following the instructions, you can ensure a smooth setup process and start exploring the virtual realms in no time.
Step 3: Connecting the Base Stations
After unboxing the HTC Vive headset, the next step is to connect and set up the base stations. The base stations play a crucial role in tracking your movements and providing an immersive VR experience. Follow these steps to connect the base stations correctly:
- Choose suitable locations: Find two spots in your play area where you can mount the base stations. Make sure they are placed diagonally across from each other and are within line of sight.
- Mount the base stations: Use the included mounting brackets or tripods to securely install the base stations. Ensure they are positioned at a height between 6.5 and 7.5 feet for optimal tracking.
- Connect the power cables: Plug in the AC power adapter for each base station. Ensure the power cables are securely connected to the base stations and the power outlets.
- Sync the base stations: Press and hold the Channel button on the back of one base station until the LED indicator starts blinking. Then, press the Channel button on the second base station until it also starts blinking. The base stations will sync with each other wirelessly.
- Wait for the base stations to sync: Let the base stations sync with each other for a few seconds until the blinking light turns solid green. This indicates that the base stations are successfully connected and ready for use.
Connecting the base stations correctly is crucial for accurate tracking in virtual reality. By choosing suitable locations, securely mounting the base stations, connecting the power cables, and syncing them wirelessly, you’ll ensure a solid foundation for an immersive VR experience.
Step 4: Connecting the Headset and Controllers
With the base stations set up, it’s time to connect the HTC Vive headset and controllers to complete the initial setup process. Follow these steps to ensure a seamless connection:
- Connect the headset cables: Locate the cables that came with your HTC Vive headset. Connect the HDMI cable to the HDMI port on your computer’s graphics card and the USB cable to an available USB port.
- Connect the link box: Connect the other end of the headset cables to the link box, a small device included with the HTC Vive package. Make sure to connect the HDMI cable to the HDMI port and the USB cable to the USB port on the link box.
- Power up the link box: Connect the power cable from the link box to an available power outlet. The link box will power up, and the LED indicator should turn green or blue, indicating that it is working properly.
- Pair the controllers: Press and hold the system button on each controller until the LED starts blinking. Then, release the button and wait for the LED to turn solid blue. This indicates that the controllers are paired and ready for use.
- Charge the controllers: If your controllers are not already charged, connect them to your computer’s USB ports or use the included micro-USB cables to charge them. It’s essential to have fully charged controllers for uninterrupted VR experiences.
Connecting the HTC Vive headset and controllers is a crucial step in the setup process. By properly connecting the headset cables, linking the devices through the link box, powering up the link box, pairing the controllers, and ensuring they are charged, you’ll be ready to dive into immersive virtual reality experiences.
Step 5: Plugging in the Cables
Once you have connected the headset and controllers, the next step in setting up your HTC Vive is to plug in the necessary cables. Follow these steps to ensure all the cables are properly connected:
- Locate the link box: The link box is the small device that came with your HTC Vive package. Ensure it is easily accessible and within reach.
- Connect the power cable: Plug one end of the power cable into the link box and the other end into a nearby power outlet. Make sure the power cable is securely inserted.
- Connect the HDMI cable: Plug one end of the HDMI cable into the link box’s HDMI port and the other end into your computer’s HDMI port. Ensure a secure connection to guarantee stable video transmission.
- Connect the USB cable: Plug one end of the USB cable into the link box’s USB port and the other end into an available USB port on your computer. This will enable data transfer and power the headset.
- Check the connections: Once all the cables are plugged in, ensure they are properly connected and not loose. Verify that the connections are secure to avoid any interruptions during your VR sessions.
Plugging in the cables correctly is vital for a smooth and uninterrupted VR experience. By connecting the power cable, HDMI cable, and USB cable to the link box and your computer, and ensuring all connections are secure, you’ll be ready to fully immerse yourself in the world of virtual reality with your HTC Vive headset.
Step 6: Adjusting the Headset Straps
To ensure a comfortable and secure fit, it’s essential to properly adjust the straps of your HTC Vive headset. Follow these steps to adjust the headset straps for a personalized fit:
- Place the headset on your head: Carefully place the headset over your head, ensuring the lenses align with your eyes and the straps rest comfortably on your head.
- Adjust the top strap: Locate the top strap on the back of the headset. Loosen or tighten it using the adjustment mechanism until the headset feels snug and secure on your head.
- Adjust the side straps: Locate the side straps on the headset and adjust them accordingly. Loosen or tighten them to find the optimal balance between comfort and stability.
- Position the screen correctly: Adjust the position of the headset on your face to align the lenses with your eyes. Ensure the lenses are neither too close nor too far from your eyes for optimal focus and clarity.
- Secure the straps: Once you have found the desired fit, tighten the straps to lock them in place. Make sure the headset feels secure on your head but not uncomfortably tight.
Taking the time to adjust the headset straps properly is essential for a comfortable and immersive VR experience. By adjusting the top strap, side straps, and position of the screen, and securing the straps in place, you’ll be able to enjoy hours of virtual reality gaming without discomfort or slippage.
Step 7: Setting Up the Room-Scale VR
If you have enough space in your room, you can take advantage of room-scale VR experiences with your HTC Vive headset. Follow these steps to set up room-scale VR:
- Launch the SteamVR application: Open the SteamVR application on your computer. If you haven’t installed it yet, download and install it from the Steam website.
- Choose “Room-Scale” mode: In the SteamVR application, go to the settings and select the “Developer” tab. Check the box that says “Enable Room-Scale” to activate room-scale VR mode.
- Measure your play area: Use a measuring tape to measure the dimensions of your play area. The recommended size for room-scale VR is at least 6.5 feet by 5 feet (2 meters by 1.5 meters).
- Set up the play area boundaries: In the SteamVR application, go to the settings and click on “Room setup.” Follow the on-screen instructions to trace the boundaries of your play area using the headset and controllers. This helps create a virtual barrier to prevent you from colliding with objects or walls while in VR.
- Confirm the play area: Once you have traced the boundaries, make sure they are accurate and adjust if necessary. This will ensure that the virtual environment matches your physical play area.
- Clear the play area: Remove any obstructions or obstacles from your play area, such as furniture or fragile objects. Ensure there’s enough space for you to move around freely without any hindrances.
Setting up the room-scale VR option allows for a more immersive and interactive VR experience. By launching the SteamVR application, enabling room-scale mode, measuring and setting up the play area boundaries, and clearing the area of any obstacles, you’ll be ready to fully engage in the virtual world with your HTC Vive headset.
Step 8: Installing the Vive Software
To ensure optimal performance and access to all the features of your HTC Vive headset, it’s important to install the necessary Vive software on your computer. Follow these steps to install the Vive software:
- Visit the Vive website: Open your web browser and navigate to the official HTC Vive website.
- Download the software: Look for the software download section on the website and click on the appropriate link to download the Vive software for your operating system.
- Run the installer: Locate the downloaded software file and run the installer. Follow the on-screen instructions to complete the installation process.
- Create a Viveport account (optional): If you choose to create a Viveport account, you’ll gain access to additional content, including games and experiences. Follow the prompts to create an account, or skip this step if you prefer.
- Connect your headset: Once the installation is complete, connect your HTC Vive headset to your computer using the included USB and HDMI cables.
- Launch the Vive software: Open the Vive software on your computer. You may be prompted to update the firmware of your headset and controllers. Follow the prompts to perform any necessary updates.
Installing the Vive software is a crucial step in maximizing the performance and functionality of your HTC Vive headset. By visiting the Vive website, downloading and running the installer, creating a Viveport account (optional), connecting your headset, and launching the Vive software, you’ll be ready to explore a wide range of VR experiences and content.
Step 9: Pairing the Controllers
To fully utilize the capabilities of your HTC Vive headset, it’s important to pair the controllers with the system. Follow these steps to successfully pair the controllers:
- Power on your controllers: Press and hold the system button on each controller to power them on. The LED lights on the controllers should start blinking.
- Prepare for pairing: Make sure your controllers are close to the base stations and within the headset’s field of view.
- Access the SteamVR menu: Put on your VR headset and press the system button on one of the controllers to bring up the SteamVR menu.
- Select the controller pairing option: Using the VR headset’s trackpad or your controller, select the “Pair Controller” option from the SteamVR menu.
- Wait for pairing prompt: The VR headset will prompt you to point the controller at the base station for pairing. Follow the on-screen instructions and point each controller toward the base stations.
- Wait for pairing confirmation: After pointing each controller toward the base stations, wait for the VR headset to confirm successful pairing. The LED lights on the controllers will turn solid green once they are paired.
Pairing the controllers with your HTC Vive headset is an essential step to enable seamless interaction in virtual reality. By powering on the controllers, accessing the SteamVR menu, selecting the pairing option, pointing the controllers toward the base stations, and waiting for the pairing confirmation, you’ll be able to fully immerse yourself in the virtual world and engage with your VR experiences with ease.
Step 10: Room Calibration
To ensure accurate tracking and an optimal VR experience with your HTC Vive headset, it’s essential to perform room calibration. Follow these steps to calibrate your room for the best VR performance:
- Ensure a clear play area: Make sure the play area is clear of any obstacles or objects that could interfere with the tracking system or pose a safety risk.
- Launch SteamVR: Open the SteamVR application on your computer and ensure your HTC Vive headset and controllers are turned on and connected.
- Access Room Setup: In the SteamVR application, click on the dropdown menu and select “Room Setup.” This will guide you through the calibration process.
- Select the appropriate room type: Choose between “Room-Scale” or “Standing Only” based on the space available and your desired VR experience.
- Define your play area: Using the HTC Vive controllers, trace the boundaries of your play area by pointing at the floor to mark the corners.
- Confirm the play area: Review the defined boundaries and adjust if necessary. Ensure the virtual representation matches the physical space accurately.
- Set up the floor level: Follow the on-screen prompts to set the floor level by placing one of the HTC Vive controllers on the ground and pressing the appropriate button on the other controller.
- Perform final checks: Once the calibration is complete, double-check that the play area boundaries are accurate and that the floor level is properly set.
Room calibration is vital to ensure accurate tracking and a seamless VR experience with your HTC Vive headset. By launching SteamVR, accessing Room Setup, defining the play area, setting the floor level, and performing final checks, you’ll optimize the virtual environment for immersive and precision-based gaming and interactions.
Step 11: Putting on the Headset
Now that you have completed the setup process for your HTC Vive headset, it’s time to put it on and dive into the immersive world of virtual reality. Follow these steps to put on your HTC Vive headset correctly:
- Ensure the headset is powered on: Make sure the headset is turned on and connected to your computer via the cables.
- Adjust the straps: Loosen the straps of the headset so that it can easily fit over your head.
- Position the headset: Hold the headset by the straps and gently place it over your head, ensuring that it is centered and the lenses align with your eyes.
- Secure the straps: Adjust the top strap first, ensuring that it rests comfortably on the top of your head. Then, adjust the side straps so that the headset fits snugly but not too tightly.
- Position the lenses: Move the headset slightly up or down to align the lenses with your eyes. Adjust the distance between the lenses using the IPD (Interpupillary Distance) knob for the best visual clarity.
- Secure the headset: Once you have positioned the headset correctly, tighten the straps to secure it in place. The headset should feel stable on your head without causing any discomfort.
- Adjust the headset position if needed: If you notice any blurriness or discomfort during use, you can readjust the position or tighten/loosen the straps to optimize comfort and clarity.
Putting on the HTC Vive headset correctly is crucial for a comfortable and immersive VR experience. By adjusting the straps, positioning the headset properly, securing it in place, and fine-tuning the fit, you’ll be ready to explore virtual worlds with lifelike realism and precision.
Step 12: Enjoying the HTC Vive!
Congratulations! You have successfully set up your HTC Vive headset and are now ready to embark on exciting and immersive virtual reality adventures. Follow these final steps to make the most of your HTC Vive experience:
- Launch your VR content: Open the SteamVR application on your computer, and from there, access the Steam Store or your library to explore a wide range of VR games, experiences, and applications.
- Choose your VR experience: Browse through the available VR content and select the game or experience you want to try. Take note of user reviews and ratings to find the most immersive and enjoyable experiences.
- Put on the headset: Slide the headset over your head, ensuring a comfortable fit. Adjust the straps and position the lenses for optimal comfort and visual clarity.
- Grab your controllers: Pick up your HTC Vive controllers and familiarize yourself with the buttons and controls. They will be your key to interacting within virtual environments.
- Enter the virtual world: Once you’re in the VR environment, use your controllers to navigate, interact, and explore. Immerse yourself in stunning visuals, realistic sounds, and engaging gameplay.
- Experiment and customize: Explore the settings and customization options within each VR experience. Adjust options like graphics quality, movement style, and comfort settings to tailor the experience to your preferences.
- Take breaks when needed: VR can be an intense and immersive experience. Remember to take breaks and rest your eyes, especially if you start to feel discomfort or fatigue.
- Share the experience: If you have friends or family members who are eager to try VR, invite them to join and witness the incredible world of virtual reality.
With your HTC Vive headset set up and ready to go, it’s time to let your imagination run wild in captivating virtual environments. Enjoy the immersive gameplay, interactive adventures, and unforgettable experiences that the HTC Vive has to offer. Embrace the future of entertainment and prepare to be amazed!