
Choosing a Minecraft Mod or Texture Pack
Minecraft is a game that allows for endless creativity and customization, thanks to the availability of mods and texture packs. Mods can add new features, gameplay mechanics, and even entirely new dimensions to the game, while texture packs can enhance the visuals and create a whole new look and feel. Choosing the right mod or texture pack can greatly enhance your Minecraft videos and make them stand out from the crowd. Here are a few factors to consider when making your selection:
- Theme: Think about the theme or concept you want to portray in your video. Are you going for a medieval setting? Or perhaps a futuristic sci-fi world? Consider the mod or texture pack that aligns with your desired theme.
- Compatibility: Check if the mod or texture pack is compatible with your version of Minecraft. Some mods may require specific versions or even other mods to work correctly, so make sure to do thorough research beforehand.
- Popularity and Reviews: Look for mods or texture packs that have positive reviews and a large user base. This indicates that the content is of high quality and has been thoroughly tested and enjoyed by others.
- Updates and Support: Check if the mod or texture pack is regularly updated and supported by the creator. Updates ensure compatibility with the latest version of Minecraft and often introduce new features and bug fixes.
- Performance Impact: Consider the performance impact of the mod or texture pack. Some mods may require more system resources, which can lead to lag and reduced frame rates. This can negatively affect the quality of your gameplay and video recording.
Once you have considered these factors, you can browse popular modding websites and Minecraft forums to find the perfect mod or texture pack for your video. Experiment with different options, and don’t be afraid to mix and match to create a unique look and feel. Remember, the mod or texture pack you choose should align with your vision for the video and enhance the overall viewing experience for your audience.
Setting Up Your Recording Software
Recording your Minecraft gameplay is essential for creating captivating and engaging videos. To do this, you need reliable recording software that can capture your screen seamlessly. Here are some steps to help you set up your recording software:
- Selecting the right software: There are several recording software options available, both free and paid. Some popular choices include OBS Studio, Bandicam, and FRAPS. Evaluate the features, ease of use, and system requirements of each software to choose the one that suits your needs.
- Adjusting recording settings: Once you have installed your chosen software, open the settings menu and configure the recording options. Set the desired frame rate and resolution for your videos. It is recommended to record in HD or higher resolutions for better video quality.
- Choosing the recording area: Minecraft may be played in windowed mode or full-screen. Decide whether you want to record your entire screen or only a specific portion, such as the Minecraft window. This choice allows you to focus on capturing the most relevant content for your video.
- Configuring audio settings: Minecraft videos often include commentary or background music. Make sure to set up your recording software to capture the desired audio sources. Consider using a separate microphone for better audio quality and adjust the volume levels accordingly.
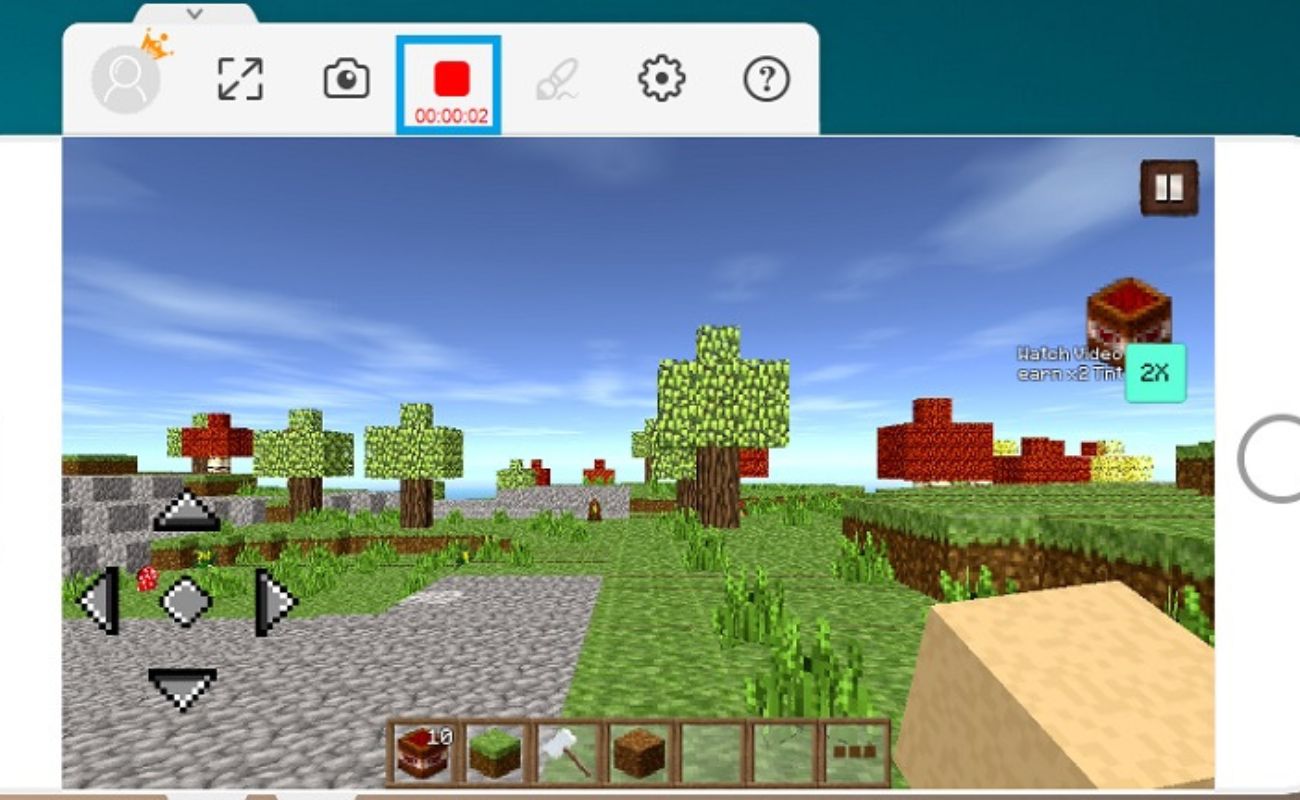
- Hotkeys and recording controls: Familiarize yourself with the hotkeys or shortcuts provided by the recording software. These allow you to start, pause, and stop recording easily. Knowing these shortcuts will save you time and ensure smooth recording sessions.
- Testing and optimizing: Before you start capturing your gameplay, do a test recording to ensure everything is functioning correctly. Monitor the frame rate, audio levels, and overall performance of your recording software. Adjust settings if needed to optimize the video quality while maintaining smooth gameplay.
By following these steps, you can set up your recording software efficiently and ensure that you capture high-quality footage of your Minecraft gameplay. Remember to have fun and experiment with different settings to find the configuration that works best for you.
Configuring Your Audio Settings
High-quality audio is crucial for a successful Minecraft video. It enhances the viewer’s experience and adds depth to your gameplay commentary or background music. To ensure optimal audio settings, follow these steps:
- Choose the right microphone: Invest in a good quality microphone to capture clear and crisp audio. USB microphones are a popular option for beginners, while XLR microphones provide professional-grade sound. Consider factors such as sound quality, durability, and compatibility with your recording setup.
- Position your microphone: Proper microphone placement is essential for recording great audio. Position the microphone close to your mouth, ensuring it is facing you directly. Use a microphone stand or arm to achieve the optimal distance for clear and balanced sound capture.
- Adjust microphone gain: Microphone gain controls the sensitivity of your microphone. If your recorded audio is too loud and distorted, reduce the gain. If it’s too quiet, increase the gain. Test your microphone levels before recording to find the right balance that avoids distortion and captures your voice clearly.
- Use a pop filter: A pop filter is a screen that reduces plosive sounds, such as “p” and “b” sounds, from distorting your audio. It eliminates unwanted noise, ensuring that your voice sounds smooth and professional. Position the pop filter between your mouth and the microphone for the best results.
- Consider background noise: Minecraft videos often have background music or sound effects. To minimize background noise, record in a quiet environment and use noise-cancelling techniques like foam panels or a noise gate plugin. Editing software can also help remove unwanted noise during post-production.
- Monitor audio levels: Keep an eye on your audio levels during recording and adjust as needed. Aim to have your voice peak around -12 dB to -6 dB, ensuring a healthy audio signal without clipping or distortion. Use headphones to monitor your audio while recording to catch any potential issues in real-time.
It’s important to spend time configuring your audio settings before recording your Minecraft videos. Clear and high-quality audio can significantly enhance the overall production value of your content. Remember to regularly check and update your audio setup as needed to achieve the best results.
Planning Your Minecraft Video
Before jumping into recording your Minecraft video, taking the time to plan can greatly improve its quality and coherence. A well-thought-out plan helps you stay organized and ensures that your video has a clear purpose and storyline. Here are some steps to help you with the planning process:
- Define the objective: Determine the goal of your video. Are you creating a tutorial, showcasing a specific build, or creating a narrative adventure? Having a clear objective will guide your content and help you structure your video.
- Identify the target audience: Consider who your video is aimed at. Are you targeting beginners, advanced players, or a general Minecraft audience? Understanding your audience allows you to tailor your content to their needs and interests.
- Create a script or outline: Write a script or an outline that outlines the key elements of your video. Map out the main points, scenes, and dialogue you want to include. This will serve as a roadmap during recording and editing, ensuring a coherent flow of content.
- Storyboard your video: For visual-heavy videos, creating a storyboard can be helpful. Sketch out the specific shots or scenes you want to include. This visual representation can aid your filming process and ensure that you capture the required footage.
- Consider video length: Determine the optimal duration for your video. This will depend on the content and the attention span of your target audience. Aim for a length that is engaging and informative without being too long or too short.
- Plan editing techniques: Consider incorporating various editing techniques to enhance your video. This can include adding transitions, text overlays, music, and sound effects. Planning these techniques in advance allows for a smoother editing process.
- Include call-to-action: If you want to engage your audience beyond the video, include a call-to-action. This can be subscribing to your channel, joining your Minecraft server, or visiting your website. Strategically place these calls-to-action to encourage audience engagement.
By planning your Minecraft video, you will have a clear direction and purpose, resulting in a more engaging and cohesive final product. Stay flexible during the recording process, but refer back to your plan to ensure you capture all the necessary content. Remember, thorough planning leads to better execution and a more satisfying viewer experience.
Building a Minecraft Set or World
Creating an immersive and visually captivating Minecraft video requires a carefully crafted set or world. Building an appropriate environment enhances the storytelling and engages your audience. Here are some considerations when building your Minecraft set or world:
- Choose a theme: Select a theme or concept that aligns with your video’s objective and storyline. Whether it’s a medieval village, a futuristic city, or a fantasy realm, having a consistent theme helps set the mood and adds depth to your video.
- Plan the layout: Sketch out a rough blueprint or outline of your set or world. Consider the various structures, landscapes, and points of interest you want to include. This planning phase helps you stay organized and create a cohesive and well-structured environment.
- Gather the necessary resources: Collect the materials and blocks you need to build your set or world. If you’re using mods or texture packs, ensure that you have the required resources to create the desired aesthetic. Consider using tools like WorldEdit to speed up the building process.
- Add details and landmarks: A well-designed set or world is rich in details. Add elements such as trees, plants, furniture, and decorative objects to create a realistic and visually appealing environment. Include landmarks or points of interest that serve as key locations in your video.
- Consider lighting and ambiance: Lighting plays a crucial role in setting the mood of your video. Experiment with different light sources and techniques to create the desired ambiance. Utilize tools like torches, glowstone, and lanterns to add depth and atmosphere to your set or world.
- Experiment with redstone contraptions: Redstone contraptions can add interactivity and functionality to your set or world. Incorporate mechanisms like doors, traps, elevators, and hidden pathways to enhance the gameplay experience and surprise your audience.
- Test and refine: Prior to recording, explore your set or world to ensure everything is functioning as intended. Test for any potential issues or areas that may need improvement. Make adjustments, fine-tune details, and iterate until you are satisfied with the final result.
Building a Minecraft set or world is an exciting and creative process. Give yourself time to explore different design ideas and experiment with various techniques. Remember, attention to detail and thoughtful planning contribute to a visually stunning and immersive video experience.
Recording Your Gameplay
Once you have prepared your Minecraft set or world, it’s time to start recording your gameplay. Recording your gameplay allows you to capture the action and showcase your gameplay skills. Here are some tips to help you with the recording process:
- Set up your recording software: Launch your chosen recording software and configure the settings as outlined in the earlier section. Ensure that your recording area is set to capture the Minecraft window or the entire screen, depending on your preference.
- Prepare your narration or commentary: If you plan to include commentary or narration in your video, consider preparing a script or notes beforehand. This will help you stay focused and deliver your thoughts clearly while playing.
- Optimize performance: Close any unnecessary programs or background applications that may slow down your computer or impact performance during recording. This will help maintain a smooth gameplay experience without interruptions or lag.
- Start recording: Begin recording before launching Minecraft. This ensures that you capture the entire gaming session, from launching the game to closing it. Double-check that your recording software is capturing the Minecraft window or screen correctly.
- Engage with your audience: Interact with your viewers throughout your gameplay. Respond to comments, answer questions, and provide additional insights in real-time. This engagement helps build a connection with your audience and makes your video more interactive.
- Experiment with different angles and shots: Vary your camera angles and shots to add visual interest to your video. Use different perspectives, such as first-person and third-person views, to provide a dynamic and engaging gameplay experience.
- Record multiple takes if necessary: If you make a mistake or encounter an issue while recording, don’t hesitate to start over or record additional takes. This ensures that you capture the best possible footage for your video.
- Take breaks and rest: Recording Minecraft gameplay can be time-consuming and physically demanding. Take regular breaks to rest, hydrate, and stretch. This will help you maintain focus and energy throughout your recording session.
Remember, recording your gameplay requires practice and patience. Don’t be discouraged if your first attempts are not perfect. As you gain experience, you will develop your own recording style and techniques. Enjoy the process, have fun playing Minecraft, and let your passion for the game shine through in your recorded gameplay.
Editing Your Minecraft Footage
Editing is a critical step in the process of creating a polished and professional Minecraft video. It allows you to refine your footage, add visual effects, incorporate music and sound effects, and create a cohesive and engaging final product. Here are some steps to help you edit your Minecraft footage:
- Import your footage: Transfer your recorded gameplay footage from your recording software to your video editing software. Organize your clips into folders or bins to easily locate and access the footage you need.
- Trim and arrange your clips: Review your footage and cut out any unnecessary or repetitive sections. Arrange your clips in the desired sequence to create a logical and engaging flow in your video.
- Add transitions and effects: Enhance the visual appeal of your video by incorporating transitions between scenes and shots. Experiment with various transition effects like fades, wipes, and dissolves to make your video transitions smooth and seamless.
- Adjust color and lighting: Use color correction and grading tools to enhance the visuals of your footage. Adjust brightness, contrast, saturation, and other parameters to achieve the desired look and mood for your video.
- Include text and on-screen graphics: Add text overlays, titles, and captions to provide context and information to your viewers. Use on-screen graphics or annotations to highlight important elements or explain gameplay mechanics.
- Sync audio and adjust levels: Ensure that your audio is properly synced with your footage. Adjust the audio levels to ensure a balanced mix between the in-game sound, your commentary, and any background music or sound effects.
- Integrate music and sound effects: Choose suitable background music and sound effects to enhance the atmosphere and emotions in your video. Consider the mood and pacing of your video when selecting the right audio elements.
- Apply visual effects and filters: Experiment with visual effects and filters to add creative elements to your video. This can include blurs, vignettes, motion effects, and more. Use these effects sparingly to enhance your footage without overwhelming it.
- Review and fine-tune: Take the time to review your edited video and make adjustments as necessary. Pay attention to pacing, transitions, audio levels, and overall coherence. Fine-tune any areas that need improvement to ensure a high-quality final video.
Editing your Minecraft footage allows you to transform raw gameplay clips into a captivating and polished video. Embrace your creativity and experiment with different editing techniques to make your video unique and engaging. Remember, the editing process is often iterative, and with practice, you will continue to improve your skills and create exceptional Minecraft videos.
Adding Effects and Annotations
Adding effects and annotations to your Minecraft video can enhance the visual appeal, provide additional context, and engage your audience. These elements help create a more immersive and interactive viewing experience. Here are some ways to add effects and annotations to your video:
- Text and Titles: Use text overlays and titles to introduce sections, provide captions, or highlight important information. Choose fonts and styles that align with the theme and tone of your video. Experiment with animations and transitions to make your text elements more visually appealing.
- Annotations: Annotations are graphical elements that can be added to your video, such as arrows, circles, or text callouts. Use annotations to draw attention to specific areas or objects within your Minecraft gameplay. This can help guide your viewers’ attention and emphasize important details.
- Visual Filters and Effects: Apply visual filters and effects to add style and atmosphere to your video. Filters like sepia tone, black and white, or vignettes can create a unique aesthetic that suits your video’s theme. Experiment with motion effects, blurs, or color grading to further enhance the visuals.
- Green Screen: If you’re using a green screen during recording, take advantage of it during the editing process. Replace the green background with a different image or video to transport your Minecraft character into a different setting or create a custom backdrop.
- Transitions: Use smooth and well-timed transitions between scenes to create a seamless flow. Common transitions include fades, crossfades, or wipes. Experiment with different transitions to find the ones that best fit the tone and pace of your Minecraft video.
- Picture-in-Picture: Incorporate a picture-in-picture effect to show multiple perspectives simultaneously. This can be particularly useful when you want to display both your gameplay and your facecam or showcase different angles of your Minecraft world simultaneously.
- Sound Effects: Consider adding sound effects to enhance the audio experience. Use appropriate sound effects for actions such as footsteps, explosions, or special abilities within the game. These effects help immerse your viewers into the Minecraft world and make the video more engaging.
- Music: Choose background music that complements the mood and atmosphere of your video. Use different tracks to heighten tension, create excitement, or evoke specific emotions. Ensure that the music does not overpower other audio elements but rather enhances the overall audio experience.
Adding effects and annotations to your Minecraft video allows you to elevate the overall production value and engage your audience on a visual and auditory level. Experiment with different effects, annotations, and audio elements to create a unique and captivating viewing experience.
Uploading and Sharing Your Minecraft Video
After investing time and effort into creating your Minecraft video, it’s essential to share it with the world. Uploading and effectively promoting your video increases its visibility and helps you reach a wider audience. Here are some steps to upload and share your Minecraft video:
- Choose a video hosting platform: Select a video hosting platform that aligns with your goals and target audience. YouTube is the most popular option, but you may also consider alternatives like Vimeo or Dailymotion.
- Create an appealing title and thumbnail: Craft a descriptive and catchy title for your video to attract viewers. Design an eye-catching thumbnail that accurately represents the content and entices people to click on your video.
- Write a compelling description: Write a detailed and engaging description that provides additional information about your video. Include relevant keywords and hashtags to improve searchability. This description acts as a summary and helps viewers understand the video’s content and purpose.
- Tag and categorize your video: Use relevant tags and categories to help your video appear in searches and recommendations. Choose tags that are specific to your video’s content and include broader tags related to Minecraft.
- Add end screens and cards: Utilize the end screen and card features provided by the hosting platform. End screens allow you to promote other videos or encourage viewers to subscribe, while cards can be used to link to related content, merchandise, or external websites.
- Share on social media: Leverage social media platforms to share your Minecraft video. Post links to your video on your social media profiles and relevant Minecraft communities. Encourage your followers to share and engage with your video to expand its reach.
- Engage with your audience: Respond to comments on your video and engage with your viewers. This helps build a community around your content and encourages viewers to stay connected and loyal to your channel.
- Collaborate with others: Seek out opportunities to collaborate with other Minecraft content creators. Collaborations introduce your video to a new audience and allow you to cross-promote each other’s content.
- Optimize for search engines: Optimize your video’s metadata for search engines. Research relevant keywords and incorporate them into your title, description, and tags. This increases the likelihood of your video appearing in search results and recommended video sections.
- Promote on your website or blog: If you have a personal website or blog, embed your Minecraft video on relevant pages. This allows your existing audience to easily access and share your video.
Remember that uploading and sharing your Minecraft video is just the beginning. Consistency and quality content creation are key to growing your audience and establishing your presence within the Minecraft community. Engage with your viewers, respond to feedback, and continue to improve and refine your videos to keep your audience entertained and coming back for more.
Promoting Your Minecraft Video
Promoting your Minecraft video is crucial to ensure that it reaches a wider audience and receives the recognition it deserves. While uploading and sharing your video is a great start, implementing effective promotion strategies can take it to the next level. Here are some ways to promote your Minecraft video:
- Utilize social media platforms: Leverage popular social media platforms like Twitter, Facebook, Instagram, and TikTok to promote your video. Share teasers, clips, or behind-the-scenes content to generate excitement and drive traffic to your video.
- Engage with Minecraft communities: Join Minecraft forums, groups, and subreddits where you can share your video with like-minded individuals. Engage in discussions, provide valuable feedback, and build relationships with fellow Minecraft enthusiasts to expand your network.
- Collaborate with other Minecraft content creators: Collaborating with other Minecraft YouTubers or streamers can expose your video to a larger audience. Create joint projects, appear as a guest in their videos, or participate in Minecraft multiplayer sessions to cross-promote each other’s content.
- Reach out to influencers: Identify influential Minecraft content creators and reach out to them. Offer to collaborate or ask for a shoutout in their videos or social media posts. Their endorsement can significantly boost the visibility of your video.
- Optimize your video for search engines: Conduct keyword research and optimize your video’s metadata, including title, description, and tags. This helps search engines understand the content and improve your video’s search rankings, increasing its discoverability.
- Create engaging thumbnails and captivating titles: Invest time in designing visually appealing and attention-grabbing thumbnails. Craft compelling titles that pique viewers’ curiosity and make them want to click on your video.
- Encourage viewer interaction: Prompt viewers to like, comment, subscribe, and share your video at the end of each video and in your video description. Engage with your audience by responding to comments, asking questions, and encouraging discussions to foster a sense of community.
- Consider paid advertising: If your budget allows, explore paid advertising options such as Google Ads or social media ads to increase the reach of your Minecraft video. Target specific demographics and interests to maximize the effectiveness of your ad campaigns.
- Share your video on relevant platforms: Look for platforms and communities specifically dedicated to Minecraft content, such as Minecraft forums, Discord servers, and Minecraft-specific subreddits. Be an active participant within these communities and share your video when appropriate, ensuring it aligns with the platform’s guidelines.
- Regularly engage with your audience: Building a dedicated audience requires consistent engagement. Respond to comments, ask for feedback, and provide exclusive content or sneak peeks to keep your viewers involved and eager to watch your future videos.
Promoting your Minecraft video requires a proactive and targeted approach. By implementing these strategies and consistently engaging with your audience, you can maximize the visibility and reach of your video, ultimately growing your Minecraft channel and connecting with a larger community of Minecraft enthusiasts.