
Reasons to Make Calls on a Tablet
Tablets have become popular devices for many reasons. They offer a bigger screen compared to smartphones, making them more suitable for multimedia consumption and productivity tasks. But did you know that tablets can also be used for making calls? Here are a few reasons why you might consider using your tablet for phone calls:
- Convenience: If you have a tablet with cellular connectivity, you can make calls from anywhere, just like with a smartphone. This means you don’t have to carry multiple devices, as your tablet can serve as both a communication and entertainment device.
- Bigger Display: Tablet screens are larger than smartphone screens, offering a better calling experience. You can see the caller’s information, such as their name and picture, more clearly, making it easier to identify and interact with your contacts.
- Multi-tasking: Tablets excel in multi-tasking capabilities, allowing you to make calls while simultaneously using other applications. You can browse the internet, read emails, or even take notes during a call, maximizing your productivity.
- Better Audio: Tablets generally have superior speakers compared to smartphones, providing better call quality and a more immersive audio experience. This is especially beneficial in noisy environments where you need clear and crisp communication.
- Cost Saving: If you have a cellular-enabled tablet, you can save money by using a data plan instead of a separate phone plan. This is particularly useful if you already have a tablet and don’t want to invest in an additional device.
These are just a few reasons why making calls on a tablet can be advantageous. Whether you’re using it for personal or professional purposes, the convenience, bigger display, multitasking capabilities, better audio, and potential cost savings make it a viable option for communication.
Checking for a SIM Card
Before you can start making calls on your tablet, you need to ensure that it has a SIM card slot and a compatible SIM card inserted. Here’s how you can check for a SIM card:
Step 1: Examine the tablet: Look for a small tray or slot on the side or back of your tablet. This is where the SIM card is typically inserted. If you don’t see a tray or slot, it’s likely that your tablet doesn’t support cellular connectivity and cannot be used for making calls.
Step 2: Open the SIM tray: If you have identified the SIM card slot, use a SIM card removal tool or a paperclip to gently press the eject button and open the SIM tray.
Step 3: Check for a SIM card: Once the SIM tray is open, carefully examine it to see if there is already a SIM card inserted. If there is no SIM card, you will need to acquire one from your cellular service provider.
Step 4: Insert the SIM card: If your tablet doesn’t have a SIM card or the current one is not compatible, insert the new SIM card into the tray. Align the notched corner of the SIM card with the corresponding notch in the tray, then gently push the tray back into the tablet until it clicks into place.
Step 5: Check for SIM card recognition: After inserting the SIM card, power on your tablet and go to the settings menu. Look for the “SIM card” or “Cellular” section to check if the tablet recognizes the SIM card. If it does, you’re ready to proceed with making calls.
It’s worth noting that not all tablets have SIM card slots, especially those without cellular capabilities. In such cases, you may need to rely on alternative methods like Wi-Fi calling or Voice over IP (VoIP) apps to make calls. However, if your tablet supports cellular connectivity and has a SIM card slot, checking for a SIM card is the first step towards using it as a fully functional phone.
Enabling Wi-Fi Calling
If your tablet doesn’t have a SIM card slot or if you prefer not to use cellular connectivity, you can still make calls using Wi-Fi calling. Wi-Fi calling allows you to make voice calls over a Wi-Fi network, saving you from relying on cellular reception. Here’s how you can enable Wi-Fi calling on your tablet:
Step 1: Check for compatibility: Not all tablets support Wi-Fi calling, so the first thing you need to do is check if your tablet has this feature. You can typically find this information in the device’s settings or user manual. If Wi-Fi calling is supported, proceed to the next step.
Step 2: Connect to a Wi-Fi network: In order to use Wi-Fi calling, you need to connect your tablet to a Wi-Fi network. Ensure that you are within range of a stable Wi-Fi connection and go to the Wi-Fi settings on your tablet. Select the desired network and enter the password if prompted.
Step 3: Enable Wi-Fi calling: Once connected to a Wi-Fi network, go to the settings menu on your tablet and look for the “Phone” or “Calls” section. Within this section, you should find the option to enable Wi-Fi calling. Toggle the switch to turn it on.
Step 4: Configure Wi-Fi calling settings: Depending on your tablet’s operating system, you may have additional settings related to Wi-Fi calling. You can usually customize preferences such as call quality, preferred network, or even set up emergency addresses for accurate emergency calling. Explore the settings to personalize your Wi-Fi calling experience.
Step 5: Make a Wi-Fi call: With Wi-Fi calling enabled, you can now make calls over a Wi-Fi network. Open your tablet’s dialer or phone app, enter the desired number, and initiate the call. The call will be made using the internet connection provided by the Wi-Fi network you are connected to.
It’s important to note that both you and the person you are calling must have Wi-Fi calling enabled for the feature to work. Additionally, some cellular service providers may require you to activate Wi-Fi calling on your account before you can use it. If you encounter any issues or have questions about Wi-Fi calling, it’s best to reach out to your service provider for assistance.
Enabling Wi-Fi calling on your tablet can be a convenient option, especially in areas with weak cellular reception or if you prefer to use a Wi-Fi network for your calls. It allows you to stay connected and make voice calls even without a SIM card. Take advantage of this feature and enjoy the flexibility and convenience it offers.
Using Voice over IP Apps
If you want to make calls on your tablet without relying on cellular connectivity or Wi-Fi calling, Voice over IP (VoIP) apps are a great option. VoIP apps allow you to make calls using an internet connection, whether it’s Wi-Fi or mobile data. Here’s how you can use VoIP apps for making calls on your tablet:
Step 1: Choose a VoIP app: There are several popular VoIP apps available for both Android and iOS devices. Some of the most well-known options include Skype, WhatsApp, Google Voice, FaceTime (for iOS users), and Facebook Messenger. Research and choose the app that best suits your needs and preferences.
Step 2: Download and install the app: Visit your tablet’s app store (such as the Google Play Store or Apple App Store) and search for the chosen VoIP app. Download and install it on your tablet following the instructions provided. Make sure to grant the app necessary permissions for microphone access and any other requirements.
Step 3: Sign in or create an account: Launch the installed VoIP app and sign in if you already have an account. If not, follow the app’s prompts to create a new account. This usually requires providing your phone number or email address and creating a password.
Step 4: Add contacts: Once you’re signed in, you may need to add your contacts to the VoIP app. Depending on the app, this can be done by syncing your contacts from your device’s address book or manually adding them one by one.
Step 5: Make a call: With your contacts added, you can now make calls using the VoIP app. Open the app, find the contact you want to call, and tap the call button or initiate the call through the app’s interface. The call will be made using the internet connection provided by your Wi-Fi or mobile data.
VoIP apps often offer additional features like video calling, group calls, messaging, and even file sharing. Explore the app’s settings and functionalities to make the most of your calling experience.
It’s important to note that both you and the person you are calling must have the same VoIP app installed and be connected to the internet for the calls to go through. Additionally, some VoIP apps offer paid calling minutes to landline or mobile numbers, so be aware of any charges or subscriptions associated with the app.
Using VoIP apps on your tablet allows you to make calls using the internet, making it a cost-effective and versatile option for communication. Enjoy the convenience and flexibility that VoIP apps offer, and stay connected with your contacts wherever you are.
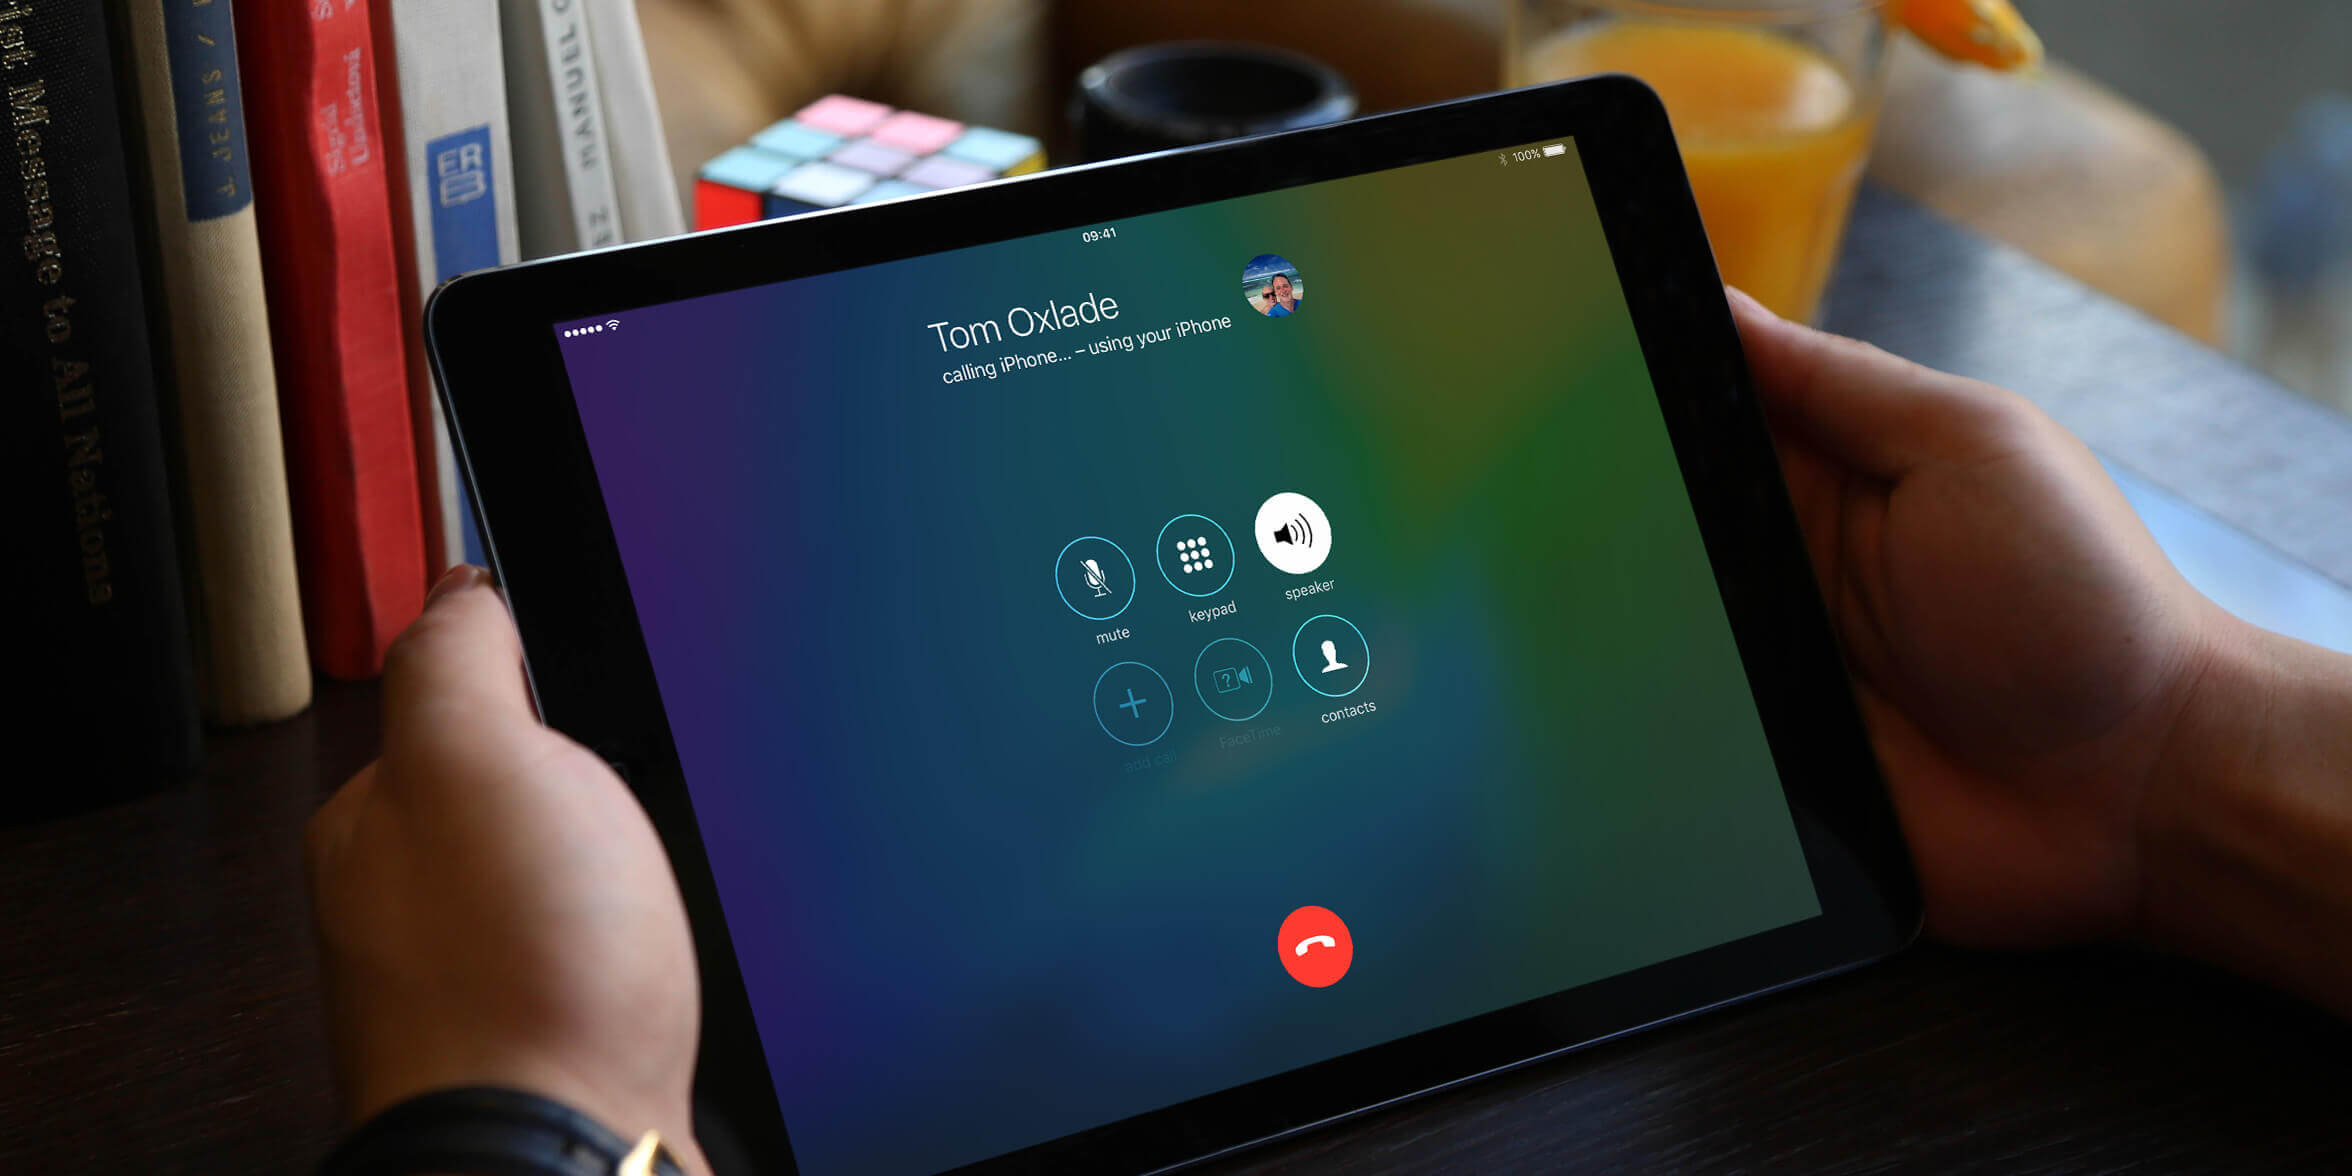
How to Make an Audio Call
Whether you’re using cellular connectivity, Wi-Fi calling, or a VoIP app, making an audio call on your tablet is a straightforward process. Here’s a step-by-step guide on how to make an audio call:
Step 1: Open the calling app: Launch the phone or calling app on your tablet. This may be the default dialer app, the Wi-Fi calling app, or the VoIP app you have installed.
Step 2: Choose the contact: From the list of contacts available in the app, select the person you want to call. You can either manually search for the contact or scroll through your contact list.
Step 3: Initiate the call: Once you have selected the contact, tap the call button or choose the “Call” option. This will initiate the audio call.
Step 4: Wait for the call to connect: Give the app a few seconds to establish the connection and dial the contact’s number. The app will show you the call status, such as “Dialing” or “Connecting.”
Step 5: Start the conversation: Once the call has connected, you will hear a ringing tone or a prompt indicating that the call is now active. Begin speaking with the person on the other end of the line.
Step 6: End the call: When you’re ready to end the call, tap the “End Call” button or choose the appropriate option in the calling app. This will terminate the audio call.
Note that the exact steps may vary slightly depending on the calling app you’re using, but the general process remains the same. Some apps may offer additional features during the call, such as call recording, call holding, or call merging.
It’s important to ensure a stable internet or cellular connection throughout the call to maintain good call quality. If you experience any issues during the call, such as dropped calls or poor audio, try switching to a different network or contacting your service provider for assistance.
By following these steps, you can easily make audio calls on your tablet and enjoy conversations with your contacts, whether they’re using a phone, tablet, or computer.
How to Make a Video Call
With the advancements in technology, making video calls on your tablet has become easier than ever. Whether you’re using a dedicated video calling app or a built-in feature, video calls offer a more immersive and personal communication experience. Here’s how you can make a video call on your tablet:
Step 1: Choose a video calling app: There are several popular video calling apps available that you can use on your tablet, such as Skype, FaceTime, Google Duo, or WhatsApp. Choose the app that is compatible with your tablet and suits your needs.
Step 2: Install and sign in: Download and install the chosen video calling app from the app store. Once installed, open the app and sign in with your account credentials or create a new account, depending on the app’s requirements.
Step 3: Add contacts: After signing in, add the contacts you want to make video calls with to your app’s contact list. Depending on the app, you may need to send a friend request or search for their username/phone number to add them.
Step 4: Initiate a video call: Once your contacts are added, select the person you want to video call from your contact list. Tap on their name or select the video call option within the app.
Step 5: Wait for the call to connect: The app will start connecting the call and notify you when the other person has accepted the video call. This may take a few seconds depending on your internet connection.
Step 6: Engage in the video call: Once the video call is connected, you will see the other person on your tablet’s screen. Engage in the conversation by speaking directly into the tablet’s microphone and looking at the front-facing camera. You will be able to see the other person’s video feed on your screen.
Step 7: End the video call: When you’re ready to end the conversation, tap the end call button or choose the appropriate option within the video calling app to terminate the video call.
It’s important to ensure a stable internet connection and good lighting when making video calls to ensure clear audio and video quality. If you experience technical difficulties, try moving closer to the Wi-Fi router or using a different network for a better connection.
Video calls on your tablet allow you to have face-to-face conversations with friends, family, or colleagues even when you’re physically apart. Take advantage of this feature to stay connected visually and share memorable moments with your loved ones.
Managing Contacts for Calls
When it comes to making calls on your tablet, having your contacts organized and easily accessible is essential. Whether you’re using the built-in dialer, a calling app, or a VoIP service, managing your contacts efficiently can save you time and make the calling process smoother. Here are some tips for managing your contacts for calls on your tablet:
1. Keep your contacts up to date: Regularly review and update your contact list to ensure that the information is accurate and current. Add new contacts as needed and remove outdated or duplicate entries.
2. Organize your contacts: Utilize groups or labels to categorize your contacts based on criteria that make sense to you. For example, you could have groups for family, friends, work contacts, or specific projects. This allows for easy navigation and quick access to the right contacts when you need them.
3. Sync your contacts: If you have contacts saved on other devices or online accounts, such as Google or iCloud, make sure to sync them with your tablet. This ensures that you have all your contacts available on your tablet without needing to manually enter each one.
4. Add contact details: Make sure to include various contact details for each entry, such as phone numbers, email addresses, and social media profiles. This gives you flexibility in choosing the preferred method of communication for each contact.
5. Set favorites or frequently dialed contacts: Most calling apps or dialers allow you to mark contacts as favorites or set them as frequently dialed. Take advantage of this feature to have quick access to your most commonly used contacts.
6. Use a caller ID app: If your tablet’s dialer doesn’t offer advanced caller ID features, consider installing a caller ID app. These apps can identify incoming calls, provide information about unknown numbers, and even block spam or unwanted calls.
7. Backup your contacts: Regularly back up your contacts to ensure that you don’t lose them in case of device failure or accidental deletion. Use cloud services or export your contacts to a file for safekeeping.
8. Utilize contact search: Take advantage of the search functionality within your calling app or dialer to quickly find specific contacts. This is especially helpful if you have a large contact list.
By effectively managing your contacts, you can streamline the calling process and easily connect with the people you need to speak with. Keep your contacts organized, up to date, and easily accessible to make your calling experience efficient and hassle-free.
Troubleshooting Connectivity Issues
Having connectivity issues while making calls on your tablet can be frustrating. Fortunately, there are several troubleshooting steps you can take to resolve common connectivity problems. Here are some tips to help you troubleshoot connectivity issues when making calls on your tablet:
1. Check your internet connection: Ensure that you have a stable and reliable internet connection. If you’re using Wi-Fi, make sure you’re within range of the router and that the signal strength is good. If you’re using mobile data, check if you have a strong cellular signal.
2. Restart your tablet: Sometimes, a simple restart can resolve connectivity issues. Power off your tablet, wait for a few seconds, and then turn it back on. This can refresh the device’s network settings and potentially resolve any temporary glitches.
3. Update the operating system and apps: Check for any available software updates for your tablet’s operating system and calling apps. Keeping your device and apps up to date can often fix bugs, improve performance, and address compatibility issues that may be causing connectivity problems.
4. Reset network settings: If you’re still experiencing connectivity issues, try resetting your tablet’s network settings. This will remove any saved networks, Bluetooth pairings, and VPN configurations. Go to the settings menu, find the “Network” or “Connections” section, and look for the option to reset network settings.
5. Clear cache and data of calling apps: If the issue persists with a specific calling app, try clearing the app’s cache and data. This can resolve any corrupt or conflicting data that may be causing connectivity problems. Go to the app settings, find the relevant calling app, and choose the option to clear cache and data.
6. Disable battery-saving modes: Some battery-saving features on your tablet may restrict network connections to conserve power. Check if battery-saving mode or any similar settings are enabled and disable them temporarily to see if it improves network connectivity for calls.
7. Test with a different network: If possible, try making calls on a different Wi-Fi network or switch to a different mobile data network. This can help identify if the issue is related to the specific network you’re using or if it’s a problem with your tablet.
8. Contact your service provider: If all else fails, reach out to your cellular service provider or internet service provider for further assistance. They can troubleshoot network issues specific to your account or location and provide additional guidance to resolve the connectivity problem.
By following these troubleshooting tips, you can often diagnose and fix common connectivity issues when making calls on your tablet. However, if the problem persists, it’s best to seek professional assistance or contact the relevant support channels for more advanced troubleshooting steps.
Limitations of Tablet Calls
While making calls on a tablet can be convenient and versatile, it’s important to be aware of the limitations that come with this functionality. Here are some key limitations to keep in mind when using your tablet for calls:
1. Lack of portability: Tablets are larger and less portable than smartphones. This can be a limitation if you need to make calls while on the go and prefer the compact size and easy handling of a smartphone.
2. Limited calling features: Compared to dedicated smartphones, tablets may have limited calling features. For example, some tablets may not support certain advanced call features like call recording, call waiting, or conference calling.
3. Dependence on Wi-Fi or cellular coverage: Tablets rely on either Wi-Fi or cellular coverage to make calls. If you’re in an area with poor or no coverage, making calls on your tablet may not be possible. This limitation can affect your ability to place calls in remote locations or during travel.
4. Reduced call quality: Although tablets generally offer good audio quality, they may not match the call clarity provided by dedicated smartphones. Factors like speaker quality, microphone placement, and noise cancellation can impact the overall call quality on a tablet.
5. Battery life: Tablets typically have larger screens and more powerful hardware compared to smartphones, which can result in higher power consumption. Making frequent calls on your tablet may drain the battery quicker compared to using a dedicated phone for calls.
6. Limited phone number availability: Some cellular service providers may not offer phone number options for tablets, or they may charge an additional fee to assign a phone number to your tablet. This can limit your ability to have a dedicated phone number for your tablet calls.
7. Potential compatibility issues: Tablet calling apps or services may not be compatible with certain calling platforms or devices. It’s important to ensure that the apps you choose to use are compatible with the devices and operating systems of the people you intend to call.
Understanding these limitations can help you make informed decisions when using your tablet for calls. It’s important to assess your needs and consider these factors to determine if a tablet is the right device for your calling requirements, or if it’s beneficial to have a dedicated smartphone for more extensive calling functionality.