
Ingredients and Materials Needed
In order to make a Water Breathing Potion in Minecraft, you will need several ingredients and materials. Here’s a list of what you’ll need:
- Glass Bottles: You will need at least one glass bottle to hold the potion.
- Nether Wart: This ingredient can be found in Nether Fortresses.
- Blaze Powder: It is obtained by killing Blaze mobs in the Nether.
- Pufferfish: This can be found by fishing in various bodies of water.
- Glowstone Dust (optional): This is used to amplify the duration of the potion.
- Sugar (optional): Adding sugar will increase the brewing speed of the potion.
These are the essential ingredients for brewing a Water Breathing Potion. Make sure you have them all before you proceed with the brewing process.
If you’re wondering where to find these materials, glass bottles can be made by smelting sand in a furnace. Nether Wart can be found in Nether Fortresses, which are dark structures that can be found in the Nether dimension. Blaze Powder is dropped by Blaze mobs when defeated. Pufferfish can be obtained by fishing in oceans, rivers, and other bodies of water.
While Glowstone Dust and Sugar are optional, they can be very helpful in enhancing the potion. Glowstone Dust can be obtained by mining Glowstone Blocks in the Nether, and Sugar can be crafted using sugar cane, which grows near bodies of water.
Now that you have all the necessary ingredients and materials, let’s move on to the brewing process.
Step 1: Gathering the Required Materials
The first step in making a Water Breathing Potion is to gather all the necessary materials. Here’s what you need to do:
- Find Sand: You will need to find some sand to make glass bottles. Sand can be found in beaches and deserts.
- Smelt Sand: Once you have collected enough sand, you need to smelt it in a furnace to make glass. Place the sand in the top slot of the furnace and fuel in the bottom slot. Wait for the glass to appear in the result slot.
- Collect Nether Wart: Nether Wart is a crucial ingredient for brewing potions. To find it, you will need to locate a Nether Fortress in the Nether. Explore the Nether and look for large, dark structures made of Nether Brick. Inside these fortresses, you will find patches of Nether Wart growing. Collect it by breaking the Nether Wart blocks.
- Kill Blazes: Blaze Powder is another key ingredient that can be obtained by defeating Blaze mobs in the Nether. Blaze mobs can be found in Nether Fortresses, usually in rooms with spawners. Be prepared for a tough fight, as Blaze mobs can shoot fireballs and deal damage. Defeat them and collect Blaze Rods, which can be crafted into Blaze Powder.
- Fish for Pufferfish: Pufferfish can be found by fishing in various bodies of water, such as oceans, rivers, and lakes. Craft a fishing rod using sticks and string, then cast your line into the water and wait for a bite. Once you catch a Pufferfish, you’re ready for the next step.
- Optional: Gather Glowstone Dust and Sugar (optional): Glowstone Dust can be obtained by mining Glowstone Blocks in the Nether. Sugar can be crafted using sugar cane, which grows near bodies of water. These optional ingredients can enhance the potion’s effects and brewing speed.
Once you have gathered all the required materials, you’re ready to move on to the next step: crafting the Brewing Stand.
Step 2: Crafting the Brewing Stand
In order to brew potions in Minecraft, you will need a Brewing Stand. Follow these steps to craft one:
- Gather Cobblestone: You will need three blocks of Cobblestone to create the Brewing Stand.
- Open the Crafting Table: Right-click on a Crafting Table to open the 3×3 crafting grid.
- Place Cobblestone in Crafting Grid: In the crafting grid, arrange the three blocks of Cobblestone in the bottom two rows.
- Create the Brewing Stand: Once the Cobblestone blocks are arranged in the correct pattern, a Brewing Stand will appear in the result box. Drag it into your inventory to complete the crafting process.
Now that you have crafted a Brewing Stand, it’s time to move on to the next step: finding a Nether Fortress.
Make sure to place the Brewing Stand in a convenient and well-lit location in your Minecraft world. You will need access to it whenever you want to brew potions.
Keep in mind that brewing stands can also be found in some generated structures, such as Strongholds and Villages. If you are lucky enough to come across one, you may not need to craft it yourself.
Having a Brewing Stand is essential for brewing various types of potions, including the Water Breathing Potion which we will create in the following steps. Once you have the Brewing Stand set up, you’re ready to move forward in the brewing process.
Step 3: Finding a Nether Fortress
In order to collect Nether Wart, an essential ingredient for brewing potions, you will need to locate a Nether Fortress in the Nether. Follow these steps to find one:
- Enter the Nether: To reach the Nether, you need to construct a Nether Portal using Obsidian blocks. Activate the portal by right-clicking on it, and you will be transported to the Nether dimension.
- Explore the Nether: Once in the Nether, explore the landscape carefully. Nether Fortresses typically generate in strips that run north and south. Look for large, dark structures made of Nether Brick.
- Travel in One Direction: It is recommended to pick a direction (north or south) and travel in a straight line. This will increase your chances of finding a Nether Fortress.
- Be Prepared for Challenges: Nether Fortresses can be dangerous, so come prepared with armor, weapons, and blocks for building bridges over lava lakes or barriers for protecting yourself from mobs.
- Look for Structure Features: As you explore, keep an eye out for structure features that indicate the presence of a Nether Fortress, such as staircases, corridors, balconies, and spawners. These can guide you towards the fortress.
- Collect Nether Wart: Once you have successfully located a Nether Fortress, explore its interior and look for patches of Nether Wart growing in soul sand. Collect the Nether Wart by breaking the blocks.
Remember to exercise caution while exploring the Nether Fortress, as it is inhabited by dangerous mobs like Blazes and Wither Skeletons. Defeat or avoid them to ensure your safety.
Once you have collected a sufficient amount of Nether Wart, you are ready to proceed to the next step: collecting Blaze Powder.
Step 4: Collecting Blaze Powder
To brew potions successfully, you will need Blaze Powder, which is obtained by defeating Blazes in the Nether. Follow these steps to collect Blaze Powder:
- Find a Blaze Spawner: Blaze mobs can be found in Nether Fortresses near Blaze spawners. These spawners will emit smoke and have a cage-like structure. Look for them as you explore the fortress.
- Activate the Blaze Spawner: Once you have located a Blaze spawner, you can activate it by placing torches or other light sources nearby. This will prevent Blazes from spawning and make it easier for you to defeat them.
- Equip Yourself: Before engaging with Blazes, make sure you have prepared adequately. Wear armor, bring weapons like a sword, and have a good supply of food to regenerate health if needed.
- Fight the Blazes: Approach the Blaze spawner cautiously and wait for Blazes to spawn. Use your sword to attack and defeat them. Be aware that Blazes can shoot fireballs, so keep a safe distance and dodge their attacks.
- Collect Blaze Rods: Upon defeating Blazes, they will drop Blaze Rods. Collect these items, as they can be crafted into Blaze Powder. Each Blaze Rod can be turned into two Blaze Powders in a crafting table.
It’s important to note that Blazes are hostile and can pose a threat, especially in groups. Be prepared for a challenging fight, and bring helpful items like potions of Fire Resistance or Water Breathing for added protection.
Once you have collected enough Blaze Powder, you are ready to move on to the next step: brewing the Awkward Potion.
Step 5: Brewing the Awkward Potion
Before you can create a Water Breathing Potion, you need to brew an Awkward Potion as the base. Follow these steps to brew the Awkward Potion:
- Place the Brewing Stand: Set up your Brewing Stand in a well-lit area. Right-click on the ground to place it.
- Add Blaze Powder: Fuel the Brewing Stand by placing a Blaze Powder in the top-left slot. This powers the Brewing Stand and allows it to start the brewing process.
- Add Water Bottles: Place up to three Glass Bottles filled with water in the bottom three slots of the Brewing Stand. This will be the base for brewing the Awkward Potion.
- Add Nether Wart: Take Nether Wart and place it in the top slot of the Brewing Stand. This is the primary ingredient for creating the Awkward Potion.
- Wait for Brewing: Once the Nether Wart is added, the brewing process will begin. The water bottles will become Awkward Potions over time, indicated by bubbles and a progress bar.
- Collect the Awkward Potions: When the brewing process is complete, the Awkward Potions will appear in the three slots of the Brewing Stand. Collect them by right-clicking on each slot with empty Glass Bottles.
The Awkward Potion serves as the base for creating various other potions, including the Water Breathing Potion. It has no immediate effect on its own but is an essential ingredient in further brewing steps.
Once you have brewed the Awkward Potions, you are ready to move on to the next step: adding a Water Bottle to the brewing stand.
Step 6: Adding a Water Bottle
With the Awkward Potion in hand, it’s time to add a Water Bottle to the Brewing Stand and continue the brewing process. Follow these steps:
- Open the Brewing Stand: Right-click on the fully fueled Brewing Stand to access its interface.
- Place the Awkward Potion: Take the Awkward Potion you brewed in the previous step and place it in one of the three bottom slots of the Brewing Stand.
- Add a Water Bottle: Take a Glass Bottle filled with water and place it in the top slot of the Brewing Stand. This will combine with the Awkward Potion to create the base for the Water Breathing Potion.
- Wait for Brewing: Once you have added the Water Bottle, the brewing process will initiate. You will see bubbles and a progress bar indicating the completion of the brewing process.
- Collect the Water Breathing Potion: When the brewing process is finished, the Water Breathing Potion will appear in the bottom slot of the Brewing Stand. Collect it by right-clicking on the slot with an empty Glass Bottle.
Adding the Water Bottle is a crucial step in creating the Water Breathing Potion. The combination of the Awkward Potion and the Water Bottle transforms the base potion into the desired effect.
Make sure the Brewing Stand is properly fueled with Blaze Powder to continue the brewing process effectively. You can check the fuel level by hovering over the Blaze Powder icon in the Brewing Stand interface.
Once you have collected the Water Breathing Potion, you’re ready to proceed to the next step: adding a Pufferfish for the final touch.
Step 7: Adding a Pufferfish
Adding a Pufferfish to the brewing process will give your potion the Water Breathing effect. Follow these steps to incorporate the Pufferfish into your potion:
- Open the Brewing Stand: Right-click on the fully fueled Brewing Stand to open its interface.
- Place the Water Breathing Potion: Take the Water Breathing Potion you obtained in the previous step and place it in one of the bottom slots of the Brewing Stand.
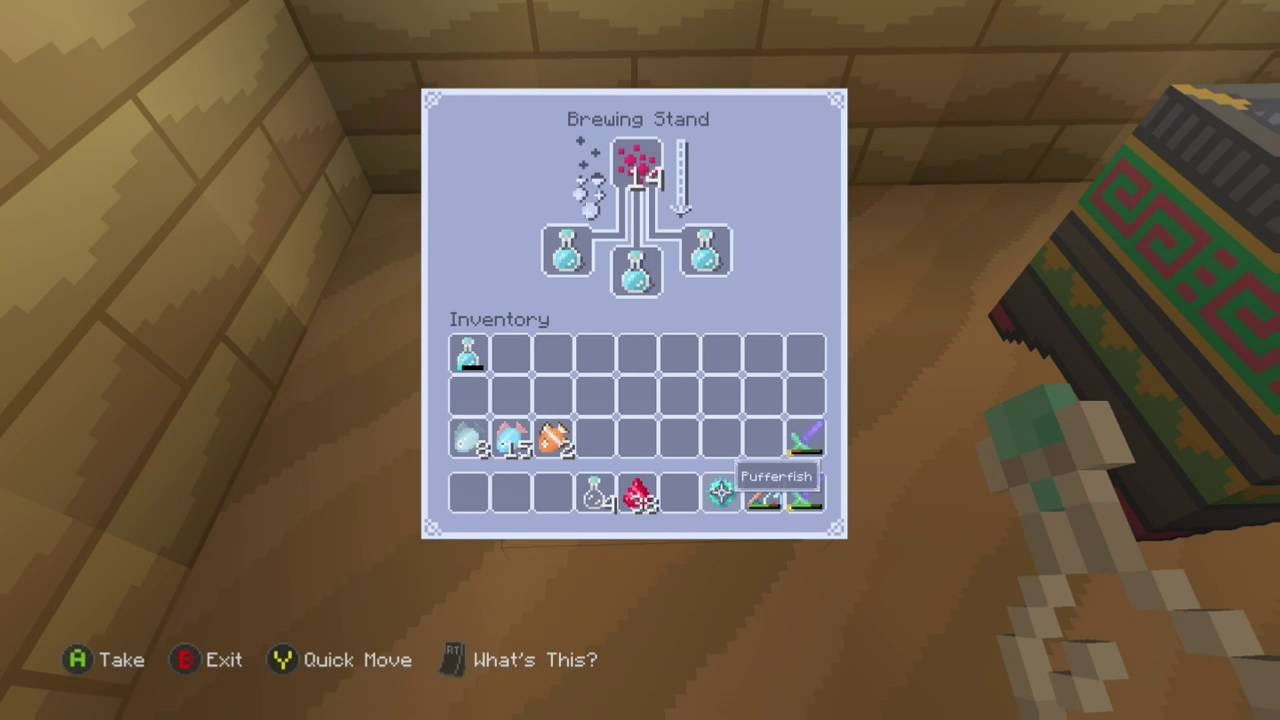
- Add a Pufferfish: Take a Pufferfish and place it in the top slot of the Brewing Stand. This will infuse the potion with the Water Breathing effect.
- Wait for Brewing: Once you have added the Pufferfish, the brewing process will commence. Bubbles and a progress bar will indicate the brewing progress.
- Collect the Water Breathing Potion: When the brewing process is complete, the Water Breathing Potion will appear in the bottom slot of the Brewing Stand. Collect it by right-clicking on the slot with an empty Glass Bottle.
The addition of the Pufferfish to the Brewing Stand gives the Water Breathing Potion its unique ability to grant the player underwater breathing capabilities for a specific duration.
Remember to always have a sufficient supply of Glass Bottles filled with water on hand to collect the brewed potions.
With the Water Breathing Potion successfully brewed, you’re now ready to move on to the last step: collecting the final potion and using it to explore the depths of the Minecraft world.
Step 8: Collecting the Water Breathing Potion
Congratulations! You have reached the final step of creating the Water Breathing Potion. Now it’s time to collect your potion and prepare to explore the underwater wonders of Minecraft. Follow these steps:
- Open the Brewing Stand: Right-click on the fully fueled Brewing Stand to open its interface.
- Collect the Water Breathing Potion: The Water Breathing Potion should be in the bottom slot of the Brewing Stand. Right-click on the slot with an empty Glass Bottle to collect the potion.
- Store the Potion: Once you have collected the Water Breathing Potion, it will be added to your inventory. Make sure to store it in a convenient slot for easy access during your underwater adventures.
With the Water Breathing Potion in hand, you can now enjoy extended periods of time underwater without the need to constantly surface for air. This potion is especially useful when exploring underwater structures, mining for resources in ocean biomes, or battling hostile mobs beneath the surface.
Make the most of your Water Breathing Potion by paying attention to its expiration time. The default duration of the potion is 3 minutes, but this can be extended by adding Glowstone Dust during the brewing process.
Remember to exercise caution while underwater, even with the Water Breathing Potion. Keep an eye on your health and watch out for other dangers that may lurk in the depths.
Now that you have successfully brewed and collected the Water Breathing Potion, it’s time to dive in and explore all the underwater marvels that Minecraft has to offer!