
Materials Needed
Before starting the process of making a projector screen, it’s important to gather all the necessary materials. Having everything prepared will ensure a smooth and successful construction. Here are the key materials you will need:
- Projector fabric: Look for a high-quality projector fabric that is specifically designed for optimal light reflection and minimal distortion. This will ensure an excellent viewing experience.
- Frame: Choose a sturdy and durable material for the frame, such as PVC pipes or lightweight wood. The dimensions will depend on the desired size of your projector screen.
- Measuring tools: Get a measuring tape or ruler to accurately determine the dimensions of the screen and frame.
- Scissors or a utility knife: You will need these tools to cut the fabric to the correct size and shape.
- Adhesive or sewing supplies: Depending on the type of fabric you choose, you may need adhesive tape or a sewing machine to secure the edges. This will ensure the fabric stays taut on the frame.
- Hooks or mounts: If you plan to hang the screen, you will need hooks or mounts to attach it to the wall or ceiling.
- Optional border material: If you want to add a decorative border to your projector screen, you can choose a fabric or trim that complements your home theater setup.
Having all these materials ready will make the process of creating your own projector screen easier and more efficient. Ensure that you have carefully selected each component to ensure the best possible outcome. Once you have gathered all the materials, it’s time to move on to the next step: measuring the dimensions of your projector screen.
Step 1: Measuring the Dimensions
Before you start constructing your projector screen, it is crucial to accurately measure the dimensions. This step will ensure that your screen fits perfectly into your designated viewing area. Follow these steps to measure the dimensions:
- Determine the screen size: Consider the viewing area and the distance between the projector and the screen. This will help you decide on the ideal screen size. Measure the width and height of the desired screen using a measuring tape or ruler. Note down these measurements for reference.
- Consider the aspect ratio: Projector screens typically have different aspect ratios, such as 16:9 or 4:3. Choose an aspect ratio that matches your projector’s native resolution, as it will provide the best image quality. Keep in mind the aspect ratio when determining the dimensions of your screen.
- Account for border or frame: Decide if you want to include a border or frame around your screen. If so, add the desired width of the border to your measurements. The border can enhance the appearance and provide a professional finish to your projector screen.
- Consider viewing distance: Take into account the viewing distance from your projector screen. Consider the optimal distance for your chosen screen size and aspect ratio. This will ensure that viewers can comfortably enjoy the projected content without any distortion.
- Double-check the measurements: Once you have determined the width, height, aspect ratio, and border width, double-check your calculations. Accuracy is key to ensure a well-fitted and visually pleasing projector screen.
By carefully measuring the dimensions of your projector screen, you will create a customized screen that perfectly fits your viewing area. Proper measurements will contribute to an immersive viewing experience. Once you have determined the dimensions, you can move on to the next step, which is choosing the right fabric for your projector screen.
Step 2: Choosing the Right Fabric
Choosing the right fabric is a crucial step in creating a high-quality projector screen. The fabric you select will directly impact the brightness, clarity, and overall visual experience. Follow these guidelines to choose the perfect fabric for your projector screen:
- Consider the gain: Gain refers to the amount of light reflected by the screen. A higher gain fabric will reflect more light, resulting in a brighter image. However, keep in mind that higher gain fabrics can also lead to hot spots or uneven light distribution. Consider the lighting conditions of your viewing area and choose a fabric with an appropriate gain level.
- Opt for a high-quality material: Look for a projector fabric that is specifically designed for optimal image clarity and minimal distortion. High-quality materials will ensure vibrant colors, sharp details, and accurate image reproduction.
- Check for compatibility with your projector: Some fabrics are more compatible with certain projector technologies, such as LCD or DLP. Make sure the fabric you choose is suitable for your projector to achieve the best possible display quality.
- Consider the viewing angle: Viewing angle refers to the range of angles at which viewers can comfortably see the screen without loss of image quality. Consider the seating arrangement in your viewing area and choose a fabric with a wide viewing angle to accommodate all viewers.
- Reflectivity and color accuracy: Look for a fabric that balances reflectivity and color accuracy. The fabric should reflect the projected light evenly across the entire screen and accurately reproduce colors.
- Consider your budget: Projector fabrics come in a range of prices. Determine your budget and choose a fabric that offers good value for money while meeting your requirements for image quality and performance.
By carefully considering these factors, you can select the perfect fabric for your projector screen. A high-quality fabric will ensure sharp images, vibrant colors, and an immersive viewing experience. Once you have chosen the fabric, you can proceed to the next step – preparing the frame for your projector screen.
Step 3: Preparing the Frame
Once you have chosen the right fabric for your projector screen, it’s time to prepare the frame. The frame provides the structure and support for your screen, ensuring it remains taut and secure. Follow these steps to prepare the frame for your projector screen:
- Select a suitable frame material: Choose a frame material that is sturdy and lightweight. PVC pipes or lightweight wood are commonly used for DIY projector screens. Consider the size and weight of your screen when selecting the frame material.
- Measure and cut the frame pieces: Using your measurements from the previous step, measure and mark the pieces for your frame. Use a saw or appropriate cutting tool to cut the frame pieces to the correct length. Ensure that the frame pieces are equal in size for a balanced screen.
- Connect the frame pieces: Depending on the chosen frame material, use connectors, adhesive, or screws to join the frame pieces together. Ensure that the joints are secure and sturdy for optimal screen performance.
- Check for stability: Once the frame is assembled, check for any wobbling or instability. Make necessary adjustments to ensure that the frame is level and steady.
- Consider reinforcements: For larger screens, consider adding additional supports or braces for added stability. This will prevent any sagging or distortion over time.
- Inspect for frame sharpness: Ensure that all edges and corners of the frame are smooth and free from any sharp edges. This will help prevent any damage to the fabric during the installation process.
By following these steps, you will prepare a sturdy and reliable frame for your projector screen. A well-prepared frame is the foundation for a successful screen installation. Once the frame is ready, you can move on to the next step – cutting the fabric to the correct dimensions.
Step 4: Cutting the Fabric
With the frame prepared, it’s time to cut the fabric to the correct dimensions for your projector screen. Precise cutting ensures a proper fit and a smooth, wrinkle-free surface. Follow these steps to cut the fabric:
- Lay out the fabric: Find a clean and flat surface to work on. Carefully lay out the projector fabric, ensuring that it is free from any wrinkles or folds.
- Measure and mark the fabric: Use your measurements from step 1 to determine the width and height of the fabric. Using a ruler or measuring tape, mark the fabric with accurate measurements for cutting.
- Cut the fabric: Using sharp scissors or a utility knife, carefully cut along the marked lines. Take your time to ensure smooth and straight edges.
- Leave extra fabric for wrapping: If you plan to wrap the fabric around the frame, consider leaving a few inches of extra fabric on each side. This will allow for a secure and neat installation.
- Double-check the dimensions: After cutting the fabric, double-check the dimensions to ensure accuracy. It’s important to have the fabric cut precisely to fit your frame.
Cutting the fabric is a crucial step to achieve a professional-looking projector screen. Take your time and be precise when measuring and cutting the fabric to ensure a perfect fit. Once the fabric is cut, you can move on to the next step – attaching the fabric to the frame.
Step 5: Attaching the Fabric to the Frame
Now that you have your fabric cut to the correct dimensions, it’s time to attach it to the frame. Properly securing the fabric will ensure a smooth, wrinkle-free surface for optimal viewing. Follow these steps to attach the projector fabric to the frame:
- Prepare the fabric: Lay the fabric flat on a clean surface. If desired, iron the fabric on a low heat setting to remove any wrinkles or creases.
- Position the frame: Place the frame on top of the fabric, making sure it is centered and aligned with the edges of the fabric.
- Start attaching the fabric: Begin by securing one corner of the fabric to the frame. You can use adhesive tape, staples, or fabric-friendly glue to attach the fabric to the frame. Ensure that the fabric is taut and free from any wrinkles or sagging.
- Continue attaching the fabric: Work your way around the frame, gradually securing the fabric to the frame. Pull the fabric tightly as you go, ensuring a smooth and even surface. Use additional adhesive, staples, or glue as needed to keep the fabric securely in place.
- Trim any excess fabric: Once the fabric is fully attached, trim any excess fabric using scissors or a utility knife. Be careful not to cut too closely to the frame, leaving a small margin for a clean finish.
- Inspect the fabric: After attaching the fabric, inspect it for any loose areas or wrinkles. Smooth out any imperfections and make any necessary adjustments to ensure a perfectly stretched and wrinkle-free surface.
By following these steps, you will successfully attach the fabric to your projector screen frame. Take your time and ensure that the fabric is tightly secured for the best display quality. With the fabric securely in place, you can proceed to the optional step of adding a border to your screen.
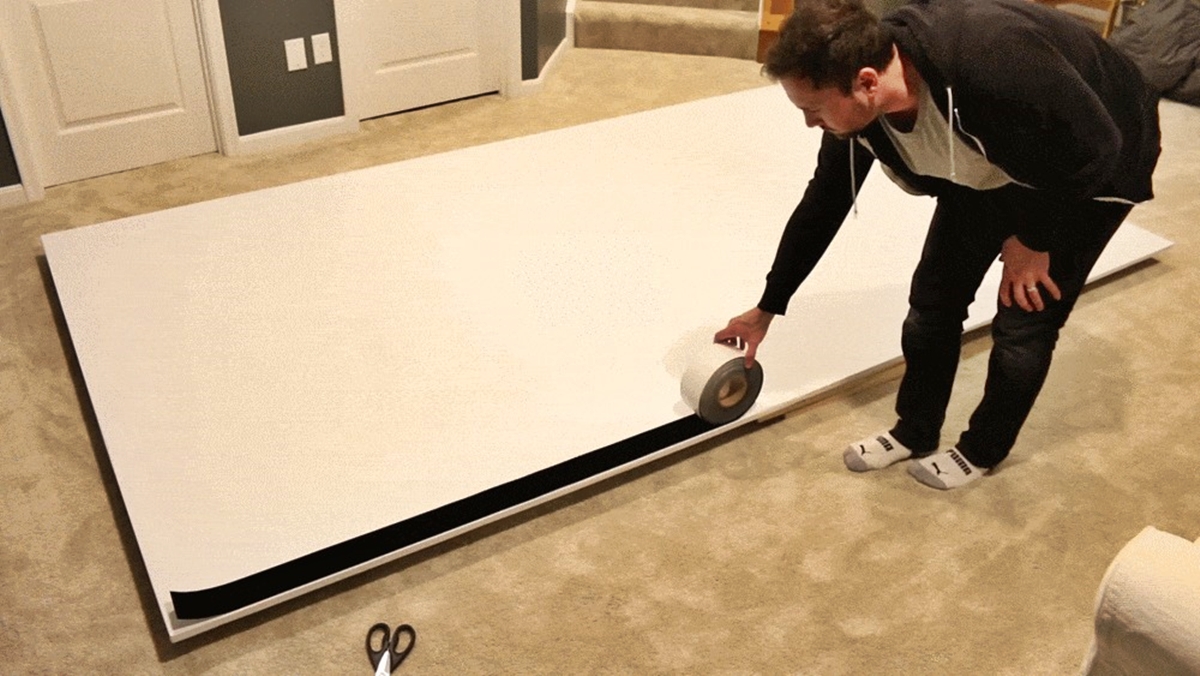
Step 6: Adding a Border (Optional)
Adding a border to your projector screen can enhance its appearance, provide a professional finish, and complement your home theater setup. While this step is optional, it can greatly enhance the overall aesthetic appeal of your screen. Follow these steps to add a border to your projector screen:
- Select a border material: Choose a fabric or trim that complements the color scheme and design of your viewing area. Consider factors such as texture, color, and pattern to create a visually appealing border.
- Measure and cut the border material: Determine the appropriate width and length for your border. Use a ruler or measuring tape to accurately measure and mark the border material. Cut it to the desired size using scissors or a utility knife.
- Position the border: Place the border material evenly along the edges of the projector screen, covering the edges of the fabric and the frame. Make sure the border is aligned and centered.
- Secure the border: Use fabric-friendly adhesive or a hot glue gun to attach the border material to the edges of the projector screen. Carefully apply the adhesive, ensuring that the border is firmly secured but not excessively tightened.
- Trim any excess border material: Once the border is attached, trim any excess material using scissors or a utility knife. Make clean, straight cuts to maintain a neat and professional look.
- Inspect the border: After adding the border, inspect it to ensure it is evenly attached and visually appealing. Smooth out any wrinkles or imperfections, making any necessary adjustments to achieve a seamless border.
Adding a border to your projector screen is a creative way to customize its appearance and elevate the overall viewing experience. By following these steps, you can create a professional-looking projector screen that perfectly matches your home theater setup. Once the border is added, you are ready to proceed to the next step – installing hooks or mounts for your screen.
Step 7: Installing Hooks or Mounts
Installing hooks or mounts for your projector screen is an important step to ensure proper placement and stability. The method you choose will depend on whether you want to hang the screen from the ceiling, mount it on the wall, or use a free-standing setup. Follow these steps to install hooks or mounts for your projector screen:
- Select the appropriate hooks or mounts: Choose hooks or mounts that are suitable for the weight and size of your projector screen. Ensure they are sturdy and capable of securely supporting the screen.
- Determine the placement: Decide on the best location for your projector screen, taking into consideration factors such as viewer positioning, room layout, and viewing angles.
- Measure and mark the mounting points: Use a measuring tape or ruler to determine the precise placement of the hooks or mounts. Mark the mounting points on the wall or ceiling using a pencil or painter’s tape for accuracy.
- Pre-drill or install anchors (if necessary): If you are mounting the screen on a wall or ceiling with drywall, it is recommended to pre-drill holes or install anchors to ensure a secure fit.
- Attach the hooks or mounts: Using screws or appropriate mounting hardware, attach the hooks or mounts to the marked locations. Ensure they are firmly secured and level.
- Hang the projector screen: Carefully hang or mount the projector screen on the installed hooks or mounts. Double-check to ensure that it is stable and properly aligned.
- Adjust and test: Make any necessary adjustments to the screen’s height or alignment. Test the stability by gently shaking the screen to ensure it stays securely in place.
By following these steps, you will successfully install hooks or mounts for your projector screen. This will allow for a secure and stable setup, ensuring optimal viewing angles and an immersive experience. Once the hooks or mounts are installed, you can move on to the final step – setting up your projector screen for use.
Step 8: Setting Up the Projector Screen
Now that your projector screen is ready, it’s time to set it up for use. Follow these steps to ensure a successful setup:
- Position your projector: Set up your projector in the desired location, ensuring it is aligned with the screen and positioned at the optimal distance for your chosen screen size.
- Connect the projector: Connect the necessary cables from your projector to your video source (e.g., laptop, Blu-ray player) and audio system if applicable.
- Power on the projector: Turn on the projector and allow it to warm up, following the manufacturer’s instructions.
- Adjust the image settings: Use the projector’s settings to adjust the image size, focus, and keystone correction as needed. Aim for a clear, well-centered image on your projector screen.
- Test the projection: Play a test video or display your preferred content to ensure the projected image appears correctly on the screen. Make any necessary adjustments to the projector or screen alignment if needed.
- Optimize the lighting conditions: Adjust the room’s lighting to create a suitable viewing environment. Dimming the lights or using blackout curtains can help enhance the image quality and reduce glare on the screen.
- Enjoy your projector screen: Sit back, relax, and enjoy the immersive viewing experience provided by your newly set up projector screen. Invite friends and family over to share in the excitement of your home theater setup.
By following these steps, you will successfully set up your projector screen for a remarkable viewing experience. Take your time to ensure proper positioning and image adjustment. With your setup complete, you can now sit back and enjoy your favorite movies, TV shows, or presentations on your custom-made projector screen.