
Checking the Font Folder on Mac
When it comes to locating font files on a Mac, the first step is to check the Font Folder. This folder acts as a central repository for all the fonts installed on your Mac, making it an ideal place to start your search.
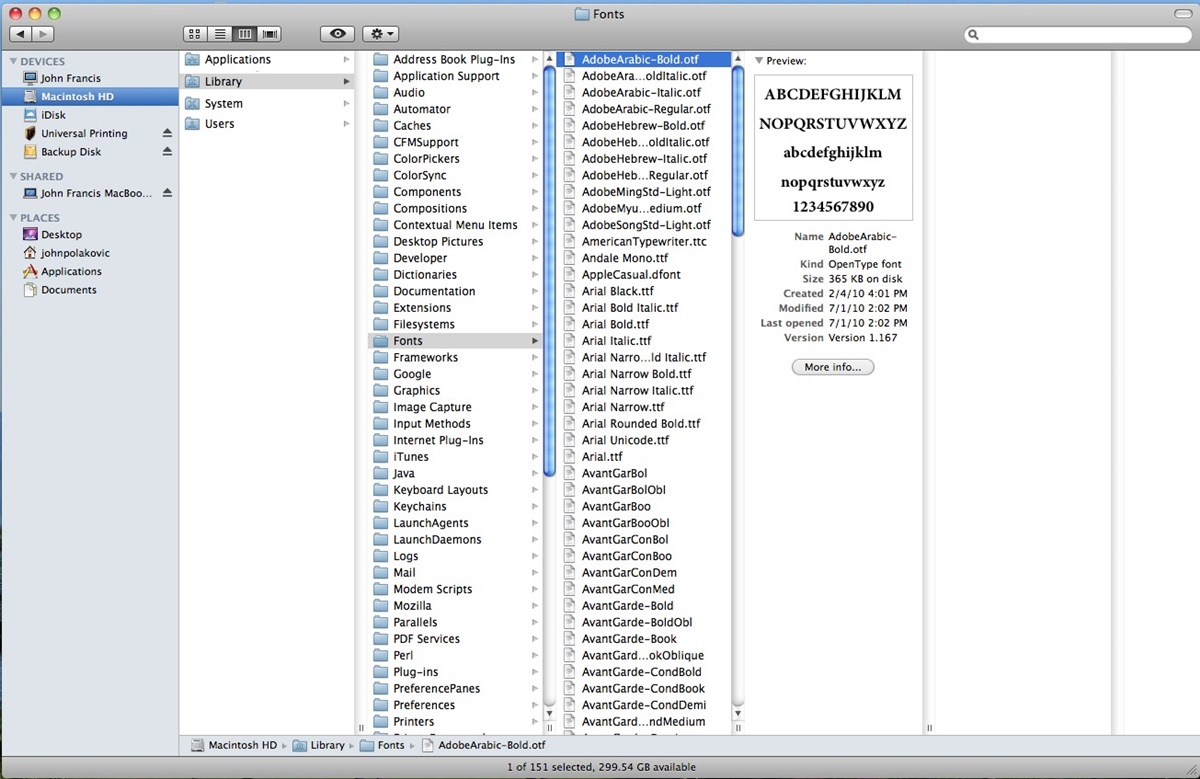
To access the Font Folder, follow these simple steps:
- Click on the “Finder” icon located at the bottom left corner of your screen.
- In the Finder menu, click on “Go” and select “Go to Folder”.
- A small window will appear. In the text field, type “/Library/Fonts” (without quotes) and click the “Go” button.
This will open the Font Folder, where you can find all the fonts that are pre-installed on your Mac. Take a moment to browse through the fonts listed to get a sense of the available options.
It’s important to note that the Font Folder only contains the system fonts that come with your Mac. Any additional fonts you have installed from external sources will be located in a different folder. This is why it’s essential to explore other methods to locate font files on your Mac.
Next, we will explore how to use Font Book and Finder to locate font files on your Mac. These methods will help you not only find system fonts but also discover any additional fonts you may have installed.
Using Font Book on Mac to Locate Font Files
Font Book is a built-in application on Mac that allows you to manage and organize your fonts with ease. It not only helps you view and activate fonts but also provides a convenient way to locate font files. Here’s how to use Font Book to locate font files on your Mac:
- Open Font Book by either searching for it in Spotlight (press Command + Space, then type “Font Book”) or navigating to the Applications folder in Finder and double-clicking on the Font Book icon.
- In the Font Book window, you will see a list of all the fonts installed on your Mac. You can browse through the different categories or use the search bar to find a specific font.
- Once you have located the font you’re interested in, right-click on it and select “Reveal in Finder.” This action will open a new Finder window with the font file highlighted.
- You can then easily copy or move the font file to a different location or access its properties and information.
Using Font Book provides a user-friendly approach to locating font files on your Mac. It not only helps you identify the font file you’re looking for but also offers additional functionalities for font management.
However, keep in mind that Font Book may not show all the fonts installed on your Mac, especially those installed manually from external sources. In such cases, you may need to explore other methods, like using Finder, to locate font files.
Using Finder to Locate Font Files on Mac
If you are unable to locate font files using Font Book or need to find fonts installed from external sources, using Finder is another convenient method. Here’s how you can use Finder to locate font files on your Mac:
- Open a Finder window by clicking on the “Finder” icon in the Dock or selecting “New Finder Window” from the File menu.
- In the sidebar of the Finder window, locate and click on the “Applications” section.
- Scroll down and find the “Font Book” application. Double-click on it to open Font Book.
- In Font Book, you can browse through the different categories or use the search bar to find the font you’re interested in.
- Right-click on the font and select “Show in Finder.” This will open a new Finder window with the font file selected.
Alternatively, you can also manually navigate to the Font Folder using Finder. Here’s how:
- Click on the “Go” menu in the Finder.
- Select “Go to Folder” from the drop-down menu.
- In the text field that appears, enter “/Library/Fonts” (without quotes) and click “Go.”
This will directly open the Font Folder in Finder, where you can explore all the font files installed on your Mac.
Using Finder provides you with more flexibility in locating font files, especially if you have installed fonts from external sources. It allows you to navigate through different folders and access font files with ease.
By using the combination of Font Book and Finder, you can cover a wider range of font locations and efficiently locate font files on your Mac.
Searching for Fonts in the Windows Font Folder
On Windows, the Font Folder serves as a central location for all installed fonts. By exploring this folder, you can easily locate and manage your font files. Here’s how you can search for fonts in the Windows Font Folder:
- Open File Explorer by clicking on the folder icon in the taskbar or pressing the Windows key + E.
- In the address bar of File Explorer, type “
C:\Windows\Fonts” (without quotes) and press Enter. - This will open the Windows Font Folder, which contains all the fonts installed on your system. You will see a list of font files in the folder.
To search for a specific font, you can use the search bar located in the top right corner of the File Explorer window. Simply type the name of the font you are looking for, and File Explorer will instantly filter and display matching results.
By browsing through the Windows Font Folder or using the search functionality, you can quickly locate and access any specific font file you need. Additionally, you can perform actions like copying or moving font files to different locations within the folder.
It’s important to note that modifying or deleting fonts from the Windows Font Folder should be done with caution as it can affect system performance or cause compatibility issues with certain applications. Therefore, it is recommended to keep backups of font files or consult professional advice before making any changes.
Searching for fonts in the Windows Font Folder is a straightforward method to locate font files on your Windows system. However, if you want to explore alternative ways to access font files, you can also use the Control Panel or File Explorer’s search functionality.
Accessing Windows Font Files through Control Panel
Another way to access font files on Windows is through the Control Panel. The Control Panel provides a centralized location for managing various system settings, including fonts. Here’s how you can access font files through the Control Panel:
- Open the Control Panel by typing “Control Panel” in the search bar and selecting it from the search results.
- In the Control Panel window, change the view to “Large icons” or “Small icons” for better visibility.
- Scroll down and look for the “Fonts” option. Click on it.
This action will open the “Fonts” window, which displays all the installed fonts on your system. You can view the font names, styles, and other relevant information.
To find a specific font file, you can scroll through the list or use the search bar located at the top right corner of the Fonts window. Enter the name of the font you’re looking for, and the list will filter to show the matching results.
By accessing font files through the Control Panel, you can easily view, manage, and install/uninstall fonts on your Windows system. Additionally, you can perform specific actions like copying font files to different locations or viewing the font properties.
It’s important to note that modifying or deleting fonts through the Control Panel should be done with caution. Removing system fonts can have unintended consequences, affecting the appearance and functionality of various applications. Therefore, it is advisable to create backups before making any changes or consult expert guidance.
Accessing font files through the Control Panel is a convenient and user-friendly method to manage your fonts on Windows. However, if you prefer a more direct file-based approach, you can also use File Explorer to locate and access font files on your system.
Locating Fonts in File Explorer on Windows
File Explorer is a powerful tool on Windows that allows you to navigate through folders and access files on your system. If you prefer a file-based approach to locate font files, File Explorer provides a straightforward method. Here’s how you can locate fonts in File Explorer on Windows:
- Open File Explorer by clicking on the folder icon in the taskbar or pressing the Windows key + E.
- In the left-hand navigation pane of File Explorer, locate and click on “This PC” or “My Computer.”
- Within This PC, you will find the different drives on your system. Double-click on the drive where your Windows operating system is installed (usually the “C:” drive).
- Navigate to the “Windows” folder and open it.
- Within the Windows folder, locate and open the “Fonts” folder. This is where all the font files are stored on your Windows system.
Once you open the Fonts folder, you will see a list of font files. You can scroll through the list or use the search bar located in the top right corner of the File Explorer window to search for specific font files by name.
Using File Explorer allows you to directly access the font files stored on your Windows system. You can perform various actions such as copying, moving, or deleting font files from this folder.
It’s important to note that modifying or deleting system fonts should be done with caution, as it can affect the performance and appearance of your Windows system. It is recommended to create backups of font files or seek expert advice before making any changes.
Locating fonts in File Explorer provides you with a file-based approach, ideal for users who prefer to directly navigate through folders and access font files on their Windows system.
Using a Font Manager Application to Find Font Files on Windows
If you have a large collection of fonts or want more advanced features for managing your fonts, using a font manager application can be beneficial. These applications provide a comprehensive suite of tools to organize, search, and locate font files on your Windows system. Here’s how you can use a font manager application to find font files:
- Download and install a font manager application of your choice. There are several options available, such as Adobe Fonts, NexusFont, FontBase, and Suitcase Fusion.
- Launch the font manager application, and you will be presented with an interface that displays your font collection.
- Using the search bar or filtering options provided by the font manager, locate the font you want to find. You can search by font name, style, or other criteria.
- Once you’ve located the font, the font manager will display the font file along with its location or provide an option to reveal the font file in File Explorer.
Font manager applications offer additional features like font activation, font pairing, and font previewing, making it easier to manage and organize your fonts efficiently.
Furthermore, font manager applications often have the ability to load fonts from various sources, including both system fonts and fonts installed from external sources. This means you can locate and manage all your fonts from a single interface.
It’s important to remember that font manager applications are third-party software, and their functionalities may vary. Before selecting a font manager, consider your specific requirements and research the available options to find the application that best suits your needs.
Using a font manager provides a robust and comprehensive approach to managing and finding font files on your Windows system. These applications offer advanced search capabilities, organization features, and an overall enhanced font management experience.