
Downloading the Android SDK
Before you can start developing Android applications, you need to download and install the Android SDK (Software Development Kit). The Android SDK provides the necessary tools and libraries to build, test, and debug Android apps.
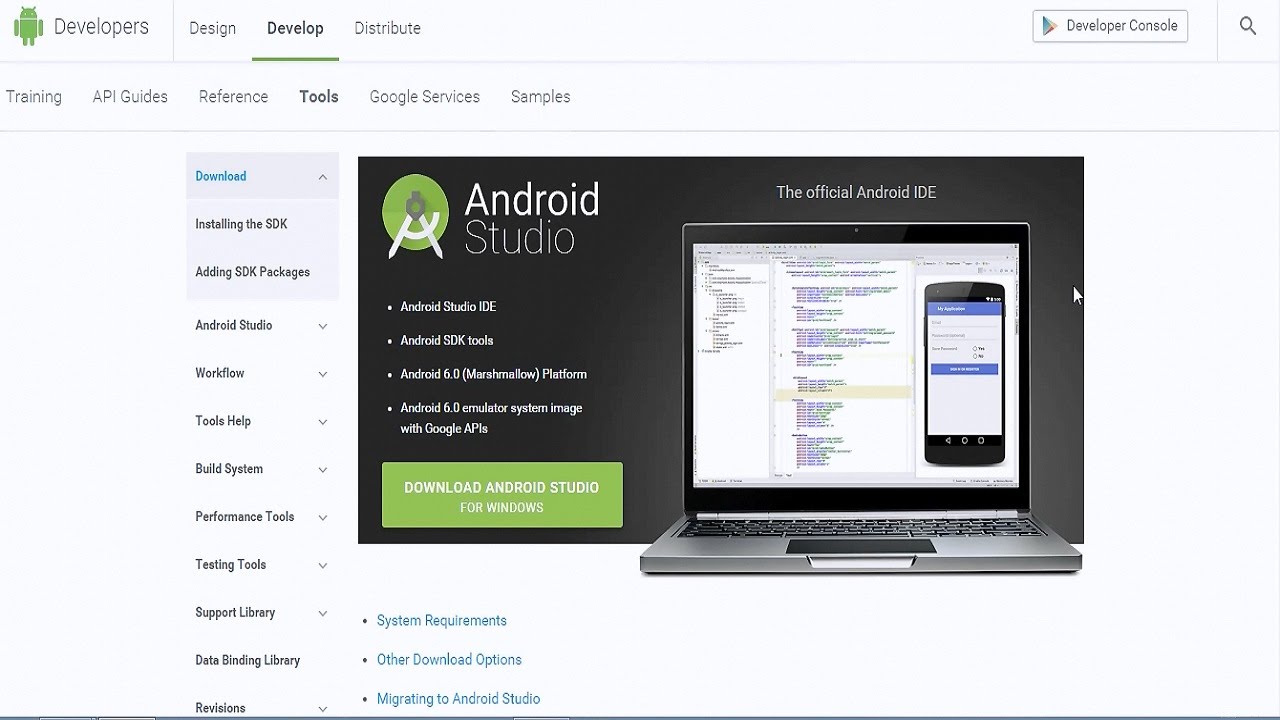
To download the Android SDK, follow these steps:
- Go to the official Android Developer website at https://developer.android.com/studio.
- Click on the “Download Android Studio” button.
- On the next page, you’ll find the download options for different platforms. Choose the one that corresponds to your operating system (Windows, macOS, or Linux).
- Click on the “Download” button for your selected platform.
- Once the download is complete, locate the downloaded file and run the installer.
- Follow the on-screen instructions to complete the installation process. You can choose whether to install Android Studio or just the Android SDK.
- After the installation completes, launch Android Studio.
- On the welcome screen, click on the “Configure” button and select “SDK Manager.”
- The SDK Manager window will open, displaying a list of available SDK components.
- Make sure the “Android SDK” checkbox is selected, and then click on the “Apply” button to start the download and installation.
The Android SDK will be downloaded and installed on your system. This process may take some time, depending on your internet connection speed. Once the installation is complete, you can proceed to set up the Java Development Kit (JDK) and configure the Android SDK.
By downloading the Android SDK, you are taking the first step towards becoming an Android developer. The SDK provides all the necessary tools to create amazing Android applications. So, go ahead and start your Android development journey now!
Setting up Java Development Kit (JDK)
Before you can start developing Android applications using the Android SDK, you need to have the Java Development Kit (JDK) installed on your computer. The JDK is required because Android apps are written in the Java programming language.
Follow these steps to set up the JDK:
- Visit the Oracle website at https://www.oracle.com/java/technologies/javase-jdk11-downloads.html to download the latest version of the JDK.
- On the downloads page, accept the license agreement and choose the appropriate JDK package for your operating system (Windows, macOS, or Linux).
- Click on the download link to initiate the JDK download.
- Once the download is complete, run the installer and follow the on-screen instructions to install the JDK.
After installing the JDK, you need to configure the Java environment variables. Here’s how:
- Open the system properties on your computer.
- Go to the “Advanced” tab and click on the “Environment Variables” button.
- Under “System Variables,” click on the “New” button to add a new environment variable.
- Set the variable name as “JAVA_HOME” and the variable value as the path to the JDK installation directory.
- Click “OK” to save the changes.
Setting up the JDK is crucial for Android app development since it provides the necessary Java tools and libraries to compile and run your code. With the JDK successfully installed and configured, you are now ready to proceed with installing the Android SDK and start building incredible Android applications.
Installing the Android SDK on Windows
If you’re using a Windows operating system, follow these steps to install the Android SDK:
- Make sure you have downloaded and installed the Java Development Kit (JDK), as mentioned in the previous section.
- Download the Android SDK by visiting the Android Developer website at https://developer.android.com/studio.
- Click on the “Download Android Studio” button and select the Windows version.
- Once the download is complete, locate the downloaded file and run the installer.
- Follow the on-screen instructions to complete the installation. You can choose a custom installation location if desired.
- When prompted, select the components you want to install. Make sure to select the “Android SDK” checkbox.
- Click on the “Next” button to continue.
- Review the installation settings and click on the “Install” button.
- Wait for the installation process to finish. It may take a few minutes.
- Once the installation is complete, click on the “Next” button and then click on “Finish.”
After installing the Android SDK, you need to set up the Android Environment Variables:
- Right-click on “This PC” or “My Computer” and select “Properties.”
- Click on “Advanced system settings” on the left sidebar.
- In the “System Properties” window, click on the “Environment Variables” button.
- Under “System Variables,” click on “New” to create a new variable.
- Set the variable name as “ANDROID_HOME” and the variable value as the path to the Android SDK installation directory.
- Click “OK” to save the changes.
Now that you have successfully installed the Android SDK on your Windows system and configured the necessary environment variables, you are ready to start developing Android applications. Make sure to keep the Android SDK up to date to access the latest features and improvements for Android development.
Installing the Android SDK on macOS
If you’re using a macOS, follow these steps to install the Android SDK:
- Ensure that you have already downloaded and installed the Java Development Kit (JDK), as mentioned in the previous section.
- Visit the Android Developer website at https://developer.android.com/studio to download the Android Studio for macOS.
- Click on the “Download Android Studio” button and select the macOS version.
- Once the download is complete, locate the downloaded file and double-click on it to start the installation.
- Drag and drop the Android Studio icon into the Applications folder to install it.
- Open the Applications folder and launch Android Studio.
- In the “Welcome to Android Studio” screen, click on “Next” to proceed.
- Select the components you want to install. Make sure that “Android SDK” is checked.
- Choose the installation location or keep the default location.
- Click on “Next” and then on “Finish” to complete the installation.
After installing the Android SDK, you need to set up the Android Environment Variables:
- Open the Terminal application on your macOS.
- Run the following command:
touch ~/.bash_profile; open ~/.bash_profile - This will create a new bash profile file and open it in a text editor.
- Add the following lines to the bash profile file:
export ANDROID_HOME=~/Library/Android/sdk

  export PATH=$PATH:$ANDROID_HOME/tools

export PATH=$PATH:$ANDROID_HOME/platform-tools - Save the file and close the text editor.
- Back in the Terminal, run the following command to apply the changes:
source ~/.bash_profile
Now you have successfully installed the Android SDK on your macOS system and configured the necessary environment variables. You are now ready to start developing Android applications. Keep in mind to regularly update the Android SDK to access the latest features and improvements for Android development.
Installing the Android SDK on Linux
To install the Android SDK on a Linux system, follow these steps:
- Ensure that you have already downloaded and installed the Java Development Kit (JDK) as mentioned in the previous section.
- Visit the official Android Developer website at https://developer.android.com/studio to download the Android Studio for Linux.
- Click on the “Download Android Studio” button and select the Linux version.
- Once the download is complete, open a terminal and navigate to the directory where the downloaded file is located.
- Extract the downloaded file using the following command:
unzip android-studio-*.zip - Move the extracted folder to the desired installation location. You can use the following command:
sudo mv android-studio /opt/ - To launch Android Studio, navigate to the
/opt/android-studio/binfolder and run thestudio.shscript. - When prompted, select the components you want to install. Ensure that “Android SDK” is checked.
- Choose the installation location for the Android SDK or keep the default location.
- Click on “Next” and then on “Finish” to complete the installation.
After installing the Android SDK, you need to set up the Android Environment Variables:
- Open a terminal and navigate to your home directory.
- Open the
.bashrcfile in a text editor by running the commandgedit ~/.bashrc. - Add the following lines at the end of the file:
export ANDROID_HOME=$HOME/Android/Sdk

  export PATH=$PATH:$ANDROID_HOME/tools

export PATH=$PATH:$ANDROID_HOME/platform-tools - Save the file and close the text editor.
- Run the following command to apply the changes:
source ~/.bashrc
Now you have successfully installed the Android SDK on your Linux system and configured the necessary environment variables. You are ready to start developing amazing Android applications. Remember to regularly update the Android SDK to access the latest features and improvements for Android development.
Configuring the Android SDK Manager
Once you have installed the Android SDK, it’s important to configure the Android SDK Manager to ensure you have the necessary tools and packages for Android app development. The Android SDK Manager allows you to download additional SDK components, such as system images, libraries, and documentation.
Follow these steps to configure the Android SDK Manager:
- Launch Android Studio on your computer.
- In the welcome screen, click on “Configure” and select “SDK Manager.”
- The SDK Manager window will appear, showing a list of installed and available SDK components.
- Under the “SDK Platforms” tab, you’ll find a list of Android versions. Install the SDK platforms that you want to target for your app by checking the corresponding checkboxes.
- Switch to the “SDK Tools” tab to see a list of additional tools available for download. Check the desired tools that you need for your app development.
- Click on the “Apply” button to start the download and installation of the selected components. This process may take some time depending on your internet connection speed.
- Once the installation is complete, you can close the SDK Manager window.
Configuring the Android SDK Manager is crucial as it ensures that you have the necessary SDK components for your app development. By selecting the appropriate SDK platforms and tools, you can develop applications that are compatible with specific Android versions and take advantage of additional features offered by the SDK.
It’s recommended to keep the Android SDK Manager updated regularly to access the latest features, bug fixes, and security patches for smooth app development.
Installing Android Virtual Device (AVD)
Android Virtual Device (AVD) allows you to emulate Android devices on your computer for testing and debugging purposes. It provides a virtual environment that simulates different screen sizes, hardware configurations, and Android versions. To install an AVD, follow these steps:
- Launch Android Studio on your computer.
- In the welcome screen, click on “Configure” and select “AVD Manager.”
- The AVD Manager window will appear, showing a list of existing virtual devices (if any).
- Click on the “Create Virtual Device” button.
- Choose a device definition based on the screen size and hardware configuration you want to emulate. You can select from various pre-defined device profiles or create a custom one.
- Select the desired system image for the Android version you want to emulate.
- Configure additional settings such as RAM size, internal storage, and camera emulation.
- Click on the “Finish” button to create the AVD.
- In the AVD Manager window, select the newly created device from the list.
- Click on the “Play” button to start the virtual device.
Once the AVD starts, you can test your app on a virtual Android device. You can interact with it as you would with a physical device, including installing and running apps, debugging, and testing different scenarios.
Creating an AVD provides a convenient way to test your app’s compatibility across different devices and Android versions without the need for physical devices. It allows you to identify and fix any issues that may arise on specific device configurations before releasing your app to a wider audience.
Remember to keep your AVD updated with the latest system images and configurations to ensure accurate testing and app development.
Configuring the Android Environment Variables
Configuring the Android environment variables is an important step to ensure that the Android SDK and related tools are easily accessible from the command line. Setting up these variables allows you to run commands and use various Android development tools without having to specify the full file paths each time.
Follow these steps to configure the Android environment variables:
- Open the System Properties on your computer. On Windows, right-click on “This PC” or “My Computer” and select “Properties.” On macOS and Linux, open the terminal and type
sudo nano /etc/environmentto edit the system environment file. - On Windows, go to the “Advanced” tab and click on the “Environment Variables” button.
- Under “System Variables,” click on the “New” button to add a new variable.
- Set the variable name as
ANDROID_HOMEand the variable value as the path to the Android SDK installation directory. - Click “OK” to save the changes.
- On macOS and Linux, in the environment file, add the following line at the end:
export ANDROID_HOME=/path/to/android/sdk - Save the file and exit the text editor.
- On macOS and Linux, run the command
source /etc/environmentto apply the changes.
By configuring the Android environment variables, you can easily access the Android SDK and tools from any location in the command line. This is particularly useful when running build scripts, compiling code, or using command-line tools such as adb (Android Debug Bridge) or gradle.
Ensure that you have correctly set the ANDROID_HOME variable to the path where your Android SDK is installed. By doing so, you can streamline your Android development workflow and avoid potential issues related to path configurations.
Remember to update the environment variables whenever you install a new version of the Android SDK or change the installation directory.
Verifying the Android SDK Installation
After installing the Android SDK, it’s important to verify that the installation was successful and that all the necessary components are properly set up. Verifying the Android SDK installation ensures that you can start developing Android applications without any issues.
Follow these steps to verify the Android SDK installation:
- Open Android Studio on your computer.
- In the welcome screen, click on “Configure” and select “SDK Manager.”
- The SDK Manager window will open, showing a list of installed and available SDK components.
- Ensure that the “Android SDK” checkbox is selected under the “SDK Platforms” tab. This confirms that the Android SDK is installed on your system.
- Switch to the “SDK Tools” tab and make sure the necessary tools, such as the Android Emulator, Android SDK Build-Tools, and Platform-Tools, are installed.
- If any updates are available, check the corresponding checkboxes and click on the “Apply” button to update the SDK.
- Once the updates are complete, close the SDK Manager.
In addition to verifying the installation through the SDK Manager, you can also test the Android SDK installation by running command-line tools like adb (Android Debug Bridge) or compiling and running a simple Android application.
Open a command prompt or terminal window, and type adb version. If the Android Debug Bridge is installed correctly, it will display the version information. This confirms that the Android SDK and related tools are accessible from the command line.
To test the Android Studio installation and create a basic Android application, you can follow the “Hello World” tutorial provided by the Android Developer website. This tutorial will guide you through the process of creating a simple app and running it on an emulator or a connected device.
By verifying the Android SDK installation, you can ensure that all the necessary components are correctly set up, allowing you to start developing Android applications without any issues. Remember to regularly update the Android SDK and related tools to access the latest features and bug fixes for a smooth development experience.
Updating the Android SDK
Updating the Android SDK is essential to gain access to the latest features, bug fixes, and security patches provided by Google. Regularly updating the Android SDK ensures that you have the most up-to-date tools and resources for Android app development. Here’s how to update the Android SDK:
- Launch Android Studio on your computer.
- In the welcome screen, click on “Configure” and select “SDK Manager.”
- The SDK Manager window will appear, displaying a list of installed and available SDK components.
- In the “SDK Platforms” tab, you can update individual Android versions by checking the corresponding checkboxes and clicking on the “Apply” button.
- Switch to the “SDK Tools” tab, where you can update individual tools, such as the Android Emulator, Android SDK Build-Tools, and Platform-Tools.
- Check the checkboxes next to the tools you want to update and click on the “Apply” button.
- The SDK Manager will download and install the selected updates. This process may take some time depending on your internet connection speed.
- Once the updates are complete, you can close the SDK Manager.
It’s recommended to regularly check for updates to ensure you are using the latest version of the Android SDK. By keeping the Android SDK up to date, you can take advantage of new features, improvements, and performance optimizations provided by Google.
In addition to updating through the SDK Manager, you can also use the command line to update the Android SDK. Open a command prompt or terminal window and navigate to the Android SDK installation directory. Run the command ./sdkmanager --update to update all installed packages to their latest versions.
Remember to update the Android SDK Build-Tools and other essential components to avoid compatibility issues when building and running your Android applications on different devices and Android versions.
By regularly updating the Android SDK, you ensure that you have the most up-to-date tools and resources for successful Android app development.
Troubleshooting Installation Issues
While installing the Android SDK, you may encounter some common issues that could prevent a successful installation. Here, we’ve outlined a few troubleshooting steps to help resolve installation issues:
- Check system requirements: Ensure that your computer meets the minimum system requirements for installing and running the Android SDK. Check the official Android Developer website for the specific system requirements.
- Verify Java Development Kit (JDK) installation: Make sure you have installed the correct version of the JDK and that it is properly configured. Check the system’s environment variables to ensure that the JDK paths are set correctly.
- Download the correct Android SDK package: Double-check that you have downloaded the correct Android SDK package for your operating system (Windows, macOS, or Linux). Using the wrong package can cause installation errors.
- Run installer as administrator: On Windows, try running the Android SDK installer as an administrator to ensure that the necessary permissions are granted.
- Disable antivirus/firewall software: Temporarily disable any antivirus or firewall software on your computer as they could interfere with the installation process. Remember to re-enable them after the installation is complete.
- Verify internet connection: A stable internet connection is crucial for downloading the Android SDK and related components. Ensure that you have a reliable internet connection to avoid interruptions during the installation process.
- Reboot your computer: Sometimes, a simple reboot can resolve installation issues by clearing any temporary glitches or conflicts that may have occurred during the installation process.
- Seek help from the developer community: If you’re still experiencing installation issues, consider reaching out to the Android developer community. Forums, online communities, and developer support channels can provide valuable assistance and guidance to help troubleshoot specific installation problems.
Remember, installation issues can vary depending on the specific configuration of your computer and the versions of the software being used. If you’re encountering persistent issues, it may be necessary to seek more detailed documentation or consult official resources provided by Google.
By following these troubleshooting steps, you can resolve common installation issues and ensure a smooth installation process for the Android SDK, enabling you to proceed with developing Android applications.