
What are Minecraft Shaders?
Minecraft is a popular sandbox game known for its pixelated graphics and open-world gameplay. While the game’s aesthetic appeal lies in its charming simplicity, some players may want to enhance their gaming experience by adding visual enhancements. This is where Minecraft shaders come into play.
Minecraft shaders are mods or modifications that improve the game’s graphics by adding realistic lighting, shadows, reflections, and other visual effects. They transform the blocky world of Minecraft into a stunning virtual landscape, giving players a more immersive and visually appealing gameplay experience.
Shaders achieve this by utilizing various techniques, such as advanced lighting algorithms, dynamic shadows, motion blur, depth of field, and ambient occlusion. These effects bring Minecraft to life, making it feel more like a realistic and dynamic environment.
Shaders can drastically change the game’s atmosphere and mood, allowing players to explore their Minecraft worlds in a whole new way. Whether you want to create a serene and peaceful landscape with soft lighting or a dark and moody setting with deep shadows, Minecraft shaders offer a wide range of options to suit your preferences.
With shaders installed, you might find yourself gazing at the sunset over the horizon, marveling at the realistic reflections on the water’s surface, or getting lost in the beauty of a starry night sky.
It’s worth noting that shaders can be resource-intensive, meaning they require a decent graphics card to run smoothly. If your computer does not meet the requirements, you may experience lag or performance issues. However, for those with capable hardware, the visual improvements offered by shaders can be well worth the investment.
To install Minecraft shaders and enjoy a visually stunning gaming experience, follow the step-by-step guide outlined in the subsequent sections. Remember to consult the system requirements of the specific shader pack you choose to ensure compatibility with your computer.
Why Should You Install Minecraft Shaders?
Minecraft shaders offer a range of benefits that can enhance your gaming experience and take your Minecraft worlds to a whole new level. Here are a few reasons why you should consider installing Minecraft shaders:
1. Enhanced Visuals: Shaders bring realistic lighting, shadows, reflections, and other visual effects to Minecraft. This can transform the game’s blocky graphics into stunning and immersive landscapes. Imagine exploring lush forests with sunlight filtering through the leaves or admiring the intricate details of a medieval castle bathed in soft, ambient light.
2. Immersive Atmosphere: Shaders create a more immersive atmosphere by adding depth and realism to the game. Whether it’s the subtle sway of grass in the wind, the sparkling of water under the sunlight, or the gentle flicker of torches illuminating dark caverns, shaders make Minecraft feel more like a living, breathing world.
3. Personalization: Shaders allow you to personalize your Minecraft experience and make it reflect your preferred aesthetic. With a wide range of shader packs available, you can choose from different styles, such as vibrant and colorful, cinematic and moody, or realistic and natural. This customization enables you to create unique and visually captivating environments that align with your creative vision.
4. Photography and Cinematic Opportunities: Shaders open up new possibilities for capturing stunning screenshots or creating cinematic videos within Minecraft. The enhanced visuals provided by shaders can elevate your media creations, making them more visually appealing and professional-looking.
5. Community Support: Minecraft shaders have a dedicated community that continuously creates and updates shader packs. This means you can find a wide variety of options to choose from, each offering its own unique style and set of visual enhancements. The active community also ensures that shaders are regularly optimized and updated, making them compatible with the latest versions of Minecraft.
6. Allows for Shader-modded Content: Some Minecraft modpacks or custom maps are designed specifically to work alongside shaders. By installing shaders, you gain access to a whole range of additional shader-modded content, including realistic texture packs, custom 3D models, and immersive gameplay mechanics.
7. Exploration and Appreciation: Minecraft shaders can encourage exploration and appreciation of the game’s landscapes. With their visually stunning effects, shaders make it more enticing to venture into uncharted territories, uncover hidden treasures, and marvel at the beauty of Minecraft’s generated worlds.
Overall, Minecraft shaders provide a way to elevate your gaming experience, introducing breathtaking visuals and enhancing the immersion and personalization within the game. Whether you’re a casual player looking to add a touch of visual flair or a dedicated creator seeking to capture breathtaking moments, installing shaders in Minecraft can offer a whole new level of enjoyment and creativity.
Step 1: Download and Install OptiFine
In order to use shaders in Minecraft, you’ll need to install a mod called OptiFine. OptiFine not only improves the game’s performance but also adds support for shaders. Follow these steps to download and install OptiFine:
1. Choose the OptiFine version: Visit the official OptiFine website (https://optifine.net/downloads) and select the version of OptiFine that corresponds to your Minecraft version. Make sure to download the correct version to ensure compatibility.
2. Download OptiFine: Click on the download link for the desired OptiFine version. You will be redirected to an adfly link. Wait for a few seconds, and then click on the “Skip Ad” button to initiate the download.
3. Install OptiFine: Once the OptiFine .jar file is downloaded, locate it in your computer’s Downloads folder or wherever you saved it. Double-click on the .jar file to launch the OptiFine installer. Select “Install” to proceed with the installation process.
4. Launch Minecraft with OptiFine: After the installation is complete, open the Minecraft Launcher. Click on the “Play” button to launch Minecraft, but before you do that, make sure to select the OptiFine profile from the drop-down menu in the bottom left corner of the launcher. This will ensure that Minecraft runs with the OptiFine mod.
5. Verify OptiFine installation: Once Minecraft is launched, check if OptiFine is successfully installed. On the main menu, you should see “OptiFine” listed in the bottom left corner of the screen. This confirms that OptiFine is installed and ready to be used with shaders.
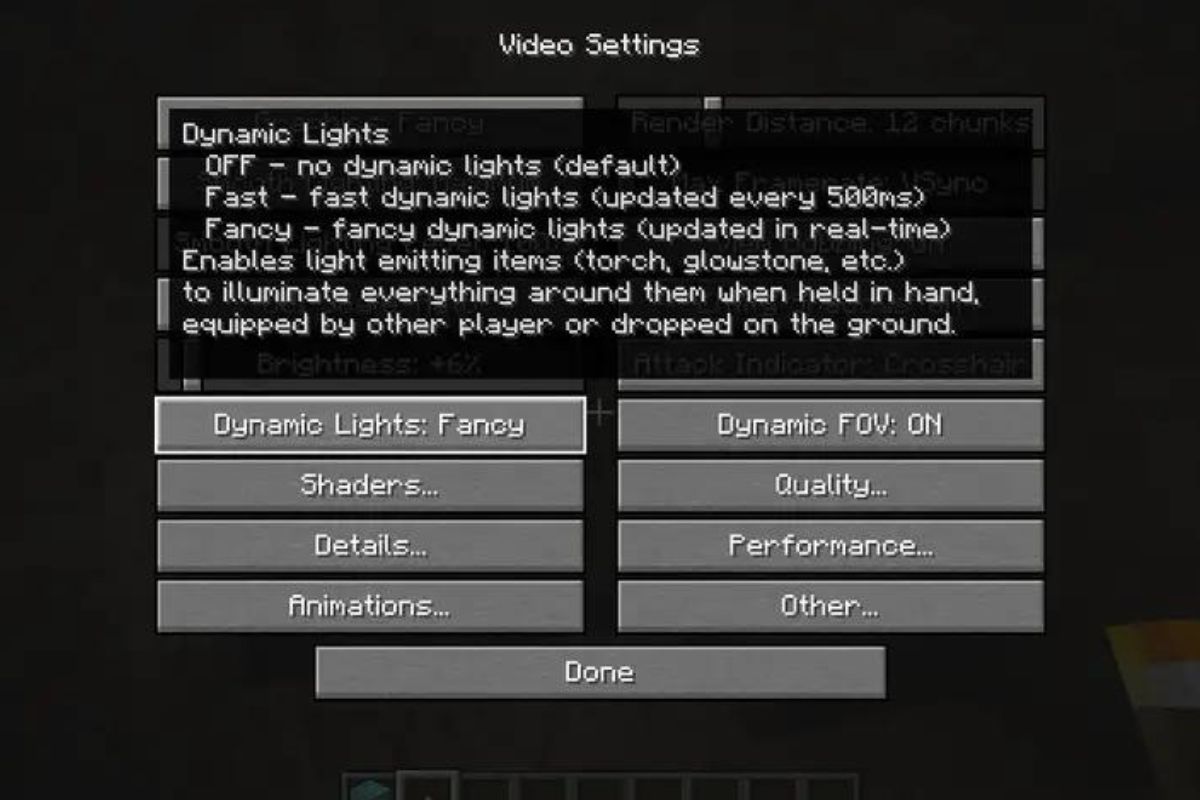
6. Set OptiFine video settings: To optimize your gameplay experience with OptiFine, you may want to adjust some video settings. Open the “Options” menu in Minecraft and navigate to “Video Settings.” Here, you can fine-tune settings such as render distance, graphics quality, particles, and more. Experiment with these settings to find the balance between visual quality and performance that suits your computer’s capabilities.
With OptiFine installed, you are now ready to proceed to the next step of installing shaders in Minecraft. Each shader pack comes with its own installation process, so make sure to follow the specific instructions provided by the shader pack’s creator.
Step 2: Download Shaders Pack
Once you have successfully installed OptiFine, the next step to installing Minecraft shaders is to download a shader pack. Shader packs are files that contain the necessary shaders and textures to apply the visual enhancements to Minecraft. Follow these steps to download a shader pack:
1. Choose a shader pack: There are numerous shader packs available, each offering a different visual style and set of effects. Popular shader packs include SEUS (Sonic Ether’s Unbelievable Shaders), Continuum, Sildur’s Vibrant, and Chocapic13. Decide on a shader pack that aligns with your preferences and computer’s capabilities.
2. Find a reliable source: It is important to download shader packs from trusted sources to ensure they are safe and legitimate. Many shader pack creators have official websites or threads on popular Minecraft forums where you can download their packs. Be cautious of downloading shader packs from unfamiliar or unofficial sources, as they may contain malware or modified files.
3. Download the shader pack: Once you have identified a reliable source, locate the download link for the desired shader pack. Click on the download link, and the shader pack file should start downloading to your computer. Shader packs are typically compressed as .zip or .rar files.
4. Extract the shader pack: After the download is complete, navigate to the location where the shader pack file was saved. Right-click on the file and select the option to extract or unzip the contents. This will create a folder containing the shader pack files.
5. Organize the shader pack: To keep your Minecraft shaders organized, create a new folder in a convenient location on your computer and name it “Shader Packs” or a similar name. Move the extracted shader pack folder into the newly created folder. This will make it easier to locate and manage your shader packs when installing them in Minecraft.
6. Backup your Minecraft files: It is always a good idea to make backups of your Minecraft files before installing any mods or shader packs. Create a copy of your Minecraft world saves and any other important files to a separate location on your computer. This ensures that you can revert to the original files in case any issues occur during the shader pack installation process.
Now that you have successfully downloaded a shader pack and organized its files, you’re ready to proceed to the next step of installing the shader pack in Minecraft. Continue following the steps provided in this guide to fully enjoy the visual enhancements of Minecraft shaders.
Step 3: Locate Minecraft Game Folder
In order to install shader packs in Minecraft, you will need to locate the Minecraft game folder on your computer. This is where you will place the shader pack files. Follow these steps to find the Minecraft game folder:
1. Open the Minecraft Launcher: Launch the Minecraft Launcher on your computer by double-clicking the shortcut or the Minecraft executable file.
2. Access the Installations Tab: Once the Minecraft Launcher is open, click on the “Installations” tab at the top of the launcher window. Here, you will see a list of Minecraft installations.
3. Select the Minecraft Installation: From the list of installations, identify the one you are currently using or wish to install shader packs for. Click on the installation to select it.
4. Open the Game Folder: After selecting the Minecraft installation, click on the three dots (…) located on the right side of the installation. This will open a dropdown menu with several options. Select the “Open Game Folder” option.
5. Explore the Minecraft Game Folder: The previous step will open the Minecraft game folder in File Explorer (Windows) or Finder (Mac). This is the folder where Minecraft stores all its game files, including the resource packs, shader packs, and saved worlds.
Alternatively, you can manually locate the Minecraft game folder by following these file paths:
- Windows: Go to the following file path: %appdata%/.minecraft/
- Mac: Go to the following file path: ~/Library/Application Support/minecraft/
Note: The “~” symbol represents your user directory.
Once you have accessed the Minecraft game folder, you are one step closer to installing shader packs and improving your visual experience in Minecraft. Continue following the steps outlined in this guide to complete the shader pack installation process.
Step 4: Open Shader Folder
After locating the Minecraft game folder, the next step in installing shader packs is to open the shader folder. Here’s a guide on how to open the shader folder:
1. Navigate to the Minecraft game folder: Open the File Explorer (or Finder for Mac) and browse to the Minecraft game folder. You can find the game folder by following the steps outlined in the previous section or by manually entering the file path for your operating system.
2. Locate the “shaderpacks” folder: Once you’re in the Minecraft game folder, look for a folder named “shaderpacks.” This folder is where you will place the shader pack files to install them in Minecraft.
3. Open the “shaderpacks” folder: Double-click on the “shaderpacks” folder to open it. If the folder doesn’t exist yet, you can create it by right-clicking inside the Minecraft game folder, selecting “New,” and choosing “Folder.” Name the new folder “shaderpacks.”
4. Prepare the shader pack: Before you can place the shader pack files into the “shaderpacks” folder, make sure the shader pack is properly extracted and ready to be installed. If you have downloaded a shader pack as a compressed (.zip or .rar) file, extract the contents of the file to obtain the shader pack folder.
5. Move the shader pack to the “shaderpacks” folder: With the “shaderpacks” folder open, simply drag and drop the shader pack folder into the “shaderpacks” folder. Alternatively, you can right-click on the shader pack folder, select “Copy,” navigate to the “shaderpacks” folder, right-click inside the folder, and choose “Paste” to move the shader pack.
Note: It’s important to ensure that only one shader pack folder exists inside the “shaderpacks” folder. Having multiple shader pack folders in this location may cause issues when loading shaders in Minecraft.
Once you have successfully opened the shader folder and placed the shader pack inside, you are now ready to proceed to the next step of loading and activating the shaders in Minecraft. Follow the subsequent steps in this guide to fully enjoy the visual enhancements provided by shader packs.
Step 5: Move Shaders Pack to Shader Folder
Now that you have opened the shader folder, the next step is to move the shader pack to the shader folder. This will allow Minecraft to recognize and load the shaders for your gameplay. Follow these steps to move the shader pack to the shader folder:
1. Locate the shader pack: Go to the location on your computer where you have saved the shader pack. This is typically the folder where you extracted the shader pack files in a previous step.
2. Select the shader pack files: Select all the files within the shader pack folder. This typically includes files with extensions such as .vsh, .fsh, .txt, and possibly other formats depending on the shader pack you downloaded.
3. Move the shader pack files: Once the files are selected, right-click on them and choose the “Cut” or “Copy” option.
4. Paste the shader pack files: Now, navigate to the shader folder that you opened in the previous step (Step 4). Right-click inside the shader folder and select the “Paste” option to move the shader pack files into the folder. Alternatively, you can use the keyboard shortcut Ctrl+V (Windows) or Cmd+V (Mac) to paste the files.
Note: Make sure to paste the shader pack files directly into the shader folder and not into any subfolders or directories inside the shader folder.
Once you have successfully moved the shader pack files to the shader folder, you are now one step closer to activating the shaders in Minecraft. Follow the subsequent steps in this guide to learn how to load and adjust the shaders to your liking.
Step 6: Load Shaders in Minecraft
With the shader pack files placed in the shader folder, the next step is to load the shaders in Minecraft. Follow these steps to load shaders and experience the visual enhancements in the game:
1. Launch Minecraft: Open the Minecraft Launcher on your computer and log in to your Minecraft account.
2. Select the Minecraft installation: If you have multiple Minecraft installations, select the one in which you have installed OptiFine (Step 1).
3. Click on “Options” and select “Video Settings”: Once the Minecraft Launcher is open, click on the “Options” button next to the “Play” button. From the dropdown menu, select “Video Settings.”
4. Open the “Shaders” settings: Within the “Video Settings” menu, you will find a tab labeled “Shaders.” Click on this tab to access the shader options.
5. Select desired shader pack: In the “Shaders” settings, a list of shader packs available in the shader folder will be displayed. Click on the shader pack you want to use for your gameplay.
6. Click “Done” to apply the shader: After selecting the shader pack, click on the “Done” button to apply the changes and load the shaders in Minecraft.
Note: If you do not see the shader pack listed in the “Shaders” settings, make sure that you have placed the shader pack files in the correct location within the shader folder (Step 5).
Once the shaders are loaded, you should notice the visual enhancements and effects taking effect in your Minecraft gameplay. Enjoy exploring the immersive and stunning world that shaders have created!
Additional Tips:
– Experiment with different shader packs to find the one that suits your preferences and computer’s performance best.
– Some shader packs may require specific settings or additional resource packs for optimal visuals. Refer to the documentation or instructions provided with the shader pack for any specific requirements.
– Adjust the shader settings within the game (if available) to fine-tune the visuals according to your liking. These settings may include options for brightness, contrast, shadows, and effects.
– Keep in mind that shaders can put a strain on your computer’s performance. If you experience lag or frame rate drops, try adjusting the graphics settings within Minecraft to achieve a balance between visual quality and performance.
Now that you have successfully loaded the shaders in Minecraft, you can move on to the next step of adjusting the shader settings to further personalize your gaming experience.
Step 7: Adjust Shaders Settings
After loading the shaders in Minecraft, you may want to adjust the shader settings to customize the visual experience according to your preferences. Follow these steps to adjust the shader settings:
1. Launch Minecraft: Open the Minecraft Launcher on your computer and log in to your Minecraft account.
2. Select the Minecraft installation: Choose the Minecraft installation in which you have loaded the shaders and want to modify the settings.
3. Click on “Options” and select “Video Settings”: In the Minecraft Launcher, click on the “Options” button next to the “Play” button, and then select “Video Settings” from the dropdown menu.
4. Open the “Shaders” settings: Inside the “Video Settings” menu, there is a tab labeled “Shaders.” Click on this tab to access the shader options.
5. Choose the shader settings: Depending on the shader pack you are using, there may be various settings available for customization. These settings could include options to adjust brightness, contrast, bloom, motion blur, shadow quality, and more. Click on the desired settings to make adjustments.
6. Preview the changes: As you make changes to the shader settings, a real-time preview of the visuals will be displayed within the Minecraft game window. This allows you to see the impact of each adjustment immediately. Take your time to experiment with different settings until you achieve the desired visual effect.
7. Save the changes: Once you are satisfied with the adjustments, click on the “Done” button to save the changes and apply the modified shader settings.
Note: The available settings and their names may vary depending on the shader pack you are using. Some shader packs may include more advanced customization options, while others may have simpler settings. Refer to the documentation or instructions provided with the shader pack for a better understanding of the available settings.
By adjusting the shader settings, you can further enhance and personalize the visual experience in Minecraft. Take the time to find the perfect balance between aesthetics and performance to suit your preferences and computer’s capabilities.
Now that you have adjusted the shader settings, you’re ready to move on to the final step of testing the shaders in Minecraft to see the full effect of your customized visual enhancements.
Step 8: Test Shaders in Minecraft
After installing and adjusting the shader settings in Minecraft, it’s time to test the shaders and experience the full visual effect. Here are the steps to test shaders in Minecraft:
1. Launch Minecraft: Open the Minecraft Launcher on your computer and log in to your Minecraft account.
2. Select the Minecraft installation: Choose the Minecraft installation in which you have loaded and adjusted the shaders.
3. Start a new world or load an existing one: Once Minecraft is launched, you can either start a new world or load an existing world to test the shaders. Choose a world that you are familiar with or one that showcases different environments and lighting conditions.
4. Check the shaders: As the game world loads, pay attention to the visual enhancements provided by the shaders. Observe the lighting, shadows, reflections, and other effects that have been applied. Take note of how the shaders improve the overall visual quality and atmosphere of the game.
5. Explore different environments: Move around in the game and explore various landscapes, such as forests, mountains, oceans, or caves. Take your time to appreciate the realistic lighting, the way shadows are cast, and the reflections on the water. Notice how the shaders transform the Minecraft world into a more immersive and visually appealing experience.
6. Observe different times of day: Pay attention to how the shaders interact with the changing time of day in Minecraft. Notice the soft hues of sunrise and sunset, the warm glow of midday, and the ambient light during nighttime. These shader effects can create stunning and dynamic visuals as you witness the different times of day.
7. Take screenshots or record videos: If desired, capture the beauty of the shaders by taking screenshots or recording videos of specific moments that stand out to you. This can be a great way to showcase the visual enhancements and share them with others.
8. Experiment and refine: Feel free to further adjust the shader settings or try out different shader packs to find the combination that best suits your preferences and enhances your Minecraft experience. Don’t be afraid to explore and experiment with different settings to achieve the desired visual effect.
By testing the shaders in Minecraft, you can fully appreciate the visual enhancements they bring to the game. Enjoy the immersive and stunning world that shaders create as you explore and interact with the Minecraft environment.
Now that you have successfully tested the shaders in Minecraft, you’re all set to enjoy your customized and enhanced visual experience. Have fun exploring and creating memorable moments within the beautifully enhanced Minecraft world!