
Gather the Necessary Tools and Materials
Before you begin installing an HDMI switch box, it is essential to gather all the necessary tools and materials. Having everything at hand will make the process smoother and more efficient. Here is a list of items you will need:
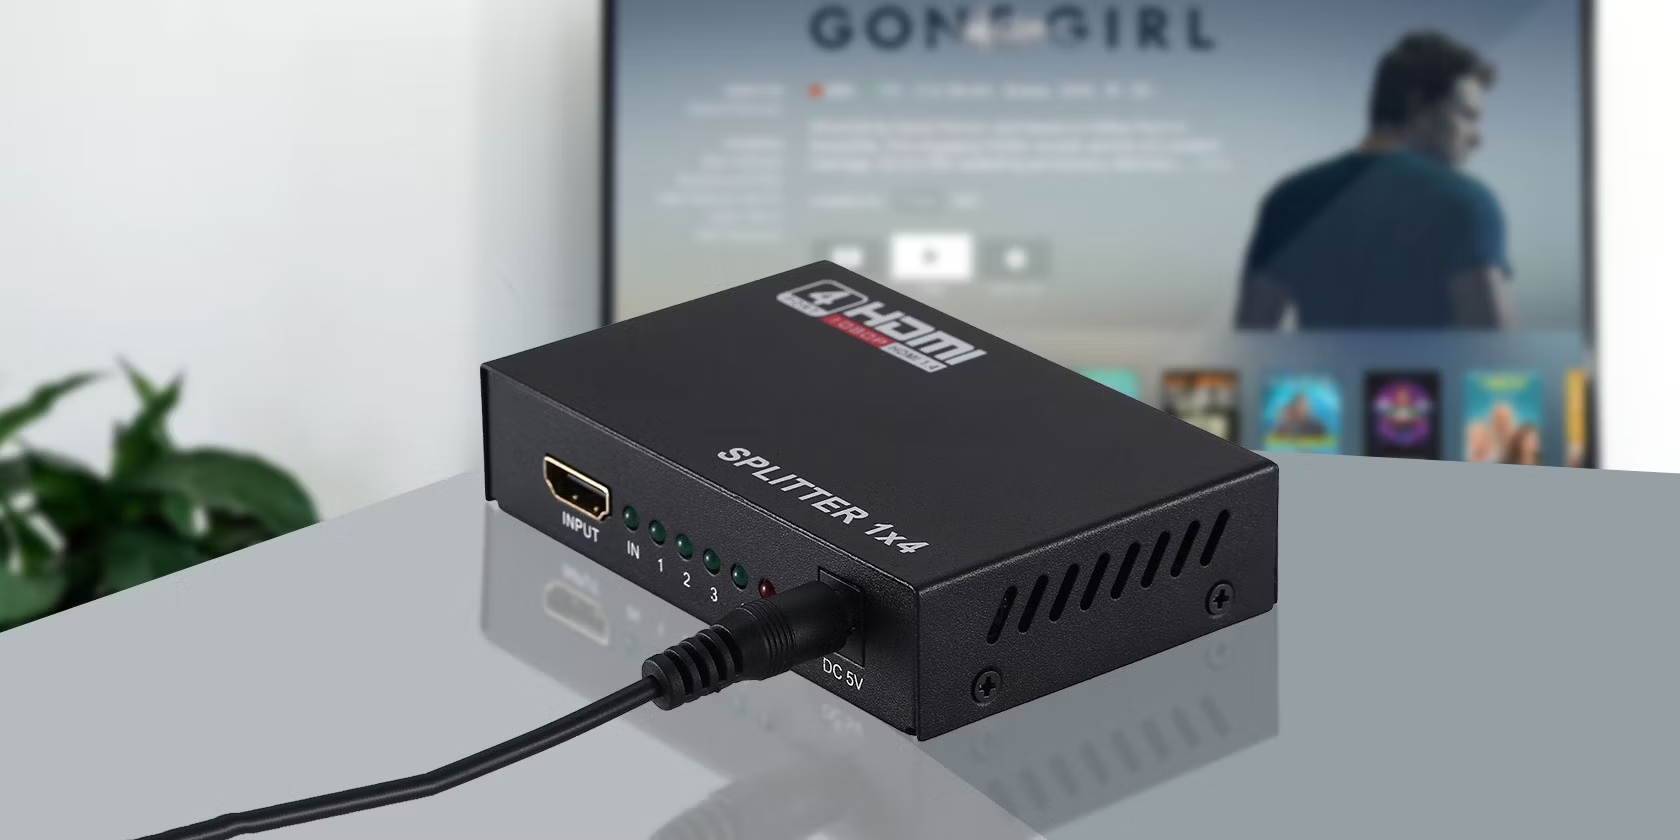
- HDMI switch box
- HDMI cables
- Power adapter (if required by the switch box)
- Remote control (if included with the switch box)
- Screwdriver (if needed to secure the cables)
Make sure to choose an HDMI switch box that meets your specific requirements. Consider the number of HDMI sources and displays you plan to connect, as well as any additional features or functionality you may need. Research different models and read customer reviews to find the best option for your setup.
When it comes to HDMI cables, it’s crucial to opt for high-quality ones. Look for cables that support the latest HDMI standards (such as HDMI 2.0 or 2.1) for optimal performance. Additionally, consider the length of the cables you will need to ensure they can reach your HDMI sources and displays comfortably.
If your HDMI switch box requires a power adapter, make sure to have one that matches the required specifications. Check the voltage and amperage requirements of the switch box and find a compatible power adapter to avoid any electrical issues. If a remote control is included with the switch box, keep it handy for easier operation.
Lastly, having a screwdriver on hand can be helpful if you need to secure the HDMI cables firmly. Some switch boxes have screws to secure the HDMI cables, ensuring a reliable connection. Using a screwdriver, you can tighten the cables and prevent accidental disconnections.
By gathering all the necessary tools and materials before starting the installation process, you set yourself up for a successful and hassle-free HDMI switch box setup. With everything in place, you can move on to the next steps of identifying the HDMI sources and displays.
Identify the HDMI Sources and Displays
Once you have gathered the necessary tools and materials, the next step in installing an HDMI switch box is to identify the HDMI sources and displays that you will be connecting. It is important to have a clear understanding of your setup to ensure a smooth installation process. Here’s how you can do it:
- Take a moment to evaluate your audio/video equipment and determine the devices that will serve as your HDMI sources. Common examples of HDMI sources include game consoles, Blu-ray players, streaming devices, and cable/satellite boxes. Make a list of these sources for reference.
- Next, identify the displays where you want to output the HDMI signals. Displays can include televisions, monitors, projectors, or any other device capable of receiving an HDMI signal. Take note of the number of displays you want to connect to the HDMI switch box.
- Consider the locations of your HDMI sources and displays in relation to the HDMI switch box’s placement. Ensure that the cables connecting the sources and displays to the switch box will be of sufficient length to reach their respective destinations. Also, factor in any potential obstacles or limitations that may affect cable routing.
- Label each HDMI source and its corresponding display to make it easier to keep track of connections during the installation process. You can use adhesive labels or tape to mark the cables or devices themselves. This simple step will save you time and avoid confusion when connecting everything.
By carefully identifying your HDMI sources and displays, you lay the foundation for a successful installation. Having a clear overview of your setup allows you to plan the cable routing effectively, ensuring a neat and organized installation. It also helps to prevent any mistakes or mix-ups during the connection process, saving you time and frustration in the long run.
Now that you have identified the HDMI sources and displays, you are ready to move on to the next step – choosing the right HDMI switch box for your setup.
Choose the Right HDMI Switch Box
Selecting the appropriate HDMI switch box is crucial to ensure smooth and efficient operation of your HDMI setup. There are several factors to consider when making your decision. Here’s a guide on how to choose the right HDMI switch box for your needs:
- Number of HDMI Inputs and Outputs: Determine the number of HDMI sources you want to connect to your switch box and the number of displays you need to output to. Make sure the switch box has enough input ports to accommodate all your sources and sufficient output ports for your displays.
- HDMI Version and Features: Check the HDMI version supported by the switch box. Choosing a switch box with the latest HDMI version (such as HDMI 2.0 or 2.1) will ensure compatibility with high-definition content and advanced features like 4K resolution, HDR, and HDCP support.
- Additional Functionality: Consider any additional features you may require. Some switch boxes offer features like remote control operation, automatic switching between sources, audio extraction, or picture-in-picture capability. Assess your needs and preferences to find a switch box that offers the desired functionality.
- Build Quality and Design: Pay attention to the build quality and design of the switch box. Look for sturdy construction and quality materials that ensure durability and longevity. Consider the size and form factor, ensuring it fits seamlessly into your setup without obstructing other devices or cables.
- User Reviews and Ratings: Read customer reviews and ratings for the switch box you are considering. Feedback from other users can provide valuable insights into its performance, reliability, and any potential issues. Look for switch boxes with positive reviews and high ratings to increase the likelihood of a satisfactory experience.
Taking the time to evaluate these factors will help you choose a switch box that meets your specific needs and provides a seamless and reliable HDMI switching experience. Once you have identified the right HDMI switch box, you can proceed to the next step of preparing the switch box and cables for installation.
Prepare the Switch Box and Cables
Now that you have chosen the right HDMI switch box for your setup, it’s time to prepare the switch box and cables for installation. Proper preparation ensures a smooth and hassle-free connection process. Follow these steps to get everything ready:
- Unbox the HDMI switch box and carefully inspect it for any visible damage. Ensure that all components, such as the switch box, power adapter (if applicable), and remote control (if included), are in good condition.
- If the switch box requires a power source, connect the power adapter to the designated port on the switch box. Ensure that the power outlet is easily accessible and compatible with the power adapter’s specifications.
- Identify the HDMI input and output ports on the switch box. Take note of their locations and labeling, as this information will be crucial during the cable connection process.
- Choose high-quality HDMI cables of appropriate length to connect your HDMI sources to the switch box and the switch box to your displays. It is recommended to use HDMI cables that support the same HDMI version as your devices for optimal performance.
- If necessary, secure the HDMI cables to the switch box and the HDMI sources using cable ties or adhesive clips. This helps keep the cables organized and prevents accidental disconnections.
- Ensure that the HDMI cables are not excessively bent or strained, as this can degrade signal quality. Avoid sharp bends or twists and leave some slack to accommodate any movement or adjustments.
- Organize the cables and arrange them neatly to avoid a tangled mess. Use cable management solutions like cable sleeves, cable raceways, or zip ties to keep the cables organized and prevent them from getting tangled or damaged.
By properly preparing the switch box and cables, you set the stage for a successful installation. Taking the time to inspect the components, connect the power source, and organize the cables ensures a smooth and efficient connection process. With everything prepared, you are now ready to connect the HDMI sources to the switch box.
Connect the HDMI Sources to the Switch Box
Now that you have prepared the switch box and cables, it’s time to connect your HDMI sources to the switch box. Properly connecting your devices ensures a seamless switching experience. Follow these steps to connect your HDMI sources:
- Locate the HDMI output ports on your HDMI sources, such as game consoles, Blu-ray players, or cable/satellite boxes. These ports may be labeled as “HDMI out” or “HDMI output”.
- Take one end of an HDMI cable and insert it into the HDMI output port of the first source device. Ensure a snug and secure connection.
- Identify the HDMI input ports on the switch box and determine which input corresponds to the first HDMI source. These ports are typically labeled numerically or with specific device names.
- Insert the other end of the HDMI cable into the corresponding HDMI input port on the switch box. Again, ensure a secure connection.
- Repeat steps 2-4 for each additional HDMI source you want to connect to the switch box. Connect the HDMI output port of each source device to a separate HDMI input port on the switch box.
As you connect each HDMI source to the switch box, take care to verify that the cables are securely connected on both ends. Ensure that the HDMI ports and connectors are properly aligned before applying gentle pressure to make the connection. Avoid forcing or bending the cable to prevent any damage to the ports or cables themselves.
Once all the HDMI sources are connected to the switch box, you can proceed to the next step of connecting the switch box to your displays.
Connect the Switch Box to the Displays
After connecting your HDMI sources to the switch box, it’s time to establish the connection between the switch box and your displays. Properly connecting the switch box to the displays ensures that you can enjoy your content on the desired screens. Follow these steps to connect the switch box to your displays:
- Identify the HDMI output ports on the switch box. These ports are typically labeled as “HDMI out” or “HDMI output”.
- Take one end of an HDMI cable and insert it into the HDMI output port on the switch box.
- Locate the HDMI input ports on your displays, such as televisions, monitors, or projectors. These ports may be labeled as “HDMI in” or “HDMI input”.
- Insert the other end of the HDMI cable into the HDMI input port on the display.
- Repeat steps 2-4 for each display you want to connect to the switch box. Connect an HDMI cable from each HDMI output port of the switch box to a separate HDMI input port on the displays.
As you connect the HDMI cables from the switch box to the displays, double-check that the cables are securely connected on both ends. Ensure that the HDMI ports and connectors are properly aligned before applying gentle pressure to make the connection. Avoid forcing or bending the cable to prevent any damage to the ports or cables.
Once the switch box is connected to your displays, you are ready to proceed to the next step of powering on the switch box and displays to begin enjoying your HDMI switch setup.
Power on the Switch Box and Displays
Now that you have connected the switch box to your HDMI sources and displays, it’s time to power on the switch box and displays. Properly powering on your devices ensures that they are ready to transmit and receive HDMI signals. Follow these steps to power on the switch box and displays:
- Locate the power button or switch on the switch box and turn it on. If the switch box requires a power adapter, ensure it is plugged into a power outlet and securely connected to the switch box.
- Ensure that the displays are plugged into power outlets and turned on. Most displays have a separate power button or switch located on the side or back.
- Wait for the switch box and displays to fully power on. This may take a few seconds or longer, depending on the devices.
Once powered on, the switch box should perform an initial setup or self-diagnostics. This process may vary depending on the switch box model. If your switch box came with a remote control, you may need to follow specific instructions to sync it with the switch box for operation.
Additionally, ensure that the displays are set to the correct HDMI input channel. Most displays have multiple input channels, and you will need to switch to the corresponding HDMI input that is connected to the switch box. Use the remote control or buttons on the display itself to navigate and select the appropriate HDMI input.
Once the switch box and displays are powered on and set to the correct input channels, you are ready to begin using your HDMI switch setup. Select the desired HDMI source from the switch box, and the corresponding audio/video content should appear on the connected display.
If there are any issues with the switch box or displays not powering on or not displaying content correctly, refer to the troubleshooting section for common issues and solutions.
Test the HDMI Switch Setup
After connecting and powering on your HDMI switch box and displays, it’s important to test the setup to ensure everything is working as expected. Testing your HDMI switch setup allows you to confirm that the switch box is successfully switching between sources and that the displays are receiving the audio and video signals properly. Follow these steps to test your HDMI switch setup:
- Select an HDMI source on the switch box using the remote control or buttons on the switch box itself. Make sure the corresponding display is set to the correct HDMI input channel.
-
Verify that the audio and video from the selected HDMI source are displayed on the connected display. Ensure that the audio is played through the correct audio output, such as the TV speakers or external speakers if connected.
- If the audio or video is not displayed, double-check the connections between the HDMI switch box and the displays. Ensure that the HDMI cables are securely connected to both the switch box and the displays.
- Try selecting a different HDMI source on the switch box to determine if the issue is specific to a particular source.
- Repeat the process for each HDMI source connected to the switch box, ensuring that both the audio and video are properly transmitted to the displays.
- Test the switching functionality of the HDMI switch box by selecting different HDMI sources. Verify that the switch box seamlessly switches between sources without any interruptions or delays.
During the testing phase, pay attention to the quality of the audio and video signals. Check for any distortions, flickering, or audio sync issues. If you encounter any issues, refer to the troubleshooting section for potential solutions or consider checking the compatibility of the HDMI sources and displays with the switch box.
By thoroughly testing your HDMI switch setup, you can ensure that all the connected devices are functioning properly. This allows you to enjoy a seamless and uninterrupted audio and video experience when switching between different HDMI sources on your switch box.
In the event that you encounter any problems, refer to the troubleshooting section for possible solutions.
Troubleshooting Common Issues
While setting up an HDMI switch box, you may encounter certain issues that can affect the functionality of your setup. Here are some common problems and potential solutions to help you troubleshoot and resolve them:
- No audio or video signal:
- Ensure that the HDMI cables are securely connected to both the switch box and the displays.
- Check that the switch box is powered on and that the displays are set to the correct HDMI input channel.
- Try using different HDMI cables to rule out any cable malfunctions.
- Poor signal quality:
- Verify that you are using high-quality HDMI cables that support the necessary HDMI version for your sources and displays.
- Check for any physical damage to the cables or connectors and replace them if necessary.
- Make sure that the HDMI switch box is not positioned too far away from the sources or displays, as long cable lengths can result in signal degradation.
- Switching issues:
- Ensure that the switch box is set to the correct input channel or source when attempting to switch between different HDMI sources.
- Try using the remote control or buttons on the switch box itself to manually switch between sources.
- Power cycle the switch box by turning it off, unplugging the power adapter (if applicable), waiting a few seconds, and then plugging it back in and turning it on again.
- If using a remote control, check the battery and make sure it is functioning correctly.
- Audio sync issues:
- Check the audio settings on the HDMI sources and the displays to ensure they are properly configured.
- Try switching to a different audio output option on the switch box (if available) to see if it resolves the sync issues.
- Restart the HDMI sources and displays to reset any audio synchronization problems.
- Compatibility issues:
- Ensure that the HDMI switch box, HDMI sources, and displays are all compatible in terms of supported HDMI versions and features.
- Check for firmware updates for the HDMI switch box, as manufacturers often release updates that improve compatibility and address known issues.
- Consider consulting the user manuals or seeking support from the manufacturer or customer service for further assistance.
If you have exhausted all troubleshooting options and are still experiencing issues with your HDMI switch setup, it may be helpful to consult a professional or contact technical support for additional guidance.
By troubleshooting and resolving common issues, you can ensure that your HDMI switch box operates smoothly, delivering high-quality audio and video signals to your displays.
Additional Tips and Considerations
As you set up and use your HDMI switch box, consider the following additional tips and considerations to enhance your experience:
- Labeling: Use adhesive labels or tape to label the HDMI input and output ports on the switch box and the corresponding cables. This makes it easier to identify and connect the correct devices, especially if you have multiple HDMI sources and displays.
- Cable Management: Employ cable management solutions, such as cable sleeves, raceways, or clips, to keep the HDMI cables organized and prevent tangles or accidental disconnections. This not only improves the aesthetics but also makes troubleshooting and maintenance easier.
- Remote Control Range: Check the range of the remote control that accompanies your HDMI switch box. Ensure that you are within the specified range for optimal operation.
- Powered vs. Unpowered Switches: Consider whether you require a powered or unpowered HDMI switch box. Powered switches typically provide better signal quality and support advanced features, but they require a power source. Unpowered switches rely on the HDMI sources themselves for power.
- Hot Plugging: Avoid hot-plugging HDMI cables, which refers to connecting or disconnecting cables while the devices are powered on. This can sometimes cause signal disruptions or damage to the HDMI ports. Power off the devices before making any cable connections or disconnections.
- Device Compatibility: Ensure that all HDMI devices, including sources, displays, and the switch box itself, are compatible with the latest HDMI standards. This ensures optimal performance and compatibility with high-resolution content and advanced features.
- Future Expansion: Consider future expansion needs when selecting the HDMI switch box. If you anticipate adding more HDMI sources or displays in the future, choose a switch box with additional input and output ports to accommodate future growth.
- Regular Maintenance: Periodically check the HDMI connections to ensure they are secure and free from dust or debris. Clean the HDMI ports and connectors if necessary, using a soft cloth or compressed air to remove any buildup.
By implementing these tips and considerations, you can optimize the performance and functionality of your HDMI switch box setup. Enjoy seamless switching between HDMI sources and a stellar audiovisual experience on your displays.