
What is a Wi-Fi Extender?
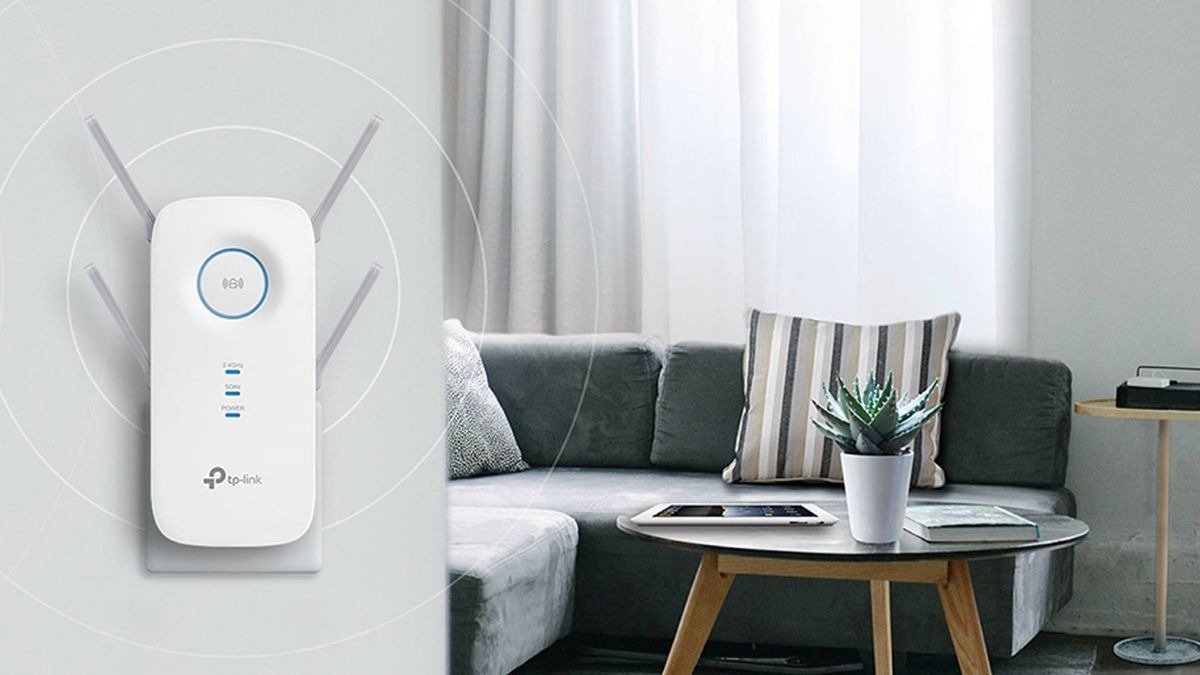
A Wi-Fi extender, also known as a wireless range extender or Wi-Fi repeater, is a device that extends the coverage area of your wireless network. It is a cost-effective solution to improve Wi-Fi signal strength and eliminate dead zones in your home or office. With a Wi-Fi extender, you can enjoy a strong and stable connection throughout your space, even in hard-to-reach areas.
Wi-Fi extenders work by receiving the existing Wi-Fi signal from your router and amplifying it to provide a wider coverage area. They act as a middleman between your devices and the router, ensuring that the signal reaches every corner of your space.
These devices are particularly useful in larger homes or buildings, where the Wi-Fi signal from the router may not reach all areas. They can also be beneficial in environments with obstructing walls or interference from other electronic devices, which can weaken the Wi-Fi signal.
Wi-Fi extenders are easy to install and require minimal technical knowledge. They can support multiple devices simultaneously, such as laptops, smartphones, tablets, and smart home devices. With a Wi-Fi extender, you can stream HD videos, play online games, and browse the internet without interruptions or buffering.
It’s important to note that while a Wi-Fi extender can improve coverage, it may slightly reduce the speed of your internet connection. This is because the extender needs to receive, amplify, and transmit the signal, which takes a small amount of time. However, the overall benefit of having a strong connection throughout your space outweighs the minor decrease in speed.
Factors to Consider Before Buying a Wi-Fi Extender
Before purchasing a Wi-Fi extender, there are several factors to consider to ensure you select the right device for your specific needs. Here are some key considerations:
- Compatibility: Before buying a Wi-Fi extender, check if it is compatible with your existing router. Look for extender models that support the same Wi-Fi standards as your router (such as 802.11ac, 802.11n, etc.) and have compatible frequency bands (2.4GHz or 5GHz).
- Range: Consider the range you need the extender to cover. Measure the distance between your router and the area where you experience weak Wi-Fi signals. This will help you determine the range capabilities required for the extender.
- Speed: Wi-Fi extenders come with different speed options. Take into account the internet speed provided by your ISP and choose an extender that can match or exceed that speed. Look for extenders with dual-band or tri-band capabilities, as they can provide faster speeds and accommodate more devices.
- Number of Antennas: The number of antennas on a Wi-Fi extender can impact its performance. Generally, more antennas mean better signal strength and coverage. Consider an extender with multiple antennas for optimal performance.
- Ease of Installation: Look for an extender that is easy to set up and configure. Some models offer a one-click WPS (Wi-Fi Protected Setup) button that simplifies the installation process. Additionally, consider if the extender comes with a mobile app or a user-friendly web interface for easier management.
- Additional Features: Some Wi-Fi extenders offer additional features like Ethernet ports, USB ports, and guest networks. Determine if these features are important to you and if they align with your networking needs.
- Budget: Set a budget for your Wi-Fi extender purchase. Extenders range in price depending on their features, brand, and capabilities. Consider your needs and find a balance between cost and performance.
- Reviews and Ratings: Before making a purchase, read reviews and ratings of different extender models. Real user experiences and feedback can provide valuable insights into the performance and reliability of the device.
By considering these factors, you can make an informed decision that will ensure optimal Wi-Fi coverage and performance in your home or office.
Steps to Install a Wi-Fi Extender
Installing a Wi-Fi extender is a straightforward process that can greatly improve your Wi-Fi coverage. Here are the steps to install a Wi-Fi extender:
- Choose the Right Location: Find a location for the extender where it can receive a strong Wi-Fi signal from your router and effectively extend it. Ideally, this should be in a central area of your home or office, away from obstructions.
- Connect the Extender to Power: Plug the extender into an electrical outlet near the chosen location. Make sure to use a reliable power source, as a weak or fluctuating power supply can affect the extender’s performance.
- Connect to the Extender’s Network: Using your computer or mobile device, go to the available Wi-Fi networks and select the one that corresponds to your extender. The network name (SSID) is often indicated on the extender or in the user manual.
- Access the Extender’s Web Interface: Open a web browser and enter the default IP address of the extender in the address bar. This IP address can usually be found in the user manual or on the extender itself. Once entered, you will be prompted to log in with the default username and password provided.
- Configure the Extender Settings: After logging in, follow the on-screen instructions to configure the extender settings. You may need to select your existing Wi-Fi network, enter the password, and choose the desired wireless network name (SSID) for your extended network. You can also set up additional security features if desired.
- Connect Devices to the Extended Network: Once the extender settings are configured, connect your devices to the extended network. Go to the Wi-Fi settings on your devices, select the newly created extended network, and enter the password if prompted.
- Test the Wi-Fi Extender Connection: To ensure the Wi-Fi extender is working correctly, test the connection by using your devices in areas that previously had weak Wi-Fi coverage. Check the signal strength and speed to verify the improved performance.
Keep in mind that the installation process may vary slightly depending on the brand and model of your Wi-Fi extender. Always refer to the user manual for detailed instructions specific to your device.
By following these steps, you can easily and effectively install a Wi-Fi extender, expanding your Wi-Fi coverage and improving your overall internet experience.
Step 1: Choose the Right Location
Choosing the right location for your Wi-Fi extender is crucial for optimal performance and coverage. Here are some key considerations to keep in mind in order to select the best location:
- Survey Your Current Wi-Fi Coverage: Start by assessing the areas of your home or office that have weak Wi-Fi signals or dead zones. These are the areas where you’ll likely need a Wi-Fi extender. Walk around with your device and check the Wi-Fi signal strength in different rooms and corners to identify the problem areas.
- Centralize the Extender: Position the Wi-Fi extender in a central location between your router and the areas with weak coverage. This will help distribute the extended signal more evenly and provide better coverage throughout the space. Keep in mind that large obstructions such as walls and furniture can weaken the signal, so try to find a location where the signal won’t be obstructed.
- Avoid Interference: Place the extender away from devices that can cause interference, such as cordless phones, microwave ovens, and baby monitors. These devices can disrupt the Wi-Fi signal and affect the extender’s performance. Additionally, avoid placing the extender too close to metal objects or appliances that can block or reflect the signal.
- Consider the Range: Measure the distance between your router and the intended location for the extender. Make sure the extender can cover this range effectively. Some extenders have indicators that help you determine their optimal range. Choose a location where the extender’s signal strength will be strong enough to provide a reliable connection to devices in the areas with weak coverage.
- Take Elevation into Account: If you have multiple stories or different levels in your space, consider placing the extender on the same level as the devices you want to connect. Wi-Fi signals have a harder time passing through floors and ceilings, so placing the extender on the same level can help improve coverage in that specific area.
Remember that the location you choose for your Wi-Fi extender will impact its performance. It’s recommended to experiment with different locations and test the signal strength in the areas you want to improve before finalizing the placement.
By selecting the right location for your Wi-Fi extender, you can ensure strong and reliable Wi-Fi coverage throughout your home or office.
Step 2: Connect the Extender to Power
Once you have chosen the right location for your Wi-Fi extender, the next step is to connect it to a power source. Follow these steps to properly connect the extender to power:
- Locate an Electrical Outlet: Find a nearby electrical outlet in the vicinity of the chosen location for the extender. Ensure that the outlet is easily accessible and provides a stable power supply.
- Plug in the Extender: Take the power cable provided with the extender and insert it into the designated power input on the extender unit. Then, plug the other end of the cable into the electrical outlet.
- Power On the Extender: Once the extender is connected to power, locate the power button or switch on the device. Press the power button or switch to turn on the extender. Wait for a few seconds to allow the extender to power up completely.
- Observe the LED Indicators: Most Wi-Fi extenders have LED indicators that provide important information about the device status. These indicators may show power, Wi-Fi signal strength, and connection status. Pay attention to the LED indicators and make sure they are showing the appropriate signals, such as a power-on indicator or an indication of Wi-Fi signal reception.
- Adjust the Extender Position: If necessary, make minor adjustments to the extender’s position to ensure optimal signal reception. You can refer to the LED indicators or use a Wi-Fi analyzer app on your smartphone to check the signal strength in different areas and make adjustments accordingly.
It’s important to note that Wi-Fi extenders require a stable power supply for proper functioning. Avoid using power outlets that are prone to power outages or fluctuations, as this can affect the extender’s performance. Additionally, check the power cable and ensure it is securely plugged into both the extender and the electrical outlet.
By properly connecting the extender to power, you are one step closer to improving the Wi-Fi coverage and strengthening the signal in the areas of your home or office that previously experienced weak connectivity.
Step 3: Connect to the Extender’s Network
After powering on the Wi-Fi extender, the next step is to connect your computer or mobile device to the extender’s network. Follow these steps to establish a connection:
- Access the Available Wi-Fi Networks: On your computer or mobile device, go to the list of available Wi-Fi networks. You should see a new network name (SSID) that corresponds to your Wi-Fi extender. This network name is often labeled on the extender or mentioned in the user manual.
- Select the Extender’s Network: Click or tap on the network name of the extender in the available Wi-Fi networks list. This will initiate the connection process between your device and the extender.
- Enter the Network Password: If prompted, enter the password for the extender’s network. The default password may be mentioned on the extender itself or in the user manual. If you have previously changed the default password, enter the updated password.
- Wait for Connection: After entering the password, wait for your device to establish a connection with the extender’s network. The connection process may take a few moments. Once connected, you will see the Wi-Fi icon on your device indicating a successful connection.
- Confirm Connection: To confirm the connection, open a web browser on your device and visit a website to ensure you have internet access. If the website loads without any issues, it confirms that you have successfully connected to the extender’s network.
It’s important to note that when connected to the extender’s network, your device is essentially receiving the extended Wi-Fi signal from the extender. This allows you to access the internet with improved coverage and performance in the previously weak areas.
If you encounter any issues during the connection process, double-check that you have entered the correct password and that your device is within range of the extender. Additionally, ensure that the extender is properly powered on and its LED indicators show a stable Wi-Fi connection.
By connecting your device to the Wi-Fi extender’s network, you are ready to proceed with the configuration of the extender and the improvement of your Wi-Fi coverage.
Step 4: Access the Extender’s Web Interface
After connecting your device to the Wi-Fi extender’s network, the next step is to access the extender’s web interface. This interface allows you to configure the settings of the extender and customize it to meet your specific requirements. Follow these steps to access the web interface:
- Open a Web Browser: On your connected device, open a web browser such as Google Chrome, Mozilla Firefox, or Safari.
- Enter the Default IP Address: In the address bar of the web browser, enter the default IP address of the extender. This IP address is usually provided in the user manual or labeled on the extender itself. Common default IP addresses include 192.168.1.1 or 192.168.0.1.
- Press Enter: Once you have entered the IP address, press the Enter key on your keyboard or click/tap the Go button in the web browser. This will initiate the connection to the extender’s web interface.
- Log in to the Web Interface: On the web browser page that opens, you will be prompted to log in to the extender’s web interface. Enter the default username and password provided in the user manual or on the extender. If you have previously changed the default login credentials, use the updated information.
- Explore the Web Interface: Once logged in, you will have access to the web interface of the extender. This interface provides options to configure various settings such as network name (SSID), security options, channel selection, and more. Take some time to explore the different sections and familiarize yourself with the available customization options.
It’s worth noting that the web interface may vary depending on the brand and model of your Wi-Fi extender. However, most interfaces follow a similar layout, allowing you to easily navigate and configure the settings.
If you encounter any difficulties accessing the extender’s web interface, ensure that your device is connected to the extender’s network and that the IP address you entered is correct. Also, check that the extender is powered on and functioning properly.
By successfully accessing the extender’s web interface, you are prepared to configure the settings and optimize the performance of your Wi-Fi extender.
Step 5: Configure the Extender Settings
After accessing the web interface of your Wi-Fi extender, you will need to configure the settings to ensure optimal performance and customization. Follow these steps to configure the extender settings:
- Select the Basic Settings: In the web interface, navigate to the “Basic Settings” or a similar section. Here, you will find options to modify the network name (SSID) of the extender. You can choose a unique name that distinguishes it from your main network.
- Choose Security Options: In the same section, you will also find security options for the extender’s network. It is recommended to enable a security protocol such as WPA2-PSK (AES) and create a strong password. This ensures that only authorized users can connect to the extended network.
- Configure Advanced Settings: Explore the web interface for other advanced settings that allow you to fine-tune the extender’s performance. These settings may include channel selection, transmission power control, QoS (Quality of Service) settings for prioritizing specific devices or applications, and more.
- Save and Apply Changes: After configuring the settings, be sure to save and apply the changes. Look for a “Save” or “Apply” button in the web interface and click or tap on it to commit the modifications.
- Reboot the Extender: After applying the changes, it is recommended to reboot the extender to ensure the new settings take effect. Look for a “Reboot” option in the web interface and initiate the reboot process. Allow the extender a few moments to fully reboot and establish the new configurations.
It’s important to note that the specific options and layout of the web interface may vary depending on the brand and model of your Wi-Fi extender. Take your time to explore the available settings and refer to the user manual for any specific instructions related to your device.
Keep in mind that configuring the extender’s settings allows you to optimize the performance, security, and customization of your extended Wi-Fi network. By selecting appropriate settings, you can ensure a reliable and tailored wireless experience throughout your space.
Step 6: Connect Devices to the Extended Network
With your Wi-Fi extender configured and ready, the next step is to connect your devices to the extended network. Follow these steps to establish a connection:
- Access the Wi-Fi Settings: On the device you want to connect, navigate to the Wi-Fi settings. This can usually be found in the settings menu or by clicking on the Wi-Fi icon in the system tray.
- Scan for Available Networks: In the Wi-Fi settings, your device will scan for available networks. Locate the network name (SSID) that corresponds to your extended network. It should be the network name you assigned during the configuration process.
- Select the Extended Network: Click or tap on the network name of the extended network to initiate the connection process.
- Enter the Network Password: If prompted, enter the password you set for the extended network during the extender configuration. The password ensures that only authorized users can connect to your extended network.
- Wait for Connection: After entering the network password, wait for your device to establish a connection with the extended network. This process may take a few moments, and you may see a loading or connecting icon on your device.
- Confirm Connection: Once connected, your device will display the Wi-Fi icon or a signal strength indicator, indicating a successful connection to the extended network.
- Repeat for Other Devices: If you have multiple devices that need to connect to the extended network, repeat the above steps for each device. Make sure to enter the correct network password to establish a secure connection.
By connecting your devices to the extended network, you can enjoy the improved Wi-Fi coverage and performance provided by the Wi-Fi extender. This allows you to use your devices in areas that previously had weak or no Wi-Fi signals.
If you encounter any issues during the connection process, ensure that you have entered the correct network password and that the extender is within range of your devices. Additionally, verify that the extender is powered on and functioning properly.
Once successfully connected, your devices will benefit from the extended Wi-Fi coverage, allowing you to browse the internet, stream media, and use online services without interruptions or signal dropouts.
Step 7: Test the Wi-Fi Extender Connection
After connecting your devices to the Wi-Fi extender, it is essential to test the connection to ensure that the extender is functioning correctly and providing improved Wi-Fi coverage. Perform the following steps to test the Wi-Fi extender connection:
- Move to Previously Weak Areas: Identify areas in your home or office where you previously experienced weak Wi-Fi coverage or dead zones.
- Check Signal Strength: Once in these areas, check the signal strength on your device. Look for the Wi-Fi icon or signal bars on your device’s screen to gauge the signal strength.
- Perform Internet Activities: Use your devices to engage in various internet activities, such as browsing websites, streaming videos, or downloading files. Monitor how well these activities perform in the previously weak areas.
- Assess Speed and Reliability: Pay attention to the speed and reliability of the connection in the extended areas. Determine if the Wi-Fi signal is strong and stable enough to support seamless internet usage.
- Move Between Zones: Move between different areas of your home or office, transitioning from the vicinity of the router to the extended areas. Observe how well the Wi-Fi connection transitions and if there are any noticeable drops or interruptions.
- Compare Results: Compare the Wi-Fi performance between the extended areas and the areas near the router. Assess whether the signal has strengthened, the internet speed has improved, and if there are any remaining dead zones.
During the testing process, it is important to consider factors that may impact the strength and reliability of the Wi-Fi signal, such as the distance from the extender, interference from other electronic devices, or physical obstructions.
If you notice any issues during the testing, such as weak signal or sporadic disconnects, consider repositioning the extender to a more optimal location or adjusting its settings using the web interface. This can help improve the performance and coverage of the Wi-Fi extender.
By testing the Wi-Fi extender connection, you can ensure that the extender is effectively extending the Wi-Fi coverage to previously weak areas, providing a reliable and seamless internet experience throughout your space.
Troubleshooting Common Issues with Wi-Fi Extenders
While Wi-Fi extenders are designed to improve Wi-Fi coverage, you may encounter some common issues that can affect their performance. Here are some troubleshooting steps to address these issues:
- Weak or Intermittent Signal: If you are experiencing a weak or intermittent Wi-Fi signal, try repositioning the extender to a location closer to the areas with weak coverage. Ensure that it is placed away from obstructions and interference-causing devices.
- Authentication Failures: If you are unable to connect to the extender’s network due to authentication errors, check if you are entering the correct password. Ensure that the password matches the one set during the extender configuration.
- Performance Degradation: If you notice a decrease in Wi-Fi speed or overall performance after installing the extender, check if the extender is placed too far from the router. Consider relocating it closer to the router to maintain a strong signal.
- Interference Issues: If you experience interference from other devices or neighboring Wi-Fi networks, try changing the channel settings of the extender’s network. Use a Wi-Fi analyzer tool to identify the least crowded Wi-Fi channels and adjust the extender accordingly.
- Compatibility Problems: Ensure that your Wi-Fi extender is compatible with your existing router. Check if both devices support the same Wi-Fi standards (such as 802.11ac or 802.11n) and frequency bands (2.4GHz or 5GHz).
- Power and Connectivity Problems: Verify that the extender is properly connected to a stable power source and that the LED indicators on the extender show a stable connection. If necessary, try unplugging and reconnecting the extender to reset its connection.
- Firmware Updates: Check if there are any firmware updates available for the extender. Update the firmware to the latest version to ensure compatibility, security, and performance enhancements.
- Resetting the Extender: If all else fails, you may need to reset the extender to its factory settings. Refer to the user manual for instructions on how to perform a reset. Note that this will erase all previous configurations, so you will need to reconfigure the extender afterwards.
If you continue to experience issues with your Wi-Fi extender, consult the product’s documentation or contact the manufacturer’s customer support for further assistance. They can provide specific troubleshooting steps based on the model and brand of your extender.
By addressing these common issues and taking appropriate troubleshooting steps, you can optimize the performance and functionality of your Wi-Fi extender, ensuring reliable and expanded Wi-Fi coverage throughout your space.