
Tools and Materials Needed
When it comes to installing a head unit without a wiring harness, you’ll need a few tools and materials to ensure a smooth and successful installation. Here’s a list of everything you’ll need:
- Wire strippers: These are essential for removing the insulation from the wires and preparing them for connection.
- Electrical tape: This will be used to secure the wire connections and provide insulation.
- Multimeter: A multimeter is useful for testing the wires and ensuring they have the correct voltage.
- Crimp connectors: These connectors are used to join wires together and create a secure and reliable connection.
- Wire nuts: Wire nuts are another option for connecting wires, especially when dealing with larger gauge wires.
- Plastic trim removal tools: These tools will come in handy when removing the old head unit and any surrounding panels.
- Socket set or screwdriver: Depending on the type of screws used to secure the head unit, you’ll need the appropriate tools to remove them.
- Head unit installation kit: This kit will include a mounting bracket and trim pieces that are specific to your vehicle’s make and model.
Additionally, it’s important to have the following materials:
- Electrical connectors: These connectors are needed to join the wires from the head unit to the vehicle’s wiring.
- Wire harness adapter: Although you won’t be using a wiring harness for this installation, a wire harness adapter will be necessary to connect the head unit’s wires to the vehicle’s wiring system.
By ensuring that you have all of these tools and materials on hand before starting the installation, you’ll be well-prepared to tackle the task at hand and achieve a successful result.
Step 1: Disconnect the Negative Battery Terminal
Before beginning the installation process, it is crucial to disconnect the negative battery terminal to ensure your safety and prevent any electrical mishaps. Here’s how to do it:
- Locate the negative terminal of your vehicle’s battery. It is usually marked with a minus (-) sign and is typically black or marked with a black cover.
- Use an appropriate-sized wrench or socket to loosen the nut or bolt that secures the negative terminal to the battery post.
- Once the nut or bolt is loosened, carefully remove the negative cable from the battery. You may need to wiggle it gently to break any corrosion or residue that may have accumulated.
- Once the negative cable is disconnected, wrap a small piece of electrical tape around the exposed terminal or use a terminal cover to ensure that it does not accidentally make contact with the battery post.
By disconnecting the negative battery terminal, you are effectively cutting off the power supply to the head unit and reducing the risk of electric shock during the installation process. This step is vital and should not be skipped.
Step 2: Remove the Old Head Unit
Now that the negative battery terminal is disconnected, you can proceed to remove the old head unit from your vehicle. Here’s how to do it:
- Start by carefully removing any trim pieces or panels that are surrounding the head unit. Depending on your vehicle’s make and model, these may be secured with screws, clips, or both. Use a plastic trim removal tool to safely pry off the trim pieces without scratching or damaging them.
- Once the trim pieces are removed, you’ll typically find several screws securing the head unit in place. Use a suitable screwdriver or socket set to remove these screws, keeping them in a safe place as you will need them for the installation of the new head unit.
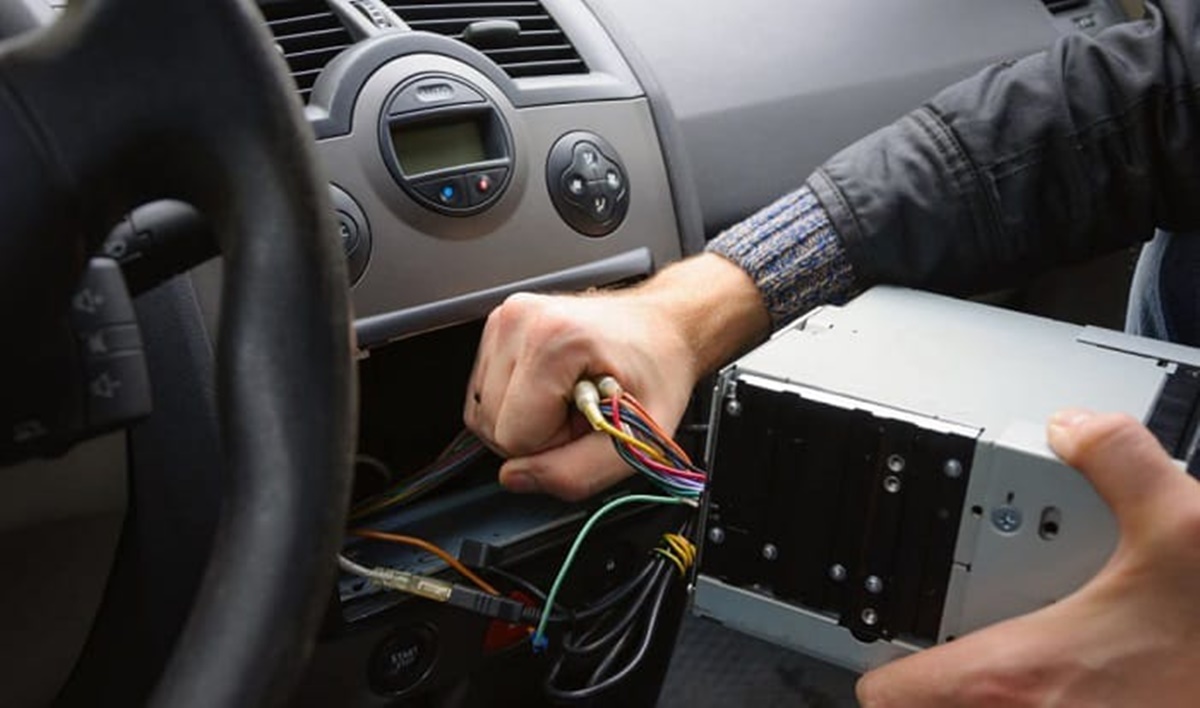
- Gently pull the old head unit out of the dash and locate the wiring harness connected to the back of it. This harness contains all the necessary wires for power, speakers, and other functions. Carefully disconnect the harness by pressing the release tab and pulling it apart.
It’s worth noting that some vehicles may have additional connections, such as an antenna cable or steering wheel control wires. These will also need to be disconnected before completely removing the old head unit. Refer to your vehicle’s specific manual or online resources for guidance in handling any additional connections.
Once the old head unit is completely disconnected, set it aside and keep it in a safe place in case you need it in the future. With the old unit removed, you’re now ready to move on to the next step of the installation process.
Step 3: Identify the Wires
Now that the old head unit is removed, it’s time to identify the wires that you’ll be working with during the installation of the new head unit. Here’s what you need to do:
- Start by referring to the wiring diagram or color-coded instructions provided with your new head unit. This will help you identify the different wires and their respective functions.
- Next, carefully examine the wires coming out of the vehicle’s wiring harness. While some wires may have labels or colors that match the new head unit’s wiring diagram, others may not be as clearly labeled.
- Using a multimeter set to the continuity or resistance mode, you can test each wire to determine its function. Start by identifying the ground wire, which is usually black. Connect one probe of the multimeter to a known ground point and touch the other probe to each wire. The wire that shows continuity or a low resistance reading is the ground wire.
- Continue this process with the remaining wires, testing for power, speakers, and other functions. Make note of the color and function of each wire as you go along.
It’s important to exercise caution while identifying the wires, as connecting them incorrectly can damage your new head unit or the vehicle’s electrical system. Take your time and double-check your findings to ensure accuracy.
If you’re unsure about any wire and its function, consult the vehicle’s manual or seek guidance from an experienced installer or online resources specific to your vehicle’s make and model.
With the wires identified, you’re now ready to prepare them for connection to the new head unit.
Step 4: Prepare the Wiring
With the wires identified, it’s important to prepare them for connection to the new head unit. Follow these steps to ensure a clean and proper wiring setup:
- Trim any excess wire length, leaving approximately half an inch to an inch of exposed wire for each connection. This will make it easier to work with and ensure a secure connection.
- Using wire strippers, carefully strip the insulation from the ends of the wires. Be cautious not to damage the conductor strands while stripping the insulation.
- Separate the wires into their respective groups, such as power, ground, speakers, and other functions. This will help you identify and connect each wire to the corresponding terminal on the new head unit.
- If necessary, crimp connectors or twist the exposed wire ends together to create solid connections. You can also use solder and heat shrink tubing for a more professional and durable connection.
- Once the connections are made, use electrical tape to wrap each connection, ensuring that there are no exposed wires. This will provide insulation and protect the connections from any potential short circuits.
It’s important to note that not all vehicles and head unit models may have the same wiring configuration. Refer to the wiring diagram provided with your new head unit, along with any vehicle-specific instructions, to ensure the correct setup.
Preparing and organizing the wiring beforehand will make the installation process much smoother and help prevent any potential issues in the future. Take your time to ensure that each wire is properly prepared and ready for connection.
Step 5: Connect the Wires
Now that the wiring is prepared, it’s time to connect the wires from the vehicle’s wiring harness to the corresponding terminals on the new head unit. Follow these steps to ensure a proper and secure connection:
- Refer to the wiring diagram provided with your new head unit, which will indicate the color-coded wires and their respective functions.
- Match each wire from the vehicle’s wiring harness to its corresponding terminal on the new head unit.
- If using crimp connectors, slide each wire into the appropriate terminal and crimp it securely using a crimping tool. Make sure the connection is tight and that there is no exposed wire outside the connector.
- If using wire nuts, twist each wire pair together and secure them by twisting the wire nut clockwise until it is tight. Ensure there is no exposed wire outside the wire nut.
- Double-check each connection to ensure that there are no loose or crossed wires. Any loose connections can cause malfunctions or electrical issues.
When connecting the wires, it’s crucial to match the functions properly, such as power, ground, speakers, and other features. Making incorrect connections can result in a faulty or non-functional head unit.
After connecting all the wires, gently tug on each connection to ensure they are secure. If any connection feels loose, recheck and adjust it as necessary.
Remember to refer to the wiring diagram if you encounter any uncertainty during the connection process. Taking the time to properly connect the wires will ensure that the head unit functions as intended and provide you with a seamless audio and control experience.
Step 6: Test the Head Unit
Once all the wires are connected, it’s important to test the functionality of the new head unit before fully installing it. Testing will help identify any issues or incorrect connections. Follow these steps to ensure everything is working properly:
- Reconnect the negative battery terminal to restore power to the vehicle’s electrical system.
- Turn on the ignition and power up the new head unit.
- Test each function of the head unit, including the radio, CD player, aux input, Bluetooth connectivity, and any other features available.
- Play audio through each speaker to ensure they are functioning correctly and balanced.
- Adjust the volume, bass, treble, and fade controls to ensure they are responsive and properly affect audio output.
- Test any additional features specific to your new head unit, such as navigation or smartphone integration.
If any issues or anomalies are detected during the testing process, make sure to recheck the connections and consult the wiring diagram provided with your new head unit. It’s crucial to resolve any problems before proceeding with the final installation.
By thoroughly testing the head unit, you can ensure that everything is working as intended and avoid any surprises or malfunctions down the road.
Step 7: Secure the Head Unit
Once you have tested the functionality of the new head unit and made necessary adjustments, it’s time to secure it in place. Follow these steps to ensure a stable and secure installation:
- Slide the new head unit into the empty slot in the dash until it fits snugly. Be cautious not to damage any wires or connectors as you insert the unit.
- Refer to the head unit installation kit that came with your new unit. This kit typically includes a mounting bracket and trim pieces that are specific to your vehicle’s make and model.
- Attach the mounting bracket to the head unit using the screws provided. Ensure that the bracket is securely fastened to avoid any vibrations or movement while driving.
- Place any necessary trim pieces around the head unit to give it a clean and finished appearance. Secure them in place according to the instructions provided with the kit.
- Double-check all the connections and wires to ensure they are properly routed and secured. Avoid any interference with other components or moving parts.
It’s important to make sure that the head unit is securely mounted and all components are properly aligned. This will prevent any rattling or shifting while driving, which could potentially damage the unit or affect its performance.
Take a few moments to admire your work and ensure that the head unit is aesthetically pleasing and integrated seamlessly into the dashboard. Adjust any trim pieces or brackets if necessary to achieve a perfect fit.
With the head unit securely in place, you’re now ready for the final step of the installation process.
Step 8: Reconnect the Negative Battery Terminal
Now that the new head unit is securely installed, it’s time to reconnect the negative battery terminal to complete the installation process. Follow these steps to reestablish the power supply:
- Double-check that all connections are secure, including the wiring harness and any additional components.
- Gently place the negative cable back onto the negative battery terminal.
- Using an appropriate-sized wrench or socket, tighten the nut or bolt that secures the negative cable to the terminal.
- Ensure that the connection is snug but be careful not to overtighten, as it may damage the terminal or cable.
- Remove any insulation or tape that was used to cover the terminal.
With the negative battery terminal reconnected, the power supply is restored to the vehicle’s electrical system. This will allow the new head unit to properly operate and function as intended.
Before leaving the installation area, take a moment to test the head unit one final time and verify that all functions are working correctly. Ensure that audio plays through all speakers, the controls are responsive, and any additional features are functioning as expected.
Congratulations! You have successfully installed a head unit without a wiring harness. Take pride in your accomplishment and enjoy the enhanced audio experience and functionality that your new head unit provides.