
Clearing Out Unnecessary Games and Data
One of the easiest ways to increase storage space on your Nintendo Switch is by clearing out unnecessary games and data. Over time, you may have accumulated a collection of games that you no longer play or need. By removing these unused games, you can free up valuable space for new games or additional updates.
Start by going to the “System Settings” on your Nintendo Switch. From there, navigate to the “Data Management” section. Here, you will find a list of all the games and data stored on your console. Take some time to review the list and identify any games that you no longer play or have completed.
Deleting games from your Nintendo Switch is a straightforward process. Select the game you want to remove and choose the “Delete” option. Remember that deleting a game will also delete any associated save data, so make sure to back up any important data before removing a game.
In addition to removing games, you can also clear out other types of data that may be taking up space on your console. This includes screenshots, videos, and game update files. Go through your screenshot gallery and delete any unnecessary captures. If you have recorded gameplay videos, consider deleting the ones you no longer need.
Another way to free up space is by deleting outdated or unused system update files. When Nintendo releases system updates, the old update files are not automatically removed from your console. These files can take up a significant amount of space over time. To delete them, go to the “System Settings” and select the “System” tab. Choose “System Update” and then “Delete Update Data.”
By regularly clearing out unnecessary games and data, you can ensure that you have enough storage space for new games and updates on your Nintendo Switch. Not only will this help improve the performance of your console, but it will also ensure that you can continue enjoying your favorite games without any storage limitations.
Moving Games to an SD Card
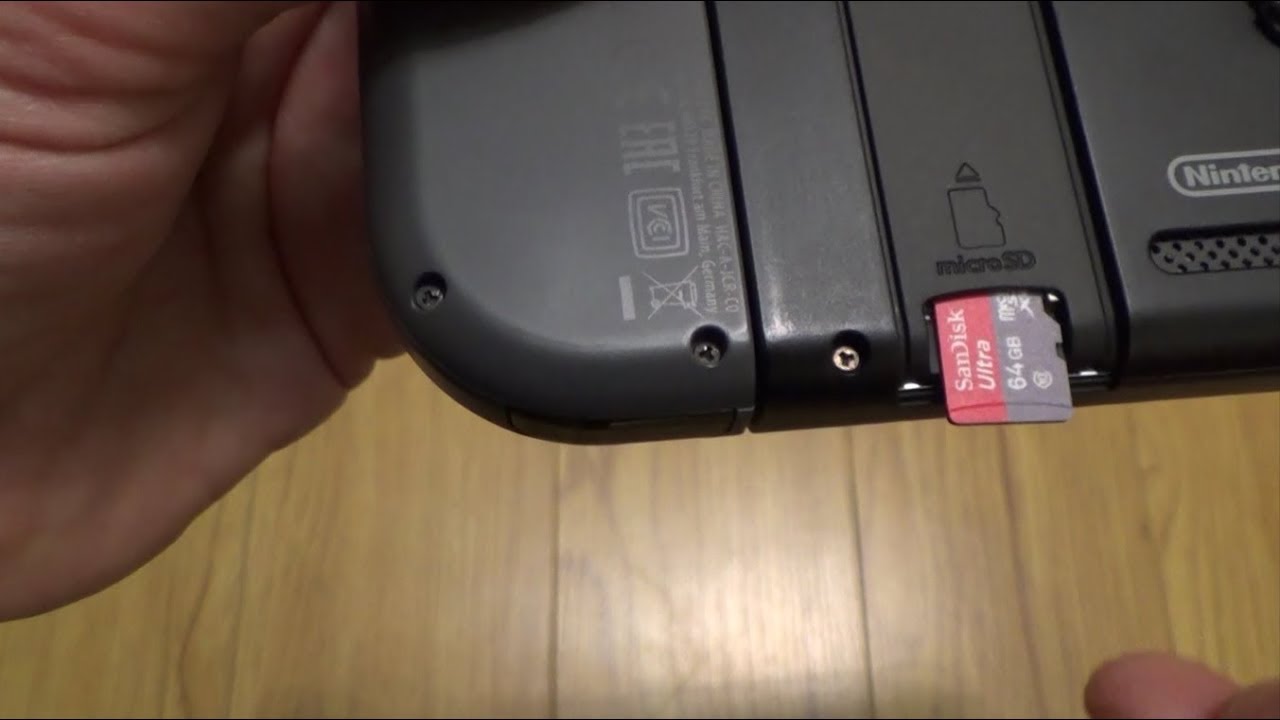
If you find that your Nintendo Switch is running low on storage space, one effective solution is to move games to an SD card. The Nintendo Switch allows you to expand its storage capacity by using an SD card, providing you with more room to install and store games.
To begin, ensure that you have an SD card inserted into your Nintendo Switch. The console supports microSD, microSDHC, and microSDXC cards with capacities up to 2TB. Once you have the SD card ready, follow these steps to move games:
- On your Nintendo Switch home screen, select the game you want to move.
- Press the “+” button on your Joy-Con controller or on the Switch Lite to access the Options menu.
- Scroll down and select “Manage Software.”
- Choose the “Move Data” option.
- A list of available storage options will appear. Select your SD card.
- Follow the prompts to complete the data transfer.
Keep in mind that you cannot move games that are currently running or being updated. Make sure to close any open games before attempting to move them. Additionally, certain game data, such as saved progress, may remain on the internal storage even after moving the game itself to the SD card.
Moving games to an SD card is an effective way to free up space on your Nintendo Switch. However, it’s important to note that the loading times may be slightly slower when playing games from the SD card compared to the internal storage. Nonetheless, the convenience of having additional storage space outweighs the minor inconvenience of slightly longer load times.
By utilizing an SD card and moving games to it, you can optimize the available storage on your Nintendo Switch and continue expanding your game library without worrying about running out of space.
Utilizing Nintendo Switch Online Cloud Backup
Storage limitations can be frustrating, especially when it comes to game save data. Losing progress in a game due to insufficient storage can be disheartening. Fortunately, Nintendo offers a solution with the Nintendo Switch Online Cloud Backup feature.
The Nintendo Switch Online subscription service provides the ability to back up game save data to the cloud. By utilizing this feature, you can free up valuable internal storage space on your Nintendo Switch while still retaining your game progress. Here’s how to utilize the Nintendo Switch Online Cloud Backup:
- Ensure you have an active Nintendo Switch Online subscription.
- Go to the “System Settings” on your Nintendo Switch console.
- Select “Data Management” and then “Save Data Cloud Backup.”
- Choose the specific game title for which you want to enable cloud backup.
- Follow the prompts to enable cloud backup for the selected game.
Once you have enabled cloud backup for a game, your save data will automatically be synced to the cloud when your Nintendo Switch is connected to the internet. This means your progress is securely stored and can be accessed anytime, even if you delete the game from your console.
It’s important to note that not all games are eligible for cloud backup due to various reasons like online multiplayer cheating prevention. However, the majority of popular titles support this feature.
In the event that your Nintendo Switch console is lost, stolen, or damaged, you can easily restore your save data by signing in to your Nintendo Account on a new console and enabling cloud backup for the respective games.
Utilizing the Nintendo Switch Online Cloud Backup feature provides peace of mind, knowing that your game progress is safe and can be easily restored. It also allows you to manage your internal storage more efficiently by offloading game save data to the cloud.
By taking advantage of this convenient feature, you can maximize your storage space on the Nintendo Switch while ensuring that your game progress is never lost.
Archiving Games to Free Up Space
As your game library expands on your Nintendo Switch, you may find that storage space becomes increasingly limited. However, deleting games entirely may not be a desirable option, especially if you plan to return to them in the future. The good news is that the Nintendo Switch allows you to archive games, which temporarily removes them from your console without permanently deleting them.
Archiving games is a simple process that involves offloading the game files from your internal storage to an external storage device, such as an SD card. This frees up space on your Nintendo Switch while retaining the ability to easily access and reinstall the game when desired. Here’s how to archive games:
- On your Nintendo Switch home screen, find the game you want to archive and select it.
- Press the “+” button on your Joy-Con controller or on the Switch Lite to access the Options menu.
- Scroll down and select “Manage Software.”
- Choose the “Archive Software” option.
- Confirm the archive process when prompted.
Once a game is archived, its icon will still appear on your home screen, but it will be greyed out. Archived games can be easily restored by selecting the icon and choosing the “Download” option. This will reinstall the game onto your console, allowing you to pick up where you left off.
Overall, archiving games is a convenient way to free up storage space on your Nintendo Switch without losing your game progress or having to re-download the game in the future. It provides you with the flexibility to manage your library efficiently and keep space available for new games or updates.
It’s important to note that archived games will not be playable while they are archived. If you want to free up more space or are not planning to play a certain game for an extended period, consider archiving it for the time being and restoring it when you’re ready to dive back in.
By utilizing the archiving feature on your Nintendo Switch, you can keep your game library organized, maximize storage space, and ensure that your favorite games are easily accessible whenever you want to play them.
Deleting Unused Screenshots and Videos
One often overlooked aspect of storage management on the Nintendo Switch is the accumulation of screenshots and videos. While capturing and sharing memorable moments from your gaming sessions is enjoyable, these media files can quickly take up a significant amount of storage space. By regularly deleting unused screenshots and videos, you can free up storage space on your Nintendo Switch for more games and updates.
To begin the process of deleting screenshots and videos, navigate to the Album feature on your Nintendo Switch home screen. Here, you will find all the screenshots and videos you have captured during gameplay. Take some time to review your collection and identify any files that are no longer needed.
To delete a screenshot or video, select the desired file, press the “-” button on your Joy-Con controller or on the Switch Lite, and choose the “Delete” option. Alternatively, you can select multiple files at once for batch deletion by using the “+” button.
If you want to delete all of your screenshots and videos at once, you can do so by going to “System Settings” on your Nintendo Switch, selecting “Data Management,” and then choosing “Manage Screenshots and Videos.” From there, you can select “Delete All Screenshots and Videos” to remove all media files from your console.
It’s important to note that deleting a screenshot or video is permanent, and there is no way to recover it once it’s been deleted. Therefore, make sure to review your collection carefully and only delete files you no longer want or need.
By regularly deleting unused screenshots and videos, you can free up valuable storage space on your Nintendo Switch and ensure that you have ample room for new games, updates, and future captures. It’s a simple yet effective way to manage your storage and keep your console running smoothly.
Consider transferring your favorite screenshots and videos to an external storage device, such as a computer or a microSD card, before deleting them from your console. This way, you can preserve those memorable moments while still maintaining optimal storage space on your Nintendo Switch.
Keeping your screenshot and video collection tidy is a great habit to adopt as a Nintendo Switch owner. By regularly deleting unused files, you’ll have a more organized album and avoid running into storage limitations in the future.
Cleaning Up System Update Files
Over time, system updates can accumulate on your Nintendo Switch, taking up valuable storage space. When Nintendo releases a new system update, the old update files are not automatically cleared from your console. Cleaning up these unnecessary system update files can help you reclaim storage space and optimize the performance of your Nintendo Switch.
To clean up system update files, follow these steps:
- Open “System Settings” on your Nintendo Switch.
- Select the “System” tab.
- Choose “System Update.”
- Select “Delete Update Data.”
By selecting “Delete Update Data,” you will remove the older system update files that are no longer required for your console’s operation. It’s important to note that deleting these files does not remove your console’s current system software version, and you will still be able to use your Nintendo Switch normally.
Cleaning up system update files not only frees up storage space but also helps your Nintendo Switch run more efficiently. By removing unnecessary files, you may experience improved system performance and faster load times.
It’s recommended to periodically check for and delete outdated system update files to prevent them from taking up valuable storage space on your Nintendo Switch. Keeping your console up-to-date is essential for accessing new features and maintaining security, but it’s equally important to clean up old update files to optimize your overall experience.
However, if you encounter any issues after deleting system update files or if you are unsure about performing this cleanup process, it’s always a good idea to consult the official Nintendo support website or contact Nintendo customer support for further guidance.
By regularly cleaning up system update files, you can ensure that your Nintendo Switch operates at its best and has sufficient storage space for your favorite games and content.
Deleting Dusty Game Updates
As you play games on your Nintendo Switch, you may notice that updates for those games are periodically released to enhance performance, introduce new features, or fix bugs. While these updates are essential for a seamless gaming experience, the outdated update files can accumulate over time and take up valuable storage space. Deleting dusty game updates is a simple yet effective way to free up space on your Nintendo Switch.
To delete dusty game updates, follow these steps:
- Go to the home screen of your Nintendo Switch.
- Select the game for which you want to remove old updates.
- Press the “+” button on your Joy-Con controller or on the Switch Lite to access the Options menu.
- Scroll down and choose “Software Update.”
- Select “View Update History.”
- Identify and select the outdated update files you want to delete.
- Choose “Delete Update Data” to remove the selected dusty game updates.
Deleting dusty game updates allows you to reclaim precious storage space on your Nintendo Switch while keeping your games up-to-date with the latest patches. It’s important to note that removing these updates does not prevent you from downloading and installing them again in the future if necessary.
By regularly deleting outdated game updates, you can optimize the storage capacity of your console and ensure that you have adequate space for new games, updates, and other content. This practice also helps in maintaining a streamlined gaming experience and preventing unnecessary clutter on your Nintendo Switch.
It’s worth mentioning that while deleting dusty game updates is generally safe, exercise caution to ensure you do not inadvertently delete important system update files or saves associated with the game. Always double-check before confirming the deletion of any files, especially if you are unsure about their significance.
If you encounter any issues or need further assistance with deleting dusty game updates, it’s advisable to consult the official support resources provided by the game developer or reach out to Nintendo customer support for guidance.
By cleaning up dusty game updates, you can enjoy a more organized and efficient gaming experience on your Nintendo Switch, with ample space for new games and updates.
Removing Unused User Profiles
When using a Nintendo Switch console, you have the option to create multiple user profiles. These profiles allow each individual player to have their own customized game saves, preferences, and settings. However, over time you may find that some user profiles are no longer used or necessary. Removing unused user profiles can help free up storage space and streamline the user management on your Nintendo Switch.
To remove unused user profiles, follow these steps:
- From the home screen, navigate to “System Settings.”
- Select “Users” from the options.
- Choose “Delete User.”
- Select the user profile you want to remove.
- Confirm the deletion of the selected profile when prompted.
By removing unused user profiles, you can reclaim valuable storage space on your Nintendo Switch and simplify the user selection process. This is particularly useful if you have created profiles for friends or family members who no longer use the console. Removing these profiles also ensures that your console’s storage is dedicated to the currently active users.
It’s important to note that removing a user profile will delete all associated saves, game data, and settings specific to that profile from your console. Before deleting a user profile, make sure to back up any important game saves or data associated with that user to ensure you do not lose any progress.
Deleting unused user profiles is a straightforward process and can be done whenever you wish to declutter your Nintendo Switch console. It is a good practice to periodically review the user profiles on your console and remove any that are no longer in use. This helps maintain an organized and efficient gaming environment.
If you plan on reusing the Nintendo Switch console for a different player in the future, you can keep their user profile archived but deactivated. This allows you to restore the user profile without having to create it again when needed.
However, exercise caution when deleting user profiles to avoid removing a profile that is still in use or associated with important game progress. If you are unsure about deleting a specific user profile or have any doubts, it’s always a good idea to seek guidance from the official Nintendo support website or contact Nintendo customer support for assistance.
By regularly removing unused user profiles from your Nintendo Switch, you can maximize storage capacity, simplify user management, and ensure an organized gaming experience.
Reinstalling Games for a Fresh Start
If you’re looking to start anew or simply want to free up space on your Nintendo Switch, reinstalling games is an effective option. Reinstalling games not only provides a fresh start but also allows you to reclaim storage space on your console. Here’s how you can reinstall games on your Nintendo Switch:
- From the home screen, navigate to the Nintendo eShop.
- Select your profile icon in the top right corner and choose “Redownload.”
- A list of all previously purchased games will appear.
- Select the game you want to reinstall.
- Follow the on-screen prompts to complete the reinstallation process.
When you reinstall a game, you will essentially be downloading it again onto your Nintendo Switch. This process allows you to start fresh with a clean installation and removes any accumulated data or progress associated with the game. If you have any important game saves or data, make sure to back them up before proceeding with the reinstallation.
Reinstalling games is particularly useful if you want to replay a game or if you’ve completed a game and no longer need it taking up space on your console. By uninstalling and reinstalling games when necessary, you can optimize your storage capacity and ensure that you have enough space to keep enjoying new games.
It’s worth noting that games that were previously purchased but not currently on your console will still be available for redownload in the Nintendo eShop. This means you can easily reinstall games that you may have previously removed to make room for other titles.
Before reinstalling a game, consider checking if there have been any significant updates or patches released for it. Downloading the latest updates will ensure that you have the best gaming experience with the most up-to-date features and improvements.
If you have limited internet bandwidth or prefer physical copies of games, you can also reinstall games from game cartridges. Simply insert the game cartridge into your Nintendo Switch, and the game will be available to play without the need for a redownload.
Reinstalling games offers a fresh start for your gaming experience while allowing you to manage your storage space more efficiently on the Nintendo Switch. It’s an effective method to organize your game library and ensure that you have enough space for new games and updates.