
What are tab groups in Chrome?
Tab groups are a feature in Google Chrome that allow users to organize and manage their open tabs more efficiently. With tab groups, you can group related tabs together, giving you a neat and organized browsing experience. This feature is particularly beneficial for users who frequently work with multiple tabs and often find themselves overwhelmed by the clutter.
Tab groups make it easy to visually distinguish between different sets of tabs by assigning a color and a label to each group. This way, you can quickly identify and switch between different tab groups with just a glance. For example, you can create a tab group named “Work” to keep all your work-related tabs organized and another tab group called “Personal” for your personal browsing activities.
In addition to making it easier to navigate and manage your tabs, tab groups also help to improve productivity. Instead of wasting time searching through a sea of tabs, you can directly access the specific tab group you need. This streamlines your workflow and enables you to focus on the task at hand without distractions.
Tab groups in Chrome are customizable, allowing you to personalize your browsing experience. You can easily change the color of a tab group to match your preferences or to visually represent the content of the tabs within that group. For example, you can assign a blue color to a tab group related to research, while assigning a green color to a tab group for entertainment.
Furthermore, tab groups offer seamless synchronization across devices. If you are signed in to your Google account, your tab groups will be saved and accessible on any device with Chrome installed. This means you can switch between your desktop, laptop, or mobile device and have the same tab groups available, ensuring a consistent browsing experience wherever you go.
With tab groups, Chrome empowers users to take control of their browsing and stay organized. This feature is a valuable tool for professionals, students, and anyone who wants to simplify their browsing experience. By using tab groups, you can enhance your productivity, reduce clutter, and easily manage your open tabs in an intuitive and user-friendly manner.
How to enable tab groups in Chrome?
Enabling tab groups in Chrome is a straightforward process. Follow these steps to activate this feature and start organizing your tabs more efficiently:
Step 1: Open Google Chrome on your computer.
Step 2: Type “chrome://flags” in the address bar and press Enter. This will take you to the Chrome Experiments page.
Step 3: In the search bar on the Experiments page, type “Tab Groups” and press Enter. This will display the Tab Groups flag.
Step 4: Click on the drop-down menu next to the Tab Groups flag and select “Enabled”. This will activate the tab groups feature.
Step 5: Chrome will prompt you to relaunch the browser to apply the changes. Click on the “Relaunch” button to restart Chrome.
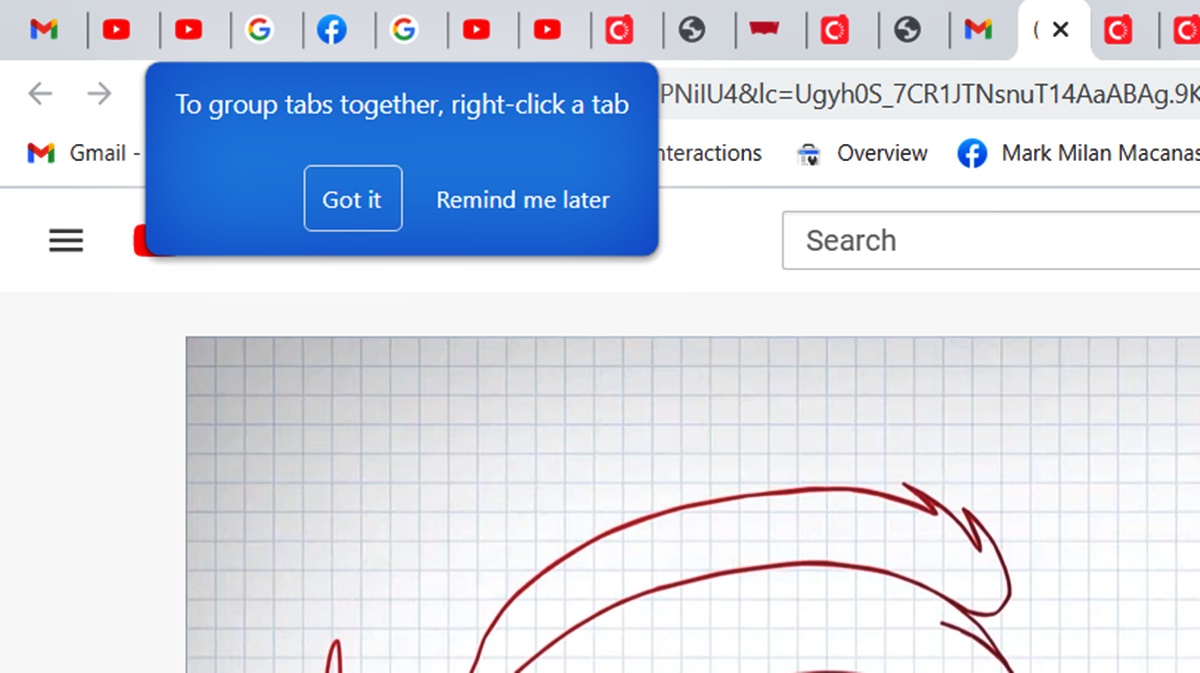
Step 6: Once Chrome relaunches, you can start using tab groups. Right-click on a tab and select “Add to new group” to create a new tab group. You can also right-click on an existing tab group to perform various actions, such as renaming the group, changing its color, or closing the entire group.
Note: If you are unable to find the Tab Groups flag in the Chrome Experiments page, it means that your Chrome version may not support this feature. Ensure that you are using the latest version of Chrome and update if necessary.
Enabling tab groups in Chrome can greatly enhance your browsing experience and productivity. By organizing your tabs into groups, you can easily manage and access relevant content, reducing clutter and improving workflow. Give it a try and enjoy the benefits of tab groups in Chrome!
Creating a new tab group
Creating a new tab group in Chrome is a simple and effective way to organize your open tabs. By grouping related tabs together, you can easily manage and navigate through them. Follow the steps below to create a new tab group:
Step 1: Open Google Chrome on your computer.
Step 2: Right-click on a tab that you want to include in the new tab group. A contextual menu will appear.
Step 3: From the menu, hover over the “Add to new group” option. A sub-menu will appear, displaying different colors for the tab group.
Step 4: Click on the desired color to assign it to the new tab group. The selected tab will be added to the newly created group.
Step 5: To add more tabs to the tab group, simply right-click on them and choose the option “Add to existing group”. This will allow you to select the existing tab group to which you want to add the tab.
Step 6: You can rename the tab group by right-clicking on it and selecting the “Rename group” option. This will enable you to give a meaningful name that represents the content or purpose of the tabs in that group.
Creating tab groups in Chrome enables you to better organize your browsing activities. You can create separate tab groups for work-related tasks, personal research, entertainment, or any other categories that suit your needs. This way, you can easily locate and access the tabs you need, without getting overwhelmed by a cluttered browser window.
Tab groups are not only beneficial for organizing tabs, but they also provide a visual representation of the content you have open. The assigned colors make it easier to distinguish between different groups at a glance, helping you to quickly identify and switch between relevant tabs.
Take advantage of the tab group feature in Chrome to stay organized and maximize productivity. By creating new tab groups, you can streamline your browsing experience and focus on the tasks that matter most to you.
Renaming a tab group
Renaming a tab group in Chrome allows you to customize the name of a group to better reflect its content or purpose. By giving tab groups meaningful names, you can easily identify and organize your tabs. Follow these steps to rename a tab group:
Step 1: Open Google Chrome on your computer.
Step 2: Look for the tab group that you want to rename in your browser window. Tab groups are indicated by a colored strip at the top of the tabs in the group.
Step 3: Right-click on the tab group. A contextual menu will appear.
Step 4: From the menu, select the “Rename group” option. This will allow you to edit the name of the tab group.
Step 5: Type the new name for the tab group and press Enter to save the changes. The tab group will now display the updated name.
Renaming tab groups gives you the ability to assign clear and descriptive names that reflect the content or purpose of the tabs within the group. For example, you can rename a tab group from the default name “Group 1” to “Work Project” or “Research Papers”. This way, you can easily identify the group and understand what type of tabs it contains.
Renaming tab groups is particularly useful when you have multiple groups with similar content. By giving each group a distinct name, you can quickly locate and access the specific group you need, without confusion or delay. This helps to streamline your browsing experience and improves your overall productivity.
Additionally, renaming tab groups allows you to personalize your Chrome browser. You have the flexibility to come up with names that resonate with your preferences and organizational style. Whether you prefer descriptive names, keywords, or creative titles, you can customize the tab groups to suit your individual needs.
With the ability to rename tab groups in Chrome, you have the power to create an organized and personalized browsing environment. Take advantage of this feature to enhance your productivity and improve your browsing experience by easily identifying and managing your tab groups.
Changing the color of a tab group
Changing the color of a tab group in Chrome allows you to visually distinguish between different groups and personalize your browsing experience. By assigning specific colors to tab groups, you can quickly identify and navigate through your tabs. Follow these steps to change the color of a tab group:
Step 1: Open Google Chrome on your computer.
Step 2: Locate the tab group for which you want to change the color in your browser window. Tab groups are represented by a colored strip at the top of the tabs within the group.
Step 3: Right-click on the tab group. A contextual menu will appear.
Step 4: From the menu, hover over the “Color” option. A color palette will appear, displaying various color options.
Step 5: Click on the desired color from the palette. The color of the tab group will update instantly.
By changing the color of a tab group, you can visually organize your tabs based on their content or purpose. For example, you can assign a blue color to a tab group for work-related tasks, and a green color for personal browsing. This color coding helps you quickly identify and switch between relevant tab groups, enhancing your productivity and reducing time spent searching for specific tabs.
Furthermore, personalizing the colors of your tab groups allows you to create a more visually appealing browsing experience. You can choose colors that reflect your personal preferences or match the overall theme of your browser. This customization option adds a personal touch to your browsing, making it more enjoyable and aligned with your individual style.
It is worth noting that the color changes you make to tab groups in Chrome are synchronized across devices. If you are signed in to your Google account, the color settings you apply to tab groups in Chrome on one device will be applied to the same tab groups on other devices as well. This ensures a consistent browsing experience across multiple devices, keeping your tab groups organized and easily identifiable wherever you go.
Take advantage of the color customization feature in Chrome to make your tab groups visually distinct and personalized. By assigning different colors to each group, you can effortlessly navigate through your tabs and enjoy a more visually pleasing browsing experience.
Moving tabs between tab groups
Moving tabs between tab groups in Google Chrome allows you to rearrange and reorganize your tabs based on your preferences and workflow. Whether you want to regroup related tabs or distribute them into different categories, Chrome makes it easy to move tabs between tab groups. Follow these steps to move tabs between tab groups:
Step 1: Open the Google Chrome browser on your computer.
Step 2: Identify the tab that you want to move to a different tab group.
Step 3: Click and hold the tab that you want to move. Drag it away from its current tab group.
Step 4: As you drag the tab, you will notice that the other tab groups are highlighted. Drop the tab into the desired tab group.
Step 5: Release the mouse button to complete the move. The tab will now appear in the new tab group.
By moving tabs between tab groups, you can keep your browsing experience organized and efficient. This flexibility allows you to group related tabs together, enabling quicker and more intuitive access to the content you need. For example, you can move an article you found that is related to your work project from the “General” tab group to the “Work Project” tab group.
Moving tabs between tab groups also ensures that your tabs are categorized in a way that makes sense to you. As your browsing needs change, you can easily reorganize your tabs, creating new tab groups or merging existing ones. This adaptability allows you to stay organized and streamline your workflow in Chrome.
It’s important to note that you can also move multiple tabs at once by holding down the Ctrl key (Command key on Mac) and selecting the tabs you want to move. Then, follow the same process of dragging and dropping the selected tabs into the desired tab group.
Google Chrome’s ability to move tabs between tab groups gives you the flexibility to customize your browsing experience. By taking advantage of this feature, you can effortlessly reorganize your tabs to match your workflow and priorities, ensuring an optimized browsing experience.
Collapsing and expanding tab groups
Collapsing and expanding tab groups in Google Chrome provides a convenient way to manage and declutter your browser window. By collapsing tab groups, you can hide the tabs within a group, freeing up space and reducing visual distractions. This feature is particularly useful when working with numerous tabs or when you want to focus on specific content. Follow these steps to collapse and expand tab groups:
Step 1: Open Google Chrome on your computer.
Step 2: Locate the tab group that you want to collapse in your browser window. Tab groups are indicated by a colored strip at the top of the tabs within the group.
Step 3: To collapse the tab group, click on the small down arrow icon located at the left side of the tab group. The tabs within the group will now be hidden, and the group will appear as a single tab.
Step 4: To expand the collapsed tab group, click on the single tab representing the group. The tabs within the group will expand and be visible again, allowing you to access the individual tabs.
Collapsing tab groups offers several benefits for managing your browsing experience. It helps to maintain a cleaner and more organized browser window by reducing the clutter caused by numerous open tabs. Instead of having multiple tabs visible at once, you can collapse them into tab groups, allowing you to focus on the tabs that are currently relevant.
This feature is especially useful when working on tasks that involve multiple tabs related to different projects or topics. By collapsing the tab groups that are not immediately needed, you can streamline your workflow and easily switch between the specific groups of tabs you are working with, minimizing distractions and enhancing productivity.
In addition to collapsing and expanding tab groups individually, Chrome also provides an option to collapse or expand all tab groups simultaneously. To do this, simply right-click on any tab group and choose the “Collapse all groups” or “Expand all groups” option from the contextual menu. This allows you to quickly toggle between a more compact view of your browser window or a comprehensive view of all your tabs.
By utilizing the collapsing and expanding feature in Chrome, you can create a more organized and efficient browsing experience. Grouping and collapsing tabs based on their relevance or project helps you stay focused and easily navigate through your open tabs, enhancing both your productivity and overall browsing satisfaction.
Closing and Reopening Tab Groups
Closing and reopening tab groups in Google Chrome allows you to manage and control your browsing sessions more effectively. By closing tab groups, you can declutter your browser window and improve overall organization. Reopening tab groups enables you to restore previous browsing sessions or quickly access important sets of tabs. Follow these steps to close and reopen tab groups:
Step 1: Open Google Chrome on your computer.
Step 2: Identify the tab group that you want to close in your browser window. Tab groups are represented by a colored strip at the top of the tabs within the group.
Step 3: To close the tab group, right-click on any tab within the group. A contextual menu will appear.
Step 4: From the menu, select the “Close group” option. This will close all tabs within the group, and the tab group will be removed from the browser window.
Step 5: To reopen a closed tab group, click on the “+” button located at the top-right corner of the browser window. This will open a new tab.
Step 6: Right-click on the new tab and select the “Reopen closed tab group” option. This will restore the previously closed tab group with its associated tabs.
Closing tab groups is useful when you want to temporarily remove specific sets of tabs from your browsing view. This can help you declutter your workspace, reduce distractions, and focus on the tabs that are currently relevant. By closing tab groups, you can effectively organize your browsing experience and ensure a clutter-free interface.
Reopening closed tab groups can be beneficial when you need to restore a previous browsing session or access a specific set of tabs that you previously closed. This feature saves you the time and effort of manually searching through your browsing history or reopening individual tabs, allowing for seamless navigation and efficient access to important content.
It is worth noting that closing and reopening tab groups does not permanently delete or remove the tabs within them. The tabs and their associated web pages are preserved, and you can still access them by reopening the tab group. This feature provides a level of flexibility and control over your browsing sessions.
By taking advantage of the option to close and reopen tab groups, you can keep your browsing sessions organized, maximize productivity, and easily manage your tabs in Google Chrome.
Deleting a Tab Group
Deleting a tab group in Google Chrome allows you to remove an entire group of tabs from your browsing session. This feature is useful when you no longer need a specific set of tabs or want to declutter your browser window. Deleting a tab group is a straightforward process. Follow these steps to delete a tab group:
Step 1: Open Google Chrome on your computer.
Step 2: Identify the tab group that you want to delete in your browser window. Tab groups are indicated by a colored strip at the top of the tabs within the group.
Step 3: Right-click on the tab group to bring up the contextual menu.
Step 4: From the menu, select the “Close Group” option. This will close all the tabs within the tab group.
Once you have closed the tab group, it will be removed from your browser window. The tabs and their associated web pages are no longer active within the tab group.
Deleting a tab group helps you to keep your browsing session organized and free of unnecessary tabs. This feature is particularly beneficial when you have completed a specific task, finished researching a topic, or no longer need a group of tabs that were related to a temporary project.
Deleting tab groups not only helps to reduce clutter but also allows you to focus on the tabs that are currently relevant and actively being used. It streamlines your workspace and ensures that your browser window remains uncluttered, enabling a more productive and efficient browsing experience.
It is important to note that when you delete a tab group, the individual tabs within the group are not permanently deleted. They remain in your browsing history and can be accessed individually if needed. By deleting a tab group, you are simply removing the grouping and easy accessibility to those tabs.
By utilizing the option to delete tab groups, you can easily manage and organize your browsing sessions in Google Chrome, keeping your workspace clean and optimized for your current tasks and projects.
Managing Tab Groups Using Shortcuts
Google Chrome provides a variety of keyboard shortcuts to help you efficiently manage tab groups and navigate through your tabs. By using these shortcuts, you can quickly perform actions such as creating new tab groups, renaming groups, and switching between tabs within a group. Below are some useful shortcuts for managing tab groups:
- Ctrl + Shift + E (Windows) or Command + Shift + E (Mac): This shortcut allows you to create a new tab group with the currently selected tab.
- Ctrl + Shift + T (Windows) or Command + Shift + T (Mac): Reopens the most recently closed tab group, restoring all the tabs within that group.
- Ctrl + or Command + Shift + . (period): Switches to the next tab within the currently active tab group.
- Ctrl + or Command + Shift + , (comma): Switches to the previous tab within the currently active tab group.
- Ctrl + 1, Ctrl + 2, Ctrl + 3, etc. (Windows) or Command + 1, Command + 2, Command + 3, etc. (Mac): Switches to the specified tab group based on its position in the tab strip. For example, Ctrl + 2 will switch to the second tab group from the left.
By utilizing these keyboard shortcuts, you can efficiently manage your tab groups and navigate through your tabs without having to rely on the mouse or trackpad. This saves time and boosts productivity, as you can seamlessly switch between tabs and perform actions with just a few key presses.
Additionally, Google Chrome also provides customizable shortcuts for various actions, including those related to tab groups. To customize shortcuts in Chrome, follow these steps:
- Open Google Chrome on your computer.
- Click on the three-dot menu icon at the top-right corner of the browser window.
- Select “Settings” from the dropdown menu.
- Scroll down and click on “Advanced” to expand the advanced settings.
- Under the “Accessibility” section, click on “Manage accessibility features”.
- In the “Keyboard shortcuts” section, click on “Open the keyboard shortcuts settings” link.
- Customize the shortcuts for various actions, including tab grouping, according to your preference.
By customizing the shortcuts, you can create a personalized browsing experience that aligns with your workflow and preferences. This enables you to manage tab groups more efficiently and navigate through your tabs in a way that suits your needs.
By leveraging the power of keyboard shortcuts in Google Chrome, you can streamline your tab management process and enhance your productivity when working with tab groups.
Chrome Extensions for Tab Grouping
If you are looking to enhance your tab grouping experience in Google Chrome, there are several useful Chrome extensions available that provide additional functionality and customization options. These extensions can help you organize your tabs more effectively and simplify your browsing experience. Here are a few popular extensions specifically designed for tab grouping:
1. Tabli: Tabli is a powerful tab management extension that allows you to group and organize your tabs into customizable lists. It provides a sleek and intuitive interface for managing your tabs, making it easy to switch between tab groups and quickly access the tabs you need.
2. Toby: Toby is a feature-rich tab management extension that offers advanced tab grouping capabilities. It allows you to create personalized collections of tabs, customize the appearance of each collection, and easily switch between different tab groups. Toby also provides additional features such as bookmarking and syncing across devices.
3. Cluster: Cluster is a tab grouping extension that focuses on simplifying your workflow. It allows you to organize tabs into clusters, which can be collapsed or expanded for better organization. Cluster also offers customization options such as color-coding and provides a sidebar for easy navigation between tab groups.
4. OneTab: OneTab is a popular tab management extension that helps you save memory and declutter your browser window. It allows you to convert all open tabs into a single tab with a list of URLs, which can be grouped and easily restored whenever needed. OneTab helps reduce tab overload and improves performance by reducing memory usage.
5. Group Your Tabs: Group Your Tabs is a straightforward tab grouping extension that enables you to create and manage multiple tab groups. It provides a simple interface where you can easily add tabs to a group, rename groups, and switch between different groups with a single click. It helps keep your tabs organized and easily accessible.
These extensions offer different features and approaches to tab grouping, allowing you to choose the one that best suits your needs and browsing style. They can enhance your productivity, reduce clutter, and provide a more streamlined tab management experience in Google Chrome.
To add these extensions to your Chrome browser, follow these steps:
- Open Google Chrome on your computer.
- Click on the three-dot menu icon at the top-right corner of the browser window.
- Select “More tools” from the dropdown menu.
- Choose “Extensions” from the submenu.
- In the Extensions page, click on the “Open Chrome Web Store” button.
- Search for the desired extension in the Chrome Web Store.
- Click on the extension from the search results and follow the prompts to install it.
By utilizing these Chrome extensions for tab grouping, you can enhance your tab management capabilities and customize your browsing experience according to your preferences.