
What is the HTC Vive?
The HTC Vive is a high-end virtual reality (VR) headset that offers an immersive and interactive VR experience. Developed by HTC and Valve Corporation, the Vive provides users with a wide range of virtual reality applications and games, allowing them to step into a whole new world of immersive entertainment.
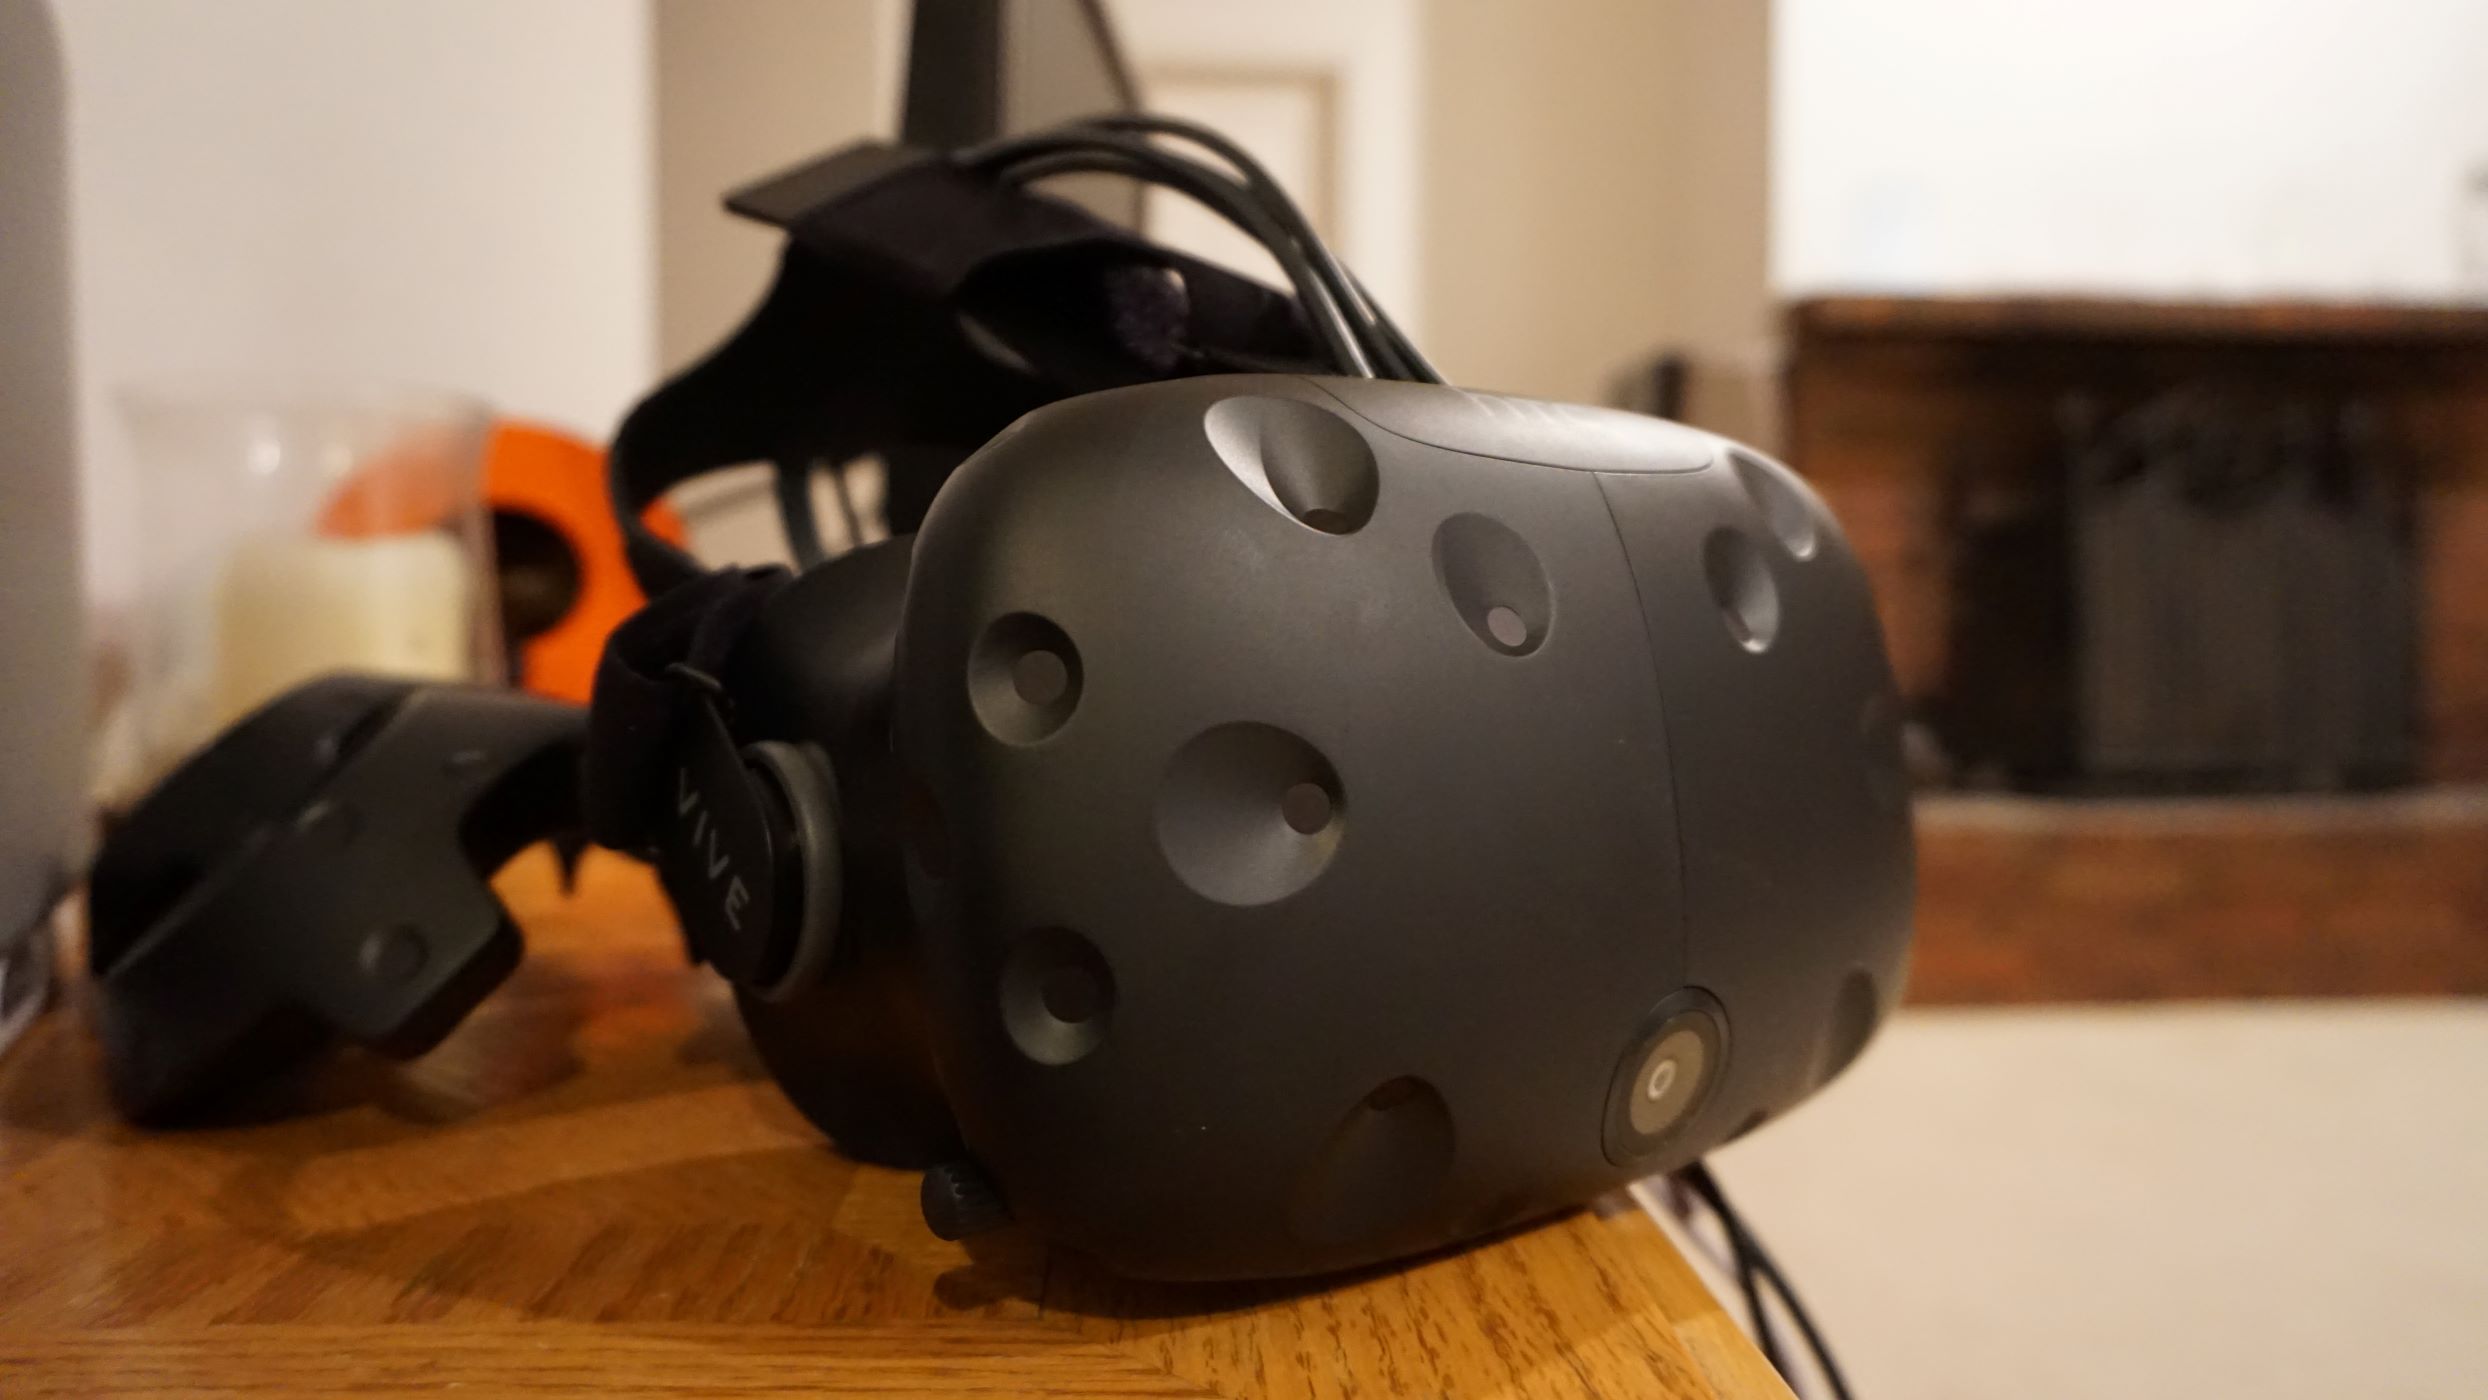
This cutting-edge VR headset features a high-resolution display and precise tracking technology, providing users with stunning visuals and a sense of presence in their virtual environments. The Vive comes with two wireless motion controllers, enabling users to interact with the virtual world and manipulate objects with natural hand movements.
One of the standout features of the HTC Vive is its room-scale VR capabilities. With the help of external sensors called “Lighthouse base stations,” the Vive can track your movement in a physical space, allowing you to walk around and explore virtual worlds in a truly immersive manner.
In addition to its impressive hardware, the HTC Vive relies on the SteamVR platform, developed by Valve, to deliver a vast library of VR games, experiences, and applications. SteamVR provides a seamless and user-friendly interface for accessing and exploring a wide variety of VR content, making it easy for users to discover new experiences and dive into the virtual realm.
Whether you’re interested in gaming, creativity, education, or simply seeking a thrilling immersive experience, the HTC Vive offers something for everyone. With its advanced technology, intuitive controls, and extensive library of content, the Vive is a top choice for VR enthusiasts and newcomers alike.
Where to Buy the HTC Vive
If you’re ready to embark on your virtual reality journey with the HTC Vive, you might be wondering where you can purchase this incredible VR headset. Fortunately, there are several options available to get your hands on the Vive.
The official and most reliable place to buy the HTC Vive is through the official HTC website. By purchasing directly from HTC, you can be assured of getting an authentic product and enjoy all the benefits of their customer support. They often offer bundle deals and promotions, so keep an eye out for any special offers that may enhance your VR experience.
In addition to the official website, you can also buy the HTC Vive from various authorized retailers. Check with popular electronics stores like Best Buy and Micro Center, as well as online marketplaces like Amazon. These retailers often provide competitive pricing and frequent sales, giving you more options and potentially saving you some money.
When buying from a third-party retailer, make sure to verify the authenticity of the product and the seller’s reputation. Look for customer reviews, ratings, and any return policies they may offer. It’s always recommended to buy from trusted sources to ensure a smooth purchasing experience.
If you prefer to try before you buy, some retail locations have dedicated VR sections where you can experience the HTC Vive firsthand. This allows you to test the headset and see if it meets your expectations before making a purchase. Check with your local electronics or gaming stores to see if they have a VR display or demo unit available.
Lastly, keep an eye out for VR-related events and conventions in your area. These often provide opportunities to purchase the HTC Vive directly from the manufacturers or authorized resellers. Additionally, attending these events can give you a chance to explore the latest advancements in virtual reality technology and connect with fellow VR enthusiasts.
Remember, the availability and pricing of the HTC Vive may vary depending on your location and the promotions running at the time. Take your time to research different sources, compare prices, and consider any bundle deals or incentives that may enhance your VR experience.
Price
The HTC Vive is a premium virtual reality headset, and its price reflects the advanced technology and immersive experience it offers. The cost of purchasing an HTC Vive varies depending on the region, retailer, and any promotional offers available at the time of purchase.
As of the time of writing, the price of the HTC Vive generally ranges from $599 to $799. However, it’s important to note that this price typically includes the headset itself, two wireless controllers, two Lighthouse base stations for room-scale tracking, and all necessary cables and accessories.
In addition to the base package, HTC occasionally offers bundle deals that include additional games, accessories, or even a VR-ready computer. These bundles can provide extra value for those looking to get started with virtual reality.
While the cost may initially seem high, it’s important to consider the technology and capabilities that the HTC Vive offers. The room-scale tracking, high-resolution display, and intuitive motion controllers provide an unparalleled VR experience that justifies the investment for many enthusiasts.
If the upfront cost is a concern, it’s worth noting that some retailers may offer financing options or installment plans to make the purchase more affordable. Additionally, keeping an eye out for sales and promotions can help you save money on the HTC Vive. These deals may be available during special events like Black Friday or during HTC’s own promotional campaigns.
When considering the price of the HTC Vive, it’s also essential to take into account the ongoing cost of VR content. While there are many free experiences available, premium games and applications usually come at an additional cost. However, there is a wide range of content available at various price points, ensuring there’s something suitable for every budget.
Ultimately, the price of the HTC Vive is an investment in an unparalleled virtual reality experience. It’s important to carefully consider your budget, needs, and the value you place on immersive technology before making a decision. Keep an eye out for promotions, research different retailers, and choose the option that best fits your preferences and budget.
Minimum System Requirements
Before diving into the world of virtual reality with the HTC Vive, it is crucial to ensure that your computer meets the minimum system requirements. These requirements are necessary to ensure optimal performance and compatibility with the Vive headset and its associated software.
The minimum system requirements for the HTC Vive are as follows:
- Processor: Intel Core i5-4590 / AMD FX 8350 or equivalent
- Memory: 4GB RAM or more
- Graphics Card: NVIDIA GeForce GTX 970 / AMD Radeon R9 290 or equivalent
- Operating System: Windows 7 SP1 or newer
- Available Ports: 1x USB 2.0 or newer
- Video Output: HDMI 1.4, DisplayPort 1.2, or newer
These system requirements are necessary to support the demanding processing and graphics capabilities needed for virtual reality experiences. It is important to note that these are the minimum specifications, and for the best experience, it is recommended to have a computer that exceeds these minimum requirements.
In addition to the hardware requirements, it is essential to have a sufficient play area for room-scale VR experiences. The ideal play area for the HTC Vive is a minimum of 6.5 feet by 5 feet (2 meters by 1.5 meters). This allows for freedom of movement and ensures that you can fully utilize the Vive’s room-scale tracking capabilities.
It’s also worth mentioning that the HTC Vive is primarily designed for use with a PC, and its compatibility with other platforms, such as Mac or Linux, may be limited. Therefore, it is crucial to ensure that your computer meets the specified system requirements and runs the recommended operating system.
Before purchasing the HTC Vive, it is recommended to use the official compatibility tool provided by HTC. This tool can be found on the official HTC Vive website and will help you determine if your computer meets the required specifications for optimal VR performance.
By ensuring that your computer meets or exceeds the minimum system requirements, you can fully enjoy the immersive virtual reality experiences offered by the HTC Vive.
Compatibility
When considering the HTC Vive, it is essential to understand its compatibility with various devices and software. This ensures that you can seamlessly integrate the VR headset into your existing setup and enjoy a smooth virtual reality experience.
The HTC Vive is primarily designed to work with PC systems running Windows 7 SP1 or newer. While compatibility with other operating systems like Mac or Linux may be limited, there are some unofficial workarounds available for those platforms.
To connect the HTC Vive to your PC, you will need an available HDMI 1.4, DisplayPort 1.2, or newer video output. You will also need a USB 2.0 or newer port for the headset communication and tracking.
In terms of graphics requirements, the HTC Vive recommends a NVIDIA GeForce GTX 970 or AMD Radeon R9 290 or equivalent graphics card. However, for a smoother experience and to take full advantage of the Vive’s capabilities, it is advisable to have a more powerful graphics card, such as a NVIDIA GeForce GTX 1070 or higher.
It’s essential to ensure that your PC meets or exceeds the recommended system requirements to avoid any performance issues or compatibility hiccups. The HTC Vive compatibility tool, available on their official website, can help you determine whether your computer system is compatible with the headset.
When it comes to software compatibility, the HTC Vive relies on the SteamVR platform developed by Valve Corporation. SteamVR is compatible with a wide range of VR titles and applications available on the Steam platform. This provides users with access to a vast library of VR content, including games, educational experiences, creative tools, and more.
In addition to SteamVR, the HTC Vive can also work with other VR platforms, such as Oculus Home, through the use of third-party software like Revive. This allows users to access content from multiple VR platforms and expand their options for immersive experiences.
It’s worth noting that the compatibility of the HTC Vive extends beyond gaming and entertainment. The headset can also be used for various professional applications, such as virtual training, architectural visualization, and medical simulations. Many software developers have created VR-focused applications and tools that are compatible with the HTC Vive, further expanding its capabilities beyond the gaming realm.
Overall, the compatibility of the HTC Vive with PC systems and the wide range of VR content available make it a versatile and powerful virtual reality solution for a variety of purposes and applications.
Installation Guide
Setting up the HTC Vive is a straightforward process, but it’s important to follow the installation steps carefully to ensure a smooth and successful setup. This installation guide will help you get your HTC Vive up and running in no time.
Step 1: Unpack the Box
Begin by unpacking the contents of the HTC Vive box. Inside, you will find the VR headset, two wireless controllers, two Lighthouse base stations, necessary cables, and any additional accessories included in your specific package. Take your time to remove everything from the packaging and ensure nothing is missing or damaged.
Step 2: Prepare Your Play Area
Choose a suitable location in your home or office for your VR setup. Clear the area of any obstacles and ensure you have enough space for room-scale VR experiences. Ideally, your play area should be a minimum of 6.5 feet by 5 feet (2 meters by 1.5 meters). Remove any fragile or valuable objects from the area to avoid accidents during gameplay.
Step 3: Set up the Base Stations
Mount the two Lighthouse base stations in opposite corners of your play area. Ensure that they are securely mounted or placed on stable surfaces. Connect the base stations to a power source and make sure they have a clear line of sight with each other.
Step 4: Connect the Headset
Plug the necessary cables into your PC. Connect the headset’s 3-in-1 cable to the link box, then connect the other end of the link box to your PC using the provided HDMI, USB, and power cables.
Step 5: Install the Software
Download and install the SteamVR software from the Steam platform. Follow the on-screen instructions to complete the installation process.
Step 6: Complete Room-Scale Setup
Launch the SteamVR software and follow the prompts to complete the room-scale setup. This process involves defining your play area by tracing the boundaries using one of the Vive controllers. The software will guide you through the process, ensuring accurate and precise room-scale tracking.
Step 7: Pair the Controllers
Turn on the Vive controllers by pressing the system button. Follow the on-screen instructions to pair and calibrate the controllers with the headset. Make sure the controllers are fully charged to maximize gameplay time.
Step 8: Put on the Headset and Start Exploring
Put on the HTC Vive headset and adjust the head straps for a comfortable fit. Use the adjustment knobs on the side to position the lenses correctly. Adjust the IPD (interpupillary distance) to match your eye spacing for optimal visual clarity.
Launch a VR experience or game from the SteamVR menu, and you’re ready to start exploring the world of virtual reality with the HTC Vive.
Following these installation steps will help you set up your HTC Vive correctly and ensure an enjoyable VR experience. Remember to consult the official HTC Vive documentation and support resources for any specific troubleshooting or additional setup instructions.
Setup and Configuration
Once you have completed the initial installation of your HTC Vive, there are additional setup and configuration steps you can take to maximize your VR experience and tailor it to your preferences. This section will guide you through some of the essential setup and configuration options.
Step 1: Adjust the Headset Straps and Fit
Before diving into VR, ensure that the straps on the headset are adjusted to fit your head comfortably and securely. Adjust the side straps and top strap accordingly to achieve a snug fit that doesn’t cause discomfort or excessive pressure on your face.
Step 2: Adjusting the Interpupillary Distance (IPD)
Everyone’s eyes are positioned slightly differently, so it’s crucial to adjust the IPD setting on the headset for optimal visual clarity. Locate the IPD adjustment knob on the side of the headset and turn it until the visuals appear clear and in focus. This will help reduce eye strain and enhance the overall VR experience.
Step 3: Audio Configuration
The HTC Vive comes with built-in headphones for immersive audio. Make sure that the headphones are positioned correctly over your ears, and adjust the volume to a comfortable level. If you prefer using your own headphones or audio setup, the Vive also provides an audio jack for connecting external audio devices.
Step 4: SteamVR Settings
Launch the SteamVR software on your PC and navigate to the SteamVR settings. Here, you can fine-tune various aspects of your VR experience. Some key settings include chaperone (the virtual boundaries set while in VR), controller settings (for customization and mapping), performance settings (to optimize graphics and frame rates), and audio settings (to adjust microphone and headphone settings).
Step 5: Controller Customization
The Vive controllers can be customized to suit your preferences. The SteamVR software allows you to remap buttons, adjust sensitivity, and even create custom button bindings for specific VR games and applications. Take some time to explore these options and create a controller setup that feels intuitive and comfortable for you.
Step 6: Install Additional Software and Applications
Once you have set up your HTC Vive, it’s time to explore the vast library of VR content available. Visit the Steam platform and browse through the VR category to discover games, applications, and experiences that interest you. Install them onto your PC and launch them through the SteamVR software or the dedicated VR launcher provided by the developer.
Step 7: Experiment and Enjoy!
The beauty of the HTC Vive is in the wide range of experiences and possibilities it offers. Experiment with different VR games, educational apps, creativity tools, and immersive experiences. Explore virtual worlds, interact with objects, and fully immerse yourself in the virtual environment.
Remember to take breaks and pace yourself, especially during extended VR sessions. Hydrate, rest your eyes, and be mindful of your surroundings while using the Vive to ensure a safe and enjoyable experience.
By following these setup and configuration steps, you can fine-tune your HTC Vive experience to match your preferences and make the most out of your virtual reality journey.
Calibration Tips
To ensure an optimal and accurate VR experience with your HTC Vive, proper calibration is essential. Calibration helps fine-tune the tracking, visual clarity, and overall performance of the headset. Here are some tips to help you calibrate your HTC Vive for the best results.
1. Room-Scale Calibration: During the initial room-scale setup, it is important to accurately define the boundaries of your play area. Take your time to trace the boundaries and ensure that you have enough space for comfortable movement. When tracing, hold the controller at chest height to ensure accurate tracking for both standing and room-scale experiences.
2. Display Calibration: If you find that the visuals in your HTC Vive appear blurry or out of focus, it may be necessary to adjust the position of the headset and the IPD (interpupillary distance). Ensure that the Vive is positioned securely on your head, with the lenses centered and aligned with your eyes. Use the IPD adjustment knob to fine-tune the distance between the lenses for clearer visuals.
3. Controller Tracking: The Vive controllers rely on the base stations for tracking. Keep in mind that reflective surfaces or bright lights in your play area can impact tracking accuracy. Avoid using the Vive in direct sunlight, and minimize any reflective surfaces by covering or removing them. If you encounter tracking issues, try adjusting the base station positions or angles for better coverage.
4. Height Calibration: It’s important to calibrate the height in VR to ensure an accurate representation of your avatar in virtual experiences. In the SteamVR settings, you can find a floor adjustment tool that allows you to set the floor level in your play area. Adjust the floor height until it matches your actual floor level to enhance the realism and immersion of the VR environment.
5. Audio Calibration: The Vive’s built-in headphones provide immersive audio, but you may need to adjust the volume to ensure a comfortable listening experience. Find the audio settings in the SteamVR menu, where you can adjust the headphone volume and microphone input level. Make sure audio settings suit your preferences and provide an immersive sound experience.
6. Test and Experiment: Once you have calibrated your HTC Vive, it’s a good idea to test it in different VR applications and games to ensure everything is functioning correctly. Take the time to explore different environments, interact with objects, and move around to ensure accurate tracking and an immersive experience.
Remember, proper calibration may require a bit of trial and error, so don’t be afraid to experiment and fine-tune the settings until you find what works best for you. If you encounter persistent issues, consult the official HTC Vive documentation or seek assistance from the support resources available to address any specific calibration-related concerns.
By following these calibration tips, you can optimize your HTC Vive’s performance, enhance the immersion, and enjoy a smooth and realistic virtual reality experience.
Creating a Play Area
One of the exciting features of the HTC Vive is its room-scale VR capabilities, which allow you to physically move and explore virtual environments. To fully experience room-scale VR, it’s important to create a play area that provides sufficient space and a safe environment. Here are some tips for creating an optimal play area for your HTC Vive.
1. Clear the Space: Start by clearing the play area of any furniture, obstacles, or fragile objects that could be knocked over or damaged during gameplay. Ensure that the area is free from tripping hazards like loose cables, rugs, or clutter. A spacious, well-cleared area allows for unrestricted movement and a more immersive experience.
2. Define Boundaries: Use the Chaperone system provided by SteamVR to set up virtual boundaries that help keep you within the play area and prevent accidentally bumping into walls or objects. During the initial setup process, you will trace the boundaries of your play area with the Vive controllers. Make sure to choose a size that provides enough room for movement but avoids encroachment on potentially unsafe areas.
3. Consider Lighting Conditions: While natural lighting in the play area can enhance the VR experience, bright sunlight or direct lighting on the headset’s sensors can affect tracking accuracy. It’s best to avoid direct sunlight and bright light sources, as well as minimize any reflective surfaces, to ensure optimal tracking performance.
4. Floor Markers: Placing floor markers or using visual cues can help you orient yourself within the play area. Consider using rugs, mats, or tape to mark the center or boundaries of the play area. This can provide a visual guide to help you stay centered and prevent unintentional movements outside of the defined play area.
5. Safety Considerations: Safety should always be a priority when using the HTC Vive. Be aware of your surroundings and ensure there are no hazardous objects or obstacles in the play area. If possible, use an area with a forgiving floor surface, such as carpet or foam mats, to minimize the risk of injury in case of accidental falls.
6. Height Clearance: Take into account any ceiling fixtures, fans, or other objects hanging from above that could be inadvertently reached during gameplay. Ensure that the play area provides enough vertical clearance to avoid hitting your hands or the Vive controllers on any overhead objects.
7. Storage and Cord Management: Consider storage options for the Vive headset, controllers, and cables when not in use. Keeping the equipment organized and safely stored when not in use not only helps protect it but also prevents any tripping hazards created by loose cables.
By following these guidelines and creating a dedicated play area for your HTC Vive, you can fully utilize the room-scale VR capabilities and enjoy a safer and more immersive virtual reality experience.
Installing Games and Apps
Once you have set up your HTC Vive, you’ll want to start exploring the wide range of virtual reality games, applications, and experiences available. Here’s a guide on how to install games and apps on your HTC Vive.
1. SteamVR: The HTC Vive primarily utilizes the Steam platform for accessing and installing VR content. Make sure you have the Steam client installed on your computer. If you haven’t already, create a Steam account or log in to your existing account.
2. Browse VR Content: Open the Steam platform and navigate to the “VR” category. Here, you’ll find a vast library of VR games, experiences, and applications. Use the filters and search options to browse through the available content and find something that catches your interest.
3. Read Reviews and Descriptions: Before making a purchase, take the time to read user reviews, descriptions, and watch gameplay videos. This will give you an idea of what to expect and help you make an informed decision about which games or apps to install.
4. Purchase or Download: Once you have chosen a VR game or app, click on its page to access more details. If it’s a free game or app, you can simply click the “Download” or “Install” option to start the installation process. If it’s a paid content, you’ll need to complete the purchase before downloading.
5. Follow Installation Instructions: After initiating the installation process, follow any on-screen prompts or instructions to complete the installation. The installation times will vary depending on the size and complexity of the game or app you’re installing.
6. Launching VR Content: Once the installation is complete, the game or app will appear in your Steam library. To launch the VR content, put on your HTC Vive headset and navigate to the SteamVR menu. From there, you can access your library, select the game or app you want to play, and launch it directly from within the VR environment.
7. Additional VR Platforms: While the HTC Vive primarily utilizes SteamVR, there are other VR platforms available, such as Oculus Home. Some VR games and apps may require installation through these platforms. In such cases, ensure you have the necessary accounts and software installed to access and download content from the specific platform.
8. Managing Installed Content: As you accumulate a collection of VR games and apps, you may want to organize and manage your installed content. The Steam platform allows you to create categories and collections within your library to easily navigate and access your VR content.
Remember to periodically check for updates for your installed games and apps. Developers often release updates with bug fixes, performance enhancements, and new features to improve the gameplay experience.
By following these steps, you can easily install and access a variety of VR games, applications, and experiences on your HTC Vive and embark on a thrilling virtual reality journey.
Navigating the SteamVR Menu
When using the HTC Vive, the SteamVR menu serves as a central hub for managing your VR experience, launching games and apps, adjusting settings, and accessing additional features. Understanding how to navigate the SteamVR menu is essential for getting the most out of your VR headset. Here’s a guide on how to navigate the SteamVR menu.
1. Accessing the SteamVR Menu:
To access the SteamVR menu while wearing your HTC Vive headset, press the System button on either of the Vive controllers. The System button is located above the trackpad, close to the top of the controller. Pressing it will bring up the SteamVR menu overlay, which can be seen within your virtual environment. Alternatively, you can also access the SteamVR menu on your PC monitor by clicking on the SteamVR status window.
2. Navigating the SteamVR Menu:
The SteamVR menu consists of several tabs that allow you to access different features and functions. Here are some of the key tabs and their functionalities:
- Library: This tab displays a list of all the VR games and apps you have installed. You can browse through your library, select a game or app, and launch it from here.
- Store: By selecting the Store tab, you can access the Steam store and browse through a wide range of VR content. This tab allows you to discover and purchase new games, apps, and experiences.
- Workshop: The Workshop tab allows you to access user-generated content, including mods, maps, and other customizable elements for certain VR games and experiences.
- Settings: This tab provides access to various SteamVR settings, allowing you to adjust audio, controller mappings, play area boundaries, performance settings, and more. Take some time to explore and customize these settings to enhance your VR experience.
- Dashboard: The Dashboard tab displays a customizable overlay that appears within your VR environment. It provides quick access to system-related functions, such as volume control, screen capture, and an option to access your desktop.
- VR View: The VR View tab allows you to exit VR mode and switch to a traditional 2D view on your PC monitor. This can be useful for adjusting settings or browsing content outside of the VR environment.
3. Controller Interaction:
To navigate the SteamVR menu, use the trackpad or thumbstick on the Vive controller to move the cursor and highlight different options. Press the trackpad or thumbstick to select an option or execute a command. Additionally, other buttons on the controller may have specific functions within certain tabs or games, so refer to in-game instructions or documentation for more details.
4. Customization and Features:
The SteamVR menu offers various customization options. You can customize the appearance of the SteamVR dashboard, including the background environment and the layout of the icons. The SteamVR settings allow you to further tailor your experience to your preferences, including adjusting supersampling, enabling mirrored displays, or setting up a separate VR dashboard on your desktop.
By familiarizing yourself with the SteamVR menu and its features, you can take full control of your HTC Vive experience. The menu provides quick access to your library, store, settings, and more, enabling seamless navigation and management of your VR content.
Using the Vive Controllers
The HTC Vive comes with two wireless controllers that allow you to interact with the virtual world and navigate through VR experiences. These controllers are essential for gameplay, menu navigation, and manipulating objects within the virtual environment. Here is a guide on how to effectively use the Vive controllers.
1. Controller Basics:
The Vive controllers feature a variety of buttons, sensors, and input mechanisms to provide a natural and intuitive interaction with the virtual world. The key components of the controllers include:
- Trackpad/Thumbstick: The trackpad or thumbstick, located towards the top of each controller, serves as a primary input device. It allows you to navigate menus, select options, and control movement in VR experiences.
- Trigger Button: The trigger button, positioned at the front of the controller, serves as the primary input for interactions. It is commonly used for grabbing objects, firing weapons, and performing actions within games and apps.
- Grip Buttons: There are grip buttons located on the sides of the controller that allow you to grasp and hold objects within VR experiences.
- Menu and System Buttons: The menu and system buttons, located on the top edge of the controller, provide access to different functions, such as pausing games, accessing the SteamVR menu, or bringing up the in-game menu.
2. Controller Tracking:
The Vive controllers utilize the Lighthouse base stations to track their positions in 3D space. The tracking ensures precise and accurate movements in the virtual environment, allowing for seamless interactions. The Vive controllers have a large tracking range, enabling freedom of movement within the defined play area.
3. Interacting with Objects:
When interacting with objects in VR, you can reach out and grab them using the grip buttons or trigger button. The grip buttons are typically used for holding objects, while the trigger button is often used for picking up, releasing, or using objects. Different VR games and experiences may have specific interaction mechanics, so pay attention to any in-game instructions or tutorial prompts for guidance on how to interact with objects.
4. Menu Navigation:
To navigate menus in VR, use the trackpad or thumbstick to move the cursor and highlight different options. Clicking the trackpad or thumbstick serves as a select/confirm button. The menu and system buttons provide additional functions such as opening the SteamVR menu or accessing in-game options.
5. Practice and Familiarize:
Using the Vive controllers effectively may take some practice. Spend some time exploring different VR experiences and games to become familiar with the various button configurations and interaction mechanics. As you gain experience, you’ll become more adept at using the controllers and intuitively interacting with virtual objects.
6. Customization and Settings:
The SteamVR settings provide options for customizing the behavior and mapping of the Vive controllers. Here, you can remap buttons, adjust sensitivity, or even create custom button bindings for specific games. Customization allows you to tailor the controller setup to your preferences and optimize your VR experience.
The Vive controllers are integral to the immersive and interactive nature of the HTC Vive. With their intuitive design and responsive tracking, they enable you to navigate, interact, and fully engage with the virtual world, enhancing your VR experience to new levels of realism and enjoyment.
Comfort Tips and Adjustments
Ensuring comfort while using the HTC Vive is essential for a pleasant and enjoyable virtual reality experience. Here are some tips and adjustments you can make to enhance comfort during your VR sessions:
1. Proper Headset Fitting:
Adjust the straps on the headset to ensure a snug and secure fit. The headset should rest firmly but comfortably on your head, and the weight should be evenly distributed. Experiment with different strap adjustments until you find the most comfortable fit that doesn’t cause excessive pressure on your face.
2. Adjusting Visual Clarity:
If the visuals appear blurry or out of focus, make sure the headset is positioned correctly on your head and that the lenses are centered and aligned with your eyes. Use the IPD (interpupillary distance) adjustment knob on the side of the headset to fine-tune the distance between the lenses for clearer visuals.
3. Taking Breaks:
VR can be immersive and mentally engaging, so it’s important to take regular breaks during extended play sessions. This can help prevent discomfort, eye strain, and fatigue. Use the in-game or dashboard menu to pause or exit a game when you feel the need for a break.
4. Room Conditions:
Ensure the temperature in the room is comfortable and well-ventilated to avoid excessive heat buildup while wearing the headset. Additionally, have a towel nearby to wipe off any sweat that may accumulate during active games or intense VR experiences.
5. Avoiding Motion Sickness:
If you experience motion sickness or discomfort in VR, try to take it slow initially and gradually increase exposure to more intense VR experiences. If you start feeling queasy or uncomfortable, take a break, and resume once you feel better. Some games also offer comfort settings, such as snap-turning or reducing field-of-view, which can help mitigate motion sickness.
6. Room Lighting:
Make sure the lighting in your play area is adequate but not overly bright. If the room is too dim or too bright, it can affect the tracking performance and the overall visual experience in VR. Experiment with different lighting conditions to find the optimal level for your VR sessions.
7. Cleanliness and Hygiene:
Regularly clean the headset, face cushions, and controllers to maintain hygiene and prevent a buildup of sweat, oils, or dust. Following the manufacturer’s cleaning instructions and using antibacterial wipes or a soft cloth can help keep your VR equipment and accessories clean and fresh.
8. Eye Strain Minimization:
Limit the time spent in VR and take short breaks if you start to feel eye strain or discomfort. Additionally, adjust the brightness and contrast settings of the VR display to a level that feels comfortable and easy on the eyes.
By following these comfort tips and adjustments, you can ensure a more enjoyable and comfortable VR experience with the HTC Vive. Remember that everyone’s level of comfort may vary, so it’s important to find what works best for you and make adjustments accordingly.
Cleaning and Maintenance
To keep your HTC Vive in optimal condition and ensure a hygienic and enjoyable virtual reality experience, regular cleaning and maintenance is necessary. Here are some tips for cleaning and maintaining your HTC Vive:
1. Cleaning the Headset:
Use a soft, lint-free cloth or disposable wipes specifically designed for electronic devices to clean the exterior of the headset. Gently wipe away any smudges, fingerprints, or dust particles. Avoid using harsh chemicals or abrasive materials that could damage the surface of the headset.
2. Cleaning the Lenses:
The lenses on the HTC Vive are delicate and prone to smudging. Use a microfiber cloth or lens cleaning wipes specifically designed for optical surfaces to gently clean the lenses. Avoid applying excessive pressure or using any cleaning agents that could scratch or damage the lenses.
3. Cleaning the Face Cushion:
The face cushion on the headset absorbs sweat and oils during use. To clean it, remove the cushion from the Vive headset according to the manufacturer’s instructions. Hand wash the cushion with mild soap and warm water, then allow it to air dry completely before reattaching it to the headset.
4. Cleaning the Controllers:
For cleaning the Vive controllers, use a soft cloth or disposable wipes to wipe away any dirt or grime. Pay attention to the buttons, thumbsticks, and tracking sensors. Avoid using excessive moisture that could damage the electronic components inside the controllers.
5. Storage and Protection:
When not in use, store your HTC Vive in a safe and dust-free area. Consider using a dedicated VR headset stand or storage case to protect it from accidental damage or exposure to sunlight. Keeping the headset and controllers properly stored can prolong their lifespan and maintain their functionality.
6. Regular System Updates:
Ensure that both the HTC Vive firmware and the SteamVR software are kept up to date. Regularly check for system updates and install any available updates to ensure compatibility, performance improvements, and access to the latest features and bug fixes.
7. Safety Precautions:
Follow all safety guidelines provided by the manufacturer to prevent accidents or damage to the equipment. This includes avoiding excessive force when handling the Vive components, using the headset and controllers within the recommended play area, and adhering to any usage instructions provided with the product.
8. Manufacturer Support:
If you experience any issues with your HTC Vive or need assistance with cleaning or maintenance, consult the official documentation and support resources provided by the manufacturer. They can offer specific cleaning instructions and troubleshooting steps to help resolve any problems you may encounter.
By following these cleaning and maintenance tips, you can prolong the life of your HTC Vive, maintain optimal functionality, and ensure a hygienic and enjoyable virtual reality experience every time you wear the headset.
Troubleshooting Common Issues
While the HTC Vive provides an immersive virtual reality experience, occasionally, you may encounter common issues that can impact your VR sessions. Here are some troubleshooting tips for addressing and resolving these common issues:
1. Tracking Issues:
- Ensure that the Lighthouse base stations are powered on and positioned correctly to provide adequate coverage of your play area.
- Ensure there are no reflective surfaces or bright lights interfering with the tracking system.
- Check for obstructions or objects that may be blocking the line of sight between the base stations and the headset/controllers.
- Try unplugging and re-plugging the headset and controller cables to re-establish the tracking connection.
2. Display Problems:
- Check that the cables connecting the headset to the PC are securely connected and not damaged.
- Adjust the headset’s IPD (interpupillary distance) to ensure clear visuals.
- Update your graphics card drivers to the latest version provided by the manufacturer.
- Ensure that the headset and lenses are clean and free from smudges or debris that may obstruct the display.
3. Controller Issues:
- Check that the Vive controllers are fully charged or have fresh batteries installed.
- Ensure that the controllers have a clear line of sight to the base stations for accurate tracking.
- Try unregistering and re-registering the controllers in the SteamVR settings.
- If a particular controller is not responding, try repairing or re-pairing it with the VR system.
4. Audio Problems:
- Ensure that the audio cables are securely plugged into the headset and the audio source (PC or external audio device).
- Check the volume levels on both the headset and the audio source device.
- If audio is playing through the PC speakers and not the headset, adjust the audio output settings in the SteamVR settings.
5. Performance Issues:
- Ensure that your PC meets or exceeds the minimum system requirements for VR.
- Close any unnecessary background applications and processes that may be consuming system resources.
- Lower the graphical settings or adjust the supersampling value in the SteamVR settings to improve performance.
- Make sure that your PC’s graphics card drivers are up to date.
If you encounter persistent issues that cannot be resolved using the above troubleshooting tips, it’s recommended to consult the official HTC Vive documentation, forums, or support channels. They can provide specific guidance tailored to your situation and help resolve more complex issues that may arise during your virtual reality experience.
Remember, troubleshooting is an important part of the VR experience, and with some patience and persistence, most issues can be resolved, allowing you to fully enjoy the immersive world of the HTC Vive.
Support and Resources
When using the HTC Vive, it’s helpful to know where to seek support and find additional resources to enhance your virtual reality experience. Here are some avenues you can explore for assistance, troubleshooting, and discovering new content:
1. Official Documentation:
The official HTC Vive website provides comprehensive documentation, manuals, and guides. These resources offer detailed information about setting up your headset, troubleshooting common issues, and maximizing the features and capabilities of the Vive.
2. Knowledge Base and FAQ:
Check the official knowledge base and Frequently Asked Questions (FAQ) sections provided by HTC. These resources often address common concerns, provide step-by-step instructions, and offer solutions to known issues.
3. Community Forums:
Engage with the vibrant and active community of HTC Vive users on forums such as the SteamVR community or the official HTC Vive subreddit. These forums are great places to connect with fellow VR enthusiasts, share experiences, seek advice, and find solutions to common issues.
4. Customer Support:
If you encounter an issue that cannot be resolved through self-help resources, reach out to HTC Vive customer support. They can provide personalized assistance, troubleshooting steps, and guidance to address specific problems you may be facing. Contact options may include live chat, email, or phone support, depending on your region.
5. Developer Resources:
If you are interested in creating your own VR experiences or diving into VR development, the official HTC Vive developer resources are invaluable. They provide documentation, SDKs, tools, and forums dedicated to helping developers create compelling content for the Vive platform.
6. Steam Store and Community:
The Steam platform, through which many VR games and applications are accessed, offers a wealth of resources. Explore the Steam Store for newly released VR content, read user reviews, and access community forums specific to VR games and experiences. Engaging with the VR community on Steam can provide valuable insights, recommendations, and answers to your questions.
7. Social Media Channels:
Follow official HTC Vive social media channels, such as Twitter, Facebook, and YouTube. They often share news, updates, tips, and announcements about new games, features, and VR-related events.
By tapping into these support and resource channels, you can access a wealth of information, guidance, and assistance as you explore the immersive world of the HTC Vive. Whether you’re seeking troubleshooting tips, inspiration for new VR experiences, or simply looking to connect with like-minded enthusiasts, these resources will help enrich your VR journey.