
Requirements for a .Edu Email Account
If you are looking to get a .edu email account, there are certain requirements you need to fulfill. These requirements typically involve enrolling in an accredited educational institution. Here are the key steps to follow:
- Researching Accredited Institutions: Begin by researching accredited universities, colleges, or educational organizations that offer email accounts to their students and staff. Make sure to focus on institutions that provide .edu email addresses, as these are reserved for educational institutions.
- Choosing an Institution and Program: Once you have a list of potential institutions, carefully consider their offered programs, reputation, and your personal interests. Select an institution and program that aligns with your educational goals and aspirations.
- Applying to the Chosen Institution: After deciding on an institution, follow their application process to apply for admission. This typically involves submitting an online or paper application form, along with relevant documents such as educational transcripts, personal statement, and recommendation letters.
- Fulfilling Admission Requirements: Ensure that you meet all the admission requirements set by the institution, such as standardized test scores (SAT, ACT, etc.), minimum GPA, English language proficiency tests (TOEFL, IELTS), and any specific prerequisites for your chosen program. It is essential to submit all required documents within the specified deadlines.
- Acceptance and Registration: If your application is accepted, you will receive an acceptance letter from the institution. Follow the instructions provided in the acceptance letter to complete the registration process and secure your spot at the institution.
By successfully completing these initial steps, you will be on your way to acquiring a .edu email account. The subsequent steps involve accessing and setting up your email account, verifying your account and identity, customizing your email account, and maximizing the benefits it offers. Stay tuned for the next sections to understand these steps in detail.
Step 1: Researching Accredited Institutions
When aiming to obtain a .edu email account, the first crucial step is to conduct thorough research on accredited institutions. Follow these guidelines to ensure you make an informed decision:
1. Identify Accredited Universities and Colleges: Begin by compiling a list of reputable universities and colleges that offer .edu email accounts to their students. It is crucial to prioritize institutions that hold proper accreditation, as this guarantees the credibility and quality of education.
2. Consider Your Field of Interest: Take into account your academic interests and desired field of study. Look for institutions that excel in the programs you wish to pursue. Ensure that they offer a wide range of courses and extracurricular options to support your educational journey.
3. Evaluate the Reputation: Investigate the reputation and ranking of potential institutions. Consider factors such as faculty expertise, research opportunities, alumni success stories, and overall institutional rankings. This information will give you insights into the institution’s academic standing and the potential networking opportunities available.
4. Access Online Resources: Utilize online resources, such as education portals, rankings websites, and student forums, to gather comprehensive information about different institutions. Read reviews and testimonials from current and former students to gain a better understanding of their experiences and the support services provided.
5. Explore Course Offerings: Look into the specific courses and majors offered by each institution. Ensure that they align with your educational goals and provide the necessary resources and facilities to support your learning journey. Consider the availability of internships, research opportunities, and industry partnerships as well.
6. Evaluate Financial Considerations: Take into account the cost of tuition, scholarships, and financial aid available at each institution. Research any financial support options, grants, or work-study opportunities that can help alleviate the financial burden of education.
7. Seek Guidance: Connect with guidance counselors, educational consultants, or university representatives who can provide personalized assistance and advice. They can offer valuable insights into the application process, admission requirements, and additional resources for obtaining a .edu email account.
By dedicating time and effort to this crucial initial step, you can identify the most suitable accredited institutions to pursue your education and secure a coveted .edu email account.
Step 2: Choosing an Institution and Program
After conducting thorough research on accredited institutions, the next step in obtaining a .edu email account is to carefully choose the institution and program that align with your educational goals. Here are some key factors to consider during this process:
1. Academic and Career Interests: Reflect on your academic interests and long-term career goals. Identify the fields of study that spark your curiosity and passion. Look for institutions that offer comprehensive programs in those areas.
2. Program Reputation: Evaluate the reputation and ranking of the programs you are interested in. Consider factors such as faculty expertise, research opportunities, and alumni success stories. A reputable program can enhance your educational experience and open doors to future opportunities.
3. Curriculum and Course Structure: Review the curriculum and course structure of each program. Ensure that it aligns with your academic needs and provides a combination of theoretical knowledge and practical skills. Look for programs that offer a variety of elective courses to cater to your specific interests and career aspirations.
4. Resources and Facilities: Assess the resources and facilities available at the institution. Consider factors such as libraries, research centers, laboratories, and specialized equipment that are relevant to your chosen program. These resources can greatly enrich your learning experience.
5. Student Support Services: Look for institutions that provide robust student support services. This includes academic advising, career counseling, mentoring programs, and access to tutoring or study groups. These services can contribute to your overall success and well-being as a student.
6. Campus Culture and Environment: Consider the campus culture and environment. Determine if you prefer a large or small institution, a rural or urban setting, and the diversity and inclusivity of the student population. An environment that aligns with your preferences can enhance your overall college experience.
7. Financial Considerations: Evaluate the affordability of your chosen institution and program. Take into account tuition fees, available scholarships, grants, and financial aid options. It’s crucial to choose an institution that fits within your financial means without compromising your educational aspirations.
8. Location and Accessibility: Consider the location of the institution and its accessibility. Think about factors such as proximity to home, transportation options, and the availability of internships or job opportunities in the surrounding area. These factors can impact your overall experience and future career prospects.
By thoughtfully assessing these factors, you can make an informed decision when choosing an institution and program that will not only provide you with a .edu email account but also set you on a path towards achieving your educational and career goals.
Step 3: Applying to the Chosen Institution
Once you have selected an institution that aligns with your educational goals, the next step in obtaining a .edu email account is to complete the application process. Follow these essential steps to successfully apply to your chosen institution:
1. Review Admission Requirements: Carefully review the admission requirements set by the institution. These may include academic transcripts, standardized test scores (such as the SAT or ACT), letters of recommendation, a personal statement or essay, and any additional documents specific to your chosen program.
2. Gather Required Documents: Collect all the necessary documents and information needed for the application. This may include official transcripts from previous educational institutions, test score reports, letters of recommendation, and any other supporting documents required by the institution.
3. Complete the Application Form: Fill out the application form accurately and completely. Provide all the requested information, including personal details, educational history, and program preferences. Take your time to ensure that the application is error-free and well-presented.
4. Write a Compelling Personal Statement: Craft a well-written personal statement that showcases your passion, skills, and motivations for pursuing education at the chosen institution. Highlight your academic achievements, extracurricular involvement, and any relevant experiences that demonstrate your suitability for the program.
5. Secure Letters of Recommendation: Request letters of recommendation from teachers, mentors, or employers who can attest to your academic abilities, character, and potential as a student. Provide these individuals with sufficient time to write quality recommendations and ensure they submit them before the application deadline.
6. Submit Application Fee: Pay the required application fee, if applicable. Check the institution’s website for the payment methods accepted and adhere to any specific instructions provided. Keep a record of the payment transaction for future reference.
7. Submit the Application: Once all the necessary components are ready, submit your application electronically or through mail, following the institution’s preferred method. Ensure that the application is submitted before the specified deadline to be considered for admission.
8. Follow Up and Check Application Status: Keep track of your application status by regularly checking the institution’s online portal or contacting the admissions office. If any additional documents or information are required, respond promptly to meet the admission requirements.
By diligently completing these steps, you will have successfully applied to your chosen institution, moving one step closer to obtaining a .edu email account and embarking on your desired educational journey.
Step 4: Fulfilling Admission Requirements
After submitting your application, the next step in obtaining a .edu email account is to fulfill the admission requirements set by your chosen institution. Here are the important actions to take:
1. Submit Required Documents: Ensure that you have submitted all the required documents as outlined in the admission requirements. This may include official academic transcripts, standardized test scores, proof of English language proficiency, and any other specific documents requested by the institution.
2. Pay Attention to Deadlines: It is essential to adhere to the specified deadlines for submitting the required documents. Missing deadlines might affect your eligibility for admission. Use a calendar or set reminders to stay organized and promptly fulfill all necessary requirements.
3. Provide Additional Information, if Needed: In some cases, the admissions office may request additional information or clarification about certain aspects of your application. Respond to these requests promptly and provide the requested information to assist in the evaluation process.
4. Attend Interviews or Auditions: Depending on the program or institution, you may be required to attend an interview or audition as part of the admission process. Prepare for these sessions by researching common interview questions or rehearsing for auditions to make a positive impression.
5. Pay the Enrollment Deposit: If you receive an offer of admission, you will usually be required to pay an enrollment deposit to secure your place at the institution. Make sure to submit the deposit by the specified deadline to confirm your intention to enroll.
6. Explore Financial Aid Options: Investigate and apply for financial aid options available at the institution. This may include scholarships, grants, work-study programs, or student loans. Be proactive in pursuing these opportunities to help ease the financial burden of education.
7. Attend Orientation Programs: Once you have been accepted and officially enrolled, take advantage of any orientation programs offered by the institution. These programs provide valuable information about campus resources, academic support services, and student life, helping you transition smoothly into your new educational environment.
8. Communicate with the Admissions Office: Maintain open communication with the admissions office throughout the process. Reach out with any questions or concerns you may have, and be proactive in providing any requested information promptly.
By fulfilling the admission requirements, you demonstrate your commitment and readiness to join the institution. It brings you closer to obtaining a .edu email account and embarking on an exciting academic journey.
Step 5: Acceptance and Registration
After successfully fulfilling the admission requirements, the next step in obtaining a .edu email account is receiving acceptance from your chosen institution and completing the registration process. Here is what you need to do:
1. Receive Acceptance Letter: Once the institution evaluates your application, you will receive an acceptance letter indicating your admission status. This letter will confirm that you have been accepted into the institution.
2. Read and Understand the Acceptance Letter: Carefully read the acceptance letter and its contents. Pay attention to details such as the program you have been accepted into, any conditions or requirements stated, and the deadline for accepting the offer.
3. Accept the Offer: After reviewing the acceptance letter, accept the offer of admission by following the instructions provided. This may involve submitting an acceptance form and/or paying an enrollment deposit to secure your spot at the institution.
4. Confirm Your Attendance: Most institutions require you to confirm your attendance by a specified deadline. Ensure that you communicate your intention to attend, as this helps the institution plan for enrollment and allocate resources accordingly.
5. Submit Required Forms and Documents: Along with accepting the offer, you may be required to submit additional forms or documents, such as health records, residency documents, or proof of vaccination. Follow the institution’s guidelines and submit these documents in a timely manner.
6. Register for Courses: Once you have confirmed your attendance, the institution will provide you with instructions on how to register for courses. Follow the registration process and select the courses that align with your program requirements and academic interests.
7. Pay Tuition and Fees: Familiarize yourself with the tuition and fee payment requirements. Pay the required amount by the specified deadline to complete the registration process and secure your place in the program.
8. Attend Orientation Programs: Many institutions hold orientation programs for new students. These programs provide important information about campus resources, academic policies, and student support services. Take advantage of these programs to familiarize yourself with your new educational environment.
9. Obtain Student ID and Email Account: As part of the registration process, you will receive a student ID, which will grant you access to various campus facilities and services. Additionally, you will be provided with a .edu email account, which you can use for academic communication.
Upon successfully completing these steps, you are officially accepted and registered at your chosen institution. You are now ready to embark on your educational journey, armed with a .edu email account and all the opportunities it provides.
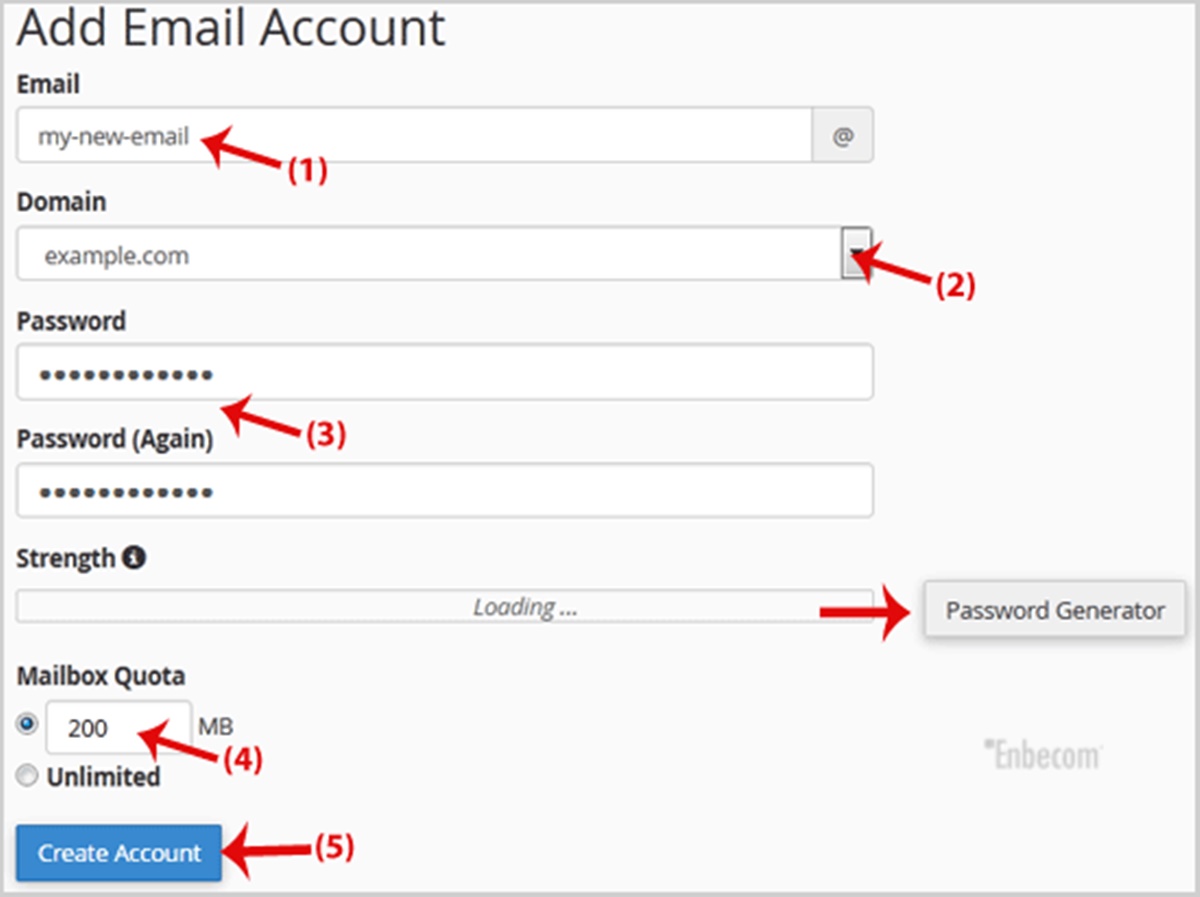
Step 6: Accessing and Setting Up Your .Edu Email Account
After being accepted and registered at your chosen institution, it’s time to access and set up your .edu email account. Follow these steps to get started:
1. Activate Your Account: Check your acceptance package or the institution’s website for instructions on how to activate your .edu email account. This may involve visiting a specific webpage or using a designated activation process.
2. Retrieve Account Information: Once your account is activated, you will be provided with your account username and password. This information is essential for accessing your .edu email account.
3. Access the Email Platform: Go to your institution’s email platform or login page. It is usually accessible through the institution’s website or a dedicated email portal. Enter your account username and password to log in.
4. Familiarize Yourself with Email Features: Take some time to explore the features and functionalities of your .edu email account. Familiarize yourself with options such as composing and sending emails, organizing your inbox, creating folders, and setting email preferences.
5. Personalize Your Account: Customize your .edu email account by updating your profile information and choosing a professional email signature. You can also personalize the layout, theme, and display settings to match your preferences.
6. Set Up Email Forwarding: If necessary, set up email forwarding to have your .edu emails automatically forwarded to another email address you frequently use. This ensures that you don’t miss any important communication.
7. Organize Your Inbox: Develop an organizational system for your inbox to efficiently manage incoming and outgoing emails. Consider creating folders to categorize emails based on courses, assignments, or important announcements.
8. Learn About Additional Features: Discover any additional features that your .edu email account offers. This may include access to cloud storage, collaboration tools, calendar integration, or integration with other campus systems.
9. Configure Email Notifications: Adjust your email notification settings based on your preferences and needs. You can choose to receive email notifications for new messages, calendar events, or other updates if desired.
10. Maintain Security: Keep your .edu email account secure by regularly updating your password and being cautious about phishing attempts or suspicious emails. Practice good email safety habits to protect sensitive information.
By following these steps, you can successfully access and set up your .edu email account. Enjoy the benefits of having an official educational email address, which will serve as a vital communication tool during your academic journey.
Step 7: Verifying Your Account and Identity
Verifying your account and identity is an important step in the process of obtaining a .edu email account. Follow these steps to ensure your account and identity verification:
1. Check the Verification Requirements: Review the institution’s guidelines or contact the IT department to understand the specific requirements for verifying your .edu email account and identity.
2. Prepare Required Documentation: Gather the necessary documentation to prove your identity. This may include a government-issued ID, such as a passport or driver’s license, official enrollment or acceptance letter, or any other document specified by the institution. Ensure that the documents are valid and up to date.
3. Submit Verification Documents: Follow the institution’s instructions to submit your verification documents. This may involve uploading scanned copies or visiting the IT department in person to present the required documents.
4. Complete Identity Verification Process: Some institutions may require you to complete an identity verification process, such as participating in a video call or providing additional personal information. Follow the provided instructions to complete this step.
5. Respond to Verification Requests Promptly: If the institution requests additional information or documentation during the verification process, respond promptly and provide the necessary details. Delay in responding may delay the verification of your account.
6. Follow Up on Verification Status: After submitting the required documents, follow up with the IT department to inquire about the verification status of your .edu email account. Confirm if there are any additional steps you need to take to complete the process.
7. Keep Important Documents Secure: Safely store copies of the verification documents for future reference. It is essential to keep these documents in a secure location to protect your identity and prevent unauthorized access.
8. Follow Any Additional Steps: In some cases, additional steps may be required to verify your account and identity. This could involve setting up multi-factor authentication or providing additional proof of enrollment or affiliation with the institution. Follow these steps as instructed.
9. Seek Assistance if Needed: If you encounter any difficulties or have questions about the verification process, do not hesitate to seek assistance from the IT department or designated support channels. They will guide you through the process and address any concerns you may have.
By completing the verification process, you ensure the legitimacy and security of your .edu email account. It helps maintain the integrity of the institution’s email system and ensures that only authorized individuals have access to official educational resources and communications.
Step 8: Customizing Your .Edu Email Account
After successfully setting up your .edu email account, the next step is to personalize and customize it to suit your preferences and needs. Follow these steps to make your .edu email account truly yours:
1. Update Your Profile Information: Access the settings or profile section of your .edu email account and update your personal information. This may include your name, contact information, and any other details requested by the institution.
2. Set a Professional Display Name: Choose a professional display name that reflects your identity and is appropriate for academic or professional purposes. Use your full name or a variation that is widely recognized and associated with you.
3. Personalize Your Email Signature: Create a customized email signature that includes your name, academic designation, and any additional contact information or affiliations you wish to include. An email signature adds a professional touch to your emails and makes it easier for recipients to connect with you.
4. Organize Your Inbox: Develop an organizational system for managing emails in your .edu email account. Create folders or labels to categorize emails based on courses, projects, or any other relevant categories. This helps you keep track of important communications and ensures efficient email management.
5. Set Up Filters or Rules: Utilize email filters or rules to automatically sort incoming emails into specific folders or apply certain actions. For example, you can set up a rule to automatically move emails from specific senders to a designated folder. This helps keep your inbox organized and reduces manual sorting.
6. Customize Email Notifications: Adjust the email notification settings based on your preferences. Decide whether you want to receive real-time notifications for new emails, calendar events, or other updates from your .edu email account.
7. Explore Additional Features: Familiarize yourself with the additional features offered by your .edu email account. This may include integration with other applications, shared calendars or contacts, and cloud storage options. Take advantage of these features to enhance your productivity and collaboration.
8. Personalize the Appearance: Many email platforms offer customization options for the appearance of your .edu email account. Explore the settings and choose a theme or color scheme that you find visually appealing and conducive to your productivity.
9. Check Spam and Junk Folder Settings: Regularly review the spam and junk folder settings to ensure that legitimate emails are not mistakenly marked as spam. Adjust the settings as needed to prevent important communications from being filtered out.
10. Regularly Update Your Password: Maintain the security of your .edu email account by regularly updating your password. Choose a strong and unique password that is not easily guessable. This helps protect your account from unauthorized access.
By customizing your .edu email account, you can create a personalized and efficient email experience that aligns with your preferences and enhances your communication and organization. Enjoy the benefits of having a tailored email account for your educational pursuits.
Step 9: Tips for Maximizing the Benefits of Your .Edu Email Account
Your .edu email account offers numerous benefits beyond just communication. Here are some tips to help you maximize the advantages of your .edu email account:
1. Leverage Student Discounts: Take advantage of the student discounts and exclusive offers that are often available to .edu email account holders. Many companies offer discounts on software, technology, subscriptions, and other products or services. Keep an eye out for special deals and promotions.
2. Access Educational Resources: Your .edu email account grants you access to various educational resources and tools. Explore the institution’s online library databases, journals, and research materials. Take advantage of any software or digital platforms provided to enhance your learning experience.
3. Connect with Peers and Faculty: Use your .edu email account to connect with classmates, faculty members, and staff. It serves as a professional communication tool that allows you to collaborate, seek academic advice, and participate in discussions related to your courses or research.
4. Stay Informed: Check your .edu email account regularly for important announcements, updates, and notifications from the institution and your professors. Stay informed about deadlines, class cancellations, upcoming events, and other relevant information.
5. Participate in Discussion Groups: Join discussion groups or mailing lists related to your field of study or academic interests. Engage in meaningful discussions, share resources, and seek guidance from fellow students and professionals. These groups can provide valuable insights and networking opportunities.
6. Utilize Cloud Storage: Many .edu email accounts include cloud storage services. Take advantage of this feature to store and back up your academic files, documents, and research materials. Access your files from any device and easily share them with classmates and professors.
7. Create a Professional Online Presence: Use your .edu email account to create a professional online presence. Consider setting up a professional website or an online portfolio to showcase your work, skills, and achievements. This can be a valuable asset when applying for internships, jobs, or further education.
8. Stay Organized: Use your .edu email account’s organizational features, such as folders, filters, and labels, to stay organized. Keep track of important emails, assignments, and communications related to your courses. This helps you stay on top of your academic responsibilities.
9. Network with Alumni: Join alumni networks and groups associated with your institution. Networking with alumni can provide mentorship opportunities, career advice, and potential job connections. Use your .edu email account to reach out and start building professional relationships.
10. Protect Your Account: Keep your .edu email account secure by practicing good cybersecurity habits. Use strong and unique passwords, enable two-factor authentication, be cautious of phishing emails, and regularly update your password. Your email account holds sensitive information and it’s important to safeguard it.
By following these tips, you can make the most of your .edu email account, accessing valuable resources, connecting with peers and faculty, and building a strong academic and professional network. Embrace the opportunities it presents to enhance your educational journey.
Step 10: Protecting Your .Edu Email Account
It is essential to prioritize the security of your .edu email account to safeguard your personal information and ensure that unauthorized access does not occur. Follow these steps to protect your .edu email account:
1. Use Strong and Unique Passwords: Create a strong, unique password for your .edu email account. Avoid using common or easily guessable passwords. Consider using a combination of uppercase and lowercase letters, numbers, and special characters.
2. Enable Two-Factor Authentication (2FA): Activate two-factor authentication for your .edu email account. 2FA adds an extra layer of security by requiring a second verification step, such as a verification code sent to your mobile device, to access your account.
3. Be Wary of Phishing Attempts: Be cautious of phishing attempts and email scams. Avoid clicking on suspicious links or providing personal information in response to unsolicited emails. Verify the legitimacy of emails and their senders before taking any action.
4. Regularly Update Your Password: Change your .edu email account password periodically. Updating your password frequently helps protect against unauthorized access. Choose a new password that is strong and unique each time.
5. Secure Your Devices: Protect the devices you use to access your .edu email account by using strong passwords, installing reputable antivirus software, and keeping your operating system and applications up to date. Use trusted networks when accessing your email account on public Wi-Fi.
6. Be Mindful of Public Computers: Avoid accessing your .edu email account on public computers if possible. If you must use a public computer, make sure to log out of your account after each session and avoid saving passwords on the device.
7. Be Cautious of Email Attachments: Exercise caution when opening email attachments, even if they appear to be from known senders. Scan attachments with an antivirus program before opening them to ensure they are safe.
8. Keep Your Recovery Options Updated: Maintain up-to-date recovery options for your .edu email account. This includes providing an alternative email address and a valid phone number for account recovery purposes in case you forget your password or need to regain access to your account.
9. Monitor Your Account Activity: Regularly review your .edu email account activity for any suspicious login attempts or unauthorized access. If you notice any unusual activity, report it to the IT department or the appropriate authorities immediately.
10. Stay Informed about Security Best Practices: Stay updated on security best practices to protect your .edu email account. Keep abreast of the latest online security threats and recommended measures to ensure the confidentiality and integrity of your account.
By following these practices, you can significantly enhance the security of your .edu email account. Safeguarding your account ensures the protection of your personal information and allows you to enjoy the benefits of your .edu email account with peace of mind.