
Understanding SD Cards
Understanding SD Cards
SD (Secure Digital) cards are popular storage devices used in a wide range of digital devices, including cameras, smartphones, tablets, and even game consoles. They are compact, portable, and offer a convenient way to store and transfer data. However, before we delve into the details of how to format an SD card on Windows, it’s important to have a basic understanding of how these cards work.
SD cards come in various formats, including SD, SDHC (Secure Digital High Capacity), and SDXC (Secure Digital Extended Capacity). The key difference between these formats lies in their storage capacity. SD cards typically have a capacity of up to 2GB, while SDHC cards can store up to 32GB. SDXC cards, on the other hand, have a capacity that ranges from 64GB to a massive 2TB.
SD cards also vary in terms of their speed class, which indicates the minimum sustained write speed of the card. The speed class is denoted by a number inside a small circle, such as Class 4, Class 10, or UHS Speed Class 3. Generally, higher speed class cards are recommended for tasks that require fast data transfer, such as capturing high-definition video or continuous burst photography.
It’s worth noting that SD cards are not only used for storing media files, but also for housing operating systems in devices like Raspberry Pi. Understanding the different types and capacities of SD cards can help you make informed decisions when formatting and using them in various devices.
Why Format an SD Card?
Why Format an SD Card?
Formatting an SD card is a crucial step in the management and maintenance of your digital storage devices. Here are a few key reasons why you might consider formatting an SD card:
- Data Cleanup: Formatting an SD card erases all the data stored on it, including photos, videos, documents, and any other files. This can be beneficial when you want to start fresh or when you need to remove sensitive information from the card.
- Error Correction: Over time, SD cards can develop file system errors or become corrupted, leading to data loss or malfunctioning. Formatting the card can help correct these errors and restore the card to a healthy state, allowing for better performance and reliability.
- Compatibility: Different devices and operating systems may have specific formatting requirements for SD cards. Formatting the card according to the recommended file system ensures that it can be recognized and used smoothly across various devices.
- Optimized Performance: Formatting can optimize the SD card’s performance by removing fragmented files and free up space. This can result in faster read/write speeds and smoother operation, especially for devices that rely on quick data access, such as cameras or video recording devices.
It’s important to note that formatting an SD card permanently deletes all the data stored on it. Therefore, it is crucial to back up any important files or documents before proceeding with the formatting process.
In summary, formatting an SD card improves its compatibility, corrects any errors or corruption, and ensures optimized performance for your device. It is an essential maintenance process that helps you manage and organize your digital storage efficiently.
Checking for Compatibility
Checking for Compatibility
Before formatting an SD card, it is essential to ensure that it is compatible with the device or operating system you intend to use it with. This step helps avoid potential issues and ensures a smooth formatting process. Here are a few key factors to consider when checking for compatibility:
- Device Requirements: Different devices have specific requirements when it comes to SD card compatibility. Check the device’s documentation or manufacturer’s website to determine the maximum supported capacity, speed class, and format (SD, SDHC, or SDXC) for the SD card.
- Operating System Compatibility: Ensure that the operating system on your device supports the file system format of the SD card. The most commonly used file systems for SD cards are FAT32 and exFAT. Check the specifications or system requirements of your operating system to verify compatibility.
- Capacity Limitations: Be aware of the maximum storage capacity that your device or operating system can handle. Some older devices may have limitations on the SD card size they can recognize and use properly.
- Speed Class: Consider the speed class requirements of your device, especially if you plan to use the SD card for high-speed data transfer tasks. Ensure that the SD card’s speed class meets or exceeds the minimum requirements of your device.
To check the compatibility of an SD card with a specific device, you can insert the card into the device’s card slot. If the device recognizes the card and allows you to access its contents, it is likely compatible. However, it’s still recommended to verify the compatibility based on the factors mentioned above.
Additionally, keep in mind that formatting an SD card will erase all the existing data on it. It is crucial to back up any important files before proceeding with the formatting process to avoid data loss.
By checking for compatibility before formatting, you can ensure that the SD card is suitable for your device and avoid any potential issues during the formatting or usage process.
Backing Up Data
Backing Up Data
Before formatting an SD card, it is crucial to back up any important data stored on it. Formatting erases all the data on the card, and once the process is complete, the data cannot be recovered. Here are some important steps to keep in mind when backing up your data:
- Identify Essential Files: Determine which files are critical and need to be backed up. This may include personal photos, videos, documents, or any other data that you want to preserve.
- Transfer Files to a Computer: Connect the SD card to a computer using a card reader or by connecting the device that houses the SD card. Copy and paste the essential files to a specific folder on the computer to create a backup.
- Cloud Storage: Consider using cloud storage services like Google Drive, Dropbox, or iCloud to create an additional backup of your important files. Upload the selected files to your cloud storage account for added security and accessibility.
- External Hard Drive or USB Drive: If you have access to an external hard drive or USB drive, you can also transfer the essential files to it as an extra backup option. This provides an offline backup that you can store in a safe place.
- Verify Data Integrity: After completing the backup process, double-check that all the essential files have been successfully transferred and are accessible on the computer or other backup storage devices.
Taking the time to back up your data ensures that you have a copy of your important files in case something goes wrong during the formatting process or if you accidentally delete any files. It adds an additional layer of protection and gives you peace of mind.
Remember to keep your backup files in a safe place and label them appropriately for easy retrieval. Once you have completed the backup process, you can proceed with formatting the SD card, knowing that your important data is securely stored elsewhere.
Formatting an SD Card using File Explorer
Formatting an SD Card using File Explorer
One of the easiest ways to format an SD card on Windows is by using File Explorer. Follow these steps to format the SD card using this method:
- Insert the SD card into your computer’s card reader or connect the device that houses the SD card to your computer.
- Open File Explorer by pressing the Windows key + E on your keyboard or by clicking on the folder icon in the taskbar.
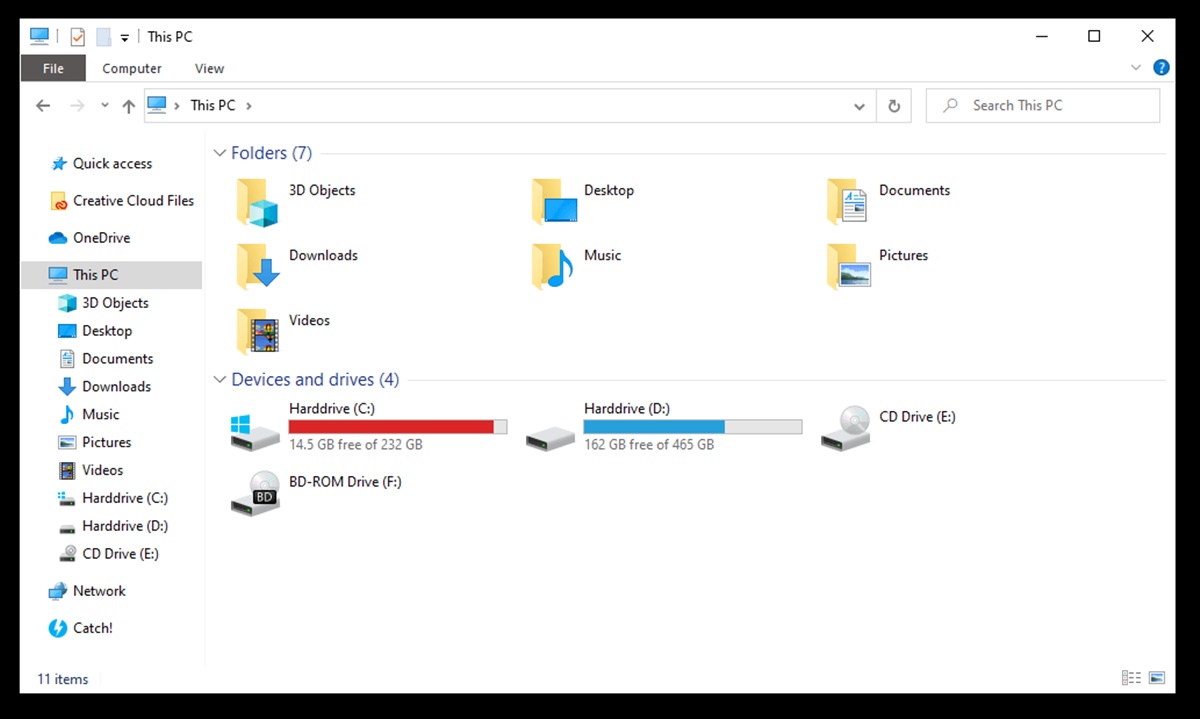
- In the left-hand sidebar of File Explorer, locate and click on “This PC” or “Computer” to see a list of connected drives.
- Find the SD card drive. It is usually listed as “Removable Disk” followed by a letter (e.g., Removable Disk (E:)).
- Right-click on the SD card drive and select “Format” from the context menu.
- A new window will appear with formatting options. Ensure that the File System is set to either FAT32 or exFAT, depending on your device’s compatibility.
- Choose a Volume Label for your SD card if desired. This is essentially a name for your SD card that will help you identify it.
- Make sure the “Quick Format” option is selected for faster formatting. If you want to perform a more thorough format, you can uncheck this option.
- Click on the “Start” button to initiate the formatting process.
- A warning prompt will appear, notifying you that all data on the SD card will be erased. Double-check that you have backed up any important files, then click on “OK” to proceed.
- Wait for the formatting process to complete. Once finished, a confirmation message will appear.
- Click on “OK” to close the format window.
Your SD card is now formatted, and it is ready to be used with your device or operating system. You can safely remove the SD card from your computer and insert it back into the intended device.
Formatting an SD card using File Explorer is a straightforward and convenient method that allows you to quickly prepare your SD card for use.Formatting an SD Card using Disk Management
Formatting an SD Card using Disk Management
If you prefer a more advanced method for formatting an SD card on Windows, you can use the Disk Management tool. Follow these steps to format the SD card using Disk Management:
- Connect the SD card to your computer’s card reader or insert it into the device that houses the SD card.
- Press the Windows key + R on your keyboard to open the Run dialog box. Type “diskmgmt.msc” and press Enter. This will open the Disk Management tool.
- In Disk Management, locate the SD card. It will be displayed as a removable disk with a label, such as “Removable” or “Disk [X]” (where [X] is the associated drive letter).
- Right-click on the SD card and select “Format” from the context menu.
- In the Format dialog box, choose the desired File System, such as FAT32 or exFAT, based on your device’s compatibility.
- Assign a Volume Label for the SD card if desired.
- Ensure that the “Perform a quick format” option is checked for faster formatting. If you want to perform a full format, you can uncheck this option.
- Click on the “OK” button to start the formatting process.
- A warning message will appear, notifying you that all data on the SD card will be erased. Make sure you have backed up any important files, then click on “OK” to proceed.
- Wait for the formatting process to complete. This may take a few minutes depending on the size of the SD card.
- Once the formatting is finished, a confirmation message will appear.
- Click on “OK” to close the format dialog box.
Your SD card is now formatted and ready to be used with your device or operating system. You can safely remove the SD card from your computer or device.
Please note that using Disk Management to format an SD card requires administrative privileges. Make sure you have the necessary permissions on your computer before proceeding.
Formatting an SD card using Disk Management provides you with more control over the formatting process and allows you to customize various options to fit your specific needs.Formatting an SD Card using Command Prompt
Formatting an SD Card using Command Prompt
For advanced users who are comfortable with command-line tools, formatting an SD card using Command Prompt provides more flexibility and control. Here’s how to format an SD card using Command Prompt on Windows:
- Insert the SD card into your computer’s card reader or connect the device that houses the SD card to your computer.
- Open the Command Prompt by pressing the Windows key + R to open the Run dialog box. Type “cmd” and press Enter, or search for “Command Prompt” in the Start menu and click on it.
- In the Command Prompt window, type “diskpart” and press Enter. This will open the DiskPart utility.
- Type “list disk” and press Enter. This command will display a list of available disks on your computer.
- Identify the disk number associated with your SD card based on its size and other characteristics. Make sure to select the correct disk, as formatting the wrong disk can lead to data loss.
- Type “select disk X” (replace X with the disk number of your SD card) and press Enter.
- Caution: The next step will erase all data on the SD card. Make sure you have backed up any important files.
- Type “clean” and press Enter. This command will erase the partition information on the SD card, preparing it for formatting.
- Type “create partition primary” and press Enter. This command will create a new primary partition on the SD card.
- Type “format fs=FAT32 quick” and press Enter. This command will format the SD card with the FAT32 file system.
- Wait for the formatting process to complete. This may take a few minutes depending on the size of the SD card.
- Once the formatting is finished, type “exit” and press Enter to close the DiskPart utility.
Your SD card is now formatted using Command Prompt. You can safely remove the SD card from your computer or device.
Formatting an SD card using Command Prompt provides a more advanced and customizable approach. However, it is important to exercise caution and double-check the disk number to avoid accidentally formatting the wrong disk and causing data loss.Formatting an SD Card using Third-Party Software
Formatting an SD Card using Third-Party Software
In addition to the built-in tools provided by Windows, you can also format an SD card using third-party software that offers more advanced features and options. Here’s how you can format an SD card using third-party software:
- Download and install a reliable third-party formatting software like SD Card Formatter, EaseUS Partition Master, or MiniTool Partition Wizard.
- Insert the SD card into your computer’s card reader or connect the device that houses the SD card to your computer.
- Launch the third-party formatting software.
- From the main interface of the software, locate and select the connected SD card.
- Choose the formatting option or feature within the software to format the SD card.
- Select the desired file system for the SD card, such as FAT32 or exFAT.
- Choose any additional options or settings provided by the software, such as allocation unit size or volume label.
- Review and confirm the formatting settings to ensure they meet your requirements.
- Click on the “Start” or “Format” button within the software to initiate the formatting process.
- Wait for the software to complete the formatting process. This may take a few minutes depending on the size of the SD card and the software’s algorithm.
- Once the formatting is finished, a confirmation message will be displayed within the software.
- You can now safely remove the SD card from your computer or device.
It’s worth noting that third-party software may offer additional features and capabilities. However, be cautious when downloading and installing software from third-party sources. Ensure that you download from reputable sources and use trusted software to minimize the risk of malware or other security concerns.
Formatting an SD card using third-party software can provide you with more flexibility and advanced formatting options. It may be particularly useful if you have specific formatting requirements or if you need to perform more specialized formatting tasks.
SD Card Format Options
SD Card Format Options
When formatting an SD card, you have several format options to choose from. The most common formats for SD cards are FAT32 and exFAT. Each format has its own advantages and considerations. Here’s an overview of the different format options:
- FAT32: FAT32 is the most widely supported file system for SD cards. It is compatible with a wide range of devices, including digital cameras, smartphones, and game consoles. FAT32 has a file size limit of 4GB and a partition size limit of 32GB, which means it may not be suitable for large files or high-capacity SD cards.
- exFAT: exFAT is an extended file system that was developed to overcome the limitations of FAT32. It supports larger file sizes and partition sizes, making it ideal for high-capacity SD cards. exFAT is compatible with most modern devices and operating systems, including Windows, macOS, and Linux. However, some older devices may not support exFAT natively.
- NTFS: NTFS is primarily used with Windows-based computers. It offers advanced features such as file compression, encryption, and access control. While NTFS is not a recommended format for SD cards, it can be useful if you plan to use the SD card primarily with a Windows device and require the additional features provided by NTFS.
- Other Formats: There are other less common formats available for SD cards, such as extFAT for Linux-based systems or HFS+ for macOS. These formats may have specific compatibility requirements and are generally not recommended for general use unless you have a specific need for them.
When choosing a format for your SD card, consider the compatibility of the file system with your devices and operating systems. If you primarily use Windows or have a wide range of devices, FAT32 or exFAT are usually the best choices. However, if you have specific requirements or are using the SD card with a specific device or operating system, it is recommended to consult the device’s documentation or support resources to determine the most suitable format option.
It’s important to note that formatting an SD card will erase all data on the card. Make sure to back up any important files before formatting and carefully consider the format option that best suits your needs.
Troubleshooting SD Card Formatting Issues
Troubleshooting SD Card Formatting Issues
While formatting an SD card is usually a straightforward process, there are instances where you may encounter issues or errors. Here are some common troubleshooting tips to help resolve SD card formatting issues:
- Check for Write Protection: Ensure that the SD card is not write-protected. Many SD cards have a physical write protection switch on the side. Make sure the switch is in the unlocked position.
- Try a Different Card Reader or Device: If you are encountering issues with the card reader or device you are using, try using a different card reader or device to see if the problem persists. It could be a compatibility issue specific to the reader or device.
- Restart the Computer or Device: Sometimes a simple restart can resolve any temporary software or connection issues that may be causing problems with formatting the SD card.
- Update Drivers and Firmware: Ensure that your computer’s card reader drivers and firmware are up to date. Outdated drivers or firmware can sometimes cause compatibility issues with SD cards.
- Scan for Errors: Run a scan on the SD card using the built-in Windows Error Checking (chkdsk) utility. This can help identify and repair any file system errors that may be preventing the card from being formatted.
- Try a Different Formatting Method: If you are encountering issues with one formatting method, try using a different method, such as Disk Management or third-party formatting software, to see if it resolves the problem.
- Check for Disk Errors: In Disk Management, right-click on the SD card and select “Properties.” In the “Tools” tab, click on “Check” under the “Error Checking” section to scan and repair any disk errors that may be affecting the formatting process.
- Format on a Different Computer: If all else fails, try formatting the SD card on a different computer. This can help determine if the issue is specific to your computer or if it is a problem with the SD card itself.
If none of the above troubleshooting steps work, it is possible that the SD card may be faulty or damaged. In such cases, you may need to consider replacing the SD card.
Remember to always back up your important data before attempting any troubleshooting or formatting procedures to prevent data loss.
By following these troubleshooting tips, you can overcome common formatting issues and ensure that your SD card is properly formatted and ready for use.