
Can’t Install macOS Monterey
If you’re experiencing difficulties installing macOS Monterey, you’re not alone. This common problem can be frustrating, but there are several steps you can take to troubleshoot and resolve the issue.
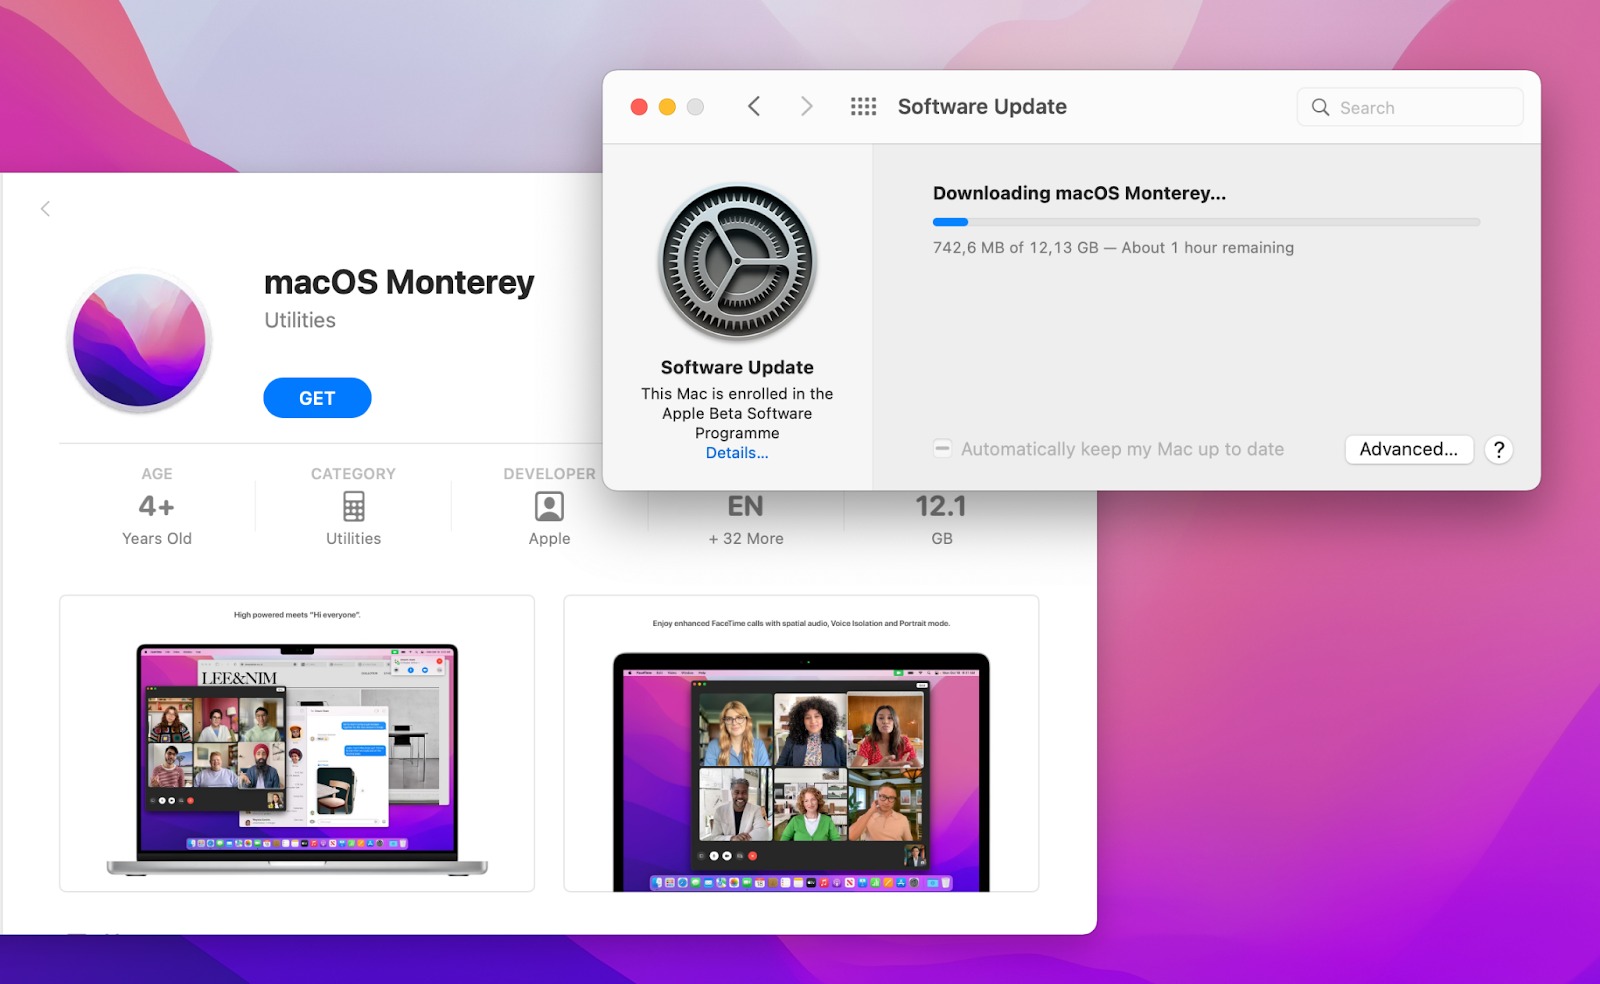
The first thing you should do is ensure that your Mac meets the system requirements for macOS Monterey. Check that you have enough available storage space and that your Mac is compatible with the new operating system.
If your Mac meets the requirements, try restarting the installation process. Sometimes, a simple restart can fix installation issues. Make sure to disconnect any external devices such as printers or USB drives before starting the installation.
Another common issue that can prevent macOS Monterey from installing is insufficient disk space. If you’re running low on storage, consider freeing up some space by deleting unnecessary files or transferring them to an external drive. It’s also a good idea to remove any unused applications or old backups that are taking up valuable space.
If you’re still unable to install macOS Monterey, you may need to reset your Mac’s NVRAM (non-volatile random-access memory) or PRAM (parameter random-access memory). These memory components store important system settings, and resetting them can often resolve installation issues. To reset the NVRAM or PRAM, shut down your Mac, then turn it on and immediately press and hold the Option, Command, P, and R keys until you hear the startup chime twice.
If none of these steps work, you can try creating a bootable installer for macOS Monterey. This involves using a USB drive to install the operating system. Apple provides detailed instructions on how to create a bootable installer on their website. This method may require more technical expertise, so proceed with caution and follow the instructions carefully.
Remember, installing a new operating system can take some time, so be patient. If you’re still unable to install macOS Monterey after trying these troubleshooting steps, it may be worth reaching out to Apple Support for further assistance.
By following these tips and troubleshooting steps, you should be able to overcome the common issue of being unable to install macOS Monterey. Stay tuned for the next sections where we’ll address other common problems you may encounter with the new operating system.
Slow Performance After Upgrading to macOS Monterey
One of the most frustrating issues that users may encounter after upgrading to macOS Monterey is a noticeable decrease in performance. If you’re experiencing slow performance, there are several steps you can take to help improve the speed and responsiveness of your Mac.
The first thing to check is if your Mac meets the system requirements for macOS Monterey. If your Mac is on the older side or doesn’t have sufficient resources, it may struggle to keep up with the demands of the new operating system. Consider checking Apple’s website to ensure your Mac is compatible with Monterey.
If your Mac meets the requirements, the next step is to check your available storage space. Insufficient disk space can significantly impact performance. Try freeing up space by deleting unnecessary files, emptying the trash, and moving large files to an external storage device or cloud storage.
Another potential cause of sluggish performance is background applications consuming system resources. Open the Activity Monitor (located in the Utilities folder within the Applications folder) and check for any processes that may be using an excessive amount of CPU or memory. You can quit those applications or processes to free up resources.
Updating your applications is also important in maintaining optimal performance. Developers often release compatibility updates to ensure their apps work smoothly with new operating systems. Check for updates in the App Store or on the developers’ websites and install them to ensure your apps are up to date.
Resetting the System Management Controller (SMC) can also help resolve performance issues. The SMC is responsible for managing various hardware components on your Mac. To reset the SMC, shut down your Mac, disconnect the power cord, wait for 15 seconds, then reconnect the power cord and turn on your Mac.
If none of these steps improve your Mac’s performance, you may want to consider performing a clean installation of macOS Monterey. This involves erasing your Mac’s hard drive and reinstalling the operating system from scratch. However, before taking this drastic step, make sure to back up your important files and data.
Remember, performance issues can have various underlying causes, and it may take some trial and error to find the solution that works for your specific situation. Be patient and try different troubleshooting steps until you notice an improvement in your Mac’s performance.
By following these suggestions, you should be able to address the issue of slow performance after upgrading to macOS Monterey. Keep reading for more tips on resolving other common problems with the new operating system.
Wi-Fi Not Working or Dropping Connection
A common issue that users encounter after upgrading to macOS Monterey is Wi-Fi connectivity problems. If you’re experiencing Wi-Fi issues such as a slow or unreliable connection, there are several steps you can take to resolve the problem.
First, check if the Wi-Fi issue is specific to your Mac or if other devices are also experiencing connectivity issues. If other devices are working fine, the problem may be with your Mac’s Wi-Fi settings.
Start by restarting your Mac and Wi-Fi router. Sometimes, a simple restart can fix temporary connection glitches. Additionally, make sure your Wi-Fi router is in a location with minimal interference from other devices or obstructions.
If the Wi-Fi issue persists, try resetting your Mac’s network settings. Go to “System Preferences” and select “Network.” Click on the Wi-Fi connection, then click the minus (-) button to remove it. After that, click the plus (+) button and add the Wi-Fi connection again. This will reset your Wi-Fi settings and may resolve the issue.
Another troubleshooting step is to update your router’s firmware. Manufacturers occasionally release firmware updates to improve compatibility and performance. Consult your router’s documentation or visit the manufacturer’s website for instructions on how to update the firmware.
If none of these steps work, you can try deleting the Wi-Fi preference files on your Mac. These files can sometimes become corrupted and cause Wi-Fi connectivity issues. Open Finder, click on “Go” in the menu bar, then select “Go to Folder.” In the prompted window, type “~/Library/Preferences/SystemConfiguration/” and click “Go.” Locate the files that start with “com.apple.airport” or “com.apple.network” and delete them. Restart your Mac and reconnect to Wi-Fi to see if the issue is resolved.
In some cases, disabling IPv6 on your Wi-Fi connection can solve Wi-Fi problems. To do this, go to “System Preferences” > “Network” > “Wi-Fi” > “Advanced” > “TCP/IP.” From the “Configure IPv6” dropdown menu, select “Off.” Restart your Mac and check if the Wi-Fi connection is stable.
If all else fails, you can try creating a new network location on your Mac. Go to “System Preferences” > “Network” > “Location” > “Edit Locations.” Click the plus (+) button to create a new location, then configure your Wi-Fi connection. This can refresh your network settings and help resolve connectivity issues.
By following these troubleshooting steps, you should be able to resolve Wi-Fi problems on your Mac after upgrading to macOS Monterey. Stay tuned for the next sections where we’ll address other common problems you may encounter with the new operating system.
Bluetooth Not Working
If you’re experiencing issues with Bluetooth connectivity after upgrading to macOS Monterey, you’re not alone. Bluetooth problems can range from devices not pairing or connecting properly to the inability to detect any Bluetooth devices. Here are some troubleshooting steps you can take to resolve Bluetooth issues on your Mac.
First, make sure that Bluetooth is enabled on both your Mac and the device you’re trying to connect to. On your Mac, go to “System Preferences” > “Bluetooth” and ensure that the “Bluetooth” option is turned on. On the device you’re trying to connect, ensure that Bluetooth is enabled in its settings.
If Bluetooth is already enabled on both devices, try restarting both your Mac and the Bluetooth device. Sometimes a simple restart can resolve temporary connectivity glitches.
If the issue persists, try removing the Bluetooth device from your Mac’s list of paired devices and then reconnecting it. Go to “System Preferences” > “Bluetooth,” right-click on the device in question, and select “Remove.” After removing the device, turn off and on the Bluetooth on your Mac, and then try pairing the device again.
Updating your Mac’s operating system and the device’s firmware can also help resolve Bluetooth issues. Check for any available system updates on your Mac and firmware updates for your Bluetooth devices. Manufacturers often release updates to improve compatibility and address connectivity problems.
Another troubleshooting step is to reset the Bluetooth module on your Mac. Open Finder and go to “/Library/Preferences,” then locate the file named “com.apple.Bluetooth.plist” and move it to the trash. Restart your Mac and try connecting your Bluetooth device again. This will reset the Bluetooth configurations, and it may solve the problem.
In some cases, changing the location of your Mac can help improve Bluetooth connectivity. Move closer to the Bluetooth device or try reducing interference from other electronic devices that may be causing signal disruption.
If you’re still unable to fix the Bluetooth issue, you can try resetting the System Management Controller (SMC) on your Mac. Shut down your Mac, disconnect the power cord, wait for 15 seconds, then reconnect the power cord and turn on your Mac. The SMC controls various hardware components, and resetting it can help resolve connectivity problems.
If none of these steps work, it’s advisable to contact the support channels for your Bluetooth device or reach out to Apple Support for further assistance.
By following these troubleshooting steps, you should be able to resolve Bluetooth issues on your Mac after upgrading to macOS Monterey. Stay tuned for the next sections where we’ll address other common problems you may encounter with the new operating system.
Battery Draining Quickly
Experiencing rapid battery drain after upgrading to macOS Monterey can be frustrating, especially when you rely on your Mac’s battery for portable use. If you’re facing this issue, there are several steps you can take to improve battery life and address the problem.
The first thing to check is if any power-hungry applications or processes are running in the background. Open the Activity Monitor (located in the Utilities folder within the Applications folder) and check for any applications or processes that may be consuming excessive CPU or energy. Quitting or closing these applications can help extend battery life.
Updating your Mac to the latest version of macOS Monterey can also help resolve battery drain issues. Apple often releases updates with bug fixes and performance improvements that can optimize battery usage. Go to “System Preferences” > “Software Update” to check for any available updates and install them.
Reducing the brightness of your Mac’s display can have a significant impact on battery life. Lower the display brightness to a level that is comfortable for you, but not overly bright. Additionally, consider enabling the “Automatic brightness” feature, which adjusts the screen brightness based on ambient lighting conditions.
Another significant factor in battery drain is background activity and processes. Many apps have background processes that can consume power even when you’re not actively using them. Review your list of open applications and close any unnecessary ones. Additionally, you can review and disable any unnecessary background activity in your Mac’s settings.
Disabling features such as Bluetooth, Wi-Fi, and location services when you’re not using them can also help conserve battery life. These features often search for connections or respond to requests in the background, consuming additional power. Toggle off these features in the menu bar or in the respective settings to save battery power.
Optimizing your Mac’s energy-saving settings is another effective way to improve battery life. Go to “System Preferences” > “Battery” and configure the settings to extend battery usage. Adjusting settings such as the time before the display sleeps or the duration before your Mac goes into sleep mode can help conserve power.
In some cases, recalibrating your Mac’s battery can help improve its accuracy and performance. Discharge your Mac completely until it shuts down, then connect it to the power adapter and let it charge to 100%. This process can help your Mac’s battery gauge provide more accurate information about the battery’s capacity.
If you’ve tried all of these steps and are still experiencing excessive battery drain, it may be worth exploring third-party battery optimization applications. These apps can provide additional features and settings to help manage and extend battery life.
By following these tips and adjustments, you should be able to improve battery life and address the issue of rapid battery draining on your Mac after upgrading to macOS Monterey. Stay tuned for the next sections where we’ll address other common problems you may encounter with the new operating system.
Apps Crashing or Freezing
If you’re experiencing frequent app crashes or freezing after upgrading to macOS Monterey, it can disrupt your workflow and be frustrating to deal with. However, there are several steps you can take to address this common problem.
The first thing you should do is check if the app(s) in question are fully compatible with macOS Monterey. Visit the developer’s website or the App Store to see if there are any updates available specifically designed for compatibility with the new operating system. Updating your apps to the latest versions can often resolve crashes and freezing issues.
If the problem persists, try force quitting the problematic app(s). To do this, click on the Apple menu, select “Force Quit,” or press Command + Option + Esc. A window will appear showing all currently running applications. Select the app(s) that are crashing or freezing and click “Force Quit.”
If force quitting the app doesn’t resolve the issue, try restarting your Mac. Sometimes, a simple restart can clear any temporary system glitches that may be causing app crashes or freezing.
If the problem is isolated to a specific app, you can try resetting the app’s preferences. Locate the app’s preferences file either in the ~/Library/Preferences/ folder or in the ~/Library/Containers/ folder. Move the preferences file to the desktop or another location, and then relaunch the app. This can help resolve any corrupt preferences that may be causing the crashes or freezing.
Another potential solution is to clear the app’s cache files. Cached files can sometimes become corrupted, leading to app instability. Consult the app’s documentation or support website to locate the cache files and delete them. Afterward, relaunch the app and see if the issue is resolved.
If the problem is not limited to a specific app and multiple apps are crashing or freezing, it’s possible that there is an issue with your Mac’s system files. In this case, you can try running a disk utility program, such as Disk Utility, to repair any disk permissions or file system errors that may be contributing to the problem.
If none of these steps resolve the app crashing or freezing, you may need to consider a clean reinstall of the problematic app(s). Completely uninstall the app and then reinstall it from a trusted source. Make sure to back up any necessary data associated with the app before performing the reinstall.
By following these troubleshooting steps, you should be able to address the app crashing or freezing issues you’re experiencing on your Mac after upgrading to macOS Monterey. Stay tuned for the next sections where we’ll address other common problems you may encounter with the new operating system.
External Devices Not Working
If you’re encountering issues with external devices not working properly after upgrading to macOS Monterey, it can be frustrating and hinder your productivity. However, there are several steps you can take to troubleshoot and resolve this problem.
The first thing you should do is check the connectivity of the external device. Ensure that the device is properly connected to your Mac and that all cables are securely plugged in. If it’s a wireless device, check the batteries or power source to ensure they’re not depleted.
If the device is connected properly but still not working, try connecting it to a different USB port or using a different cable. Sometimes, a faulty USB port or cable can cause connectivity issues. By swapping out these components, you can determine if the problem lies with the device or the connection.
Next, check if the device is recognized by your Mac. Go to “System Preferences” > “Hardware” and check if the device appears in the list of connected devices. If it does not appear, try restarting your Mac to refresh the system and the device recognition process.
If the device is recognized but still not functioning properly, updating the device’s driver software or firmware may help. Visit the manufacturer’s website to see if there are any available updates specifically for macOS Monterey compatibility. Follow the instructions provided to update the device’s driver or firmware.
Another troubleshooting step is to reset the System Management Controller (SMC) on your Mac. Shut down your Mac, disconnect the power cord, wait for 15 seconds, then reconnect the power cord and turn on your Mac. This can often resolve issues related to power management and external device connectivity.
If your external device requires specific software or drivers to function, ensure that they are installed and up to date. Check the manufacturer’s website or consult the device’s documentation to download and install the necessary software or drivers.
It’s also worth checking if the external device is compatible with macOS Monterey. Some older devices may not be fully compatible with the new operating system, resulting in limited or no functionality. Consult the device’s documentation or contact the manufacturer for compatibility information.
If none of these steps resolve the issue, try connecting the external device to another computer or device to see if it works. This will help determine if the problem lies with the device itself or with your Mac.
If the device still does not work on any computer or device, it may be a hardware issue. Contact the device’s manufacturer for further assistance or consider seeking professional help for repair or replacement options.
By following these troubleshooting steps, you should be able to resolve issues with external devices not working properly on your Mac after upgrading to macOS Monterey. Stay tuned for the next sections where we’ll address other common problems you may encounter with the new operating system.
Unable to Open Certain Files or Documents
If you’re unable to open certain files or documents after upgrading to macOS Monterey, it can be frustrating, especially if they contain important information. However, there are several steps you can take to troubleshoot and resolve this issue.
The first thing you should check is whether you have the necessary applications or software installed to open the files. It’s possible that the files you’re trying to open require specific software that may not be compatible with macOS Monterey. Check the file extensions and refer to the software’s official website to ensure compatibility and download any updates if necessary.
If you do have the correct software installed, but you’re still unable to open the files, try restarting your Mac. Sometimes, a simple restart can resolve temporary system glitches that may be preventing file access.
Another important step is to check the file permissions. Right-click on the file, select “Get Info,” and make sure that you have the necessary permissions to access and open the file. If not, adjust the permissions accordingly.
It’s also worth noting that some files may have become corrupted during the upgrade process. If you have a backup of the files, try restoring them from a previous version. If you don’t have a backup, try opening the files on another device or using alternative software to determine if the issue is specific to your Mac or the files themselves.
If the files are stored on an external device or cloud storage, try accessing them from a different location. This can help determine if the problem is with the storage device or the macOS Monterey system.
Updating the application or software that is used to open the files may also help resolve the issue. Developers frequently release updates to improve compatibility and address any bugs or issues that may arise with new operating systems. Check for available updates in the App Store or on the software’s official website.
For files that are part of a larger document or project, you can try importing or opening them into another application or software that is known to be compatible with macOS Monterey. This can help bypass any compatibility issues that may be preventing file access.
If none of these steps resolve the issue, the files themselves may be damaged or corrupt. In such cases, it may not be possible to open or recover the files. Ensuring regular backups of important files can help mitigate the risk of permanent data loss.
If you continue to experience problems opening certain files or documents, it may be worth seeking assistance from the software developers, file format communities, or Apple Support for further guidance and possible solutions.
By following these troubleshooting steps, you should be able to address the issue of being unable to open certain files or documents on your Mac after upgrading to macOS Monterey. Stay tuned for the next sections where we’ll address other common problems you may encounter with the new operating system.
Display Issues or Graphics Glitches
Experiencing display issues or graphics glitches after upgrading to macOS Monterey can be frustrating and impact your overall user experience. However, there are several steps you can take to troubleshoot and resolve these problems.
The first thing to check is if your Mac’s display settings are properly configured. Go to “System Preferences” > “Displays” and ensure that the resolution and refresh rate are set correctly for your monitor or display. Adjusting these settings can sometimes help resolve display issues.
Next, check if there are any available system updates for macOS Monterey. Apple often releases updates that address known graphics issues and improve compatibility with different hardware configurations. Go to “System Preferences” > “Software Update” to check for any available updates and install them.
If the display issues or graphics glitches persist, try resetting the System Management Controller (SMC) on your Mac. Shut down your Mac, disconnect the power cord, wait for 15 seconds, then reconnect the power cord and turn on your Mac. Resetting the SMC can help resolve various hardware-related issues, including display problems.
Updating your Mac’s graphics drivers can also improve performance and resolve graphics glitches. Check the manufacturer’s website for your graphics card or chipset and download the latest drivers compatible with macOS Monterey. Follow the installation instructions provided by the manufacturer.
If you’re using an external display or multiple monitors, ensure that the connections are secure and that the cables are in good condition. Disconnect and reconnect the cables to ensure a proper connection. If the issue persists, try using a different cable or connecting to a different display to determine if the problem lies with the display or with your Mac.
Some graphics glitches may be related to specific applications or software. Try updating or reinstalling the problematic applications to see if it resolves the issue. Contact the software developers for further assistance or to report any known graphics problems.
In certain cases, clearing the caches on your Mac can help resolve graphics issues. Use a tool like Onyx or CleanMyMac to clear system and application caches. Be cautious when using these tools and follow the instructions provided.
If none of these steps resolve the display issues or graphics glitches, it’s advisable to contact Apple Support or the support channels provided by your Mac’s manufacturer for further assistance. They may be able to provide specific guidance related to your Mac model and help resolve the problem.
By following these troubleshooting steps, you should be able to address display issues and graphics glitches on your Mac after upgrading to macOS Monterey. Stay tuned for the next sections where we’ll address other common problems you may encounter with the new operating system.
Safari Browser Problems
If you’re experiencing issues with the Safari web browser after upgrading to macOS Monterey, it can greatly impact your ability to browse the internet smoothly. Fortunately, there are several troubleshooting steps you can take to resolve these Safari browser problems.
The first step is to check for any available updates for Safari. Apple frequently releases updates that address known issues and improve browser performance. Go to the App Store and click on the “Updates” tab to see if there are any updates available for Safari.
If Safari is already up to date, try clearing the cache and cookies. Built-up cache and cookies can sometimes cause browser performance issues. Go to “Safari” > “Preferences” > “Privacy” and click on “Manage Website Data.” Remove all stored data by clicking “Remove All.” Additionally, you can clear the browser cache by going to “Safari” > “Preferences” > “Advanced” and checking the box next to “Show Develop menu in menu bar.” This will enable the “Develop” menu in the menu bar, where you can select “Empty Caches” to clear the cache.
Extensions and plugins can also cause problems with Safari. Temporarily disable any extensions or plugins you have installed and see if the issue is resolved. You can do this by going to “Safari” > “Preferences” > “Extensions” and unchecking the box next to each extension or plugin.
If Safari is still not functioning properly, try creating a new user profile on your Mac and test Safari under the new profile. This will help determine if the issue is specific to your user account or if it affects all users on your Mac. To create a new user profile, go to “System Preferences” > “Users & Groups” and click on the plus (+) button to add a new user. Then, log in to the new user profile and test Safari.
In some cases, a corrupted Safari preference file may be causing the problem. Resetting the Safari preferences can help resolve issues with the browser. Go to “Safari” > “Preferences” and click on the “General” tab. At the bottom, click on “Reset” and select “Reset Safari.” This will reset all Safari settings to their default values.
If none of these steps resolve the Safari browser problems, you can consider reinstalling Safari. This involves uninstalling Safari from your Mac using a third-party uninstaller and then reinstalling it from the official Apple website.
If you prefer to use an alternative browser, there are several options available for macOS Monterey, such as Google Chrome or Mozilla Firefox. Download and install the browser of your choice from its official website.
If all else fails, contacting Apple Support or consulting Safari’s dedicated support channels can provide further assistance in resolving any persistent Safari browser problems.
By following these troubleshooting steps, you should be able to address the Safari browser problems you’re encountering on your Mac after upgrading to macOS Monterey. Stay tuned for the next sections where we’ll address other common problems you may encounter with the new operating system.
iCloud Syncing Issues
iCloud syncing issues can be frustrating, as they can prevent your data from being seamlessly shared and updated across your devices. If you’re experiencing problems with iCloud syncing after upgrading to macOS Monterey, here are some steps you can take to troubleshoot and resolve the issue.
The first thing to check is your internet connection. Make sure you have a stable and reliable internet connection, as iCloud syncing requires an active connection to function properly.
Next, verify that you’re signed in to iCloud with the correct Apple ID on all the devices experiencing syncing problems. Go to “System Preferences” > “Apple ID” and ensure you’re signed in with the same Apple ID on your Mac and other devices. If not, sign in or switch to the correct Apple ID.
If your iCloud data is not syncing across devices, try toggling off and on the specific iCloud features that are experiencing issues. Go to “System Preferences” > “Apple ID” > “iCloud” and turn off the problematic iCloud features. Wait a few moments and then turn them back on. This can initiate a fresh sync and resolve any synchronization problems.
It’s also worth checking the storage space available on your iCloud account. If your iCloud storage is full, syncing may be limited or disabled. Go to “System Preferences” > “Apple ID” > “iCloud” > “Manage…” to check your iCloud storage utilization. If it’s near capacity, consider upgrading your iCloud storage plan to accommodate your data syncing needs.
If iCloud syncing is still not working, try restarting your devices. Restart your Mac, iPhone, iPad, or other devices experiencing syncing issues. A simple restart can often resolve temporary glitches in the syncing process.
Another troubleshooting step is to ensure that the specific apps or data you’re trying to sync are properly configured. Check the app settings on your devices and ensure that the syncing options are enabled. Some apps may have individual settings that control iCloud syncing, so make sure the options are selected as desired.
In some cases, signing out of iCloud and then signing back in can help refresh the syncing process. Go to “System Preferences” > “Apple ID” > “Overview” and click on “Sign Out.” Restart your Mac and then sign back in to iCloud with your Apple ID credentials. This can reset the iCloud connection and resolve any underlying issues.
If none of these steps resolve the iCloud syncing issues, it’s advisable to contact Apple Support or visit an Apple Store for further assistance. They have resources and expertise to resolve complex iCloud syncing problems and can provide personalized guidance based on your specific situation.
By following these troubleshooting steps, you should be able to address the iCloud syncing issues you’re experiencing on your Mac after upgrading to macOS Monterey. Stay tuned for the next sections where we’ll address other common problems you may encounter with the new operating system.
System Preferences Not Responding
If you’re encountering issues with the System Preferences application not responding after upgrading to macOS Monterey, it can be frustrating as this utility is essential for managing various settings on your Mac. Fortunately, there are several steps you can take to troubleshoot and resolve this problem.
The first step is to close the System Preferences application and reopen it. Sometimes it may become unresponsive due to temporary glitches. Simply click on the Apple menu, select “System Preferences,” and then quit the application. Afterward, relaunch it from the Dock or the Applications folder.
If the issue persists, try restarting your Mac. A simple restart can clear temporary system glitches and restore the functionality of the System Preferences application.
Another potential cause of System Preferences not responding is a corrupt preference file. Resetting the preferences can help resolve such issues. Go to the Finder, click on “Go” in the menu bar, hold down the Option key, and select “Library.” In the Library folder, navigate to the Preferences folder and locate the file with the name “com.apple.systempreferences.plist.” Move this file to the desktop (for backup) or delete it. Afterward, relaunch the System Preferences application.
If you’re still experiencing unresponsiveness, try booting your Mac in Safe Mode. Safe Mode runs your Mac with minimal system extensions and disables any non-essential login items. This can help identify and isolate any conflicting software or profile issues that may be causing the problem. Restart your Mac and hold down the Shift key immediately after hearing the startup chime. Release the Shift key once the login window appears. Use the System Preferences application in Safe Mode and see if it is responsive. If it is, the issue may be related to third-party software or login items.
Cleaning up your Mac’s cache files using a dedicated tool like Onyx or CleanMyMac can also help resolve unresponsiveness issues. These tools can clear system caches and temporary files that may be interfering with the System Preferences application. However, exercise caution when using such tools and follow the instructions provided.
If all else fails, reinstalling macOS Monterey may be necessary. First, make sure you have a backup of your important data. Then, restart your Mac in Recovery Mode by holding down Command + R immediately after hearing the startup chime. From the macOS Utilities window, select “Reinstall macOS” and follow the on-screen instructions. This process will reinstall macOS Monterey while preserving your user data. However, it’s always advisable to have a backup before performing such a major operation.
If none of these steps resolve the issue, it’s recommended to contact Apple Support or visit an Apple Store for further assistance. They can provide advanced troubleshooting steps or potentially repair any underlying hardware or software issues causing the unresponsiveness of the System Preferences application.
By following these troubleshooting steps, you should be able to address the issue of System Preferences not responding on your Mac after upgrading to macOS Monterey. Stay tuned for the next sections where we’ll address other common problems you may encounter with the new operating system.
Can’t Open or Run Older Applications
If you’re unable to open or run older applications after upgrading to macOS Monterey, it can be disappointing, especially if those applications are critical for your workflow. However, there are several steps you can take to address this compatibility issue.
The first thing to check is if the specific application is compatible with macOS Monterey. Older applications may not be designed to work with the latest operating system. Visit the developer’s website or contact their support to confirm compatibility. They may provide updates or workarounds to run the application on macOS Monterey.
If the application is no longer maintained or doesn’t have an update for compatibility, you can try running it in Rosetta mode. Rosetta is a translation technology in macOS that allows Intel-based applications to run on Apple Silicon Macs. Right-click on the application and select “Get Info.” In the Info window, check the box next to “Open using Rosetta.” This will force the application to run in compatibility mode.
Another potential solution is to run a virtual machine on your Mac. Virtual machines, such as Parallels or VirtualBox, allow you to create a separate virtual environment where you can run an older version of macOS or even Windows. This allows you to run older applications within the virtual machine, providing a solution for compatibility issues.
If neither of these options works, you may consider using alternative software that is compatible with macOS Monterey. Look for similar applications or software that offer the same functionalities as the older application. It may require some adjustment and adaptation, but it can provide a viable solution moving forward.
For critical applications that are essential to your workflow and have no viable alternatives, you may need to consider keeping a separate device or partition with an older version of macOS specifically for running those applications. This allows you to maintain compatibility while using macOS Monterey for other tasks.
It’s worth noting that technology evolves rapidly, and there may come a point where certain applications become completely unsupported. In such cases, you may need to consider finding alternative solutions or migrating to newer applications that are compatible with the latest operating system.
If you need further assistance, you can reach out to the developer’s support team or browse online forums and communities dedicated to the specific application. Other users may have encountered similar issues and can provide insights or workarounds.
By exploring these options and taking the necessary steps, you should be able to address the issue of not being able to open or run older applications on your Mac after upgrading to macOS Monterey. Stay tuned for the next sections, where we’ll address other common problems you may encounter with the new operating system.
Keyboard or Mouse Problems
Experiencing issues with your keyboard or mouse after upgrading to macOS Monterey can be frustrating, as these input devices are essential for navigating and using your Mac. If you’re encountering problems with your keyboard or mouse, there are several steps you can take to troubleshoot and resolve the issue.
First, ensure that your keyboard or mouse is properly connected to your Mac. If it’s a wired device, check that the cables are securely plugged into the appropriate ports. If it’s a wireless device, make sure that it’s turned on and in range of your Mac. You may need to replace the batteries or charge the device if it’s not functioning properly.
If the device is connected properly but still not working, try connecting it to a different USB port. Sometimes, a faulty USB port can cause issues with keyboard or mouse functionality. By testing different ports, you can determine if the problem lies with the device or the connection.
Next, check the accessibility settings on your Mac. Go to “System Preferences” > “Accessibility” and ensure that the keyboard or mouse settings are configured correctly. For example, if you’re experiencing issues with keystrokes, check the “Keyboard” options and adjust settings such as key repeat or delay until repeat. Similarly, for mouse issues, check the “Mouse & Trackpad” options and adjust tracking speed or double-click speed as needed.
If your keyboard or mouse is a Bluetooth device and it’s not working, try removing the device from your Mac’s list of paired devices and then re-pairing it. Go to “System Preferences” > “Bluetooth,” select the device, and click on the “X” button to remove it. Afterward, turn off and on the Bluetooth on your Mac, and then try pairing the device again.
Updating your Mac’s software can also help resolve keyboard or mouse problems. Apple often releases updates that include bug fixes and improvements to hardware compatibility. Go to “System Preferences” > “Software Update” to check if there are any available updates for your Mac and install them.
If none of these steps resolve the issue, try using the keyboard or mouse on another computer or device. This will help determine if the problem lies with the device itself or with your Mac. If the device works fine on another computer, the issue may be with your Mac’s software or hardware.
In such cases, contacting Apple Support or visiting an Apple Store for further assistance is recommended. They may be able to diagnose and resolve any hardware or software issues that are causing problems with your keyboard or mouse.
By following these troubleshooting steps, you should be able to address the keyboard or mouse problems you’re experiencing on your Mac after upgrading to macOS Monterey. Stay tuned for the next sections where we’ll address other common problems you may encounter with the new operating system.
Unexpected Shutdowns or Restarts
Experiencing unexpected shutdowns or restarts on your Mac after upgrading to macOS Monterey can be concerning, as it can disrupt your workflow and potentially lead to data loss. If you’re encountering this issue, there are several steps you can take to troubleshoot and resolve the problem.
The first thing to check is whether your Mac’s power adapter is securely connected. If the connection is loose or not properly inserted, it can cause intermittent power interruptions, leading to unexpected shutdowns or restarts. Ensure that the power adapter is firmly plugged into your Mac and the power outlet.
If the power connection is not the issue, check for any available system updates for macOS Monterey. Apple often releases updates that include bug fixes and stability improvements. Go to “System Preferences” > “Software Update” to check if there are any available updates for your Mac and install them.
Overheating can also cause unexpected shutdowns or restarts on your Mac. Ensure that your Mac has proper ventilation and is not overheating. Clean any dust or debris from the cooling vents and make sure that your Mac is placed on a flat and stable surface that promotes airflow.
If the issue persists, resetting the System Management Controller (SMC) can help resolve unexpected shutdowns or restarts. The SMC controls various hardware components, and resetting it can sometimes resolve power-related issues. To reset the SMC, shut down your Mac, disconnect the power cord, and hold down the Shift + Control + Option + Power buttons for about 10 seconds. Then, release the keys, reconnect the power cord, and turn on your Mac.
Software conflicts or incompatible applications can also cause unexpected shutdowns or restarts. Check for any recently installed or updated apps that may be causing the issue. Try removing or disabling those apps to see if it resolves the problem. Additionally, consider running a malware scan using reputable security software to check for any malicious programs that may be causing the unexpected shutdowns or restarts.
If none of these steps resolve the issue, it’s advisable to contact Apple Support or visit an Apple Store for further assistance. They can provide advanced diagnostics and potential hardware repairs, if necessary, to address the unexpected shutdowns or restarts.
By following these troubleshooting steps, you should be able to address the issue of unexpected shutdowns or restarts on your Mac after upgrading to macOS Monterey. Stay tuned for the next sections where we’ll address other common problems you may encounter with the new operating system.