
Check for Signal Strength and Airplane Mode
If you’re experiencing issues with making or receiving calls on your Android device, one of the first things you should check is the signal strength and your device’s airplane mode setting. Both of these factors can significantly impact your phone’s ability to connect to a network and make calls. Here’s how you can troubleshoot these issues:
1. Check Signal Strength: Start by looking at your device’s signal indicator bars. If you have low or no signal, it means you’re in an area with poor network coverage. Try moving to a different location, preferably one with better reception, and see if the signal improves. Additionally, check if other devices in the same vicinity are also experiencing signal problems. If they are, it could be a network issue that is beyond your control.
2. Turn off Airplane Mode: It may sound obvious, but sometimes the simplest solution is the most effective. Airplane mode is a feature on your Android device that disables all wireless communications, including mobile network connections. Make sure that airplane mode is turned off by going to the Settings menu on your device and toggling the Airplane Mode switch to the off position. Once it’s off, your phone should be able to make and receive calls again.
3. Toggle Airplane Mode: If your device is not in airplane mode but you’re still having issues, try toggling the airplane mode on and off. Sometimes, this simple action can help reset your network connections and restore normal call functionality. To do this, go to the Settings menu, enable airplane mode, wait for a few seconds, and then disable it again. Check if you can make or receive calls afterward.
4. Check SIM Card: A problematic SIM card can also cause issues with calling. Remove the SIM card from your phone and inspect it for any signs of damage or dirt. If there are any visible issues, carefully clean the SIM card and reinsert it. Also, make sure it’s properly seated in its slot. Once you’ve done this, restart your phone and see if the call problem resolves.
5. Reset Network Settings: Sometimes, incorrect network settings can prevent your device from making or receiving calls. To fix this, go to the Settings menu, locate the Reset options, and choose the option to reset network settings. Keep in mind that this will remove saved Wi-Fi networks and Bluetooth connections, so you’ll need to reconnect to them afterward.
By following these troubleshooting steps, you should be able to resolve most issues related to call connectivity on your Android device. If the problem persists, it may be necessary to contact your service provider for further assistance.
Restart Your Phone
If you’re encountering difficulties with making or receiving calls on your Android device, one of the simplest and most effective troubleshooting measures is to restart your phone. This basic step can often resolve a wide variety of software and connectivity issues. Here’s how you can do it:
1. Press and Hold the Power Button: Locate the power button on your device, typically located on the side or top. Press and hold the power button until the power options menu appears on the screen. This menu usually includes options such as Power Off, Restart, and Airplane Mode.
2. Select Restart or Reboot: Tap on the Restart or Reboot option from the power menu. Your device will then begin the restart process. It may take a few moments for the phone to completely shut down and turn back on.
3. Wait for the Phone to Restart: Once the restart process is initiated, patiently wait for your phone to go through the reboot sequence. This will involve the device powering off, then restarting and loading the operating system. The entire process usually takes less than a minute, but it may vary depending on your device model.
4. Test Call Functionality: After your phone has restarted, test the call functionality by dialing a number or asking someone to call you. Check if you can both make and receive calls without any issues. Hopefully, the restart has resolved any temporary software glitches that were causing the call problem.
5. Try a Forced Restart: If a normal restart doesn’t solve the issue, you can try a forced restart. To perform a forced restart, press and hold the power button and volume down button simultaneously for about 10-20 seconds. This will force your phone to restart. Remember that this method may vary depending on your device model, so consult the manufacturer’s documentation if needed.
Restarting your phone can help refresh the system and clear any temporary software hiccups that may be interfering with your phone’s call functionality. It’s a quick and straightforward solution that is worth trying before moving on to more advanced troubleshooting steps.
Update Your Phone’s Software
Keeping your Android device’s software up-to-date is essential for optimal performance and functionality. If you’re experiencing issues with making or receiving calls, it’s possible that outdated software may be the culprit. To troubleshoot this problem, follow these steps to update your phone’s software:
1. Check for System Updates: Go to the Settings menu on your device and scroll down to find the “System” or “Software Update” option. Tap on it to access the system update settings.
2. Check for Updates: Within the system update settings, tap on the “Check for updates” button. Your device will connect to the server and search for any available updates. If an update is found, follow the on-screen prompts to download and install it. Make sure your device is connected to a stable Wi-Fi network to ensure a smooth update process.
3. Install the Update: If there is an available update, tap on the “Download” or “Install” button to initiate the installation process. Your phone will restart and apply the update. This may take a few minutes, so be patient and avoid interrupting the process.
4. Test Call Functionality: After the update installation is complete and your phone has restarted, check if the issue with making or receiving calls has been resolved. Make a test call to ensure that everything is working correctly. If the problem persists, continue troubleshooting using other methods.
Regular software updates not only provide bug fixes but also include improvements in call quality and network connectivity. By keeping your phone’s software up-to-date, you can ensure a more reliable calling experience and potentially resolve any issues you may be experiencing.
If there are no available updates for your device or if the problem persists even after updating, it’s recommended to contact your device manufacturer or service provider for further assistance. They may be able to provide more specific troubleshooting steps or suggest alternative solutions to address the call issue.
Check Your Network Settings
If you’re having trouble making or receiving calls on your Android device, it’s crucial to check your network settings. Improper network settings can interfere with your phone’s ability to connect to the network and affect call functionality. Here’s how you can verify and adjust your network settings:
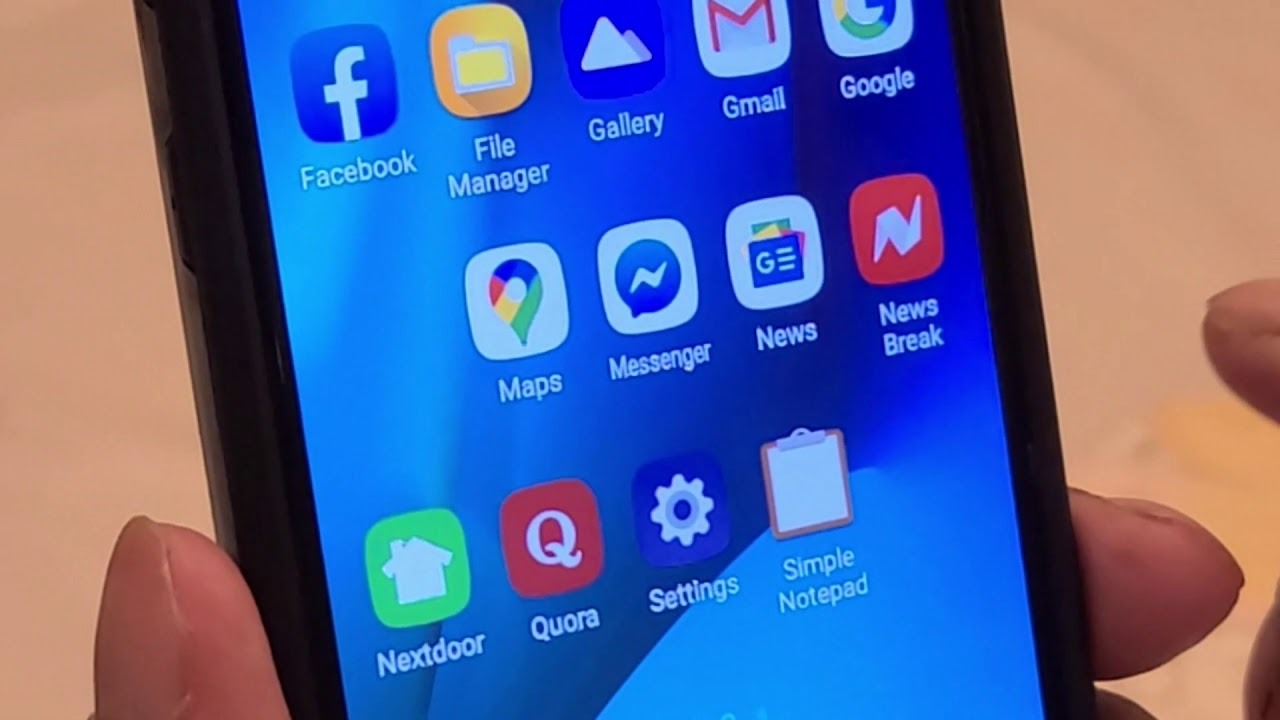
1. Go to Network Settings: Open the Settings menu on your device and look for the “Network & Internet” or “Connections” option. Tap on it to access the network settings.
2. Check Mobile Network Settings: Within the network settings, locate the “Mobile Network” or “Cellular Network” section. Ensure that the “Mobile Data” or “Data Connection” option is enabled. If it’s disabled, toggle it on, allowing your device to use cellular data for calling.
3. Select Preferred Network Type: In the same section, you may find an option called “Preferred Network Type” or “Network Mode.” Tap on it and select the appropriate network type for your service provider, such as 2G, 3G, 4G, or LTE. It’s advisable to choose the highest available network type for better call quality, if supported by your device and network.
4. Reset APN Settings: Access the APN (Access Point Name) settings within the network settings menu. If your device’s APN settings are incorrect or outdated, it can prevent you from making or receiving calls. To reset the APN settings, tap on the option to reset or restore default settings. Keep in mind that this may erase any custom APN settings you’ve made, so make a note of them before proceeding.
5. Test Call Functionality: After adjusting your network settings, make a test call to check if the issue has been resolved. If you still can’t make or receive calls, proceed to other troubleshooting steps.
If the network settings on your device appear to be correct, but you’re still experiencing call issues, it’s recommended to contact your service provider for further assistance. They can help troubleshoot network-related problems, provide specific APN settings, or verify if there are any known network outages in your area.
By ensuring your network settings are properly configured, you can improve call connectivity and address any issues arising from incorrect network configurations on your Android device.
Ensure Call Forwarding is Disabled
If you’re facing difficulties with making or receiving calls on your Android device, it’s essential to check if call forwarding is enabled. Call forwarding redirects incoming calls to another phone number, which can prevent your device from properly receiving calls. To ensure call forwarding is disabled, follow these steps:
1. Open Phone Settings: Open the Phone app on your device and tap on the three-dot menu icon or the “More” option, usually located in the upper right corner.
2. Access Call Settings: From the menu options, select “Settings” or “Call settings.” This will take you to the settings specifically related to phone calls.
3. Locate Call Forwarding Settings: Within the Call Settings menu, look for the “Call Forwarding” or “Forwarding” option. Tap on it to access the call forwarding settings.
4. Disable Call Forwarding: If call forwarding is enabled, there will be options such as “Always Forward,” “Forward When Busy,” “Forward When Unanswered,” or “Forward When Unreachable.” Tap on each option and make sure they are disabled or turned off. If any of them are enabled, toggle the switch off to disable call forwarding.
5. Test Call Functionality: After disabling call forwarding, make a test call to verify if the issue has been resolved. If you can make and receive calls without any problems, then call forwarding was likely the cause of the issue.
Remember to check both the call forwarding settings on your Android device and any additional call forwarding features that may be enabled through your service provider. Some carriers allow call forwarding to be managed through their website or dedicated apps, so it’s worth checking those platforms as well.
If call forwarding is disabled, but you continue to experience call-related problems, it’s advisable to contact your service provider for further assistance. They can help analyze the issue and provide guidance tailored to your specific situation.
By ensuring call forwarding is disabled on your Android device, you can ensure that all incoming calls are correctly directed to your phone, allowing you to make and receive calls without any interruptions.
Remove and Reinsert SIM Card
If you’re encountering issues with making or receiving calls on your Android device, a faulty or loose SIM card could be the cause. By removing and reinserting the SIM card, you can establish a secure connection and potentially resolve any connectivity issues. Follow these steps to remove and reinsert your SIM card:
1. Turn Off Your Device: Before removing the SIM card, it’s crucial to power off your Android device. This will ensure that you don’t accidentally cause any damage to the device or your SIM card.
2. Locate the SIM Card Tray: Look for the SIM card tray on your device. The location of the SIM card tray varies depending on the device model. Typically, it can be found on the side or top of the device. If unsure, refer to your device’s user manual or visit the manufacturer’s website for specific instructions on locating the SIM card tray.
3. Eject the SIM Card Tray: Once you’ve located the SIM card tray, use a SIM card ejector tool or a paperclip to insert into the small hole next to the tray. Apply gentle pressure to eject the SIM card tray from the device. Carefully pull out the tray once it pops out.
4. Remove the SIM Card: Take out the SIM card from the tray. Inspect the card for any signs of damage, dirt, or debris. If necessary, use a microfiber cloth or soft brush to clean any dirt or dust from the SIM card. Avoid using any liquid cleaners or abrasive materials that could damage the card.
5. Reinsert the SIM Card: After cleaning and ensuring that the SIM card is in good condition, carefully place it back into the SIM card tray. Make sure the card fits securely and aligns with the designated slot. Gently push the tray back into the device until it is fully inserted.
6. Turn On Your Device: Power on your Android device after reinserting the SIM card. Once your device has restarted, it will attempt to establish a connection to the network using the newly inserted SIM card.
7. Test Call Functionality: After reinserting the SIM card, test the call functionality by making a call or asking someone to call you. Check if you can both make and receive calls without any issues. If the problem persists, consider trying other troubleshooting methods.
If removing and reinserting the SIM card doesn’t resolve the call connectivity problem, it’s recommended to contact your service provider for further assistance. They can assist you in troubleshooting the issue or providing a replacement SIM card if necessary.
By carefully removing and reinserting the SIM card, you can ensure a secure connection and potentially address any connectivity issues interfering with your Android device’s ability to make or receive calls.
Reset Network Settings
If you’re experiencing persistent issues with making or receiving calls on your Android device, resetting the network settings can help resolve network-related conflicts or misconfigurations. Resetting the network settings will revert your device’s network settings to their default values, potentially resolving any network-related issues. Here’s how you can reset the network settings on your Android device:
1. Open Settings: Go to the Settings menu on your device. You can typically access it by swiping down from the top of the screen and tapping on the gear icon. Alternatively, you can find it in the app drawer or by pressing the dedicated Settings button.
2. Access Network Settings: In the Settings menu, scroll down and find the “System” or “General Management” option. Tap on it to access the system settings.
3. Reset Network Settings: Within the system settings, look for the “Reset” or “Reset options” entry. Tap on it to access the reset options menu.
4. Select Network Settings Reset: From the reset options, select “Reset Network Settings” or a similar option. You may be prompted to enter your device’s security PIN or password to proceed.
5. Confirm the Reset: A confirmation message will appear, warning you that this action will erase your saved Wi-Fi networks, Bluetooth connections, and other network-related settings. Read the message carefully and tap on “Reset Settings” or “Confirm” to proceed.
6. Restart Your Device: After resetting the network settings, it’s recommended to restart your Android device. Rebooting the device will ensure that the new network settings are applied correctly.
7. Reconnect to Networks: Once your device has restarted, go to the Wi-Fi settings and reconnect to your preferred Wi-Fi networks. You may need to enter the Wi-Fi passwords again for each network. Additionally, if you use Bluetooth devices, pair them with your device once more.
8. Test Call Functionality: After resetting the network settings and reconnecting to networks, test the call functionality on your device. Make a call or ask someone to call you to check if the problem with making or receiving calls has been resolved.
Resetting the network settings can often fix issues related to network connectivity, which can impact your ability to make or receive calls on your Android device. However, please note that this action will remove your saved network settings and preferences, so it’s important to ensure you have the necessary information to reconnect to Wi-Fi networks after the reset.
If resetting the network settings doesn’t resolve the call connectivity problem, it’s recommended to contact your service provider for further assistance or consider other troubleshooting steps.
Clear the Cache of the Phone App
If you’re encountering issues with making or receiving calls on your Android device, clearing the cache of the Phone app can help resolve any temporary glitches or corrupted data that may be affecting its performance. Here’s how you can clear the cache of the Phone app:
1. Open App Settings: Go to the Settings menu on your device. You can typically access it by swiping down from the top of the screen and tapping on the gear icon. Alternatively, you can find it in the app drawer or by pressing the dedicated Settings button.
2. Access App Manager: In the Settings menu, scroll down and find the “Apps” or “Applications” option. Tap on it to access the list of installed apps on your device.
3. Locate Phone App: Scroll through the list of installed apps and look for the Phone app. Tap on it to access the app’s settings.
4. Clear App Cache: Within the Phone app settings, tap on the “Storage” or “Memory” option. You should see a button labeled “Clear cache.” Tap on it to clear the cache of the Phone app. Be aware that clearing the cache will not delete any important data or settings.
5. Restart Your Device: After clearing the cache, it’s recommended to restart your Android device. Restarting will help ensure that any temporary changes made by clearing the cache are properly implemented.
6. Test Call Functionality: Once your device has restarted, test the call functionality by making a call or asking someone to call you. Check if you can both make and receive calls without any issues. Clearing the cache of the Phone app may have resolved any temporary issues that were interfering with its performance.
If clearing the cache of the Phone app doesn’t resolve the call connectivity problem, it’s recommended to consider other troubleshooting methods or contact your service provider for further assistance. They can provide more specific guidance or suggest alternative solutions to address the issue.
Clearing the cache of the Phone app is a simple yet effective step that can help improve the performance and reliability of the calling feature on your Android device. By clearing out temporary files and data, you can potentially resolve any issues that were preventing you from making or receiving calls.
Factory Reset Your Phone
If you’re experiencing persistent and unresolved issues with making or receiving calls on your Android device, performing a factory reset can be a last resort troubleshooting step. A factory reset will erase all data and settings on your phone, returning it to its original factory state. Here’s how you can factory reset your Android device:
1. Backup Your Data: Before proceeding with a factory reset, it’s crucial to backup any important data on your device. This includes photos, videos, contacts, messages, and any other personal files. You can backup your data using various methods, such as using cloud storage services, transferring files to a computer, or using backup apps available on the Google Play Store.
2. Access Phone Settings: Go to the Settings menu on your device. You can typically access it by swiping down from the top of the screen and tapping on the gear icon. Alternatively, you can find it in the app drawer or by pressing the dedicated Settings button.
3. Find the Reset Option: In the Settings menu, scroll down and look for the “System” or “General Management” option. Tap on it to access the system settings.
4. Reset Your Phone: Within the system settings, find the “Reset” or “Reset options” entry. Tap on it to access the reset options menu.
5. Select Factory Reset: From the reset options, choose “Factory data reset” or a similar option. You may be prompted to enter your device’s security PIN or password to proceed.
6. Confirm the Reset: A warning message will appear, informing you that a factory reset will erase all data on your device. Read the message carefully and make sure you have backed up your data. If you’re ready to proceed, tap on “Reset phone” or “Erase everything” to initiate the factory reset process.
7. Wait for the Process to Complete: Your device will now begin the factory reset process. This may take a few minutes, during which the device will restart and erase all data and settings. Do not interrupt the process, as it can lead to further complications.
8. Set Up Your Phone: Once the factory reset is complete, your device will restart and boot up to its initial setup screen. Follow the on-screen instructions to set up your device from scratch. You will need to enter your Google account details, restore your data from the backup, and customize your settings according to your preferences.
Performing a factory reset is a drastic step that should only be considered when all other troubleshooting methods have failed. It is important to note that a factory reset will erase all data on your device, so ensure that you have backed up all important information beforehand.
If the factory reset doesn’t resolve the calling issues on your Android device, it’s recommended to contact your device manufacturer or service provider for further assistance.