
Restart Your Computer
When your computer refuses to start in Safe Mode, the first step is to restart your machine. While this may seem like a simple solution, it can often resolve many temporary issues that prevent Safe Mode from loading properly.
To restart your computer, follow these steps:
- Click on the “Start” menu and select “Restart” from the options.
- If you do not have the restart option in your Start menu, you can also manually restart your computer by pressing and holding the power button on your computer until it turns off. Wait for a few seconds and then press the power button again to turn it back on.
Once your computer restarts, it will go through the normal startup process. If the issue preventing Safe Mode from starting was temporary, you should be able to access Safe Mode now. If not, proceed to the next troubleshooting steps.
Tap the F8 Key
If restarting your computer did not resolve the issue, you can try accessing Safe Mode by tapping the F8 key during the startup process. This method works on older versions of Windows, such as Windows 7 and earlier. Here’s how you can do it:
- Restart your computer.
- As the computer is booting up, constantly tap the F8 key on your keyboard before the Windows logo appears. This will bring up the Advanced Boot Options menu.
- In the Advanced Boot Options menu, use the arrow keys on your keyboard to select “Safe Mode” or “Safe Mode with Networking.” Press Enter to start up in Safe Mode.
If you are successful, your computer will start in Safe Mode. However, if you are unable to access Safe Mode using the F8 key method, you can try an alternative method in the next section.
Use Shift + Restart
If tapping the F8 key didn’t work for you or if you’re using a newer version of Windows, like Windows 8, 8.1, or 10, you can try using the Shift + Restart combination to access Safe Mode. This method allows you to access the Advanced Startup Options menu where you can choose to start in Safe Mode. Here’s how you can do it:
- Click on the “Start” menu or press the Windows key, then click on the “Power” button.
- Hold down the Shift key on your keyboard and click on “Restart”.
- Your computer will restart and bring up the Advanced Startup Options menu.
- In the Advanced Startup Options menu, click on “Troubleshoot”.
- Next, click on “Advanced options”.
- Then, click on “Startup Settings”.
- In the Startup Settings, click on the “Restart” button.
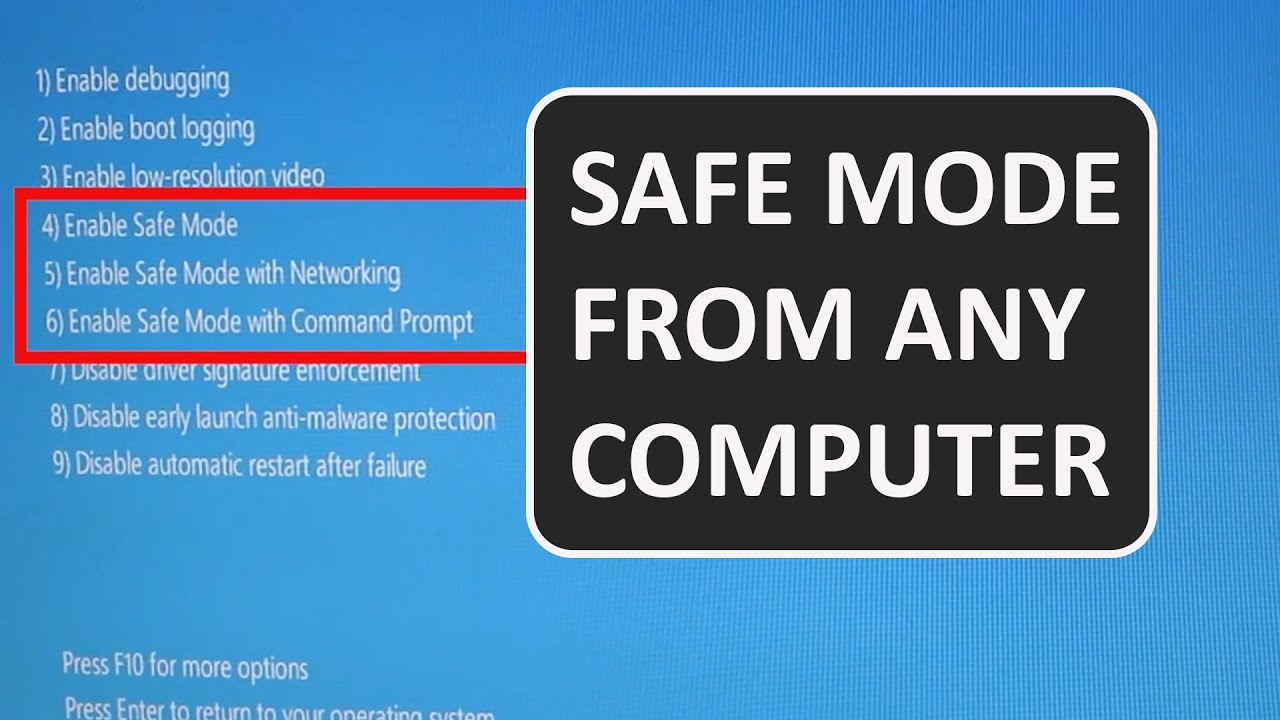
- Your computer will restart again and display a list of startup options.
- Press the number key on your keyboard corresponding to the “Enable Safe Mode” or “Safe Mode with Networking” option.
If everything goes well, your computer will start in Safe Mode. If not, there are still other troubleshooting options to explore, which will be discussed in the following sections.
Troubleshoot Advanced Options
If the previous methods didn’t work for you, don’t worry. There are still some troubleshooting options available in the Advanced Options menu that might help you start your computer in Safe Mode. Here’s how you can access and use these options:
- Restart your computer.
- During the startup process, tap the F8 key repeatedly (for Windows 7 and earlier) or use the Shift + Restart combination (for Windows 8, 8.1, or 10) to bring up the Advanced Startup Options menu.
- In the Advanced Startup Options menu, click on “Troubleshoot”.
- Next, click on “Advanced options”.
- Here, you will find several options to troubleshoot your computer. Some of the options you can try are:
- System Restore: This option allows you to restore your computer to a previous working state. It can be useful if your computer started having issues recently.
- Startup Repair: This option scans your computer for startup issues and attempts to fix them automatically.
- Command Prompt: This option opens the command prompt, where you can execute specific commands to troubleshoot and fix issues.
- UEFI Firmware Settings: This option allows you to access your computer’s firmware settings, where you can modify various hardware configurations.
Depending on the specific issue you’re facing, one of these advanced options might help you start your computer in Safe Mode. If not, continue exploring the other troubleshooting options available in the Advanced Options menu.
Start Up Repair
If your computer is still unable to start in Safe Mode, you can try the Start Up Repair option. This built-in Windows feature can automatically diagnose and fix common startup issues that might be preventing your computer from starting properly. Follow the steps below to use Start Up Repair:
- Restart your computer and access the Advanced Startup Options menu by tapping the F8 key (for Windows 7 and earlier) or using the Shift + Restart combination (for Windows 8, 8.1, or 10).
- In the Advanced Startup Options menu, click on “Troubleshoot”.
- Next, click on “Advanced options”.
- Click on “Startup Repair” option to initiate the repair process.
- Your computer will now scan for any startup issues and attempt to fix them automatically.
- Follow the on-screen instructions provided by the Startup Repair tool. It may take some time for the repair process to complete.
- Once the repair process is finished, your computer will either start normally or provide you with additional instructions or options.
Start Up Repair can often fix common issues that prevent your computer from starting in Safe Mode. However, if this method doesn’t resolve the problem, proceed to the next troubleshooting options.
System Restore
If your computer is still unable to start in Safe Mode, you can try using the System Restore feature. System Restore allows you to revert your computer’s settings back to a previous state when it was functioning properly. Here’s how you can use System Restore:
- Restart your computer and access the Advanced Startup Options menu by tapping the F8 key (for Windows 7 and earlier) or using the Shift + Restart combination (for Windows 8, 8.1, or 10).
- In the Advanced Startup Options menu, click on “Troubleshoot”.
- Next, click on “Advanced options”.
- Select “System Restore”.
- Choose a restore point from the available list. It’s recommended to select a restore point before the issue occurred.
- Click on “Next” and then “Finish” to initiate the system restore process.
- Wait for the system restore process to complete. Your computer will restart during this process.
- Once the system restore is finished, check if your computer can now start in Safe Mode.
System Restore can revert any system changes that might be causing the startup issue. However, please note that any recent software installations or updates made after the selected restore point will be removed. If System Restore doesn’t resolve the problem, continue to the next troubleshooting option.
Command Prompt
If all else fails and your computer still won’t start in Safe Mode, you can try using the Command Prompt option available in the Advanced Options menu. The Command Prompt allows you to execute specific commands that can help troubleshoot and fix issues with your computer. Follow these steps to use the Command Prompt:
- Restart your computer and access the Advanced Startup Options menu by tapping the F8 key (for Windows 7 and earlier) or using the Shift + Restart combination (for Windows 8, 8.1, or 10).
- In the Advanced Startup Options menu, click on “Troubleshoot”.
- Next, click on “Advanced options”.
- Select “Command Prompt” from the list of options.
- A Command Prompt window will open, allowing you to enter commands.
- Depending on the specific issue you’re facing, you can try various commands to troubleshoot and fix the problem.
- For example, you can run the “sfc /scannow” command to scan and repair any corrupted system files, or the “chkdsk” command to check and fix any errors on your hard drive.
- Consult official Microsoft documentation or reputable sources for specific commands that can help resolve your particular issue.
- Once you’ve attempted the necessary commands, restart your computer and check if it can now start in Safe Mode.
Using the Command Prompt can be a more advanced troubleshooting method, so it’s important to research and understand the commands you’re using or consult with a professional if needed. If the Command Prompt doesn’t solve the problem, there are still a few more options to try.
Enable Safe Mode with Networking
If you need to access the internet or network resources while in Safe Mode, you can try enabling Safe Mode with Networking. This option allows you to start your computer in Safe Mode while still having network connectivity. Follow these steps to enable Safe Mode with Networking:
- Restart your computer and access the Advanced Startup Options menu by tapping the F8 key (for Windows 7 and earlier) or using the Shift + Restart combination (for Windows 8, 8.1, or 10).
- In the Advanced Startup Options menu, navigate to the “Safe Mode with Networking” option using the arrow keys on your keyboard.
- Press Enter to start your computer in Safe Mode with Networking.
Once your computer boots into Safe Mode with Networking, you will have access to the internet and network-related functions. This can be useful if you need to download updates, install drivers, or troubleshoot network-related issues while in Safe Mode.
Please note that enabling Safe Mode with Networking may increase the startup time as additional services and drivers are loaded. If you do not require network connectivity, it’s recommended to choose regular Safe Mode instead.
If you have successfully started your computer in Safe Mode with Networking and resolved the issue, you can continue using your computer normally. However, if you’re still encountering problems, there are a few more troubleshooting options to explore.
Disable Safe Mode in the System Configuration Utility
If you no longer need to start your computer in Safe Mode and want to disable it, you can use the System Configuration utility. This utility allows you to configure various startup settings, including disabling Safe Mode. Here’s how you can disable Safe Mode using the System Configuration utility:
- Press the Windows key + R on your keyboard to open the Run dialog box.
- Type “msconfig” (without quotes) in the Run dialog box and press Enter.
- The System Configuration utility will open. Click on the “Boot” tab.
- Under the “Boot options” section, uncheck the “Safe boot” box.
- Click on “Apply” and then “OK” to save the changes.
- A prompt will appear asking if you want to restart your computer. If you’re ready to apply the changes and exit Safe Mode, click on “Restart”.
After the computer restarts, it should boot in normal mode, bypassing Safe Mode. This means that the next time you start your computer, it will start up normally without entering Safe Mode.
Disabling Safe Mode in the System Configuration utility is useful when you have resolved the issue that required Safe Mode and no longer need to access it. However, if you encounter any further issues in the future, you can re-enable Safe Mode using the same steps in the System Configuration utility.
Check for Malware
If you are still facing issues with your computer not starting in Safe Mode, it’s important to check for malware infections. Malware can sometimes interfere with the normal startup process, causing various issues. Here are some steps to help you check for malware:
- Boot your computer in normal mode.
- Make sure your antivirus software is up to date. If you don’t have an antivirus program, consider installing a reputable one.
- Perform a thorough scan of your computer using the antivirus software. Allow it to remove any detected malware.
- In addition to your antivirus scan, consider using an anti-malware program to perform a secondary scan. There are many free anti-malware tools available that can help detect and remove any stubborn malware.
- If any malware is detected, follow the recommended actions to clean your system.
- After the malware scans and removals are complete, restart your computer.
- Try accessing Safe Mode again using the appropriate method based on your Windows version.
Malware infections can cause disruptions to startup processes, including preventing Safe Mode from loading properly. By thoroughly scanning and removing any malicious software, you can optimize your computer’s performance and increase the chances of successfully starting in Safe Mode.
If you continue to experience issues with starting in Safe Mode after performing malware scans, it is recommended to seek professional assistance or consult with technical support for further troubleshooting steps.